Shelf product recognition - custom model (preview)
You can train a custom model to recognize specific retail products for use in a Product Recognition scenario. The out-of-box Analyze operation doesn't differentiate between products, but you can build this capability into your app through custom labeling and training.
Note
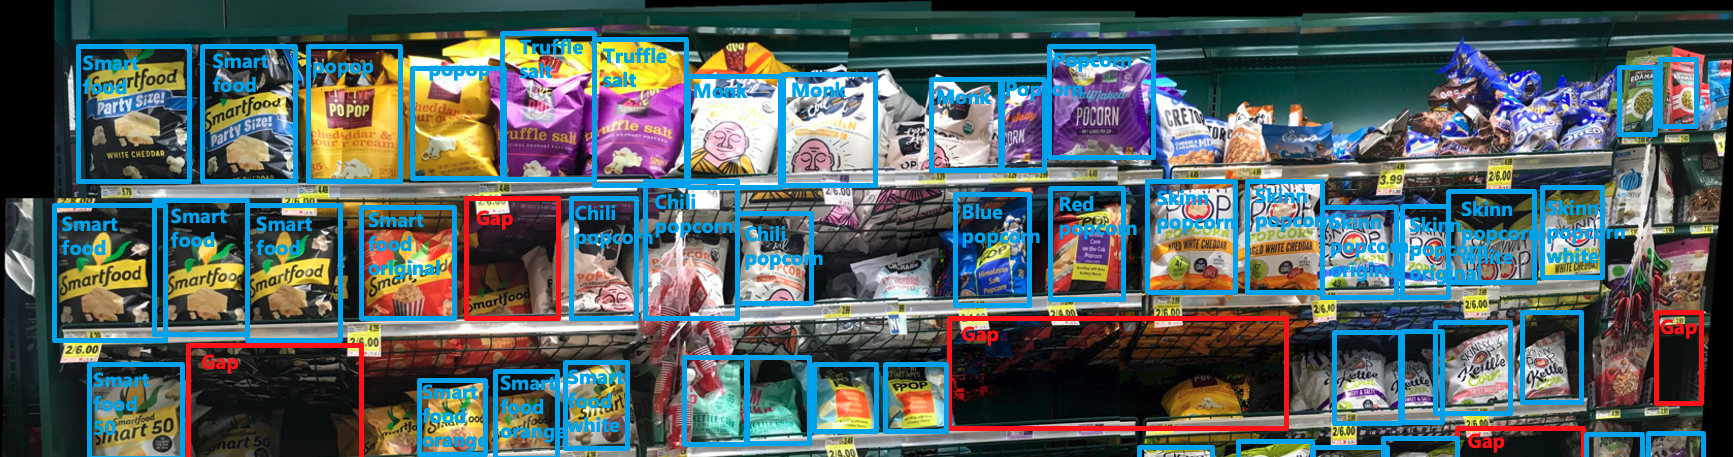
The brands shown in the images are not affiliated with Microsoft and do not indicate any form of endorsement of Microsoft or Microsoft products by the brand owners, or an endorsement of the brand owners or their products by Microsoft.
Use the model customization feature
The Model customization how-to guide shows you how to train and publish a custom Image Analysis model. You can follow that guide, with a few specifications, to make a model for Product Recognition.
Dataset specifications
Your training dataset should consist of images of the retail shelves. When you first create the model, you need to set the ModelKind parameter to ProductRecognitionModel.
Also, save the value of the ModelName parameter, so you can use it as a reference later.
Custom labeling
When you go through the labeling workflow, create labels for each of the products you want to recognize. Then label each product's bounding box, in each image.
Analyze shelves with a custom model
When your custom model is trained and ready (you've completed the steps in the Model customization guide), you can use it through the Shelf Analyze operation.
The API call will look like this:
curl.exe -H "Ocp-Apim-Subscription-Key: <subscriptionKey>" -H "Content-Type: application/json" "<endpoint>/computervision/productrecognition/<your_model_name>/runs/<your_run_name>?api-version=2023-04-01-preview" -d "{
    'url':'<your_url_string>'
}"
- Make the following changes in the command where needed:
- Replace the
<subscriptionKey>with your Vision resource key. - Replace the
<endpoint>with your Vision resource endpoint. For example:https://YourResourceName.cognitiveservices.azure.com. - Replace
<your_model_name>with the name of your custom model (the ModelName value you used in the creation step). - Replace the
<your_run_name>with your unique test run name for the task queue. It is an async API task queue name for you to be able retrieve the API response later. For example,.../runs/test1?api-version... - Replace the
<your_url_string>contents with the blob URL of the image
- Replace the
- Open a command prompt window.
- Paste your edited
curlcommand from the text editor into the command prompt window, and then run the command.
Next steps
In this guide, you learned how to use a custom Product Recognition model to better meet your business needs. Next, set up planogram matching, which works in conjunction with custom Product Recognition.
Feedback
Coming soon: Throughout 2024 we will be phasing out GitHub Issues as the feedback mechanism for content and replacing it with a new feedback system. For more information see: https://aka.ms/ContentUserFeedback.
Submit and view feedback for