Note
Access to this page requires authorization. You can try signing in or changing directories.
Access to this page requires authorization. You can try changing directories.
To control deployment and upgrade timing across your Azure Kubernetes Service (AKS), Amazon Elastic Kubernetes Service (EKS), and Google Kubernetes Engine (GKE) clusters, install and configure the Microsoft Defender for Containers sensor by using Helm.
Defender for Containers supports multiple sensor deployment models, including automatic provisioning and Helm-based installation. Helm-based deployment gives you more control over versioning and upgrade timing, but you manage some of the operational work. When you use Helm-based deployment, consider:
Sensor upgrades: With Helm-based deployment, you manage sensor upgrades and timing. Automatic provisioning follows Microsoft-managed rollout schedules.
Automatic installation flows: When you deploy the sensor by using Helm, skip automatic prompts and recommendations in the Azure portal to avoid conflicts with the existing deployment.
Prerequisites
Before you install the sensor by using Helm, complete the following prerequisites:
Implement all prerequisite requirements for the Defender for Containers sensor as described in the Defender sensor network requirements.
Enable Defender for Containers in the target subscription or security connector:
- Azure subscription: Enable Defender for Containers on AKS via portal
- Amazon Web Services (AWS): Enable Defender for Containers on AWS (EKS) via portal
- Google Cloud Project (GCP): Enable Defender for Containers on GCP (GKE) via portal
- Arc-enabled Kubernetes: Enable Defender for Containers on Arc-enabled Kubernetes via portal
Enable the following components of the Defender for Containers plan:
- Defender sensor
- Kubernetes API access
For Amazon Web Services (AWS) and Google Cloud Platform (GCP) environments: disable the Auto provision Defender's sensor for Azure Arc toggle.
If you want to keep automatic provisioning enabled for other Arc-enabled clusters in the AWS account or GCP project, apply the
ms_defender_e2e_discovery_exclude=truetag to clusters where you intend to deploy the sensor by using Helm.Ensure your environment doesn't have conflicting policy assignments that can deploy the generally available sensor version.
Review policy assignments that use the following policy definition ID, and remove any conflicting assignments:
64def556-fbad-4622-930e-72d1d5589bf5To review policy definitions, go to Policy definitions in the Azure portal, and search for the policy definition ID.
Install the Helm chart
Defender for Containers Helm charts are published to mcr.microsoft.com/azuredefender/microsoft-defender-for-containers.
The chart requires cluster identifier values under global.cloudIdentifiers. You can provide these values inline with --set, as shown in the following examples, or by using a values file.
To install the latest chart version, use the base Helm install command. Provide the required global.cloudIdentifiers values by using a values file or inline with --set, as shown in the environment-specific examples:
helm install defender-k8s oci://mcr.microsoft.com/azuredefender/microsoft-defender-for-containers
You can list the published versions by running the following command:
curl https://mcr.microsoft.com/v2/azuredefender/microsoft-defender-for-containers/tags/list
To install a specific version, include the version tag:
helm install defender-k8s oci://mcr.microsoft.com/azuredefender/microsoft-defender-for-containers:<tag>
To inspect configurable chart values, such as feature flags or pod resource limits, pull the chart and review the values.yaml file:
helm pull oci://mcr.microsoft.com/azuredefender/microsoft-defender-for-containers
To install the sensor for your environment:
For standard AKS clusters, use the mdc namespace.
For AKS Automatic clusters, use the kube-system namespace.
If your AKS cluster already has an existing Defender for Containers deployment, disable the existing deployment as described in Configure Defender for Containers for Azure, and remove any leftover resources by running the following commands:
kubectl delete crd/policies.defender.microsoft.com || true
kubectl delete crd/runtimepolicies.defender.microsoft.com || true
kubectl delete crd/securityartifactpolicies.defender.microsoft.com || true
kubectl delete ClusterRole defender-admission-controller-cluster-role || true
kubectl delete ClusterRole defender-admission-controller-resource-cluster-role || true
kubectl delete ClusterRoleBinding defender-admission-controller-cluster-role-binding || true
kubectl delete ClusterRoleBinding defender-admission-controller-cluster-resource-role-binding || true
Install the sensor:
helm install defender-k8s oci://mcr.microsoft.com/azuredefender/microsoft-defender-for-containers \
    --create-namespace --namespace <namespace> \
    --set global.cloudIdentifiers.Azure.subscriptionId="<cluster-subscription-id>" \
    --set global.cloudIdentifiers.Azure.resourceGroupName="<cluster-resource-group>" \
    --set global.cloudIdentifiers.Azure.clusterName="<cluster-name>" \
    --set global.cloudIdentifiers.Azure.region="<cluster-region>"
Replace <namespace> with:
mdcfor standard AKS clusters.kube-systemfor AKS Automatic clusters.
Verify the installation
Verify the installation by using the same namespace you used to install the chart.
helm list --namespace mdc
The installation succeeded if the STATUS field shows deployed.
Configure security rules for gated deployment
Note
Kubernetes gated deployment is supported on AKS Automatic clusters only when the sensor is installed by using Helm in the kube-system namespace. Add-on deployment isn’t supported for this scenario.
Important
When you create rules, the selected subscription might show as not supported for Gated deployment. This status occurs because you installed the Defender for Containers components by using Helm rather than through the dashboard's automatic installation.
Define security rules to control what you can deploy into your Kubernetes clusters. These rules can block or audit container images that don't meet your security criteria.
Sign in to the Azure portal.
Go to Defender for Cloud > Environment settings.
Select Security rules.
Select Gated deployment > Vulnerability assessment.
Select a rule to edit it, or select + Add rule to create a new one.
Handle existing recommendations
Important
If you install the sensor by using Helm, don't use existing Defender for Cloud recommendations to install the Defender profile or Arc extension for the same cluster. Remediating these recommendations can create a conflicting deployment.
Depending on your deployment type, the following recommendations might still appear in Defender for Cloud. Review them to confirm they refer to automatic deployment flows, then ignore them for clusters where you deployed with Helm.
Azure: Azure Kubernetes Service clusters should have Defender profile enabled - Microsoft Azure
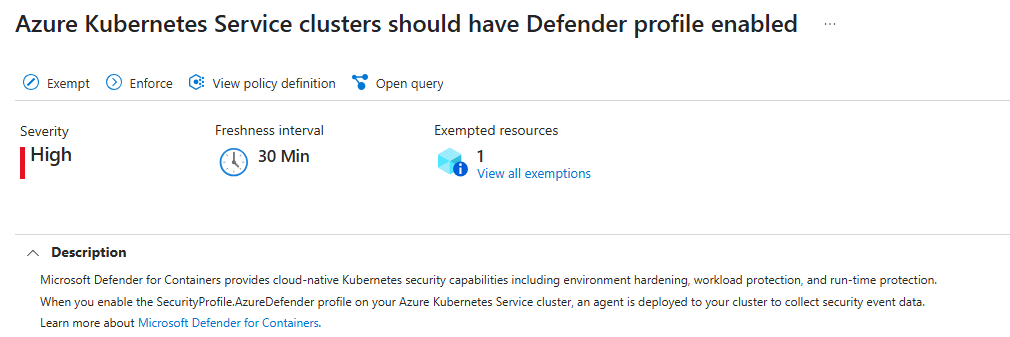
Arc-enabled Kubernetes clusters: Azure Arc-enabled Kubernetes clusters should have the Defender extension installed - Microsoft Azure

Upgrade an existing Helm-based deployment
With Helm-based deployment, you manage sensor upgrades. Defender for Cloud doesn't automatically apply them.
Run the following command to update an existing Helm-based deployment. Use the namespace you used during installation.
helm upgrade defender-k8s \
    oci://mcr.microsoft.com/azuredefender/microsoft-defender-for-containers \
    --namespace <namespace> \
    --reuse-values
Replace <namespace> with the namespace you used during installation.
The --reuse-values parameter keeps your existing custom values during the upgrade.
For <namespace>, use:
mdcfor standard AKS, EKS, and GKE clusters.kube-systemfor AKS Automatic clusters.
If the upgrade fails because of resource conflicts, add the following options to the upgrade command:
--server-side=true --resolve-conflicts