Auto-stop your Dev Boxes on schedule
To save on costs, you can enable an auto-stop schedule on a dev box pool. Microsoft Dev Box attempts to stop all dev boxes in the pool at the time specified in the schedule. You can configure one stop time in one timezone for each pool.
Note
Auto-stop schedules hibernate Dev Boxes that were created with a hibernation-enabled Dev Box definition. Dev boxes that were created using Dev Box definitions that do not support hibernation will be shut down. To learn more about enabling hibernation on your Dev Box definitions, see how to configure dev box hibernation
Permissions
To manage a dev box schedule, you need the following permissions:
| Action | Permission required |
|---|---|
| Configure a schedule | Owner, Contributor, or DevCenter Project Admin. |
Manage an auto-stop schedule in the Azure portal
You can enable, modify, and disable auto-stop schedules by using the Azure portal.
Create an auto-stop schedule
You can create an auto-stop schedule while configuring a new dev box pool, or by modifying an already existing dev box pool. The following steps show you how to use the Azure portal to create and configure an auto-stop schedule.
Add an auto-stop schedule to an existing pool
Sign in to the Azure portal.
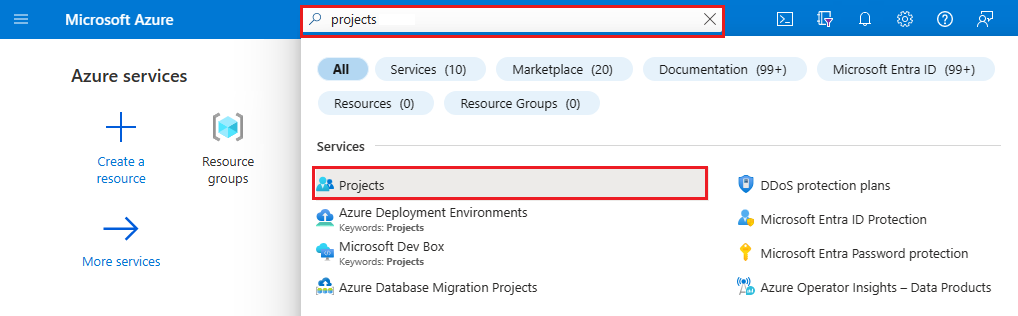
In the search box, enter projects. In the list of results, select Projects.
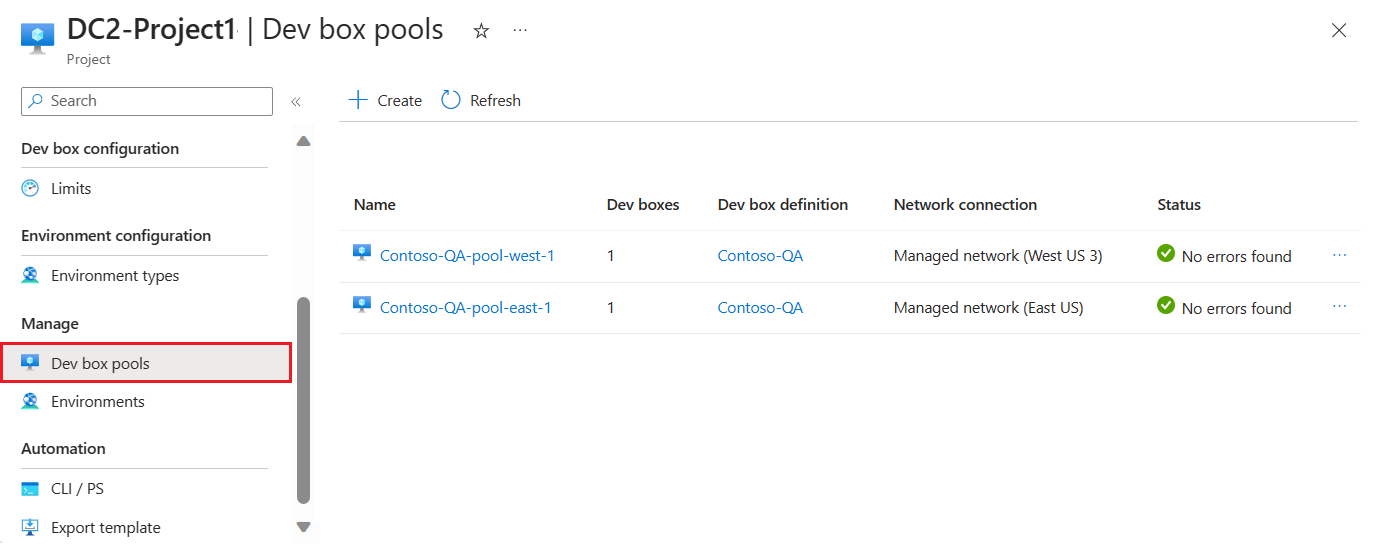
Open the project associated with the pool that you want to edit, and then select Dev box pools.
Determine the pool that you want to modify and scroll right. Open the more options (...) menu for the pool and select Edit.

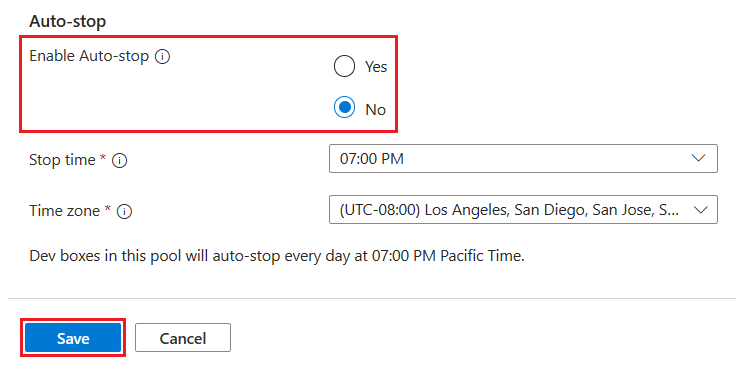
In the Edit dev box pool pane, configure the following settings in the Auto-stop section:
Setting Value Enable Auto-stop Select Yes to enable an auto-stop schedule after the pool is created. Stop time Select a time to shutdown all the dev boxes in the pool. All dev boxes in this pool shutdown at this time every day. Time zone Select the time zone that the stop time is in. 
Select Save.


Add an auto-stop schedule when you create a pool
Sign in to the Azure portal.
In the search box, enter projects. In the list of results, select Projects.
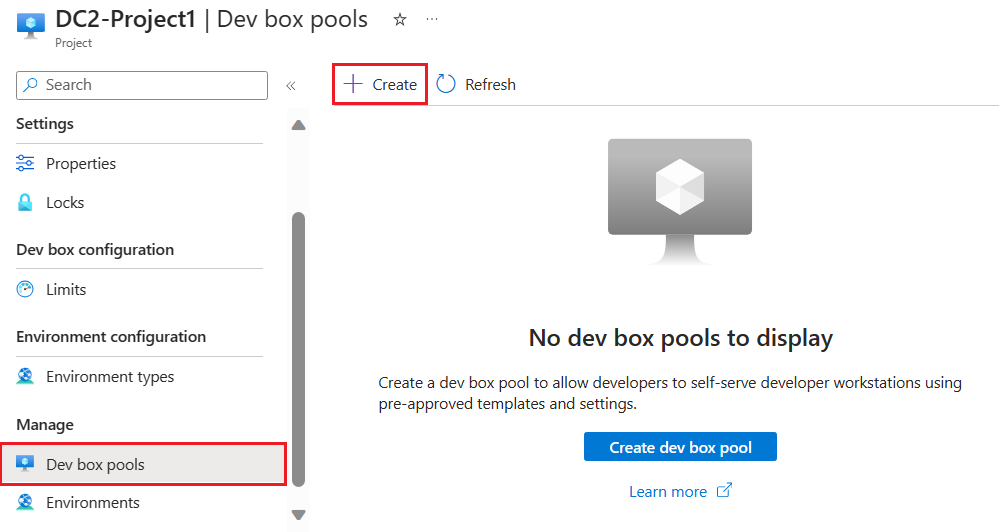
Open the project for which you want to create a pool, select Dev box pools, and then select Create.
On the Create a dev box pool pane, enter the following values:
Setting Value Name Enter a name for the pool. The pool name is visible to developers to select when they're creating dev boxes. The name must be unique within a project. Dev box definition Select an existing dev box definition. The definition determines the base image and size for the dev boxes that are created in this pool. Network connection 1. Select Deploy to a Microsoft hosted network.
2. Select your desired deployment region for the dev boxes. Choose a region close to your expected dev box users for the optimal user experience.Dev box Creator Privileges Select Local Administrator or Standard User. Enable Auto-stop Yes is the default. Select No to disable an auto-stop schedule. You can configure an auto-stop schedule after the pool is created. Stop time Select a time to shut down all the dev boxes in the pool. All dev boxes in this pool shut down at this time every day. Time zone Select the time zone for the stop time. Licensing Select this checkbox to confirm that your organization has Azure Hybrid Benefit licenses that you want to apply to the dev boxes in this pool. 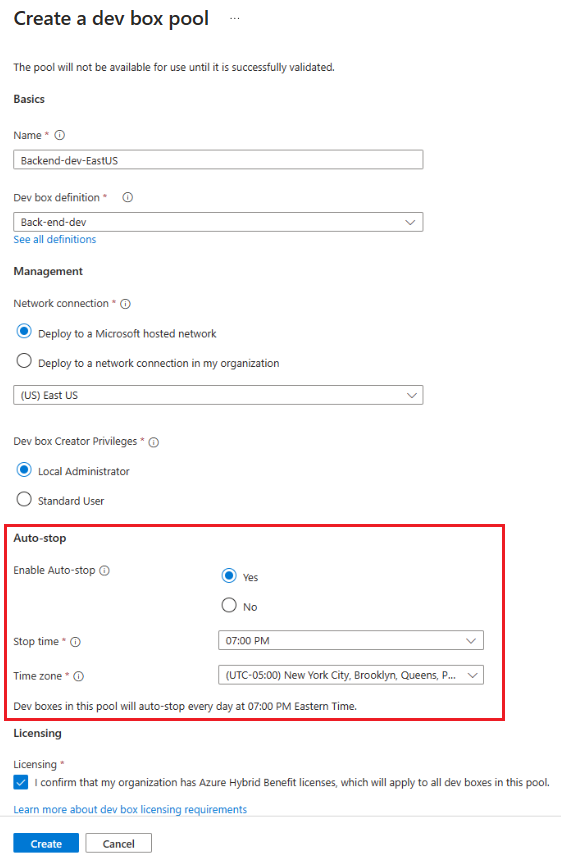
Select Create.
Verify that the new dev box pool appears in the list. You might need to refresh the screen.


Delete an auto-stop schedule
Follow these steps to delete an auto-stop schedule for your pool:
Sign in to the Azure portal.
In the search box, enter projects. In the list of results, select Projects.
Open the project associated with the pool that you want to modify, and then select Dev box pools.
Determine the pool that you want to modify and scroll right. Open the more options (...) menu for the pool and select Edit.
In the Edit dev box pool pane, in the Auto-stop section, toggle the Enable Auto-stop setting to No.
Select Save.

After you change the setting, dev boxes in this pool don't automatically shut down.
Manage an auto-stop schedule with the Azure CLI
You can also manage auto-stop schedules by using the Azure CLI.
Create an auto-stop schedule
The following Azure CLI command creates an auto-stop schedule:
az devcenter admin schedule create --pool-name {poolName} --project {projectName} --resource-group {resourceGroupName} --time {hh:mm} --time-zone {"timeZone"} --state Enabled
| Parameter | Value |
|---|---|
pool-name |
Name of your dev box pool. |
project |
Name of your dev box project. |
resource-group |
Name of the resource group for your dev box pool. |
time |
Local time when dev boxes should be shut down, such as 23:15 for 11:15 PM. |
time-zone |
Standard timezone string to determine the local time, such as "America/Los_Angeles". |
state |
Indicates whether the schedule is in use. The options include Enabled or Disabled. |
Delete an auto-stop schedule
Enter the following command in the Azure CLI to delete an auto-stop schedule:
az devcenter admin schedule delete --pool-name {poolName} --project-name {projectName}
| Parameter | Value |
|---|---|
pool-name |
Name of your dev box pool. |
project-name |
Name of your dev box project. |