Note
Access to this page requires authorization. You can try signing in or changing directories.
Access to this page requires authorization. You can try changing directories.
There are multiple ways to create an IoT Central application. You can use a GUI-based method if you prefer a manual approach, or one of the CLI or programmatic methods if you need to automate the process.
Whichever approach you choose, the configuration options are the same, and the process typically takes less than a minute to complete.
Warning
You'll need Contributor level access to your Azure Subscription to create an IoT Central app. While there may be alternative access levels to create an app, having Contributor level access to the subscription is the recommended path. If you created the subscription yourself, you're automatically an administrator with sufficient access.
Other approaches, not described in this article include:
- Use the REST API to create and manage IoT Central applications.
- Create and manage an Azure IoT Central application from the Microsoft Cloud Solution Provider portal.
Parameters
This section describes the available parameters when you create an IoT Central application. Depending on the method you choose to create your application, you might need to supply the parameter values on a web form or at the command line. In some cases, there are default values that you can use:
Pricing plan
The standard plans:
- Let you create and manage IoT Central applications using any of the available methods.
- Let you connect as many devices as you need. You're billed by device. To learn more, see Azure IoT Central pricing.
- Can be upgraded or downgraded to other standard plans.
The following table summarizes the differences between the three standard plans:
| Plan name | Free devices | Messages/month | Use case |
|---|---|---|---|
| S0 | 2 | 400 | A few messages per day |
| S1 | 2 | 5,000 | A few messages per hour |
| S2 | 2 | 30,000 | Messages every few minutes |
Application name
The application name you choose appears in the title bar on every page in your IoT Central application.
The subdomain you choose uniquely identifies your application. The subdomain is part of the URL you use to access the application. The URL for an IoT Central application looks like https://yoursubdomain.azureiotcentral.com.
Application template ID
The application template you choose determines the initial contents of your application, such as dashboards and device templates. For a custom application, use iotc-pnp-preview as the template ID.
The following table lists the available application templates:
| Template ID | Name | Industry | Description |
|---|---|---|---|
| iotc-pnp-preview | Custom application | N/A | Creates an empty application for you to populate with your own device templates and devices. |
| iotc-condition | In-store Analytics – Condition Monitoring | Retail | Creates an application to connect and monitor a store environment. |
| iotc-consumption | Water Consumption Monitoring | Government | Creates an application to monitor and control water flow. |
| iotc-distribution | Digital Distribution Center | Retail | Creates an application to improve warehouse output efficiency by digitizing key assets and actions. |
| iotc-inventory | Smart Inventory Management | Retail | Creates an application to automate receiving, product movement, cycle counting, and tracking. |
| iotc-logistics | Connected Logistics | Retail | Creates an application to track your shipments in real time across air, water, and land with location and condition monitoring. |
| iotc-meter | Smart Meter Analytics | Energy | Creates an application to monitor energy consumption, network status, and identify trends to improve customer support and smart meter management. |
| iotc-mfc | Micro-fulfillment Center | Retail | Creates an application to digitally connect and manage a fully automated fulfillment center. |
| iotc-patient | Continuous Patient Monitoring | Health | Creates an application to extend patient care, reduce readmissions, and manage diseases. |
| iotc-power | Solar Power Monitoring | Energy | Creates an application to monitor solar panel status and energy generation trends. |
| iotc-quality | Water Quality Monitoring | Government | Creates an application to digitally monitor water quality. |
| iotc-store | In-store Analytics – Checkout | Retail | Creates an application to monitor and manage the checkout flow inside your store. |
| iotc-waste | Connected Waste Management | Government | Creates an application to monitor waste bins and dispatch field operators. |
Billing information
If you choose one of the standard plans, you need to provide billing information:
- The Azure subscription you're using.
- The directory that contains the subscription you're using.
Location
The location to host your application. IoT Central uses Azure regions as locations. Currently, you can choose from: Australia East, Canada Central, Central US, East US, East US 2, Japan East, North Europe, South Central US, Southeast Asia, UK South, West Europe, and West US.
Resource group
Some methods require you to specify a resource group in the Azure subscription where the application is created. You can create a new resource group or use an existing one.
Create an application
The easiest way to get started creating IoT Central applications is in the Azure portal.
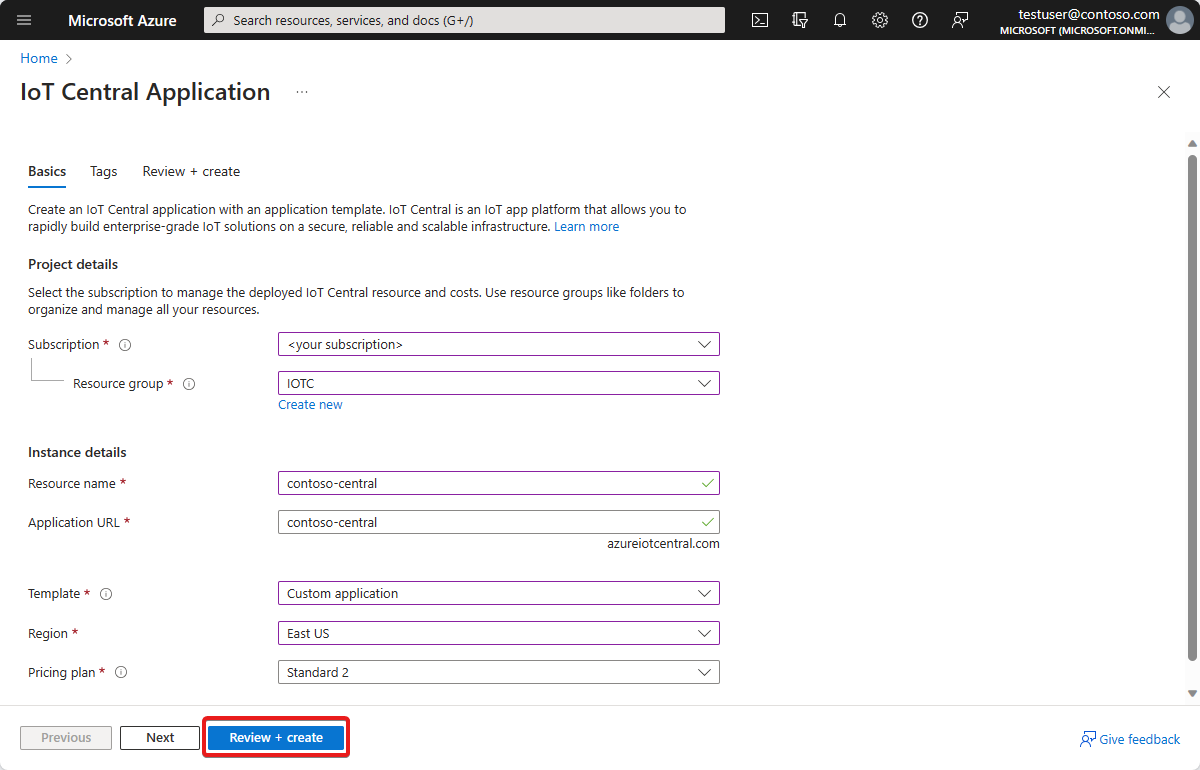
Select Review + create, then select Create to create the application.
When the app is ready, you can go to it from the Azure portal:
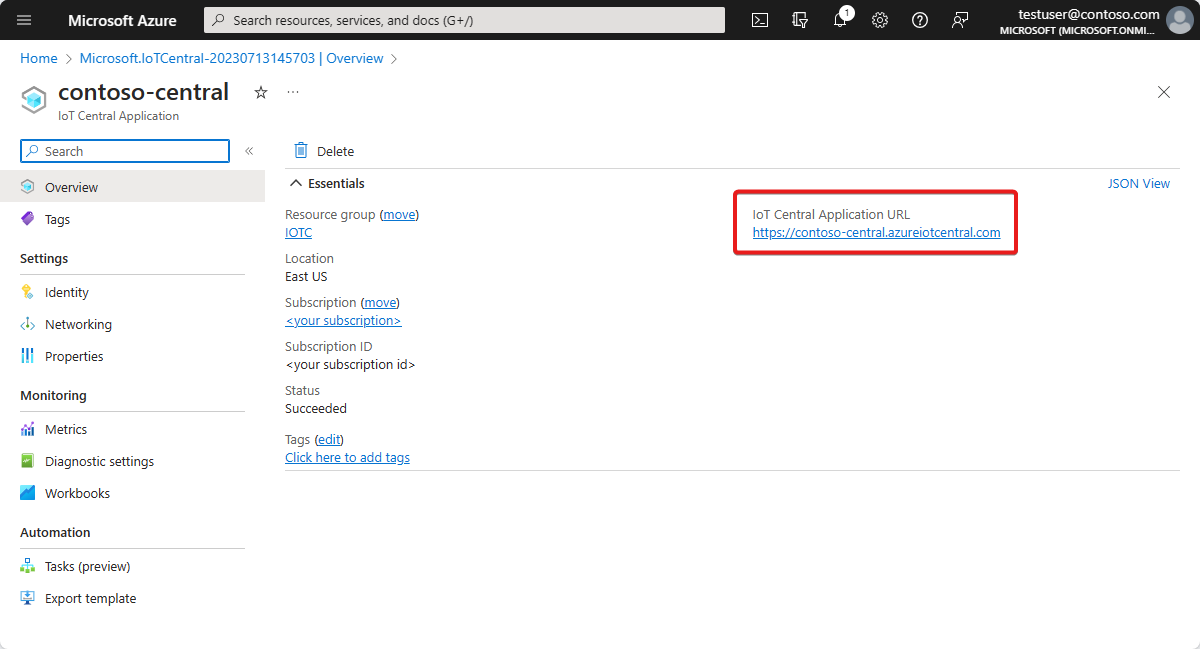
To list all the IoT Central apps in your subscription, go to IoT Central Applications.
To list all the IoT Central applications you have access to, navigate to IoT Central Applications.
Copy an application
You can create a copy of any application, minus any device instances, device data history, and user data. The copy uses a standard pricing plan that you're billed for:
- Sign in to the application you want to copy.
- Go to Application > Management and select Copy.
- In the dialog box, enter the details for the new application.
- Select Copy to confirm that you want to continue.

After the application copy operation succeeds, you can go to the new application using the link.
Be aware of the following issues in the new application:
Copying an application also copies the definition of rules and email actions. Some actions, such as Flow and Logic Apps, are tied to specific rules by the rule ID. When a rule is copied to a different application, it gets its own rule ID. In this case, users must create a new action and then associate the new rule with it. In general, it's a good idea to check the rules and actions to make sure they're up-to-date in the new application.
If a dashboard includes tiles that display information about specific devices, then those tiles show The requested resource was not found in the new application. You must reconfigure these tiles to display information about devices in your new application.
Create and use a custom application template
When you create an Azure IoT Central application, you choose from the built-in sample templates. You can also create your own application templates from existing IoT Central applications. You can then use your own application templates when you create new applications.
What's in your application template?
When you create an application template, it includes the following items from your existing application:
- The default application dashboard, including the dashboard layout and all the tiles you defined.
- Device templates, including measurements, settings, properties, commands, and views.
- All rule definitions are included. However actions, except for email actions, aren't included.
- Device groups, including their queries.
Warning
If a dashboard includes tiles that display information about specific devices, then those tiles show The requested resource was not found in the new application. You must reconfigure these tiles to display information about devices in your new application.
When you create an application template, it doesn't include the following items:
- Devices
- Users
- Continuous data export definitions
Add these items manually to any applications created from an application template.
Create an application template
To create an application template from an existing IoT Central application:
- Go to the Application section in your application.
- Select Template Export.
- On the Template Export page, enter a name and description for your template.
- Select the Export button to create the application template. You can now copy the Shareable Link that enables someone to create a new application from the template:

Use an application template
To use an application template to create a new IoT Central application, you need a previously created Shareable Link. Paste the Shareable Link into your browser's address bar. The Create an application page displays with your custom application template selected.
Select your pricing plan and fill out the other fields on the form. Then select Create to create a new IoT Central application from the application template.
Manage application templates
On the Application Template Export page, you can delete or update the application template.
If you delete an application template, you can no longer use the previously generated shareable link to create new applications.
To update your application template, change the template name or description on the Application Template Export page. Then select the Export button again. This action generates a new Shareable link and invalidates any previous Shareable link URL.
Next step
Now that you've learned how to create Azure IoT Central applications, here's the suggested next step: