Note
Access to this page requires authorization. You can try signing in or changing directories.
Access to this page requires authorization. You can try changing directories.
Microsoft Discovery Studio is the web-based, unified research environment for Microsoft Discovery. You use Discovery Studio to create and manage workspaces, projects, agents, shared sessions, knowledge bases, tools, and data—all from a single browser-based interface.
You can customize the layout and tailor the environment to match your specific research workflows—all without leaving the browser.
You can access Microsoft Discovery Studio at studio.discovery.microsoft.com using any supported modern browser. It requires no local installation or client software.
Tip
If you're new to Microsoft Discovery, start with the Quickstart: Deploy Microsoft Discovery infrastructure to set up your workspace and project before exploring Studio.
In this article, you learn about the different parts of Microsoft Discovery Studio and how to navigate the interface.
Home
By default, the first thing you see after you sign in to Microsoft Discovery Studio is the Home page. This page serves as a landing page to list and access your workspaces and projects.
The Home page includes:
- Getting started: Launch the project creation flow to begin a new research effort.
- Learn more: Access documentation and introductory guides to help you navigate the platform.
- What's new: Stay up to date with the latest Microsoft Discovery platform announcements and features.
- Recent Activity: View a list of your most recently accessed projects and workspaces for quick navigation.
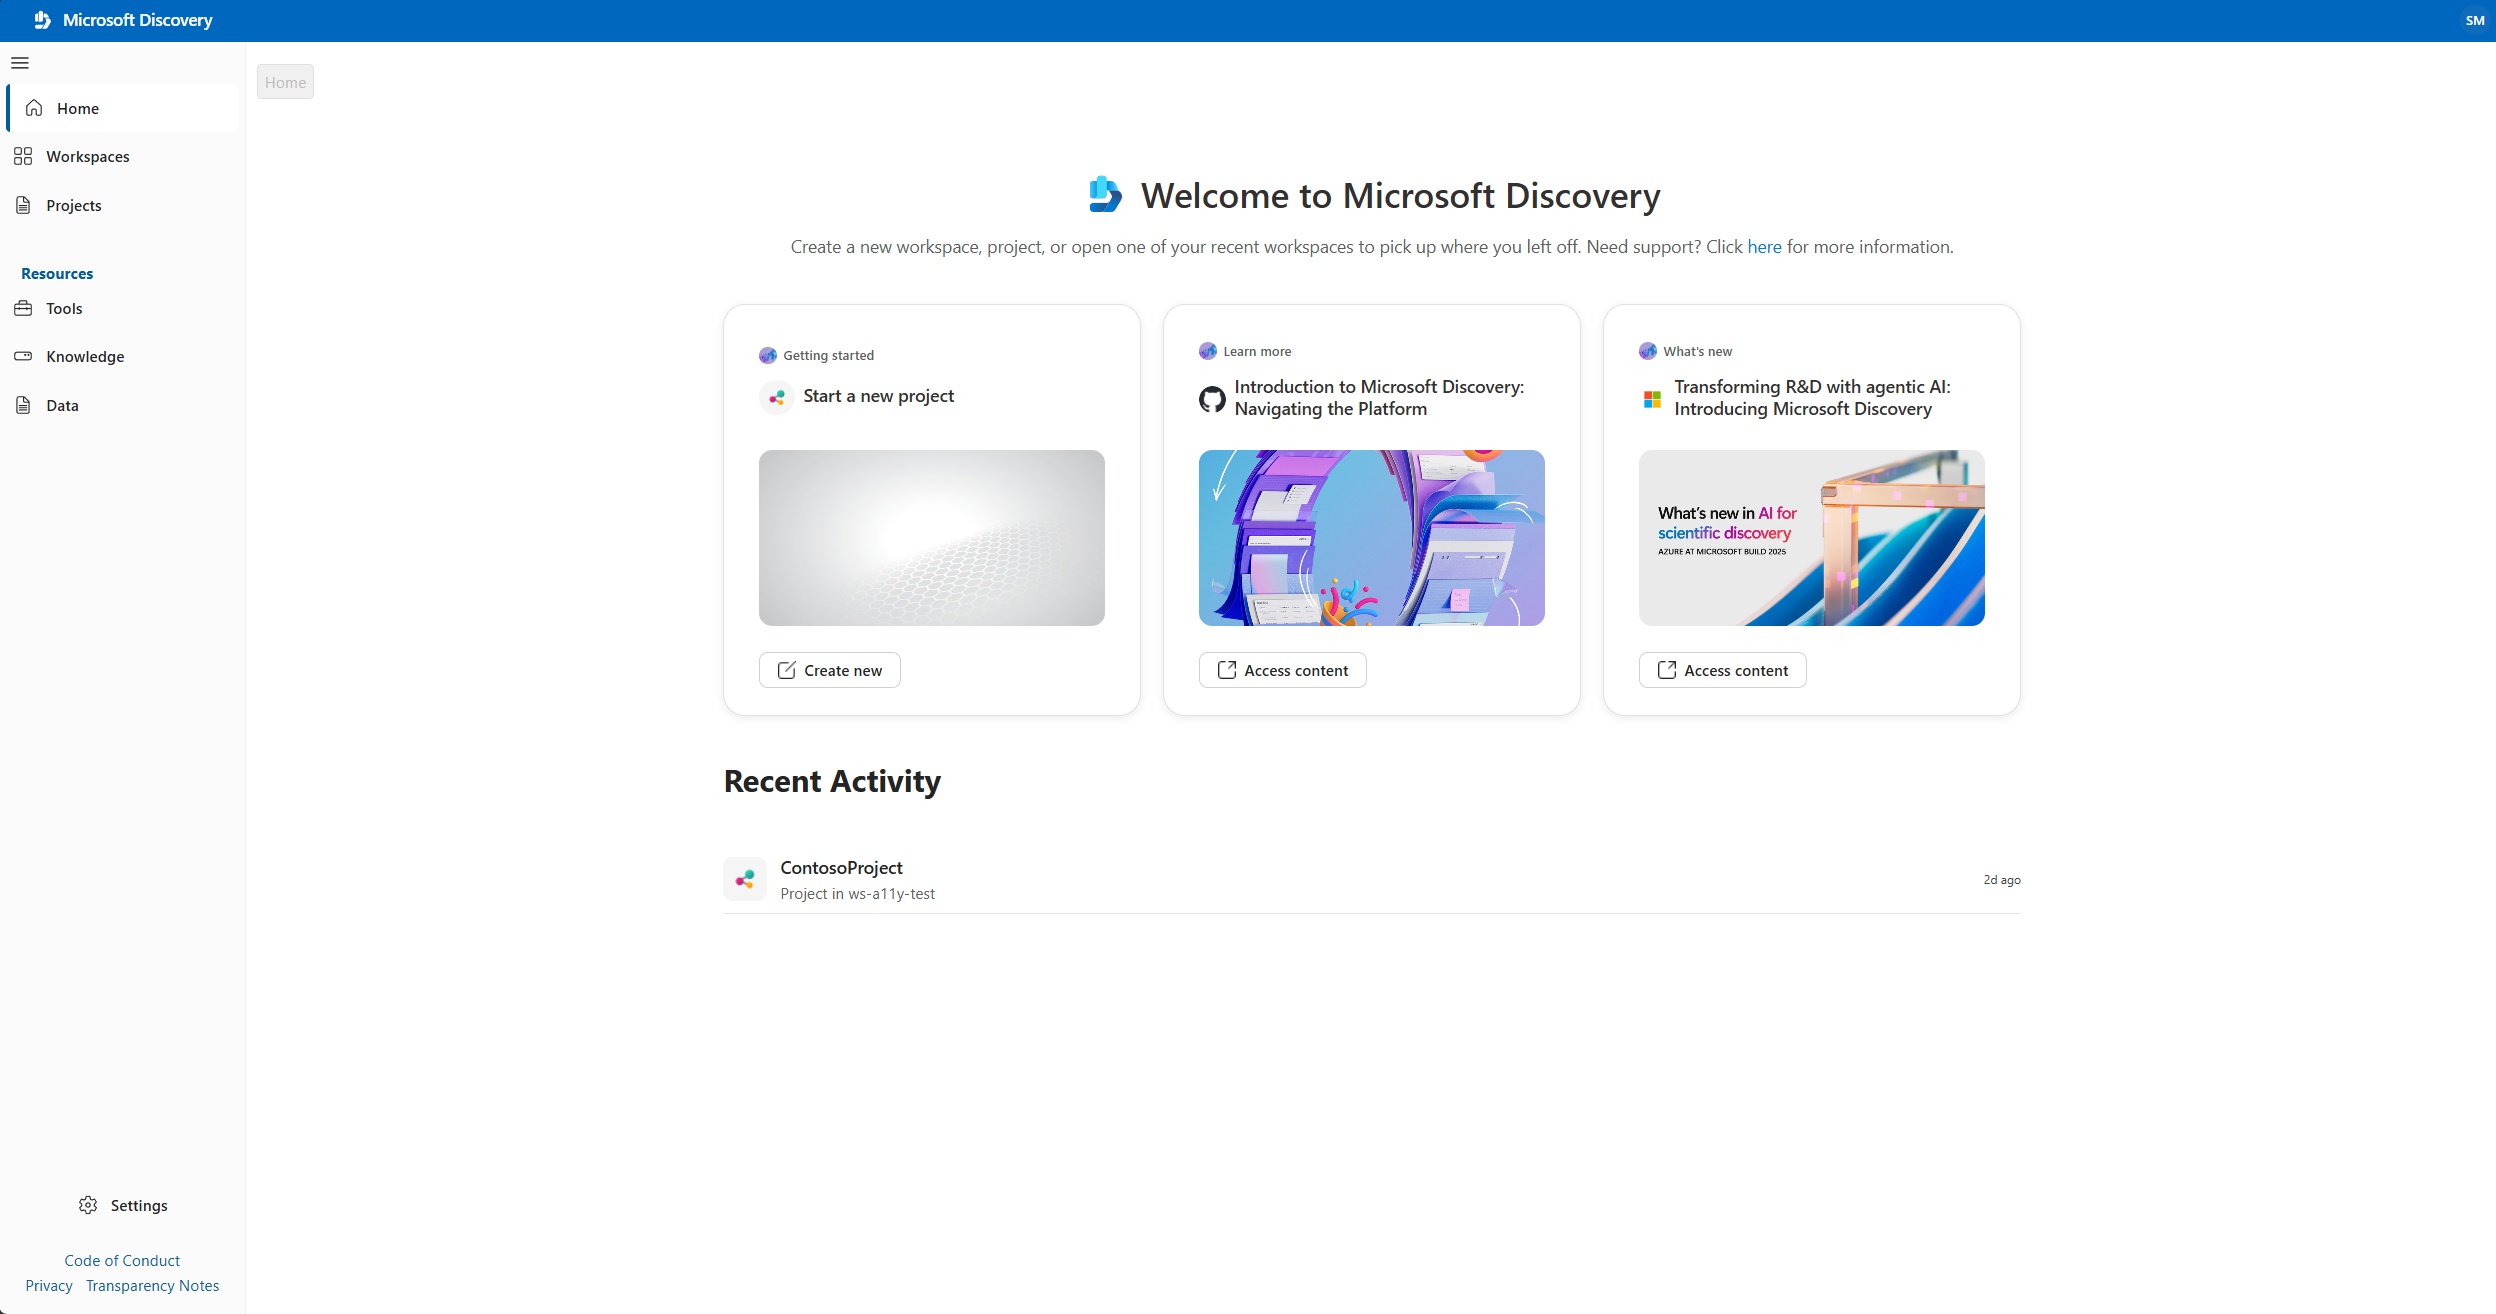
Studio elements and controls
The Discovery Studio interface consists of a persistent navigation sidebar and a main working area. The sidebar provides access to global resources and navigation, while the working area changes based on the context of your current task.
The following sections describe the key elements of the Studio interface.
| Element | Description |
|---|---|
| Navigation sidebar | The left-side menu that provides access to all major sections: Home, Workspaces, Projects, and Resources. |
| Resources section | A group within the sidebar for managing shared platform resources: Tools, Knowledge, and Data. |
| Main working area | The central pane that displays content based on your current selection—workspace and project lists and details. |
| Breadcrumb bar | Appears at the top of the working area to show your current location and allow quick navigation back to previous levels. |
| Profile menu | Located in the top-right corner. View your account information, switch Microsoft Entra ID tenants, or sign out. |
Navigation sidebar
The navigation sidebar is always visible on the left side of Microsoft Discovery Studio. It provides quick access to the platform's core areas and stays consistent regardless of what you're working on.
The sidebar is organized into two groups:
Top-level navigation:
- Home: Return to the Home page with getting started cards and recent activity.
- Workspaces: View and manage all workspaces you have access to.
- Projects: Browse, manage, and open your projects across all workspaces.
Resources:
- Tools: Browse the computational tools available to agents.
- Knowledge: Manage Bookshelves and Knowledge Bases that provide agents with domain-specific context through GraphRAG-indexed documents.
- Data: Access and manage storage containers linked to your projects for input and output data.
Workspaces view
When you select Workspaces from the sidebar, you see a table listing all workspaces you have access to. Each row displays key information about the workspace:
| Column | Description |
|---|---|
| Name | The workspace name, displayed as a link to open the workspace. |
| Region | The Azure region where the workspace is deployed. |
| Resource Group | The Azure resource group that contains the workspace resources. |
| Provisioning State | The current deployment state (for example, Succeeded, Failed, Deleting). |
| Created By | The identity that created the workspace. |
| Created At | The timestamp when the workspace was created. |
Use the Refresh and Filter controls above the table to update the list or narrow results.
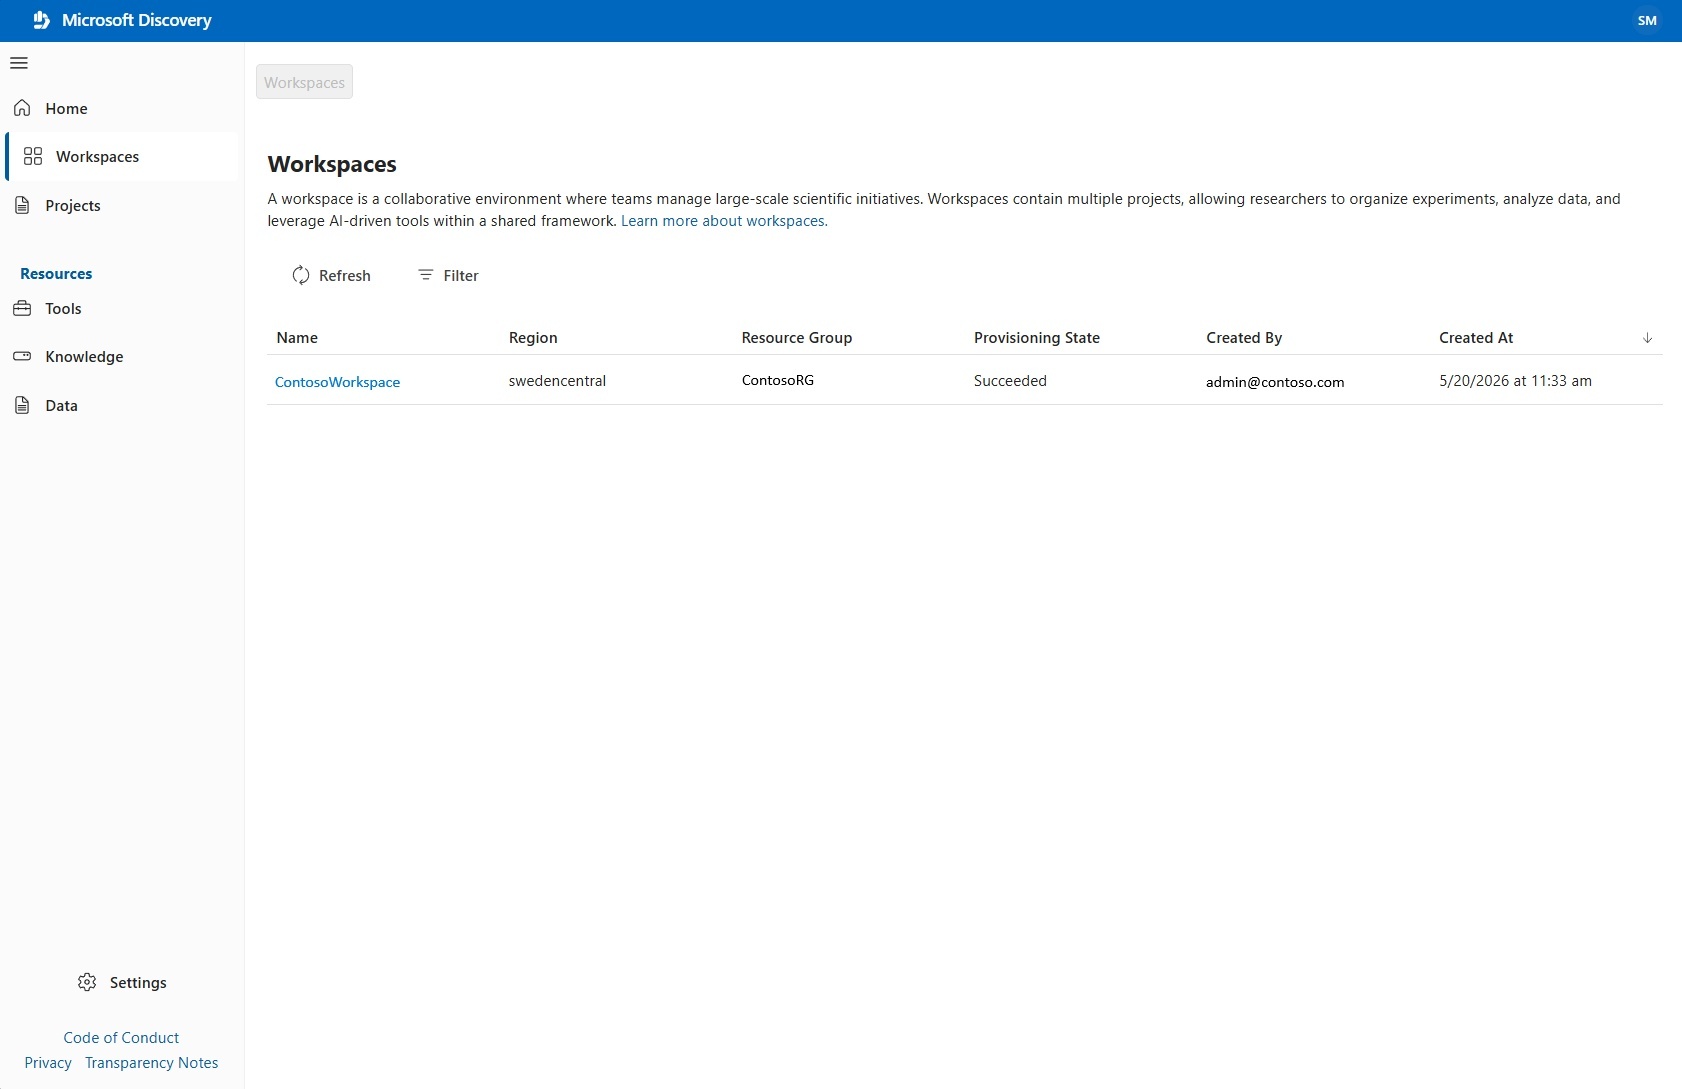
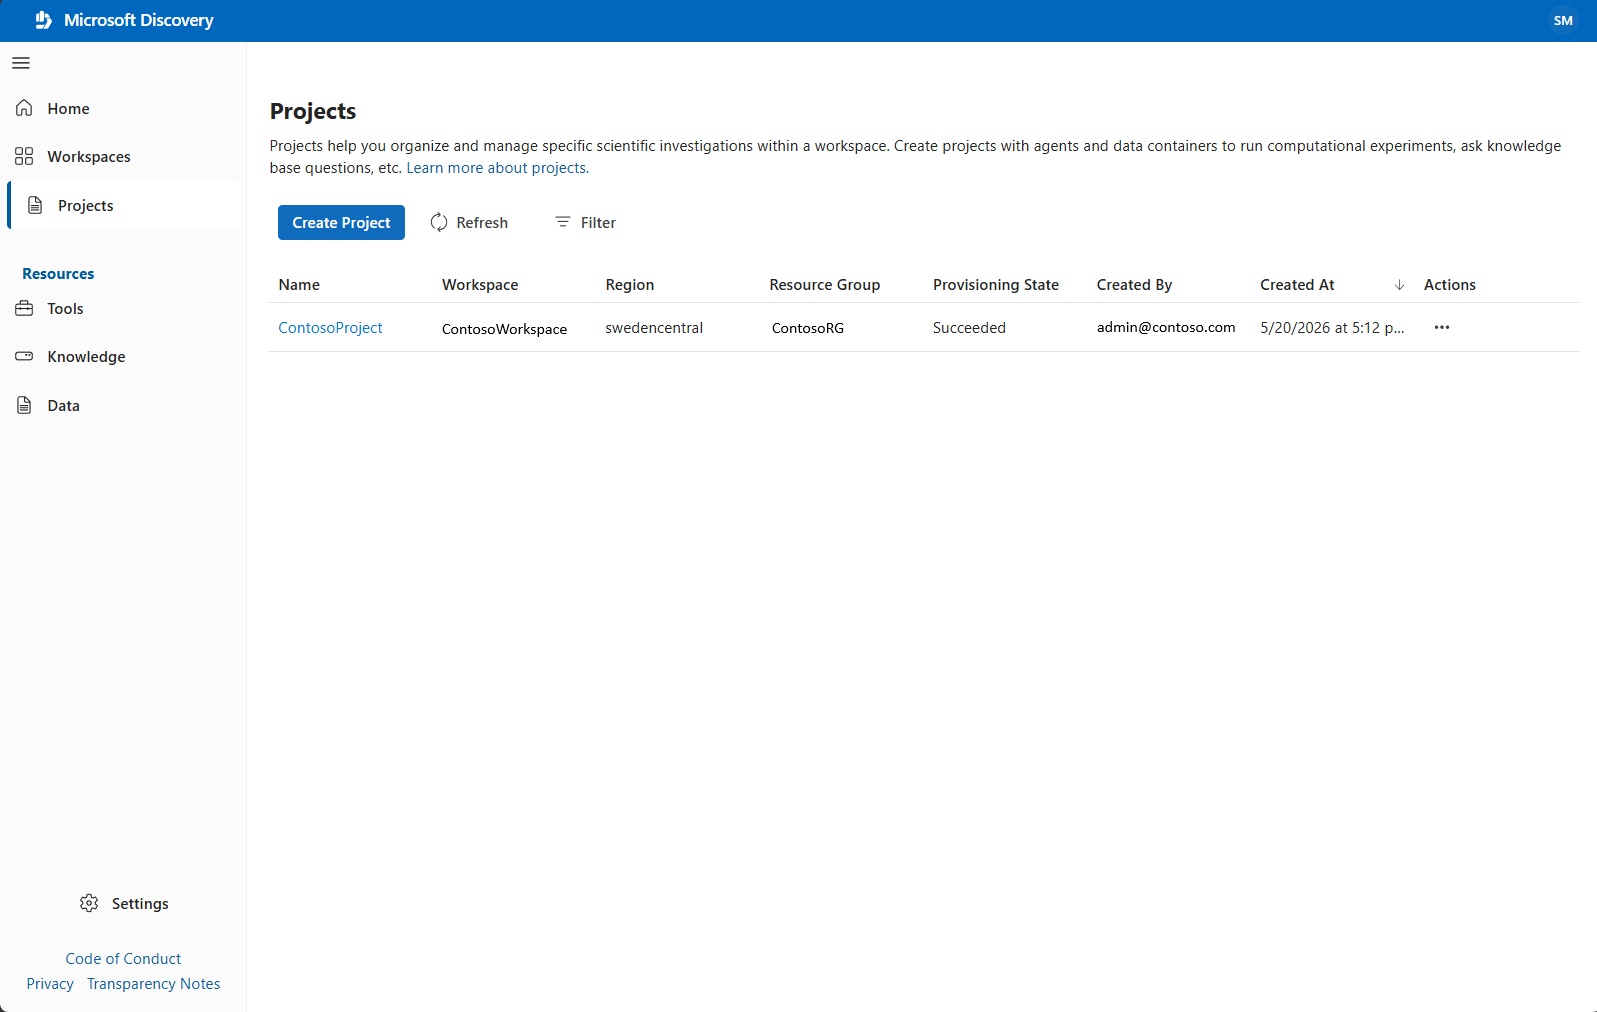
Projects view
To open a project, select Workspaces in the sidebar, open the workspace that contains the project, and then select the project name. When you open a workspace, Microsoft Discovery Studio transitions into a full Visual Studio Code for the Web environment. This portal is where you conduct your research—running shared sessions, interacting with agents, and managing project resources.
The project includes:
- Discovery tab: A sidebar that lists quick actions and all shared sessions in the current project. Select a shared session to open it and begin chatting with agents.
- Chat interface: Open a shared session to view the chat interface where you interact with agents through natural language conversations. Use the agent selector dropdown or type
@to route messages to specific agents. - Preferences: Manage user and project preferences, which help you customize agentic behavior to your style.
- Agent logs: Use agent logs to view a detailed view of your agent interaction including prompts, responses, and tool call logs including raw log output.
- Resources: A sidebar that lists all project related resources that you can use such as agents, tools, and knowledge bases. The Project Storage pane lets you browse storage containers and storage assets available in the project.
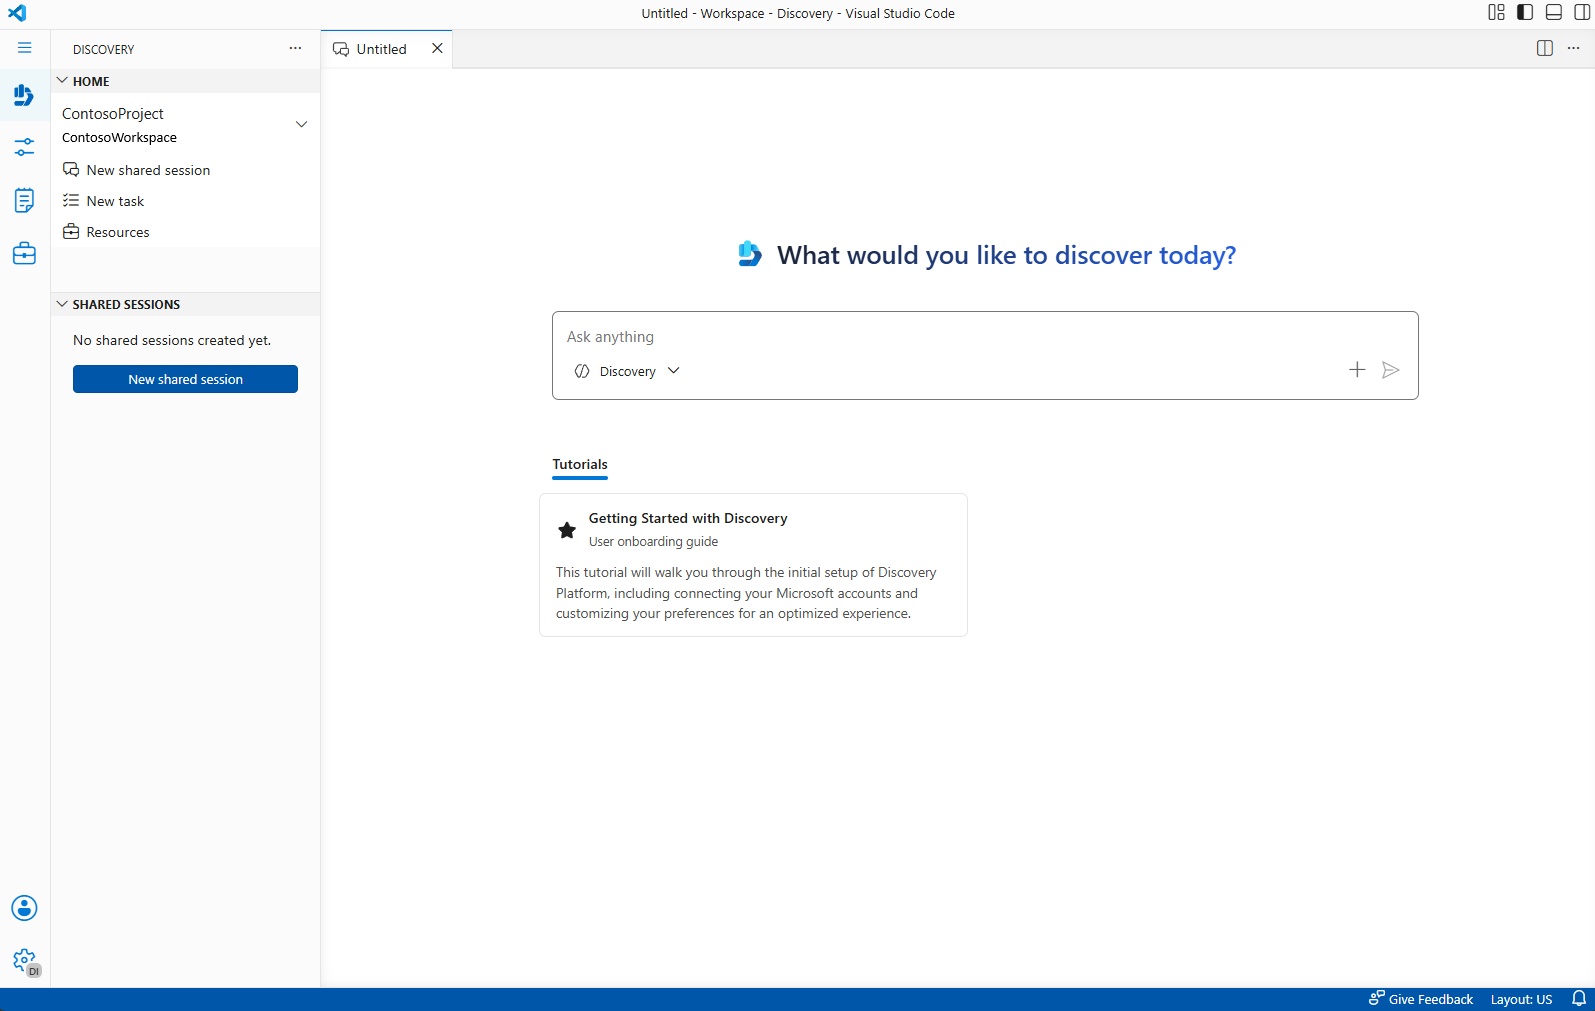
Customizing your research environment
Because Microsoft Discovery Studio is built on Visual Studio Code for the Web, you get the full flexibility and customization features adapted for scientific research:
- Themes and appearance: Change the color theme, font size, and UI layout to suit your preferences. Go to File > Preferences > Color Theme or press
Ctrl+K Ctrl+Tto browse themes. - Layout customization: Drag and drop panels, resize the sidebar and editor panes, and arrange your workspace to match your preferred workflow. Split the editor to view multiple shared sessions or files side by side.
Working with shared sessions
Shared sessions are the primary research sessions in Microsoft Discovery Studio. The Shared Sessions panel in the Discovery tab lists all shared sessions in the current project. Each shared session contains:
- A conversational thread with one or more agents
- Agent-generated outputs such as HTML reports, calculations, and data analyses
- A summary section that updates as the shared session progresses
You can have multiple shared sessions open simultaneously in separate editor tabs, making it easy to compare results or work on parallel research tracks. These are shared between users of the same project.
Get started
If you're new to Microsoft Discovery Studio, follow these steps:
- Set up infrastructure: Deploy a workspace and supporting resources by using the Deploy Microsoft Discovery infrastructure quickstart.
- Create a project: To organize your agents, shared sessions, and data, set up a project within your workspace
- Create agents: Add prompt agents to your project, or use the default Discovery agent that comes with every project.
- Start a shared session: To conduct AI-powered research, type a prompt in the chat box on the Welcome page to start a new shared session and begin chatting with your agents.
For a guided walkthrough, see Quickstart: Get started with agents and shared sessions in Microsoft Discovery Studio.