Note
Access to this page requires authorization. You can try signing in or changing directories.
Access to this page requires authorization. You can try changing directories.
This article explains how to update or remove existing tags associated with workloads in Azure Migrate. As your migration planning evolves, you might need to refine tag values or clean up metadata that’s no longer required. Manage these changes safely while keeping your inventory accurate and up to date.
Edit tags
You can update the value of an existing tag by using any of the methods.
To edit tags, follow these steps:
In the Azure Migrate project, go to the Inventory pane.
Select the workloads whose tags you want to edit.
Select Tags and then select Add and edit tags.
Note
You can edit only the tags that are common across the selected workloads.
Update the tag values as needed:
- Reserved tags: You can change reserved tag value such as updating
AzM_Environmentfrom Dev to Test orAzM_MigrationIntentfrom Retire to Migrate. - Custom tags: You can update the value of a custom tag you've defined, for example, change CostCenter from CC100 to CC200.

- Reserved tags: You can change reserved tag value such as updating

Edit tags by using CSV export and import
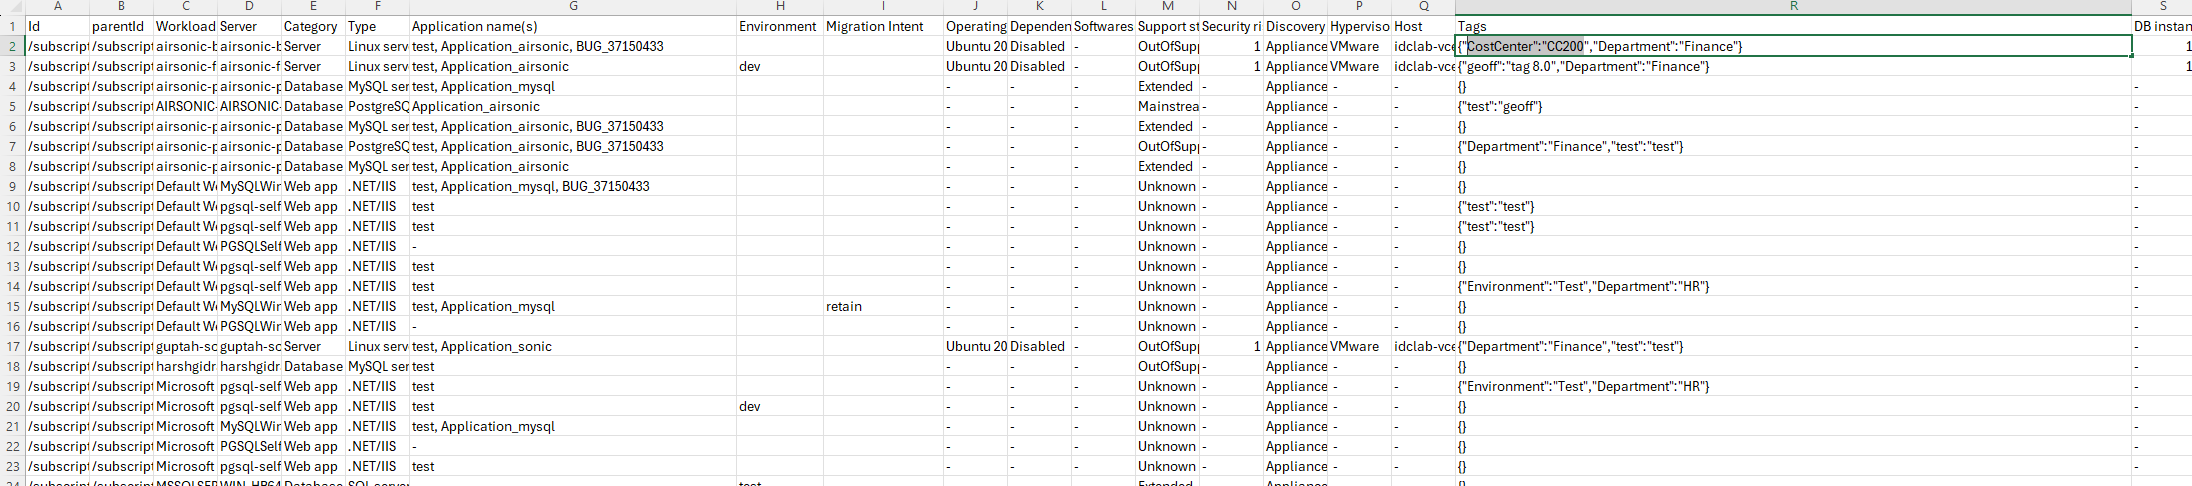
You can make changes to existing tags by exporting workload data to a CSV file, editing it offline, and importing the updated file back into Azure Migrate.
To edit tags, follow these steps:
In the Azure Migrate project, go to the Inventory pane, and export All inventory CSV file.
Open the CSV file and locate the workloads you want to update.
Update the tag values as required:
- Reserved tags:
- Update the Environment column, for example, from Dev to Test.
- Update the Migration Intent column, for example, from Retire to Migrate.

- Custom tags: In the Tags column, update the value inside the JSON. For example, change
{"Dept":"Finance","CostCenter":"CC100"}to{"Dept":"Finance","CostCenter":"CC200"}.
- Save the file and import it back via Tags > Import Tags.
- Reserved tags:


Delete tags
You can remove tags from workloads by using any of the methods.
Delete tags in the Azure portal
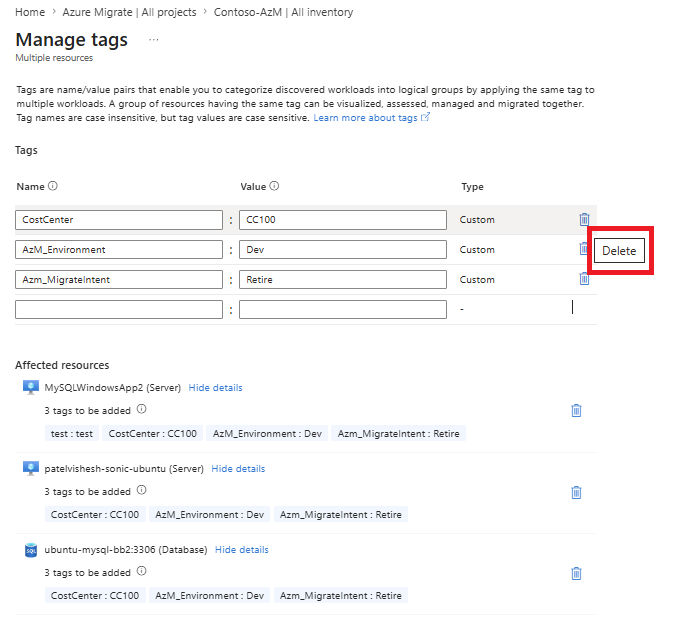
You can delete tags in the Azure portal when they're no longer needed for organizing or tracking your Azure Migrate resources.
To delete tags, follow these steps:
In the Azure Migrate project, go to the Inventory pane.
Select the workloads from which you want to remove tags.
Select Tags and then select Add and edit tags.
Delete the tag you want to remove:
- Remove
AzM_Environmentto delete the environment classification. - Remove
AzM_MigrationIntentor any custom tag that you no longer need.
- Remove

Delete tags via CSV export and import
You can delete tags in bulk by exporting workload data to a CSV file and reimporting it after removing the required entries.
To delete tags, follow these steps:
In the Azure Migrate project, go to the Inventory pane and export the All inventory CSV file.
Open the exported CSV file and locate the workloads that you want to update.
To remove reserved tags:
- For the target rows, clear the value in the Environment column or the Migration Intent column, or
- Replace the existing value with a hyphen (-).
To remove custom tags:
- In the Tags column, set the value of the tag to empty inside the JSON. For example, change:
{"Dept":"Finance","CostCenter":"CC100"}TO{"Dept":"Finance","CostCenter":""}. Removing the value deletes that tag on import.

- After updating the file, save it and import it again by selecting Tags > Import tags.
Important
- If a workload doesn’t have an Environment value, Azure Migrate treats it as Prod by default.
- If a workload doesn’t have a Migration Intent value, Azure Migrate treats it as Migrate by default.
- In the Tags column, set the value of the tag to empty inside the JSON. For example, change:

View tags
This section shows how to view existing tags for workloads in Azure Migrate so you can review their current state.
To view tags, follow these steps:
- In the Azure Migrate project, go to the Inventory pane.
- Select a workload to open its details.
- In the workload details view, review the assigned tags, including Environment, Migration Intent, and any custom tags.
- After applying tags, select a workload in the Inventory pane and confirm that the updated tags appear in the workload details view.
Filter inventory using tags
You can use tags to filter the Azure Migrate inventory and focus on specific workloads that match your criteria.
To filter inventory using tags, follow these steps:
- On the Inventory pane, select Add filter next to the search bar.
- Select the tag key to filter by (for example,
AzM_Environment,AzM_MigrationIntent, or a custom tag key). - Select one or more tag values to apply the filter.
You can use tag-based filters to scope assessments, business cases, and reports to a specific subset of your inventory.
How Azure Migrate uses tags in downstream analysis
After you apply tags to workloads, Azure Migrate uses them across downstream features to scope assessments, build business cases, plan migration waves, and generate targeted reports.
| Downstream feature | How tags are used |
|---|---|
| Assessments | Filter workloads by Environment, Migration Intent, or custom tags to scope the assessment to a specific subset. Workloads set to Retain or Retire are excluded. |
| Business case / ROI analysis | Environment determines pricing model (standard vs Dev/Test discount). Migration Intent determines which workloads are included. Custom tags can be used to slice analysis by any organizational dimension. |
| Wave planning | Prod workloads are prioritized and sequenced first. Retain and Retire workloads are excluded. |
| Reports | Tags can be used to scope executive proposals to specific subsets of your inventory. |
| Application grouping | Custom tags can be used to identify and group workloads that belong to the same application. |