Note
Access to this page requires authorization. You can try signing in or changing directories.
Access to this page requires authorization. You can try changing directories.
This article describes how to manage a Neon resource in the Azure portal.
Resource overview
Begin by signing in to the Azure portal.
In the Azure portal search bar, enter All resources and select All resources from the results.
From the Resources list, select your resource.
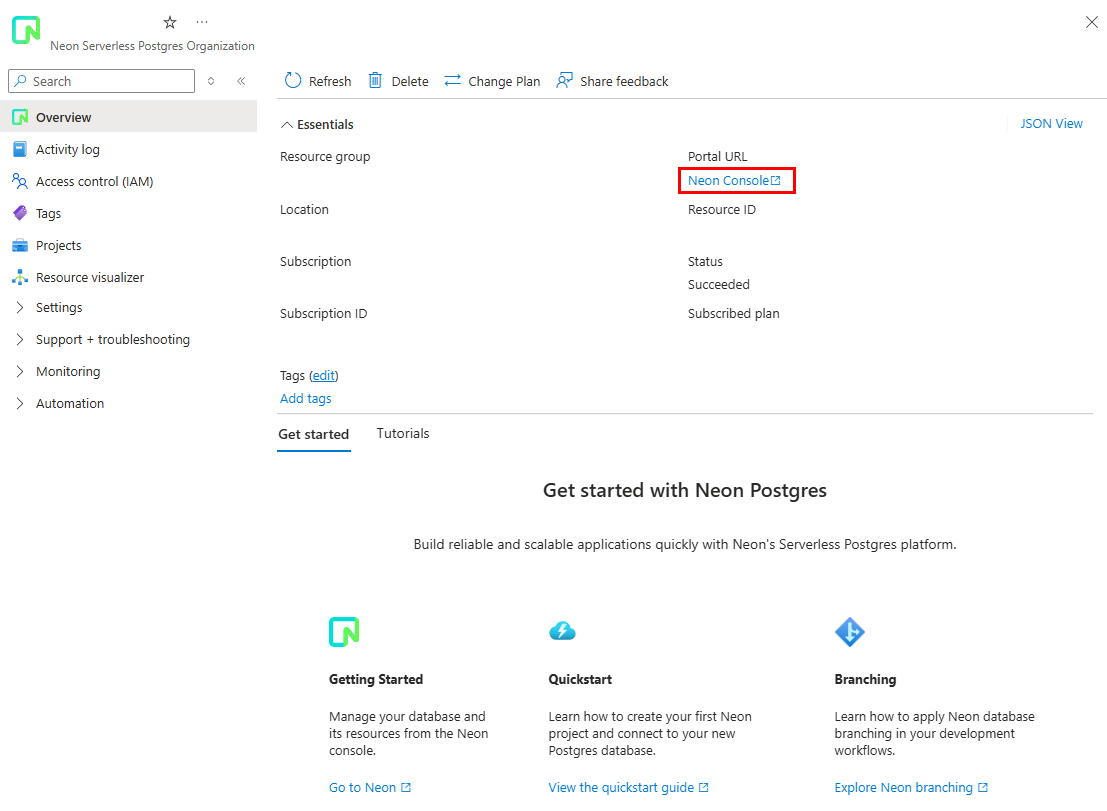
The Azure portal shows the resource with the Overview page open, by default.

The details under Essentials include:
- Resource group
- Location
- Subscription
- Subscription ID
- Tags
- Portal URL
- Resource ID
- Status
- Subscribed plan
To manage your resource, select the links next to the corresponding details.
Below the essentials, you can go to other details about your resource by selecting the links.
Access a Neon account
To access your Neon account, select Neon Console on the working pane.
If you don't have a Neon account for your Azure email address, you're prompted to configure your account and set a password.
View and create projects
When you create your first Neon organization, a default project is created for you. You can view and create your projects from the resource overview.
View projects
To view your projects, select Projects in the sidebar.
To view a specific project, select the project's name.
Create a project
On the menu bar, select + Create Project.
The Create Project pane appears.
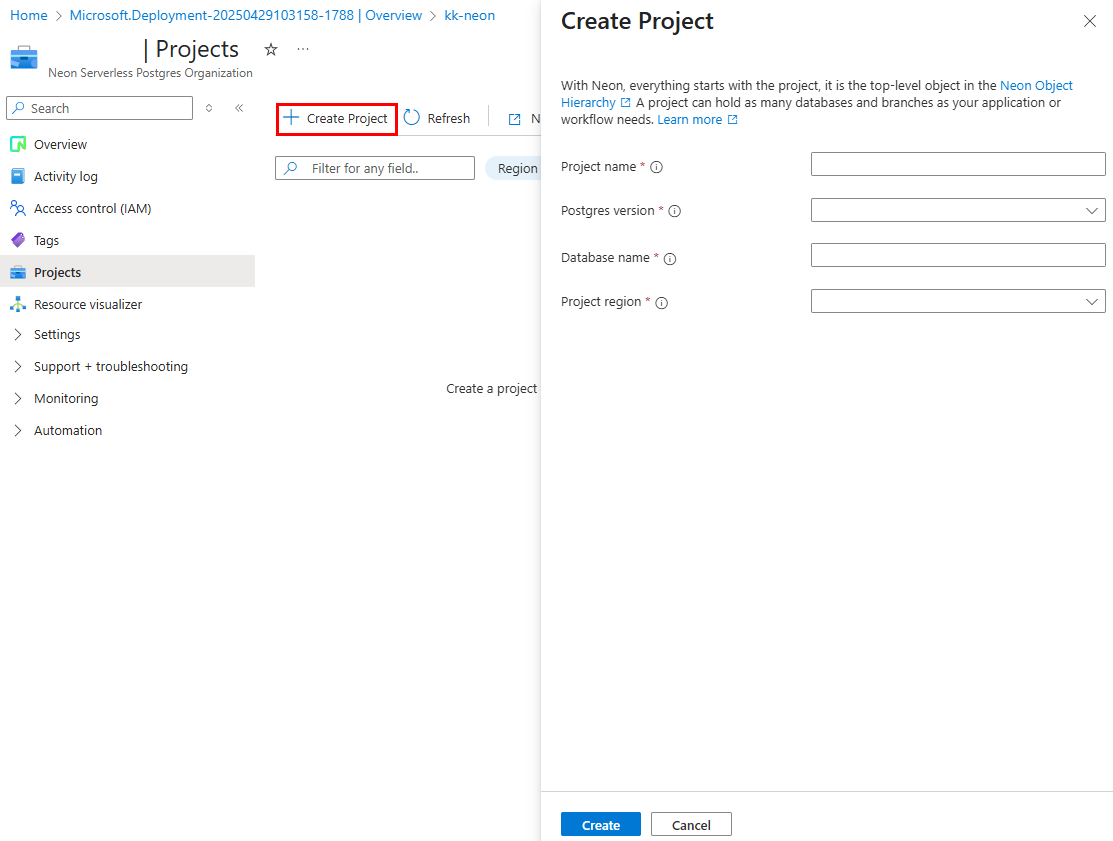
Enter the values for each setting, or continue with the default values for your project.
Setting Action Project name Specify a name for your Neon project. Postgres version Choose a Postgres version for your project. Database name Specify a name for your first database in the project. Project region Choose the region for your database. Note
The Project region value on this pane corresponds to your database. Don't confuse this value with the Region value from the Basics tab, which is where your Azure resource is deployed.
Select Create.
Add a branch to a project
A branch is a copy-on-write clone of your data. You can create a branch from a current or past state.
Each Neon project is created with a root branch called main. The first branch that you create is branched from the project's root branch. Subsequent branches can branch off the root branch or from a previously created branch.
To create a branch:
Open the project.
On the menu bar, select + Create Branch.
The Create new Branch pane appears.
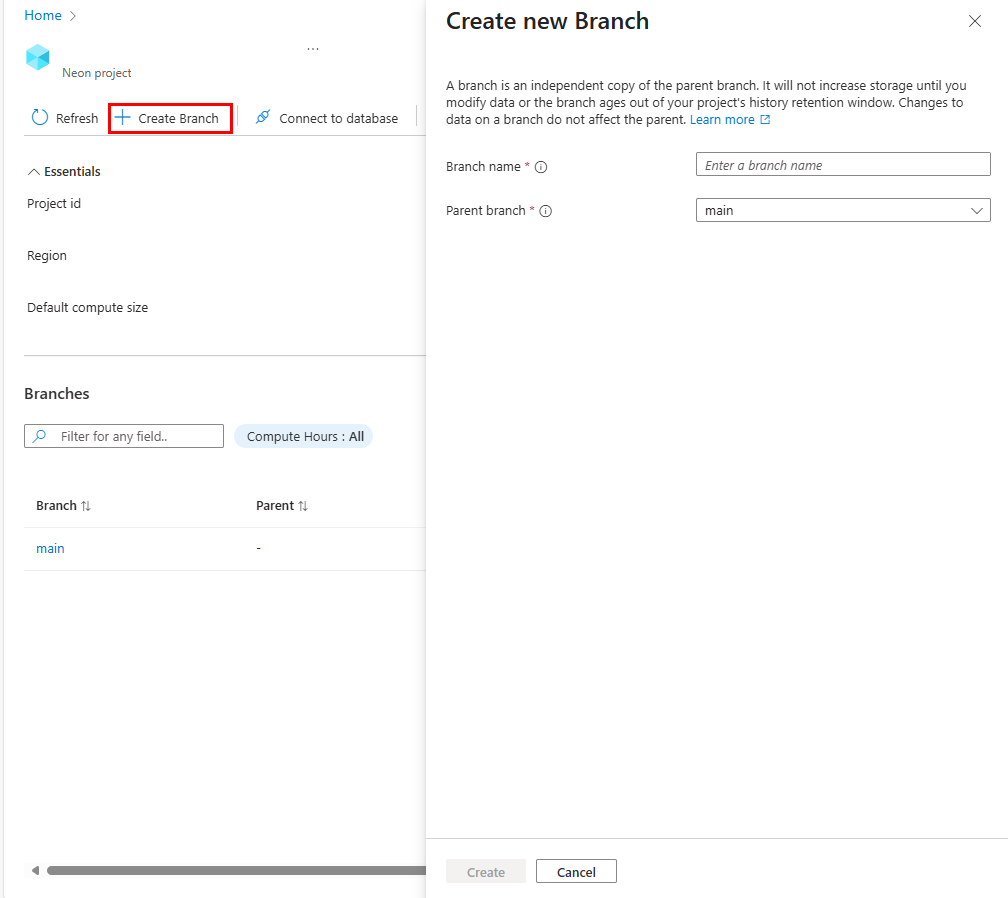
Enter the values for each setting.
Select Create.
Connect to a database
You can connect clients and applications to a Neon database via a connection string.
To generate a connection string:
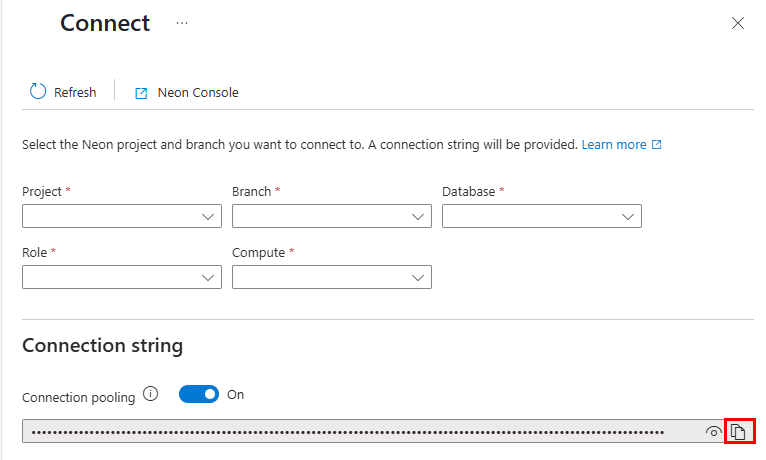
Open your project or branch.
On the menu bar, select Connect to database.
Verify the default values, or select new values in each dropdown list.
Select the copy icon next to the connection string.
Delete a resource
If you finished using your resource and you want to delete it, follow these steps:
On the command bar, select Delete.
The Delete Resource pane appears in the sidebar.
In the Confirm Delete field, enter the name of the resource.
Choose a reason for deleting the resource.
Select Delete.
After the resource is deleted, all billing through Azure Marketplace stops for that resource.
Get Support
Contact Neon for customer support.
You can also request support in the Azure portal from the resource overview.
Select Support + Troubleshooting > New support request from the service menu, then choose the link to log a support request in the Neon portal.