Note
Access to this page requires authorization. You can try signing in or changing directories.
Access to this page requires authorization. You can try changing directories.
APPLIES TO:  Azure Database for PostgreSQL - Flexible Server
This article describes how you can enable or disable high availability configuration in your Azure Database for PostgreSQL flexible server in same zone, or zone redundant deployment models.
High availability feature deploys physically separate primary and standby replicas. Both replicas can be provisioned within the same availability zone or each on a different zone, depending on the deployment model you choose. For more information, see high availability concepts. You can enable high availability at creation time of your Azure Database for PostgreSQL flexible server, or you can do it after the server is created.
Important
Billing Model Update for Azure Database for PostgreSQL Flexible Server (v5 HA): In April, we implemented a billing model update for v5 SKU with High Availability (HA) enabled servers. This change aims to correctly reflect the charges, by accounting for both the primary and standby servers. Before this change, we were incorrectly charging customers for the primary server only. Customers using v5 SKU with HA enabled servers would now see billing quantities multiplied by 2. This update doesn't impact v4 and v3 SKUs.
Steps to enable high availability for existing servers
Using the Azure portal:
Select your Azure Database for PostgreSQL flexible server.
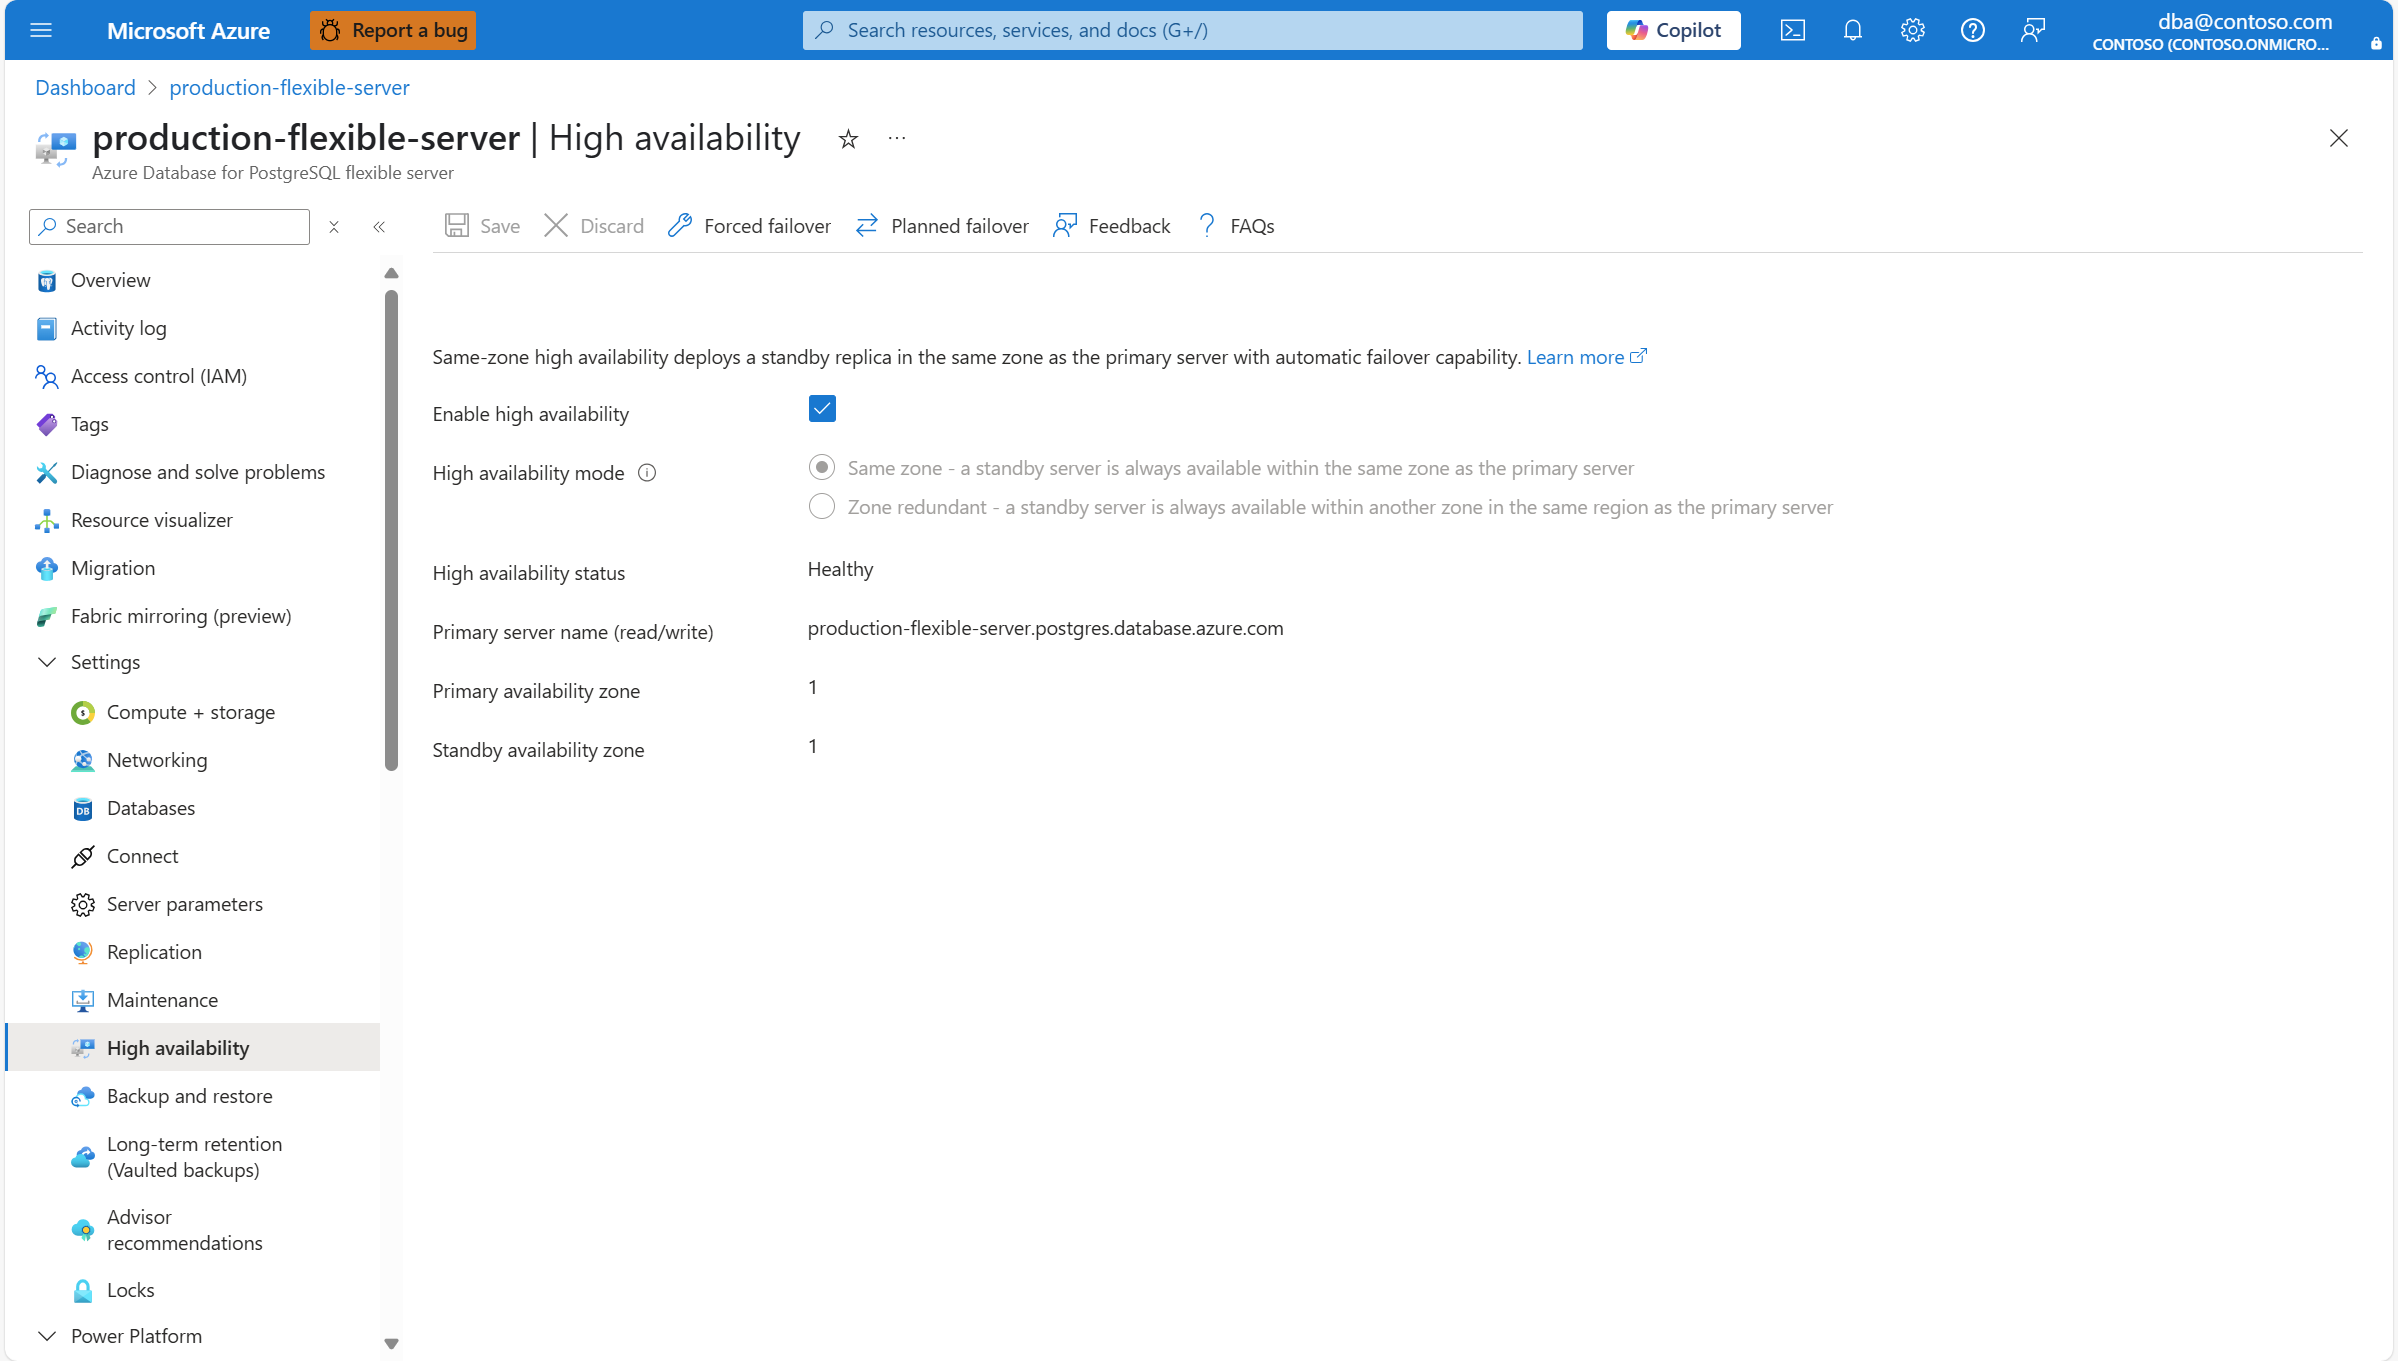
In the resource menu, under the Settings section, select High availability.
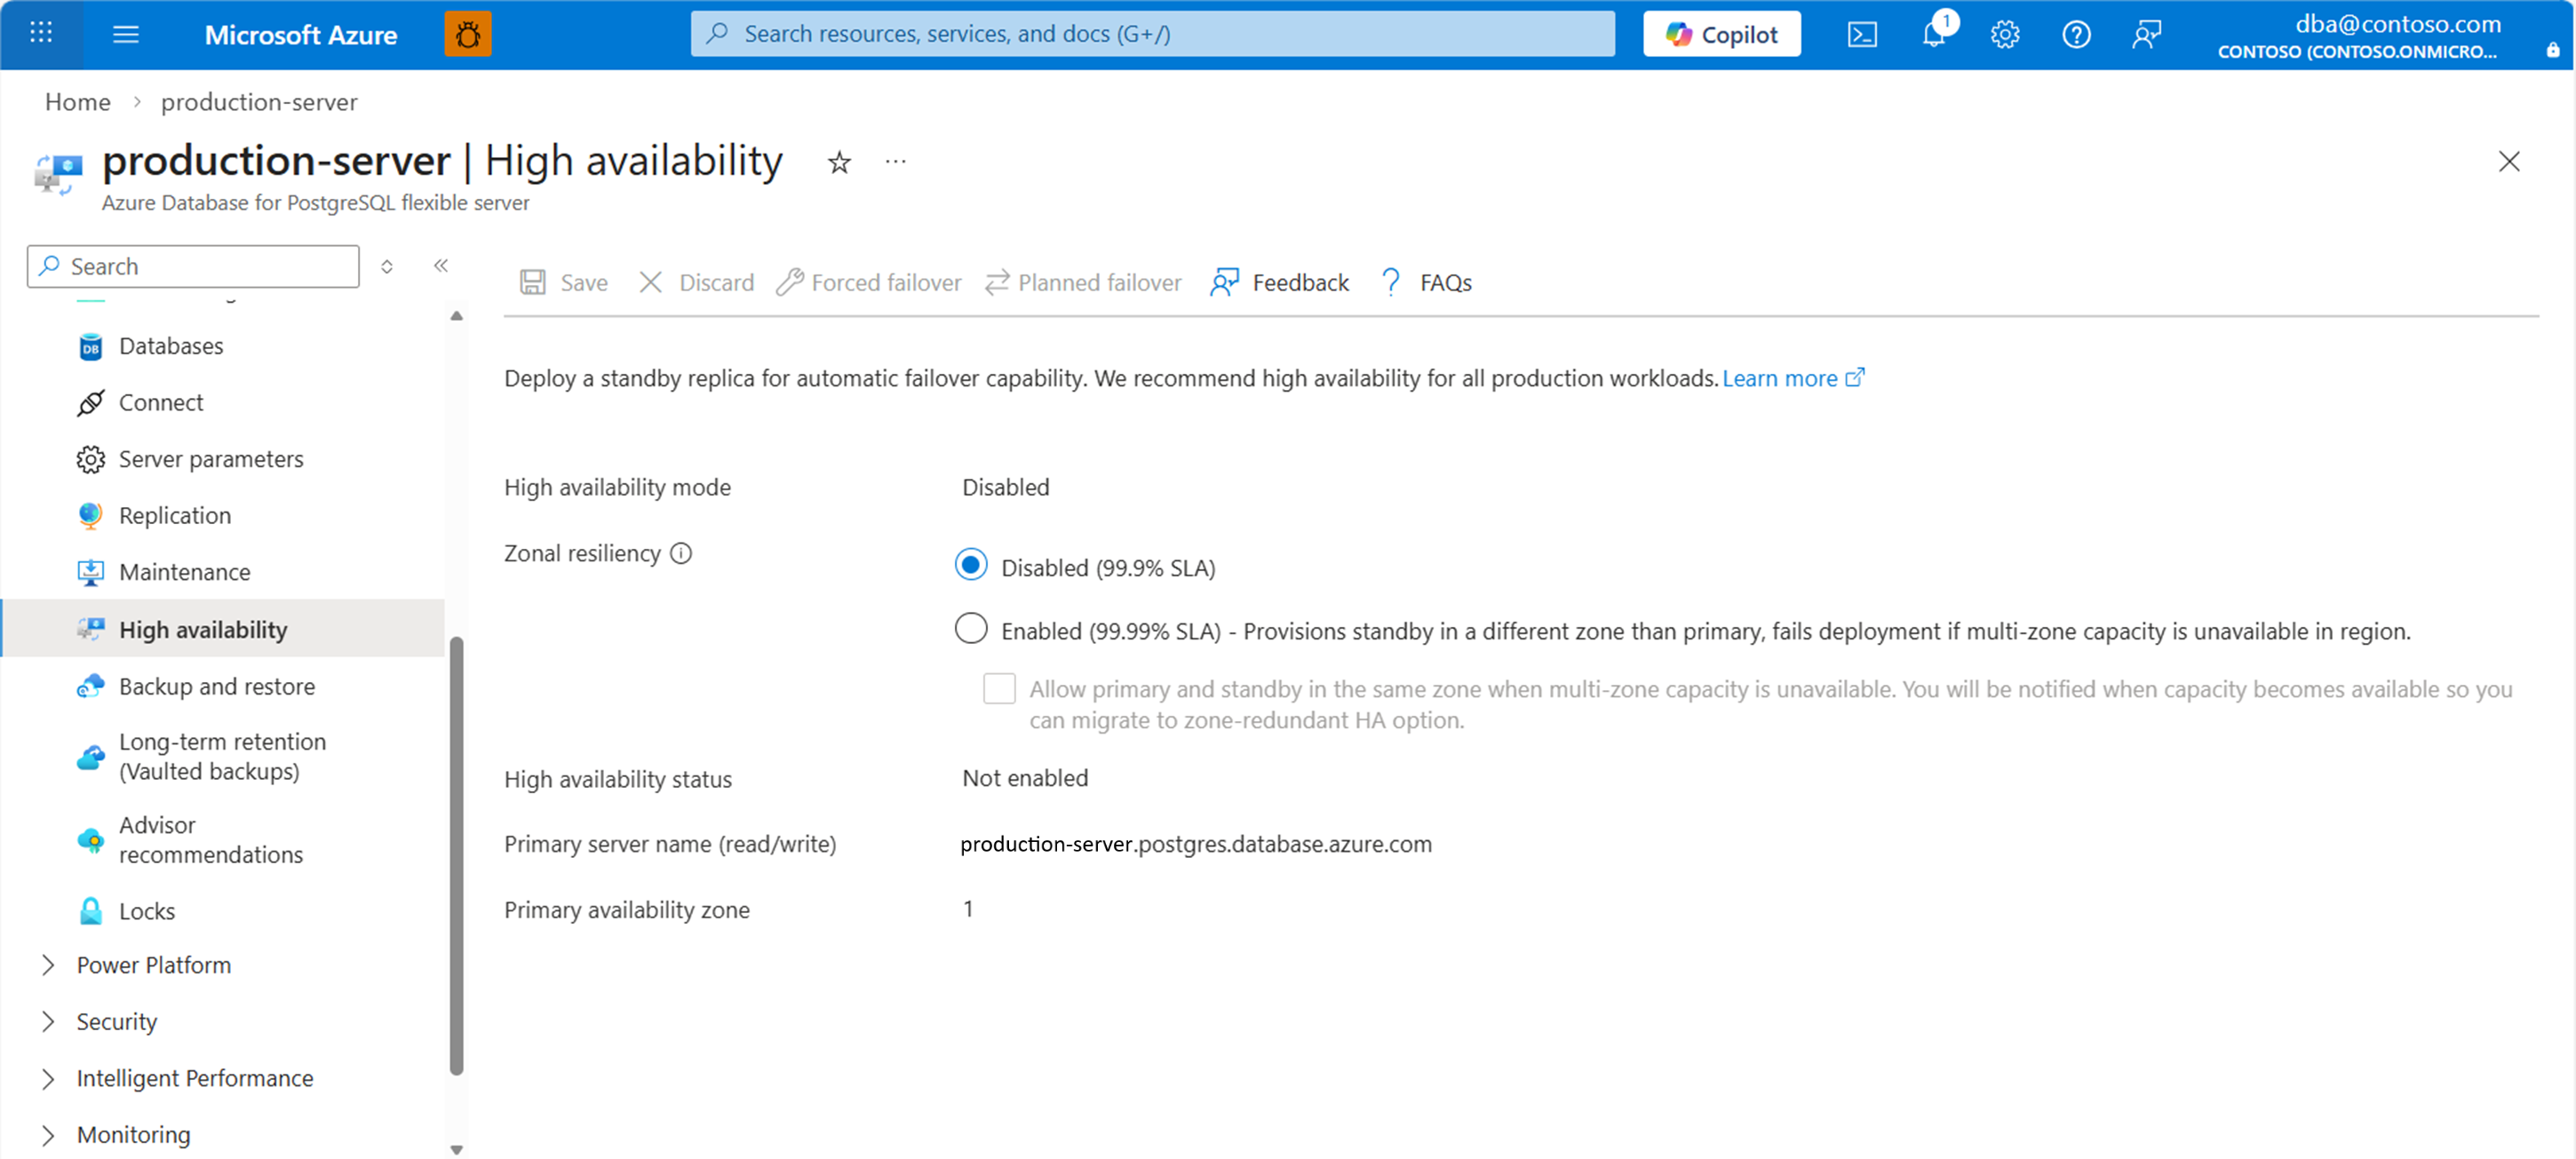
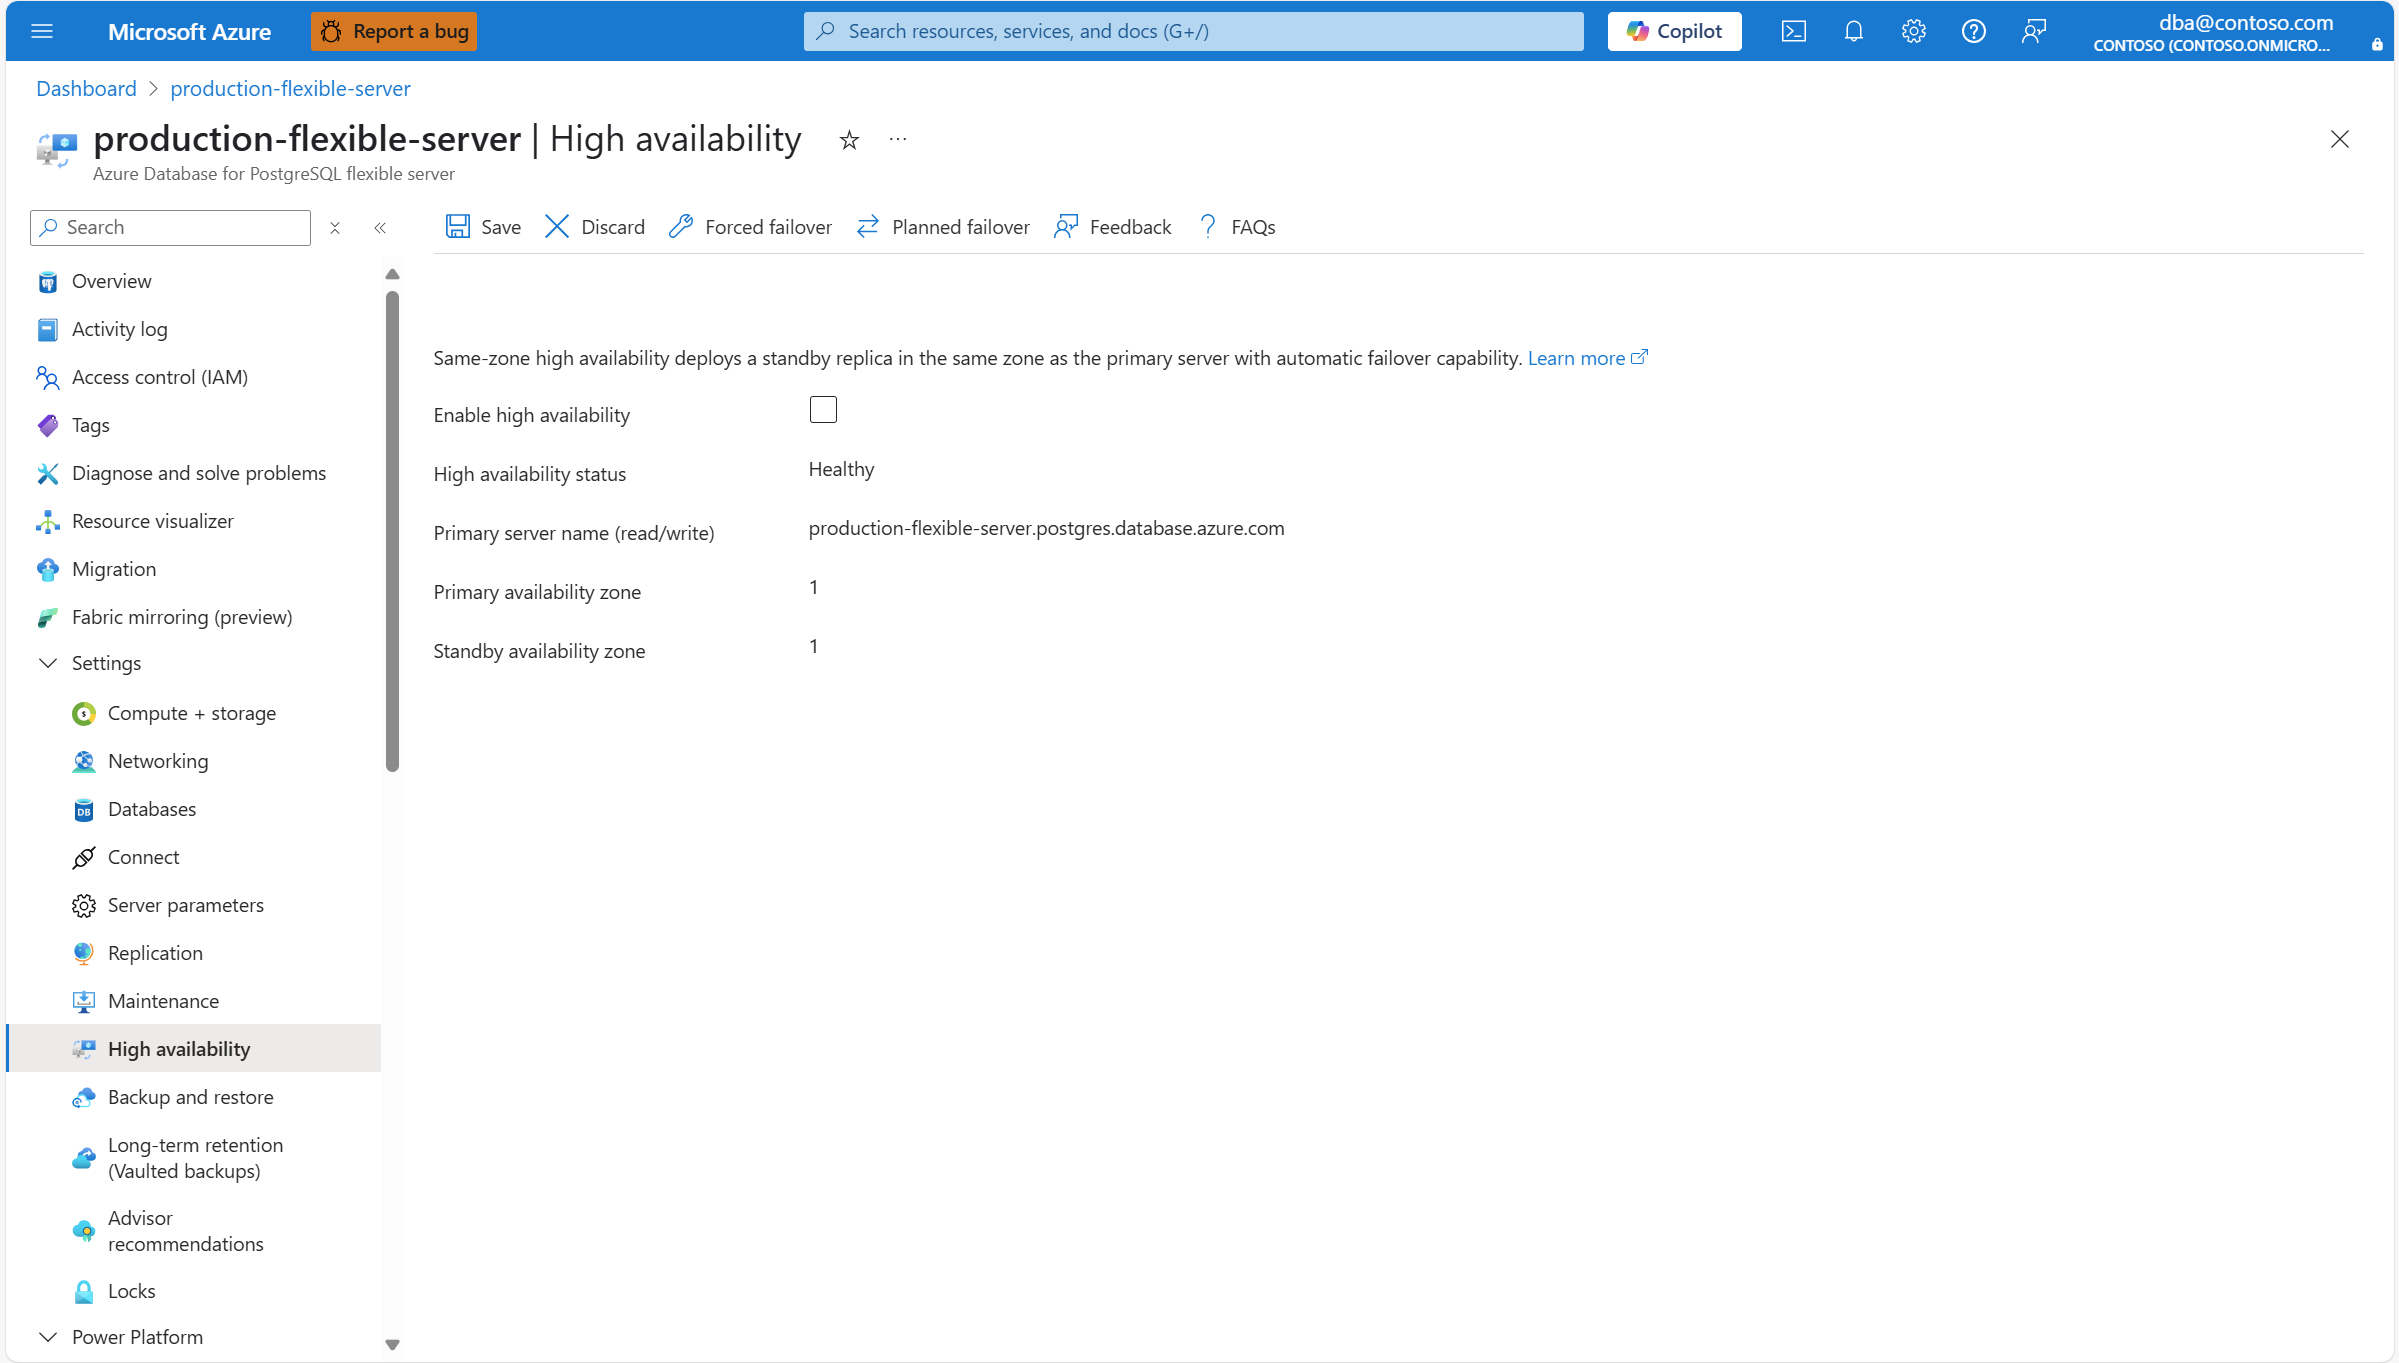
If high availability isn't enabled, the Enable high availability checkbox appears unchecked.

Also, High availability status is shown as Not enabled.
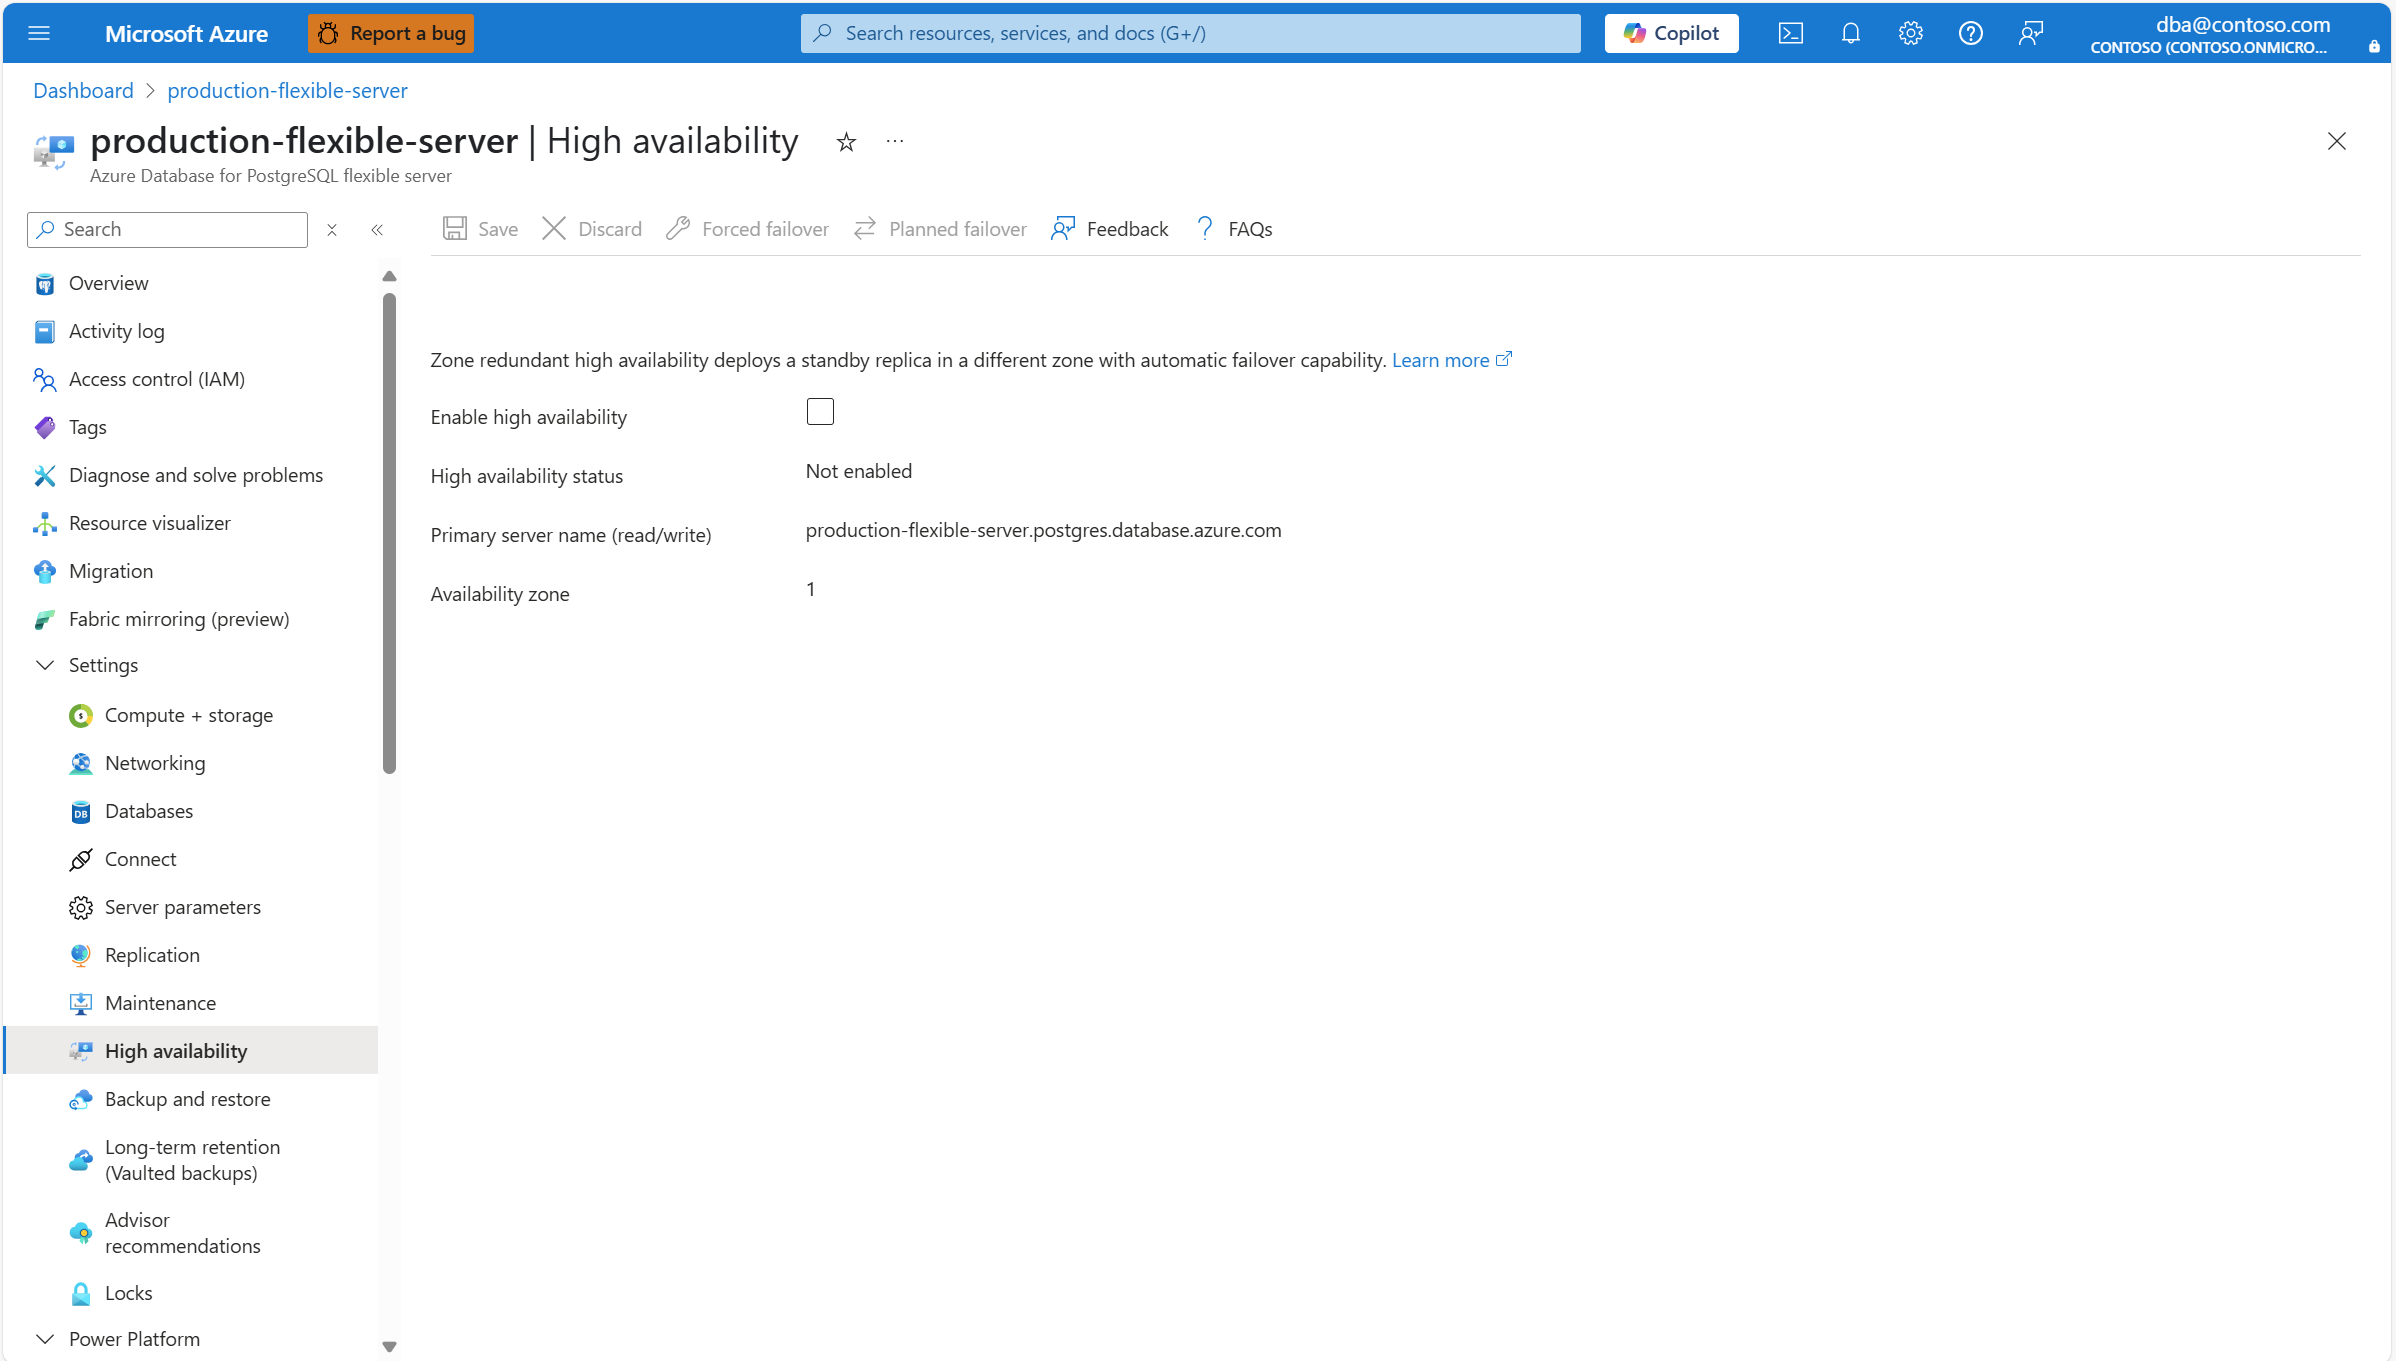
Select the Enable high availability checkbox to enable the option.
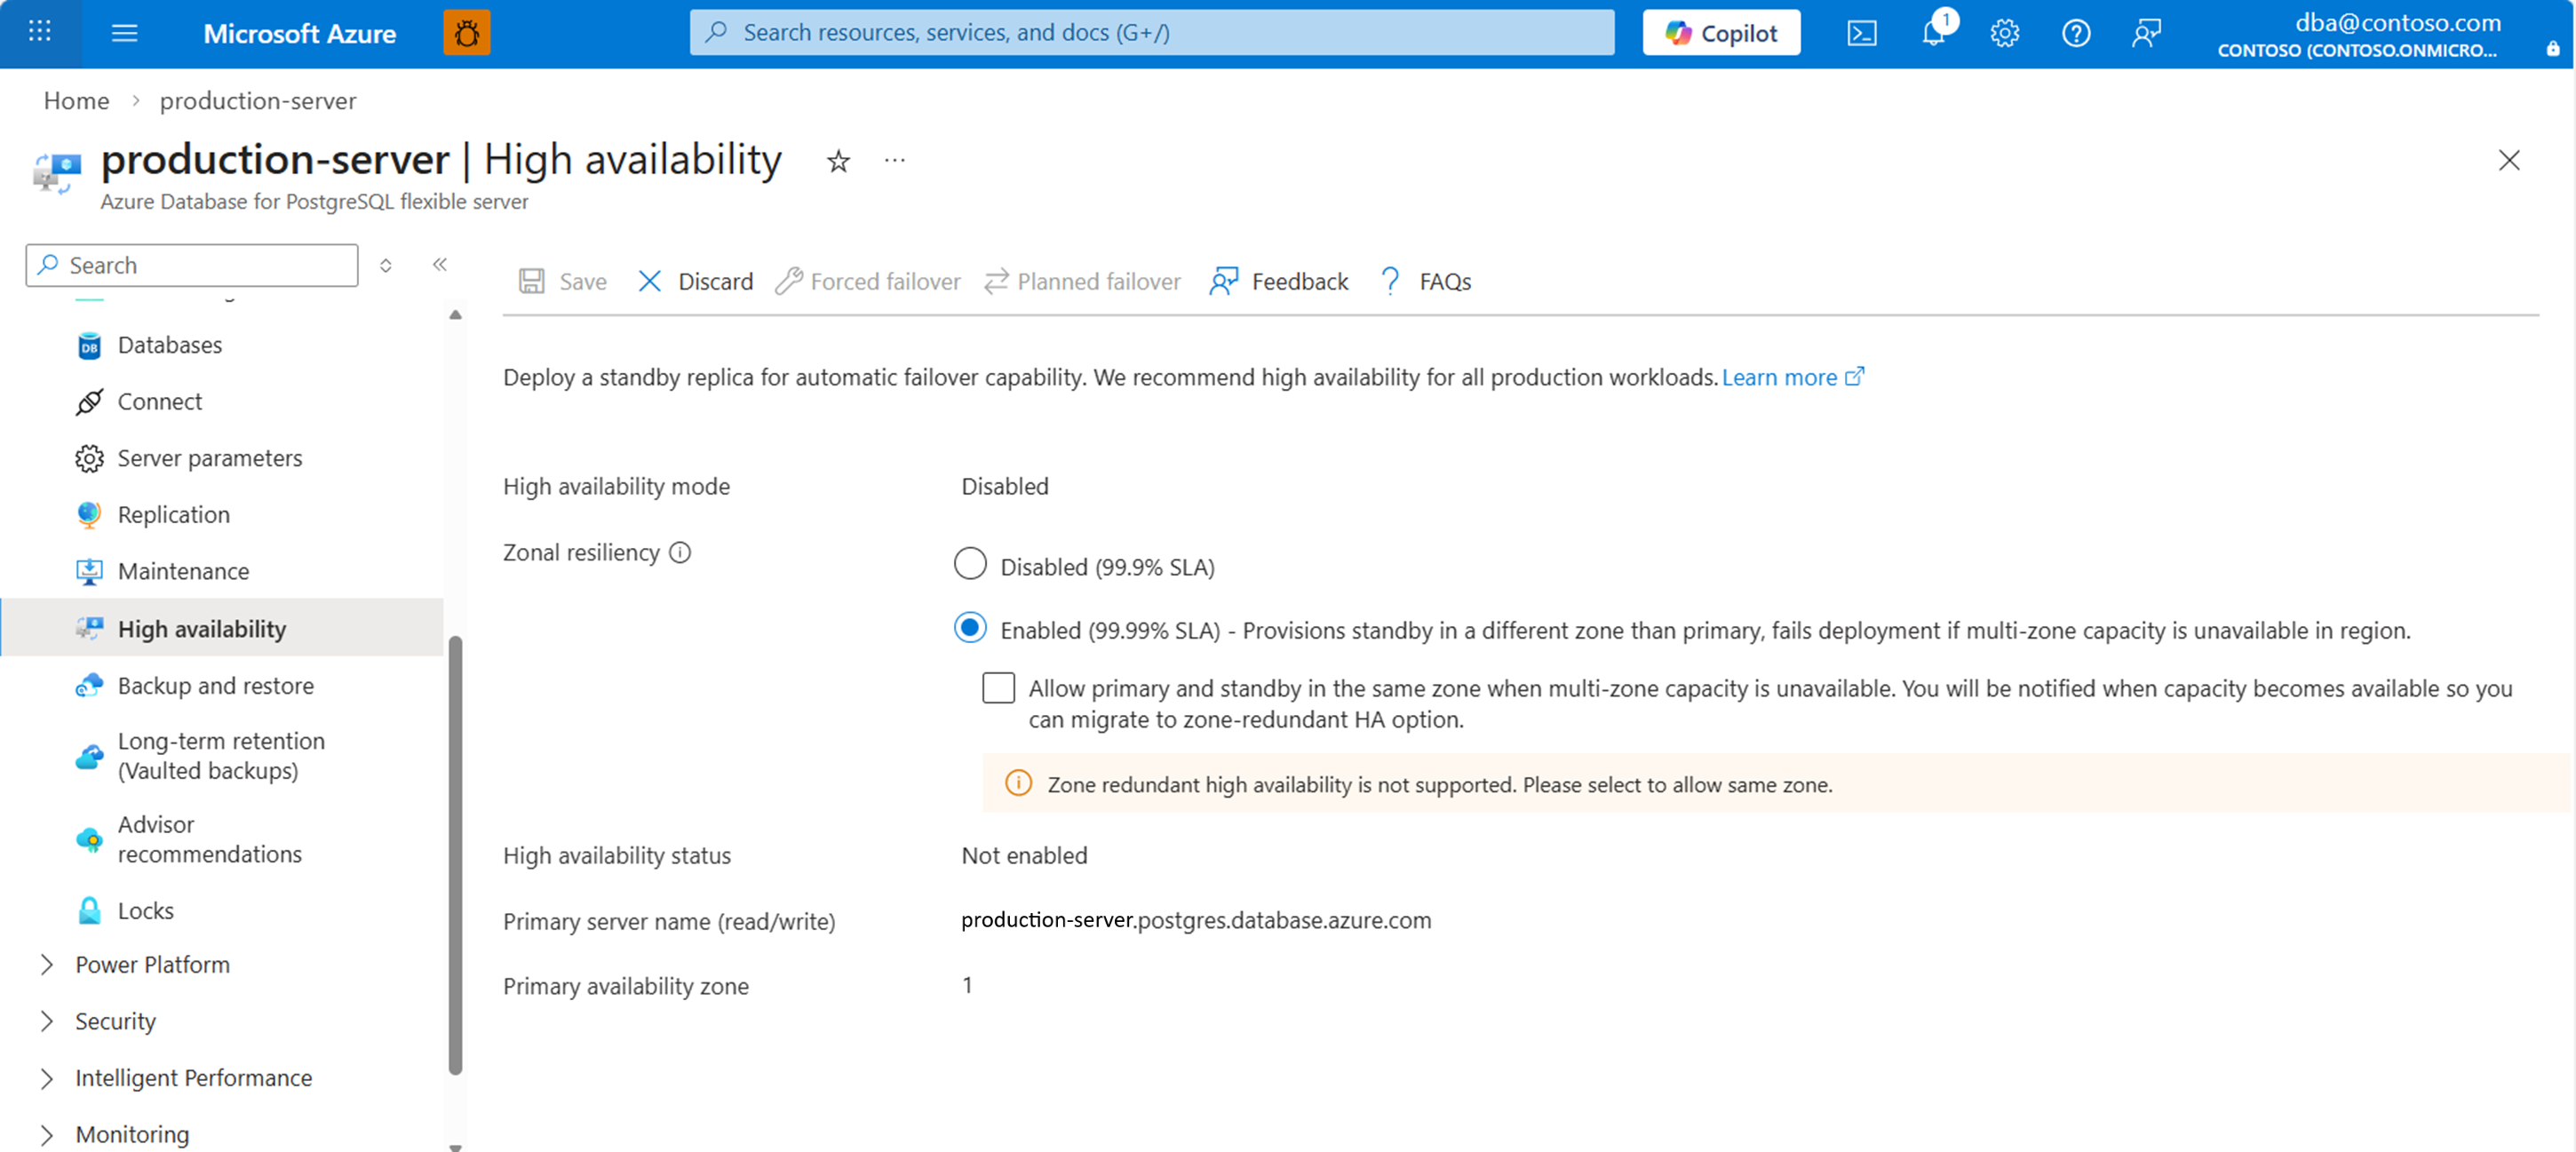
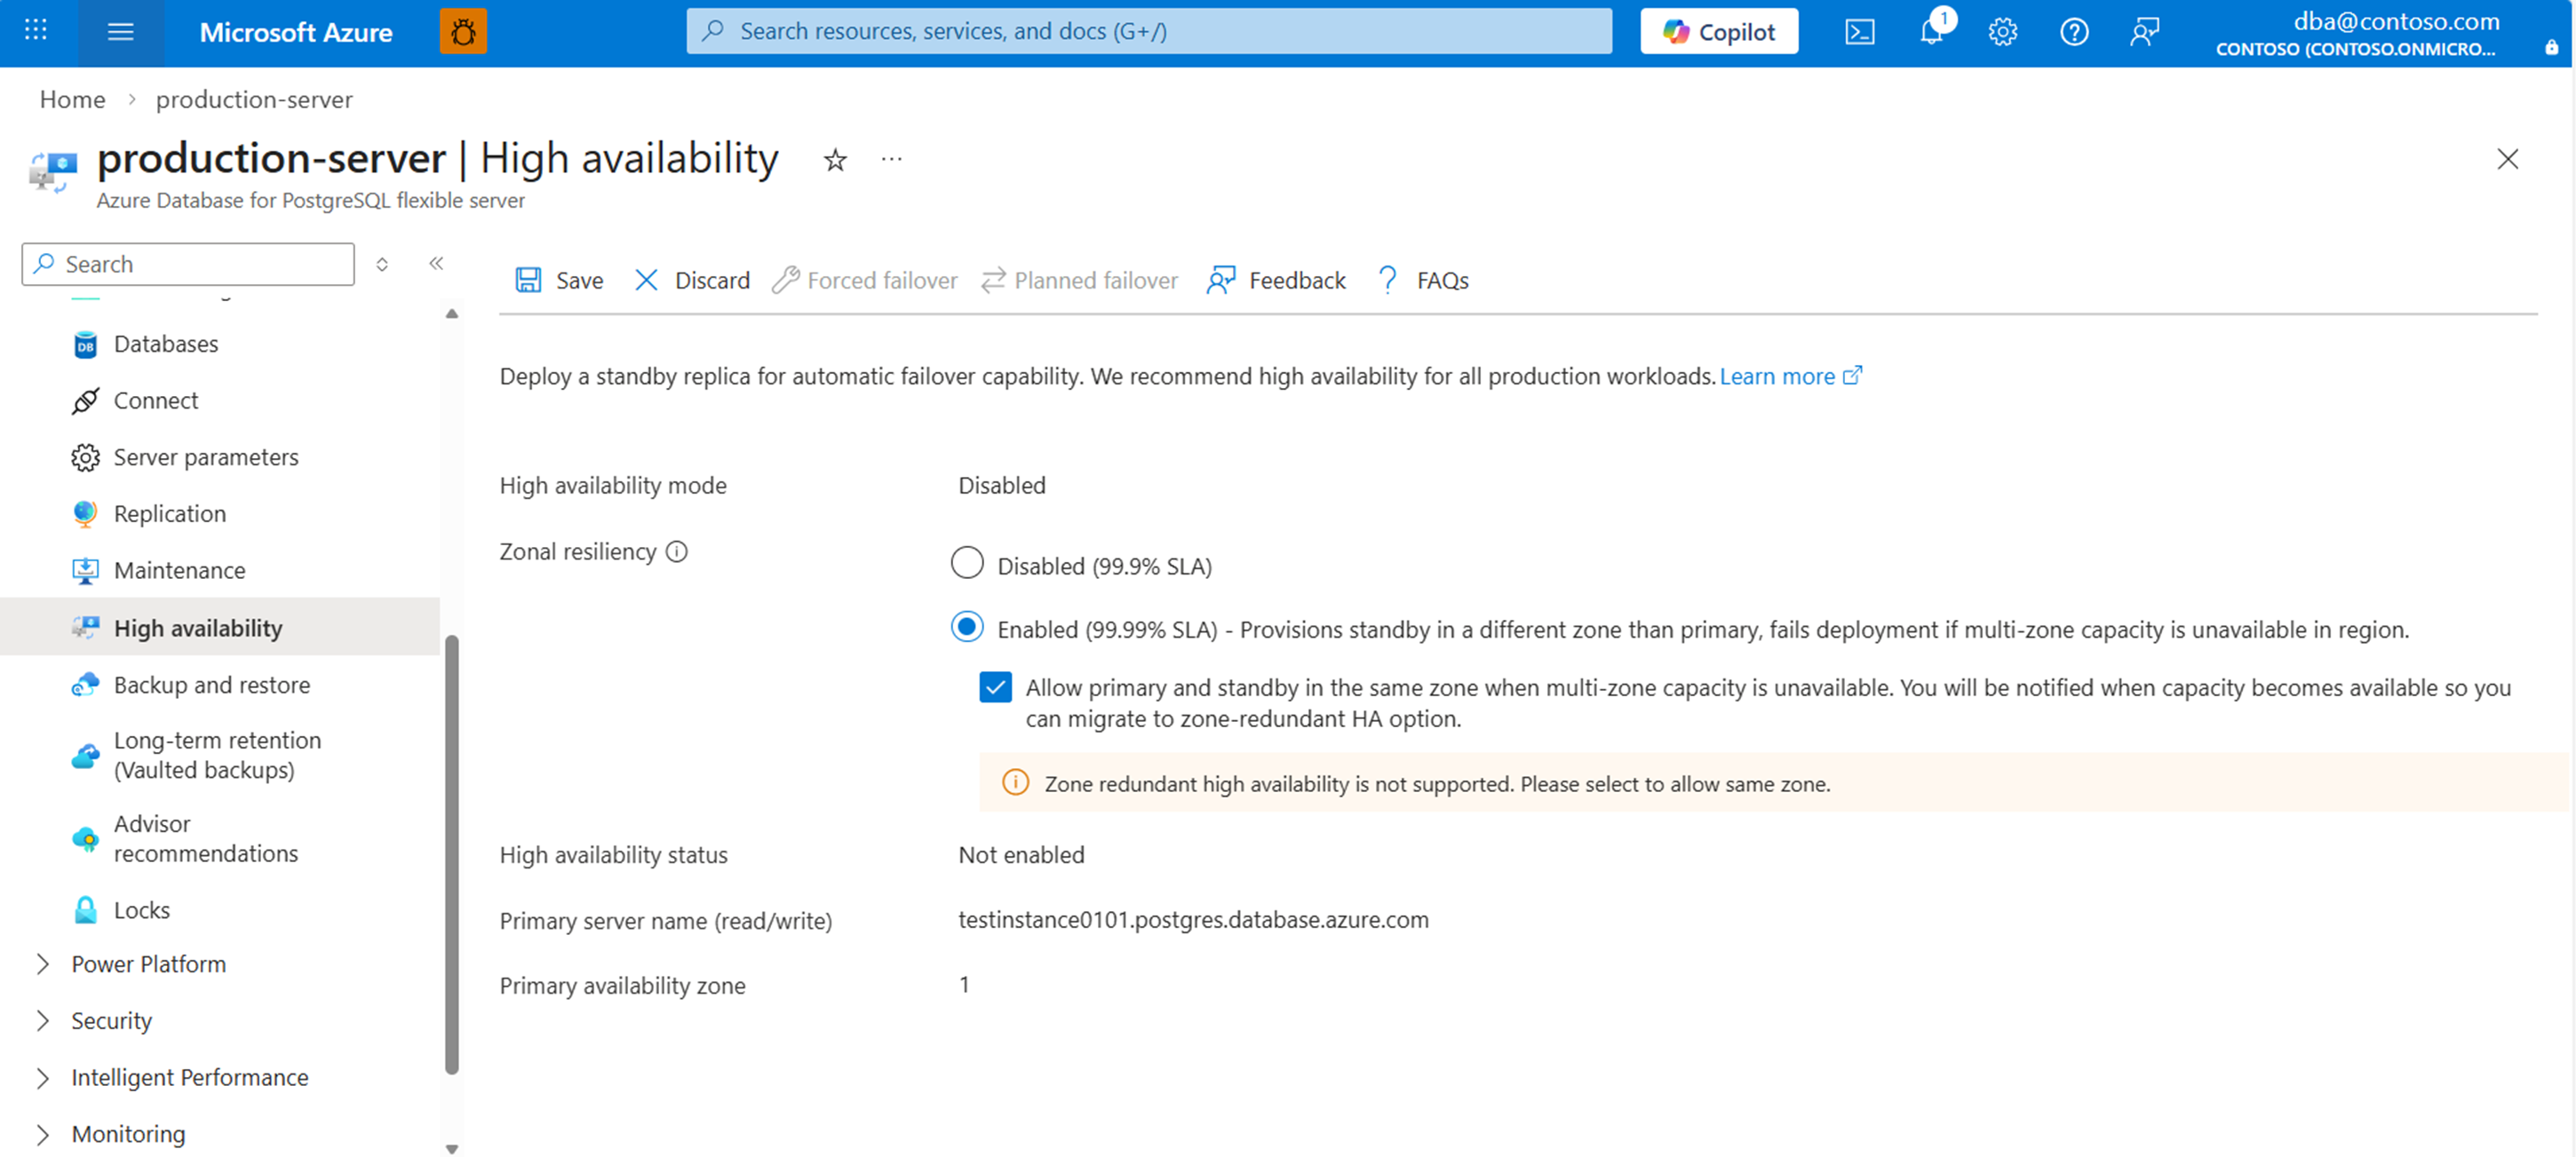
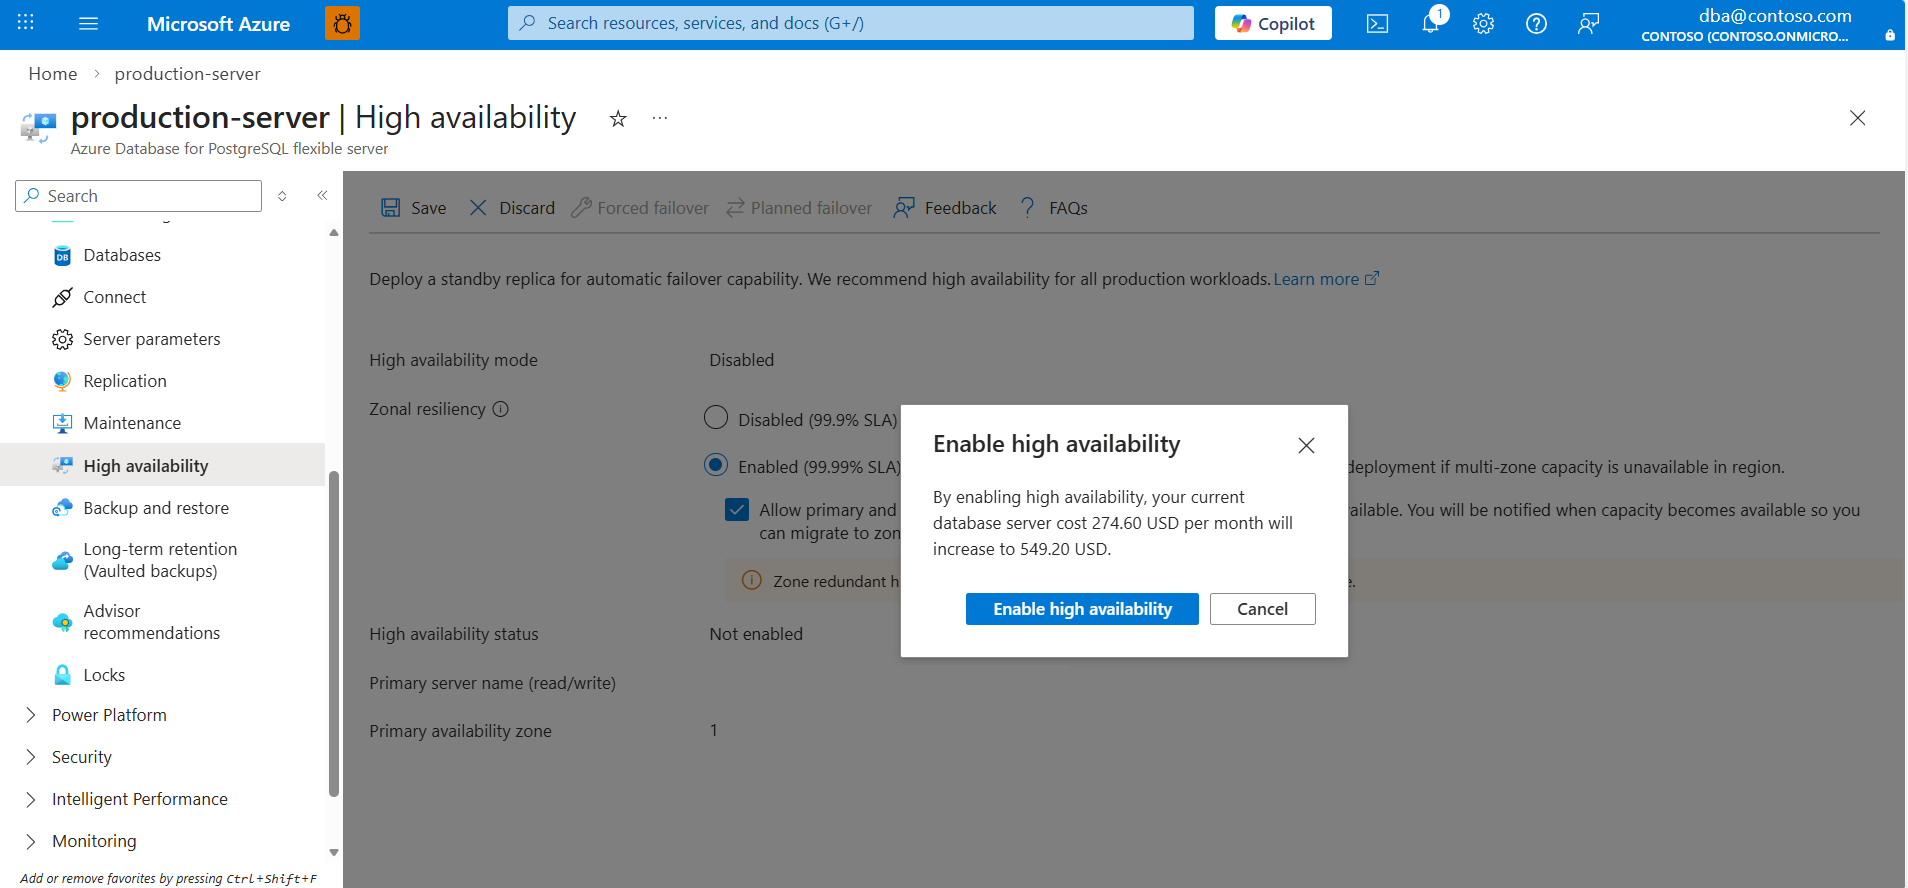
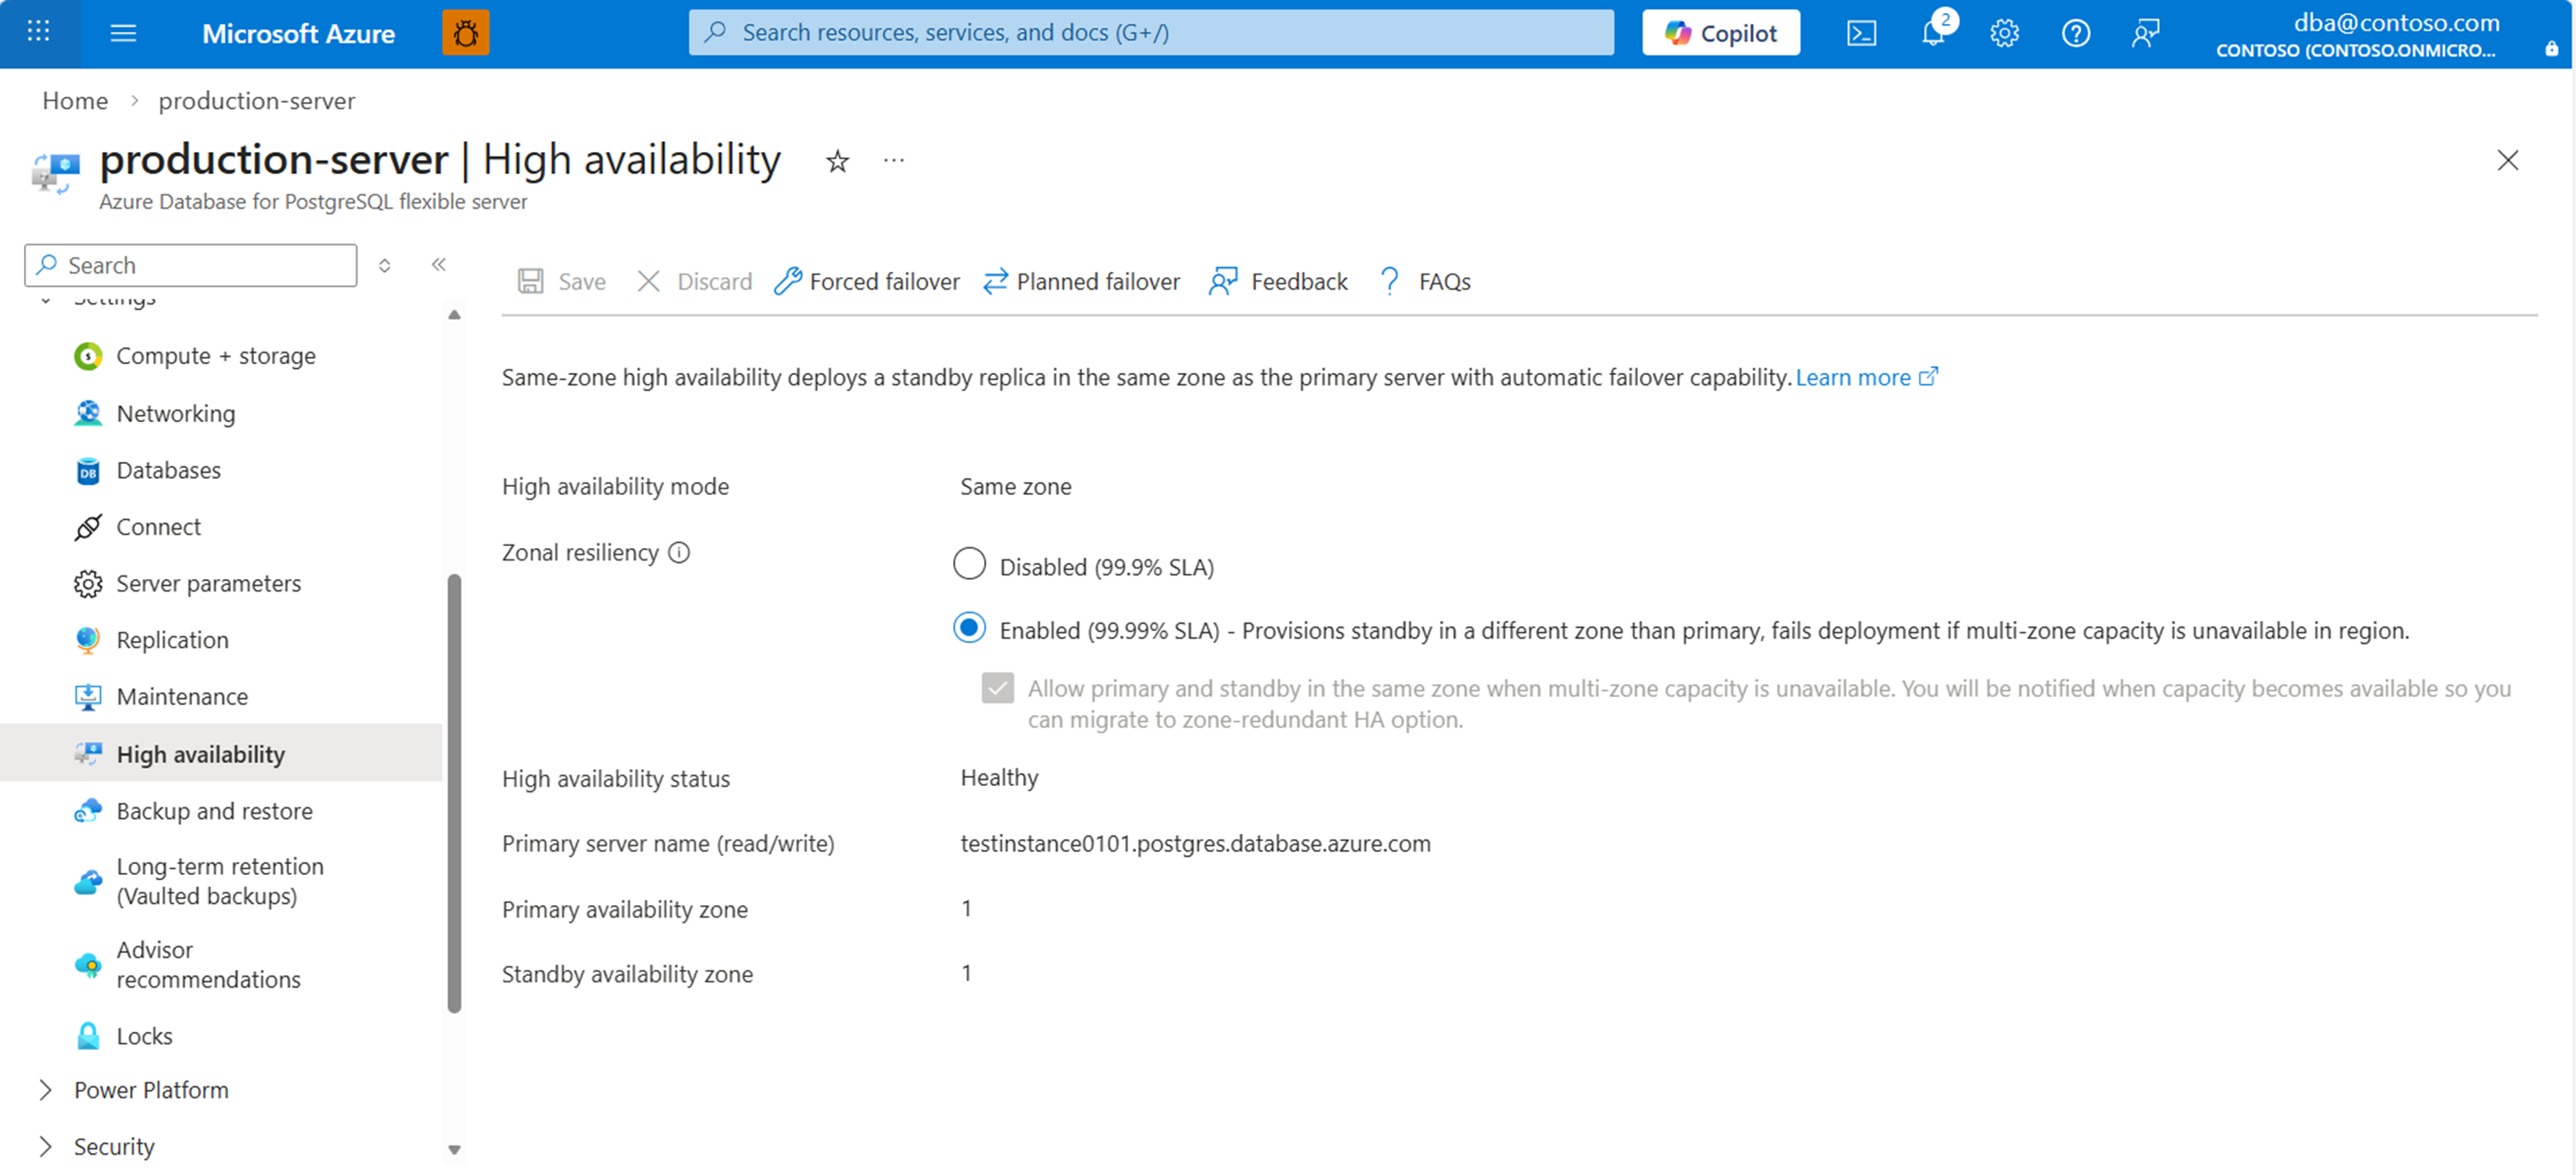
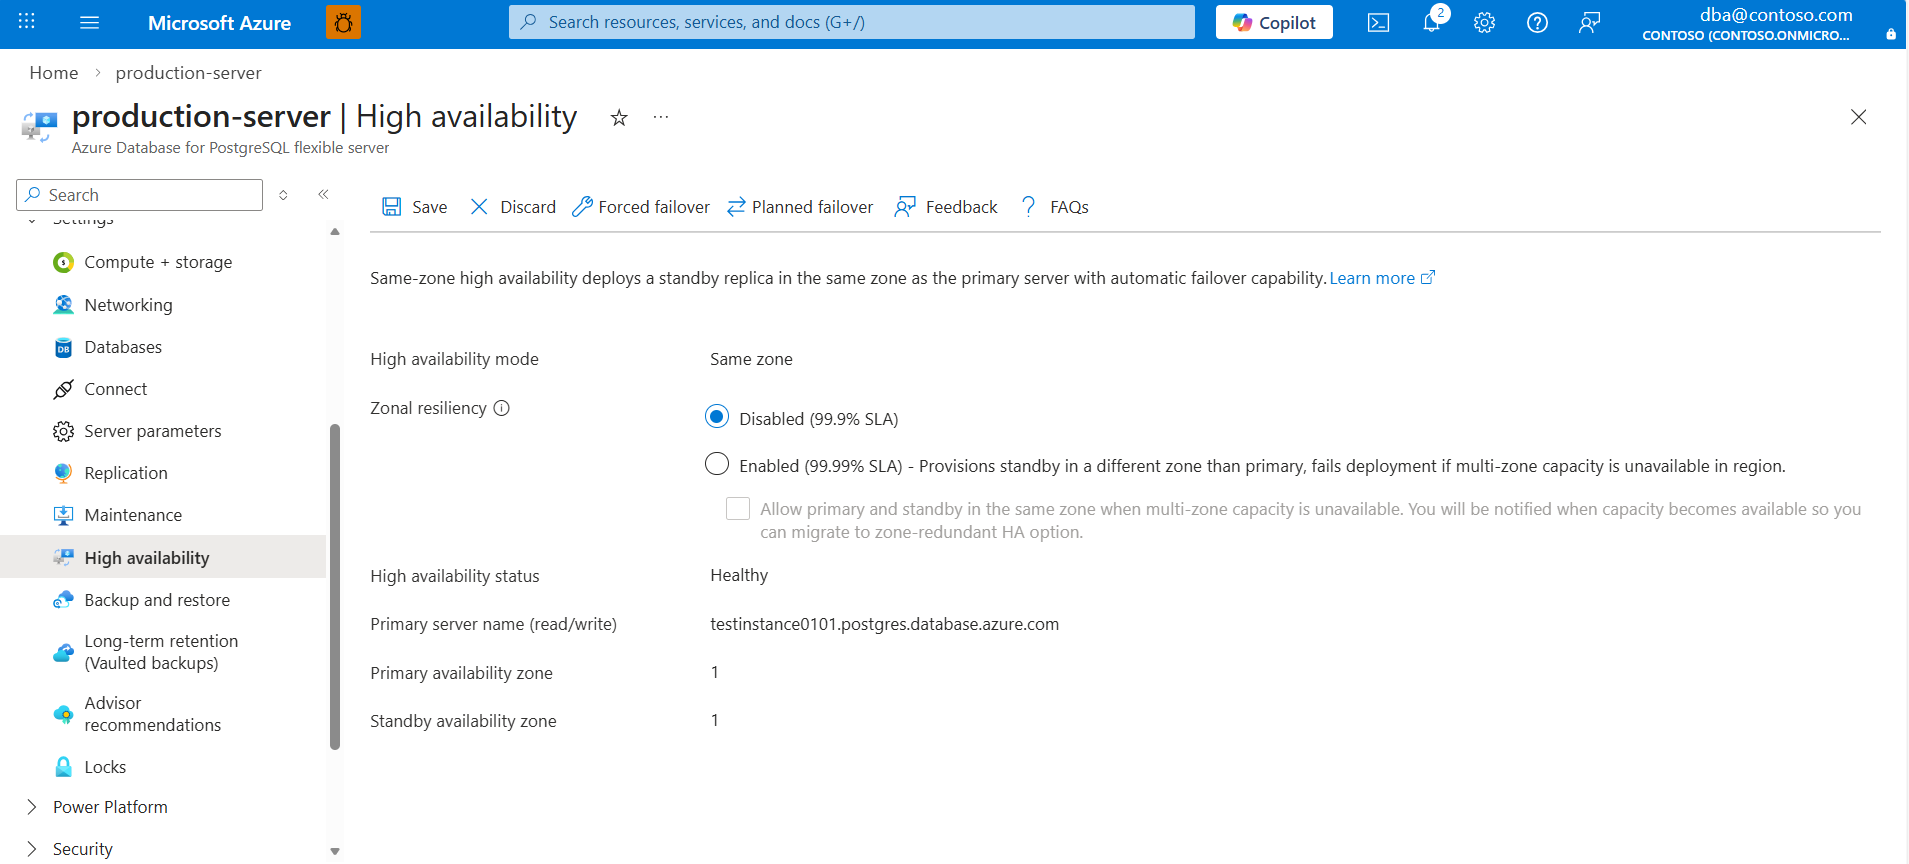
It shows Same zone and Zone redundant options. If you choose Same zone, the standby server is created in the same availability zone as the primary server.


Note
If the region in which your server is created doesn't support high availability with zone redundancy, the Zone redundant option is grayed out and disabled.
If the region supports zone redundancy, you can select Zone redundant.
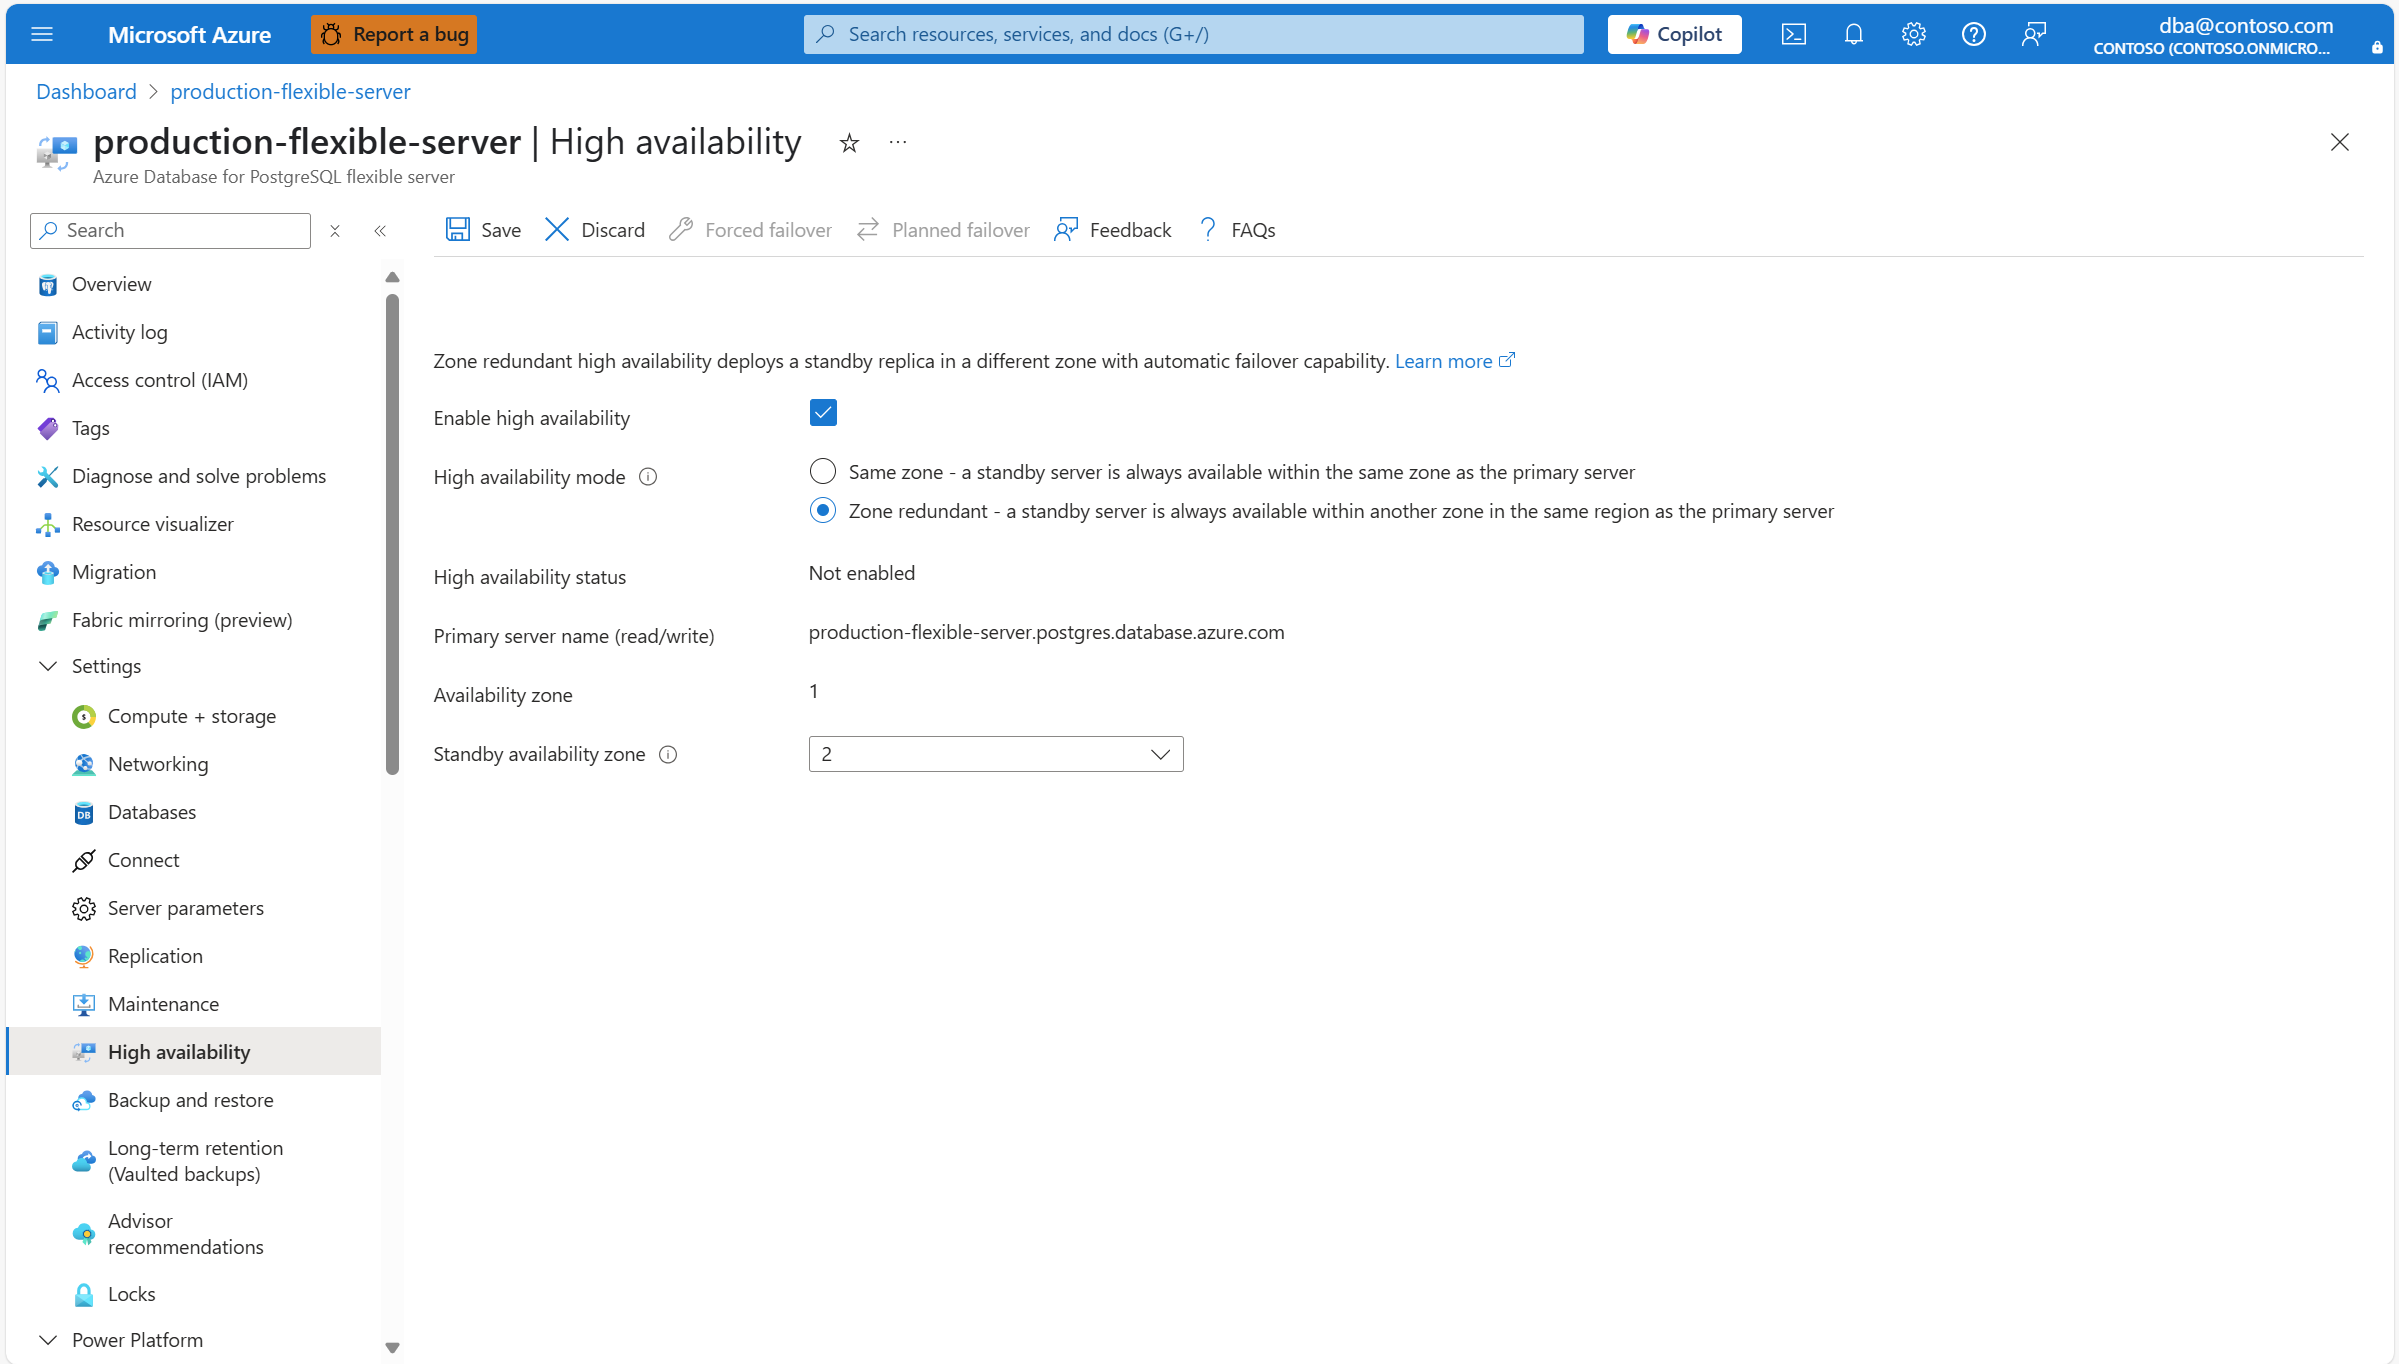
In that case, you can choose in which of the other availability zones you want to deploy your standby server.

When everything is configured according to your needs, select Save to apply the changes.

A dialog informs you of the cost increase associated with the deployment of the standby server. If you decide to proceed, select Enable high availability.
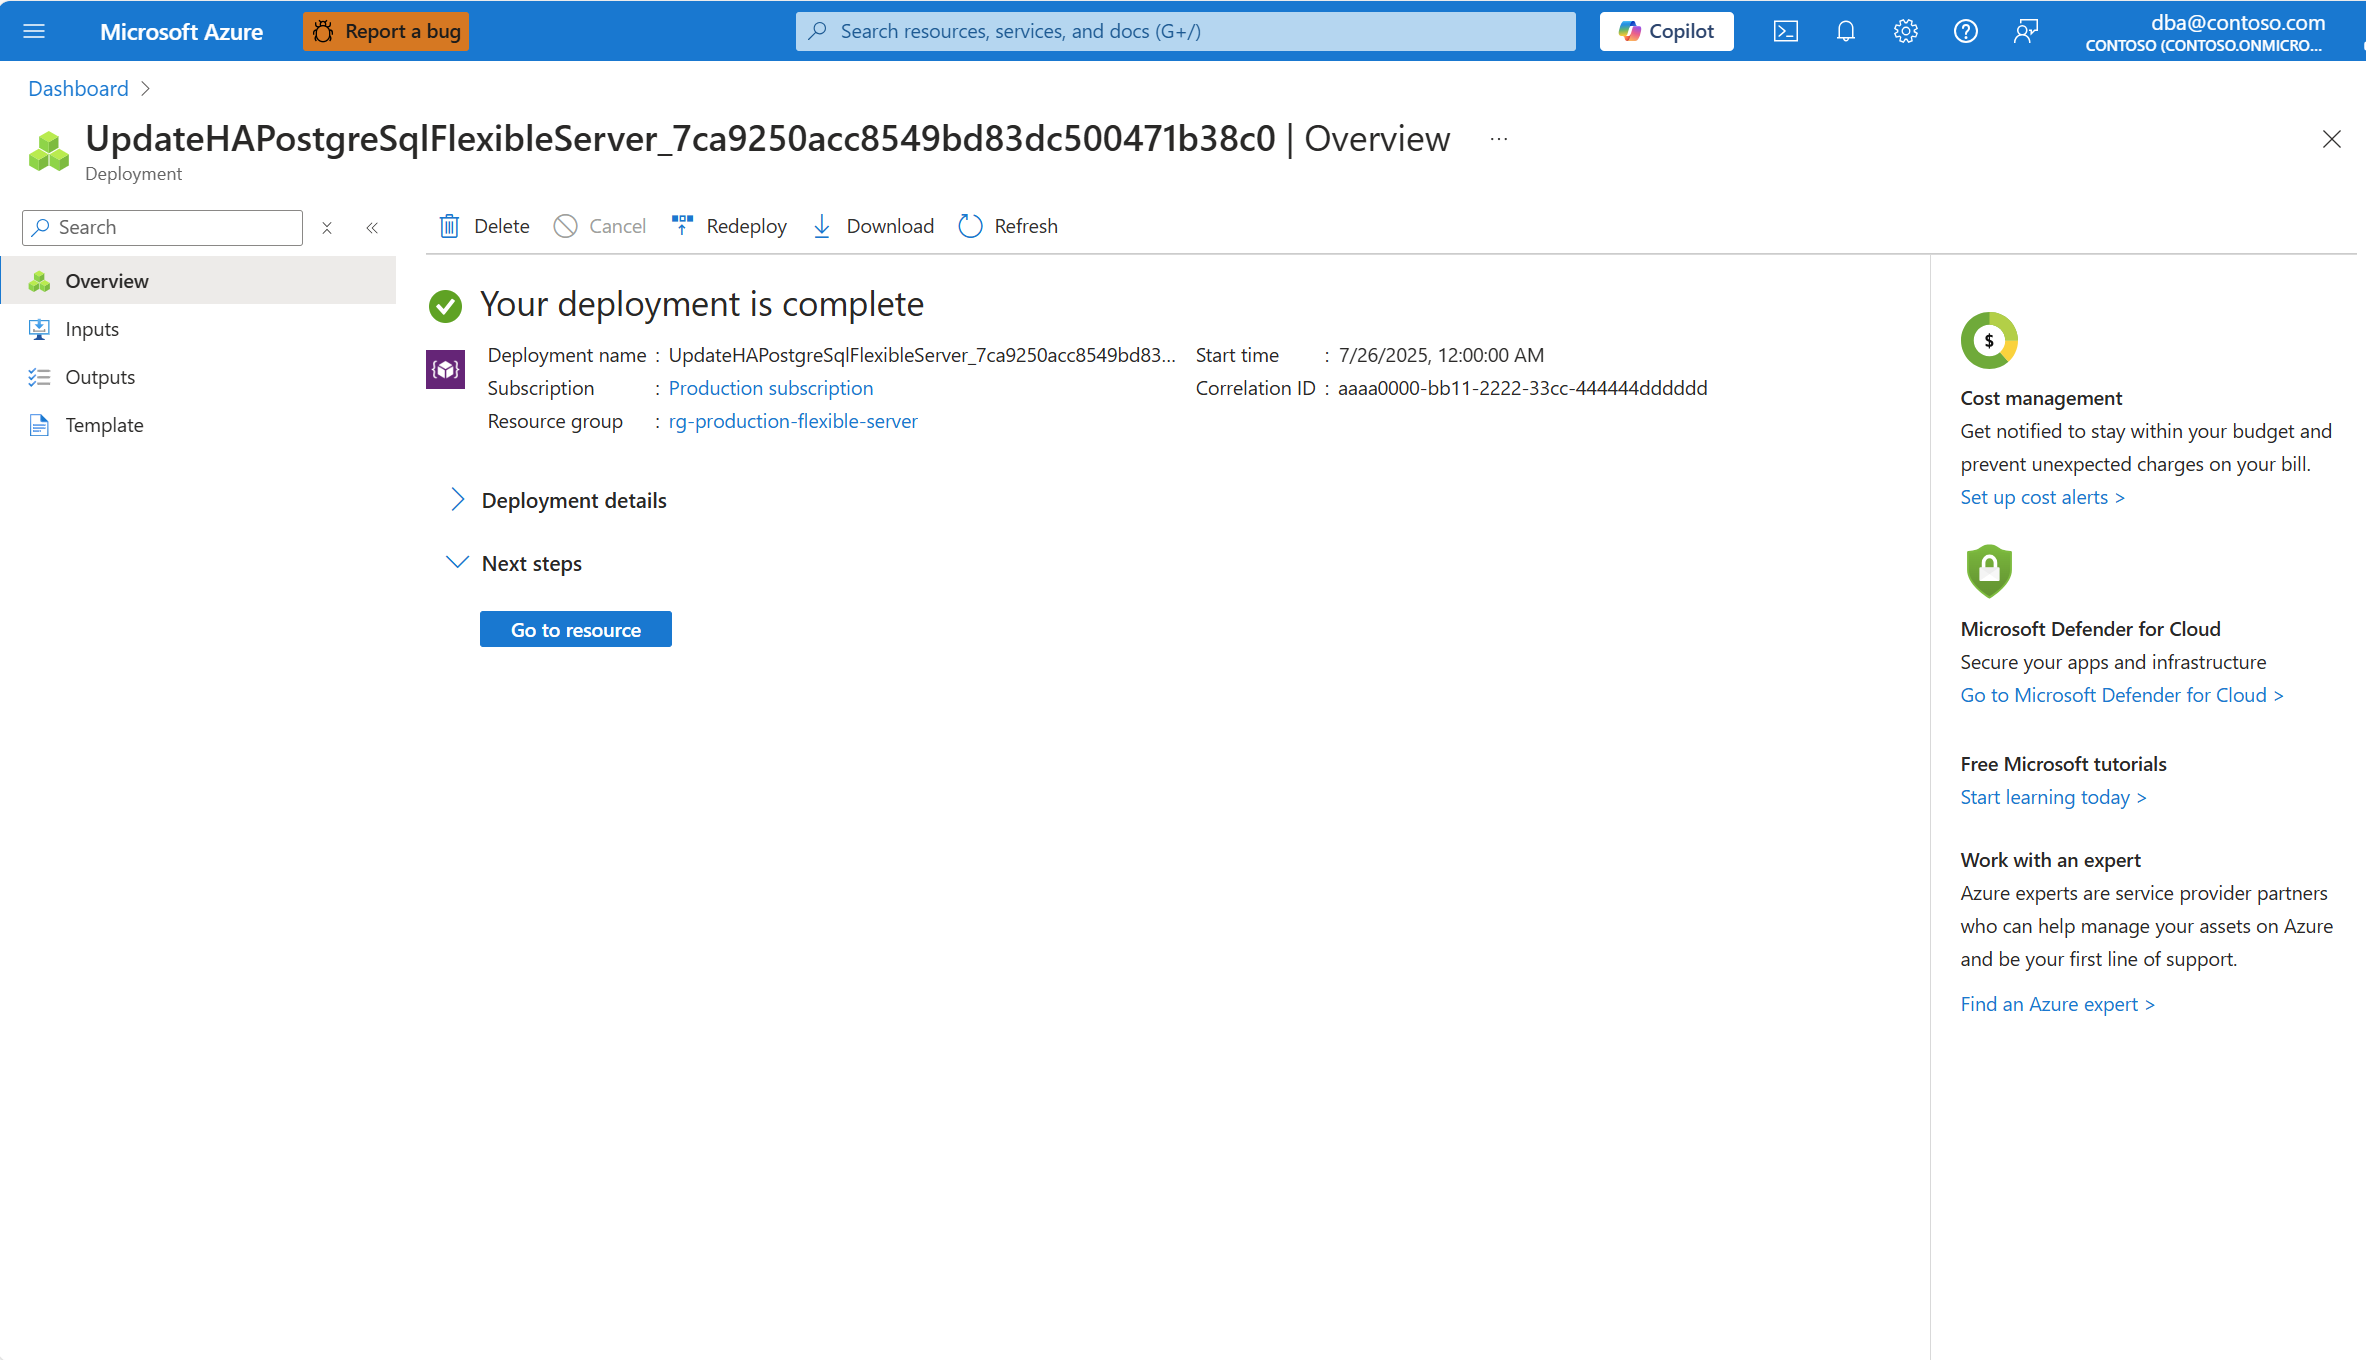
A deployment initiates and, when it completes, a notification shows that high availability is successfully enabled.


Steps to disable high availability
Using the Azure portal:
Select your Azure Database for PostgreSQL flexible server.
In the resource menu, under the Settings section, select High availability.
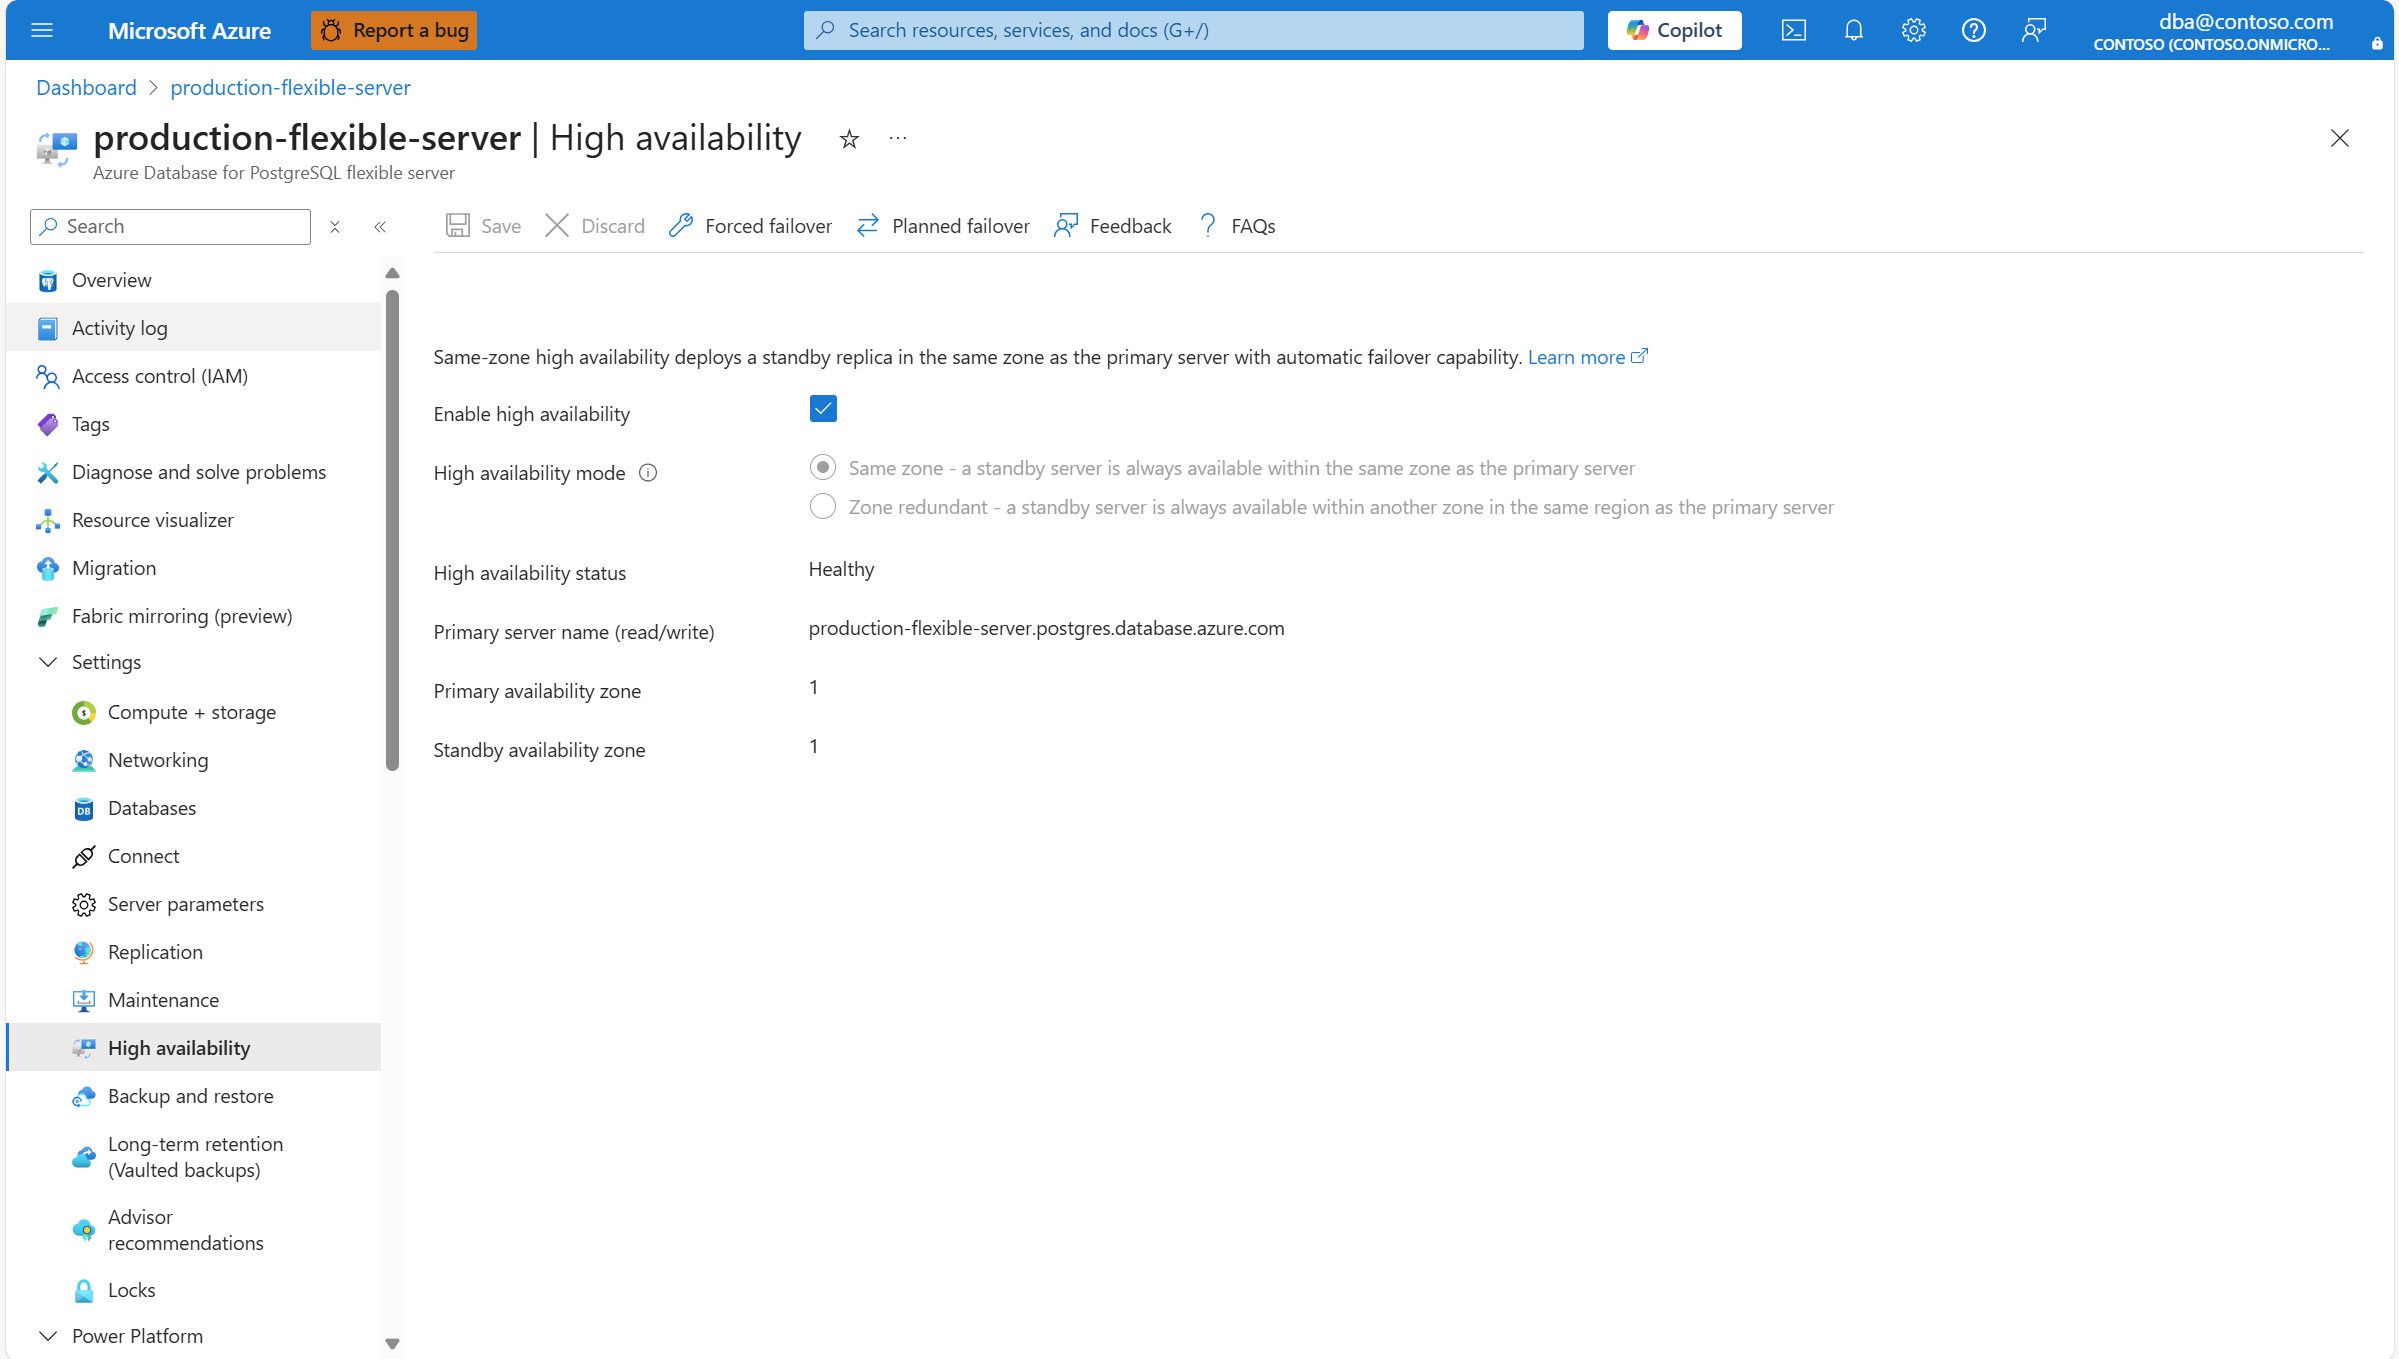
If high availability is enabled, the Enable high availability checkbox appears checked.
Also, High availability mode is set to the mode configured.

And High availability status is typically shown as Healthy.
Clear the Enable high availability checkbox to disable the option.
Select Save to apply the changes.
A dialog informs you of the cost reduction associated with the removal of the standby server. If you decide to proceed, select Disable high availability.
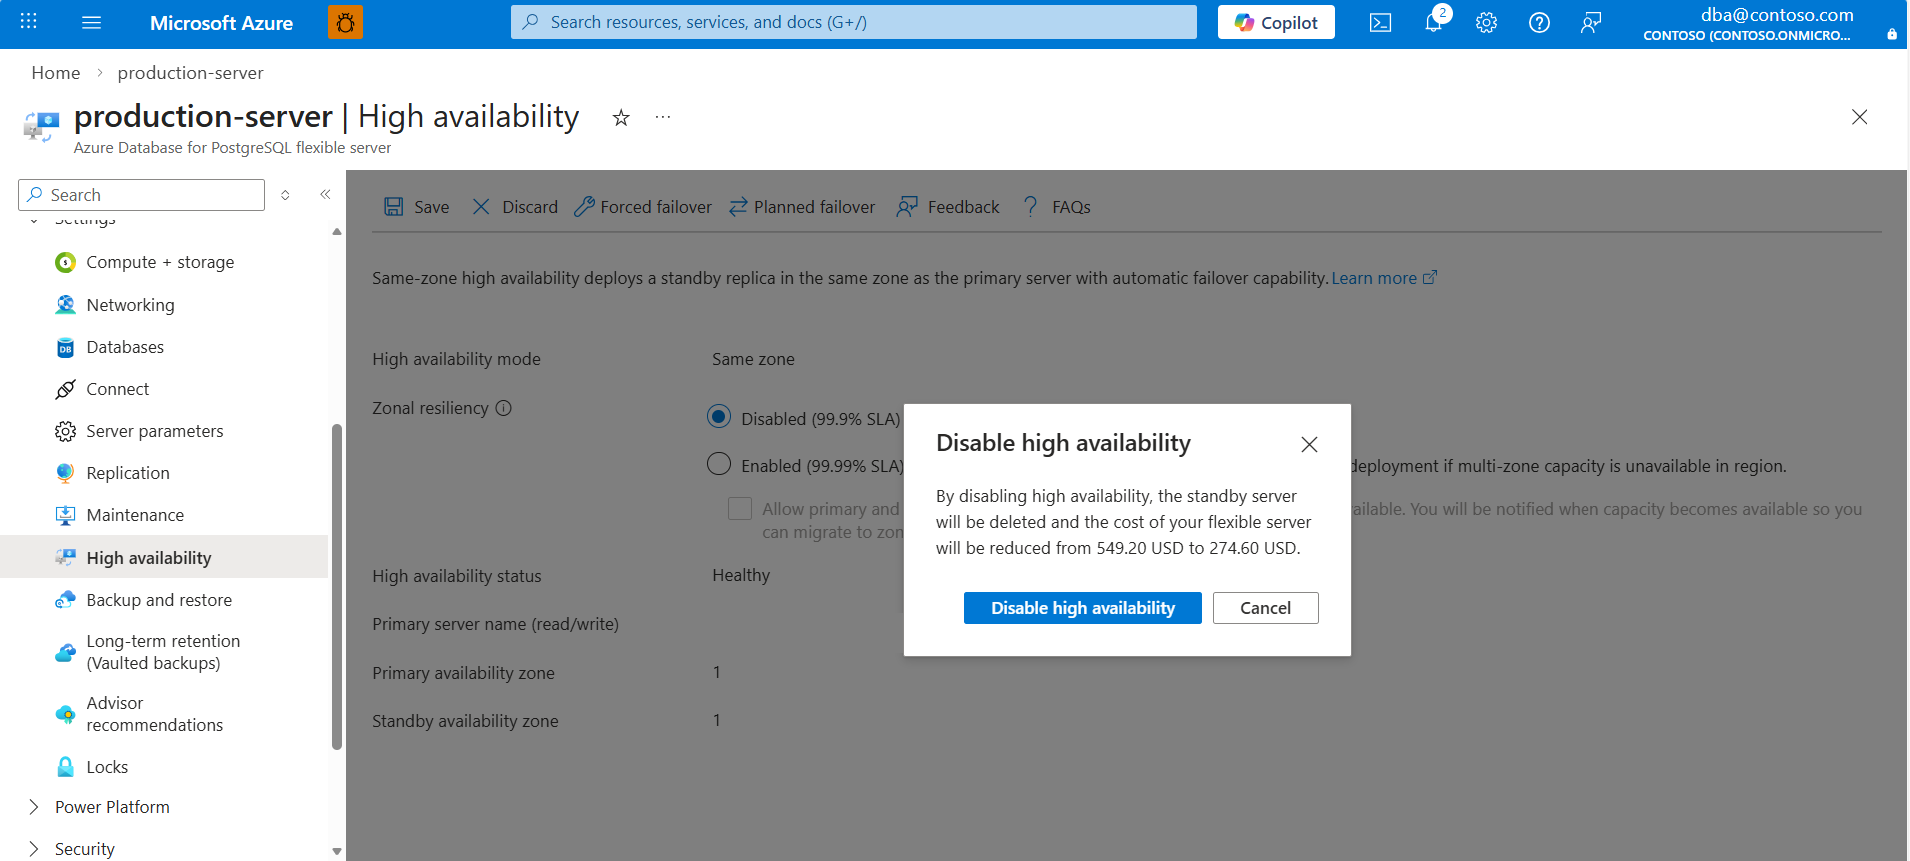
A deployment initiates and, when it completes, a notification shows that high availability is successfully disabled.


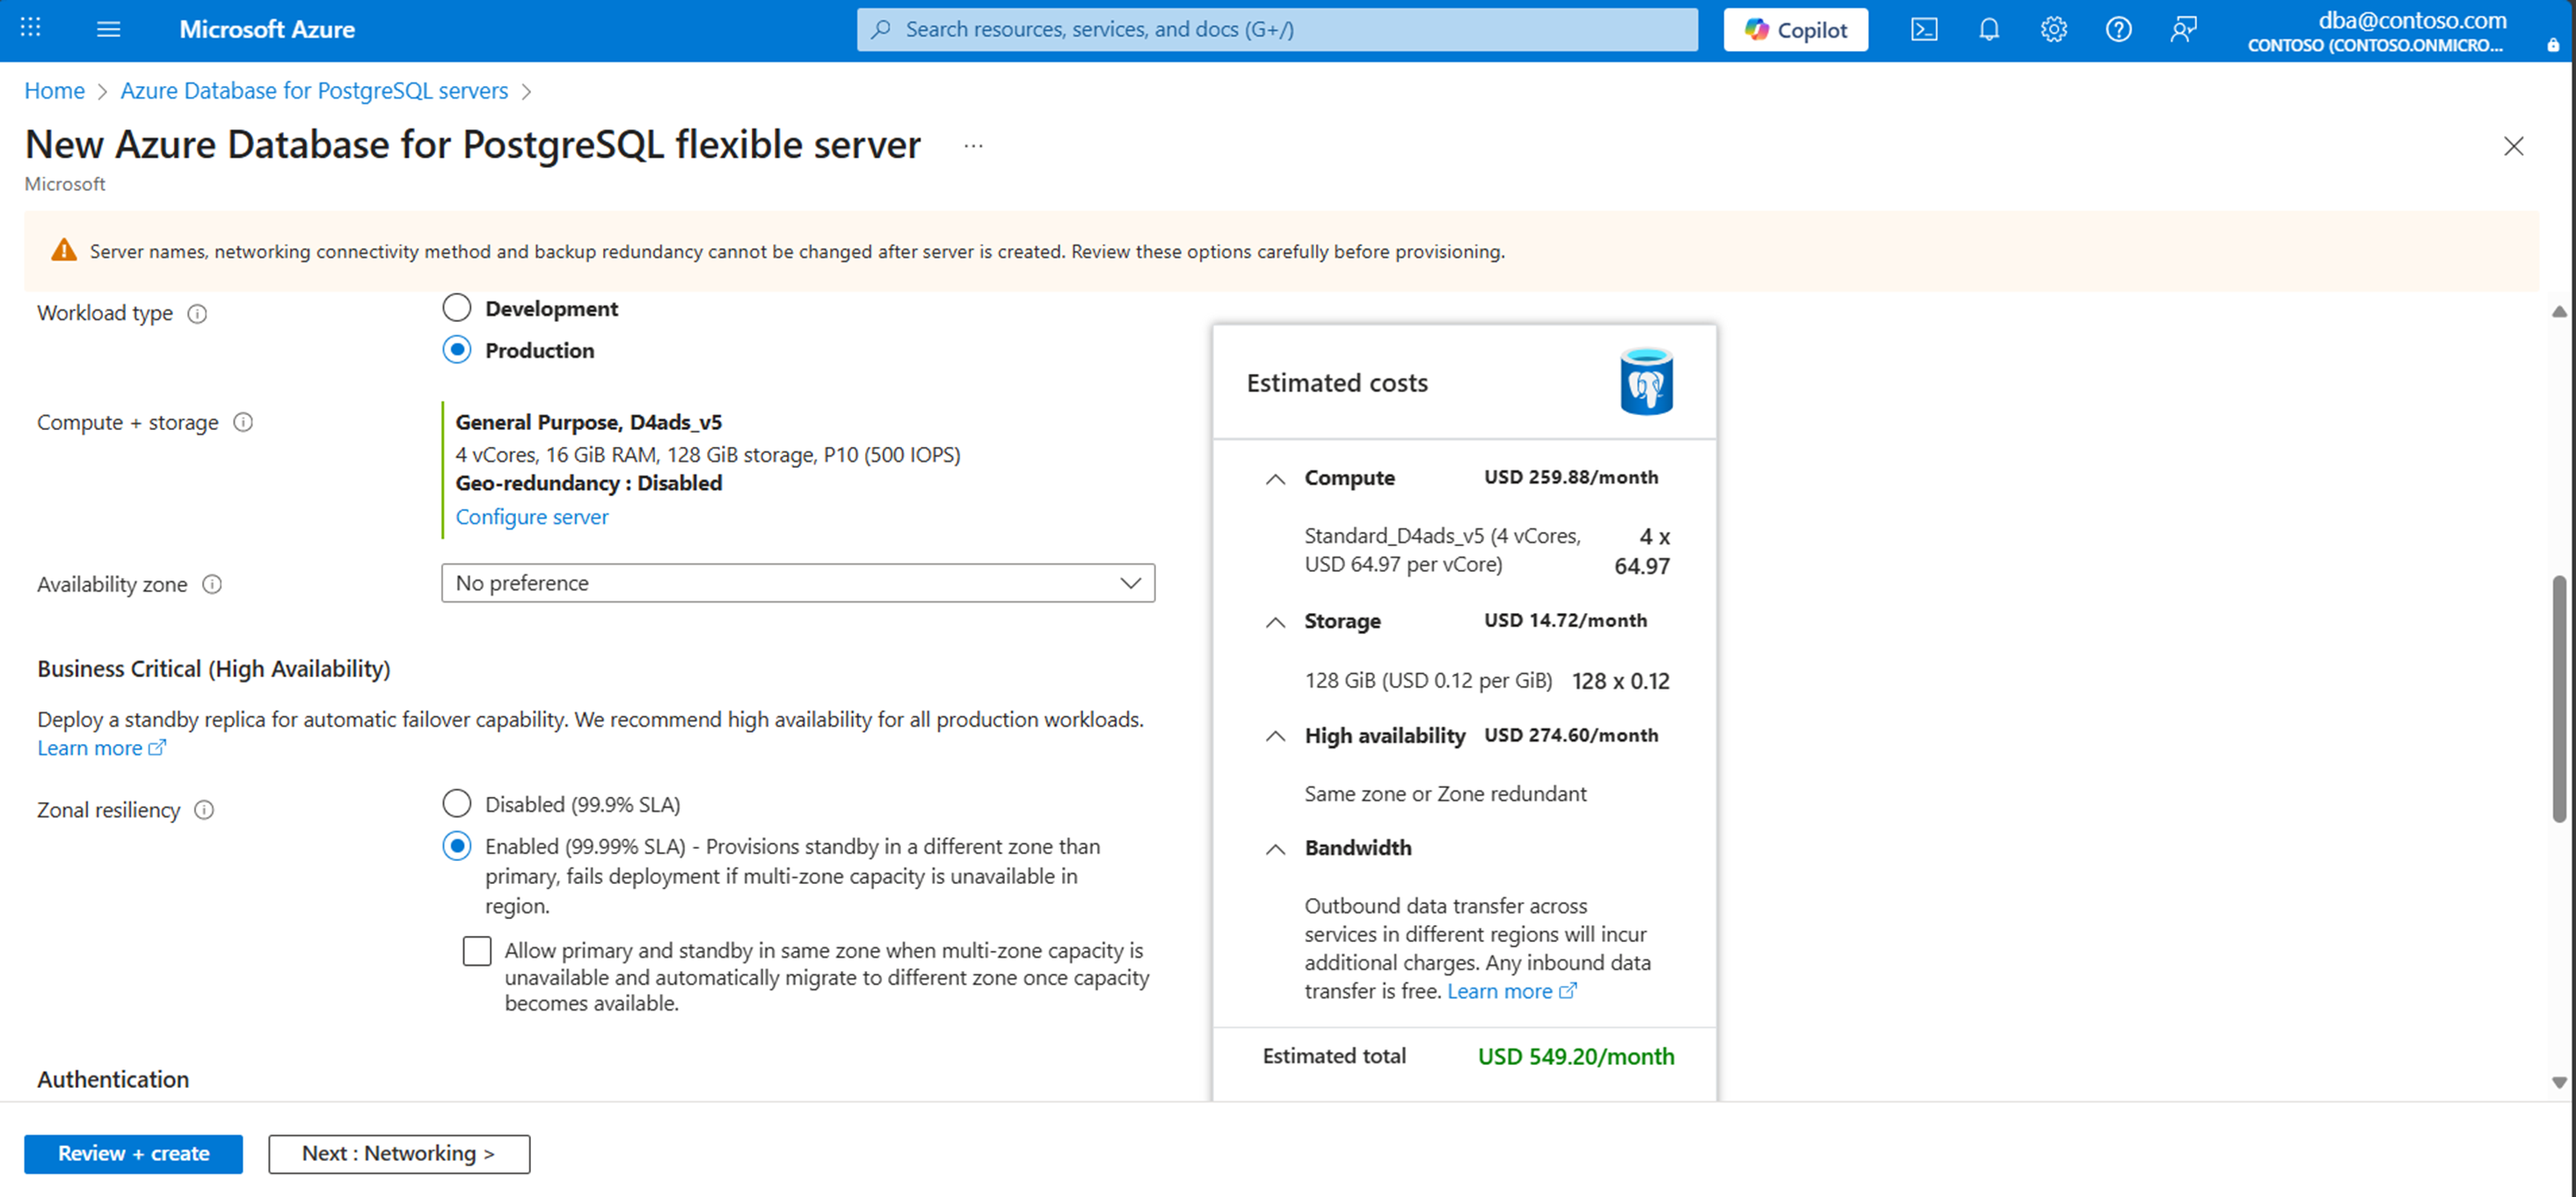
Steps to enable high availability during server provisioning
Using the Azure portal:
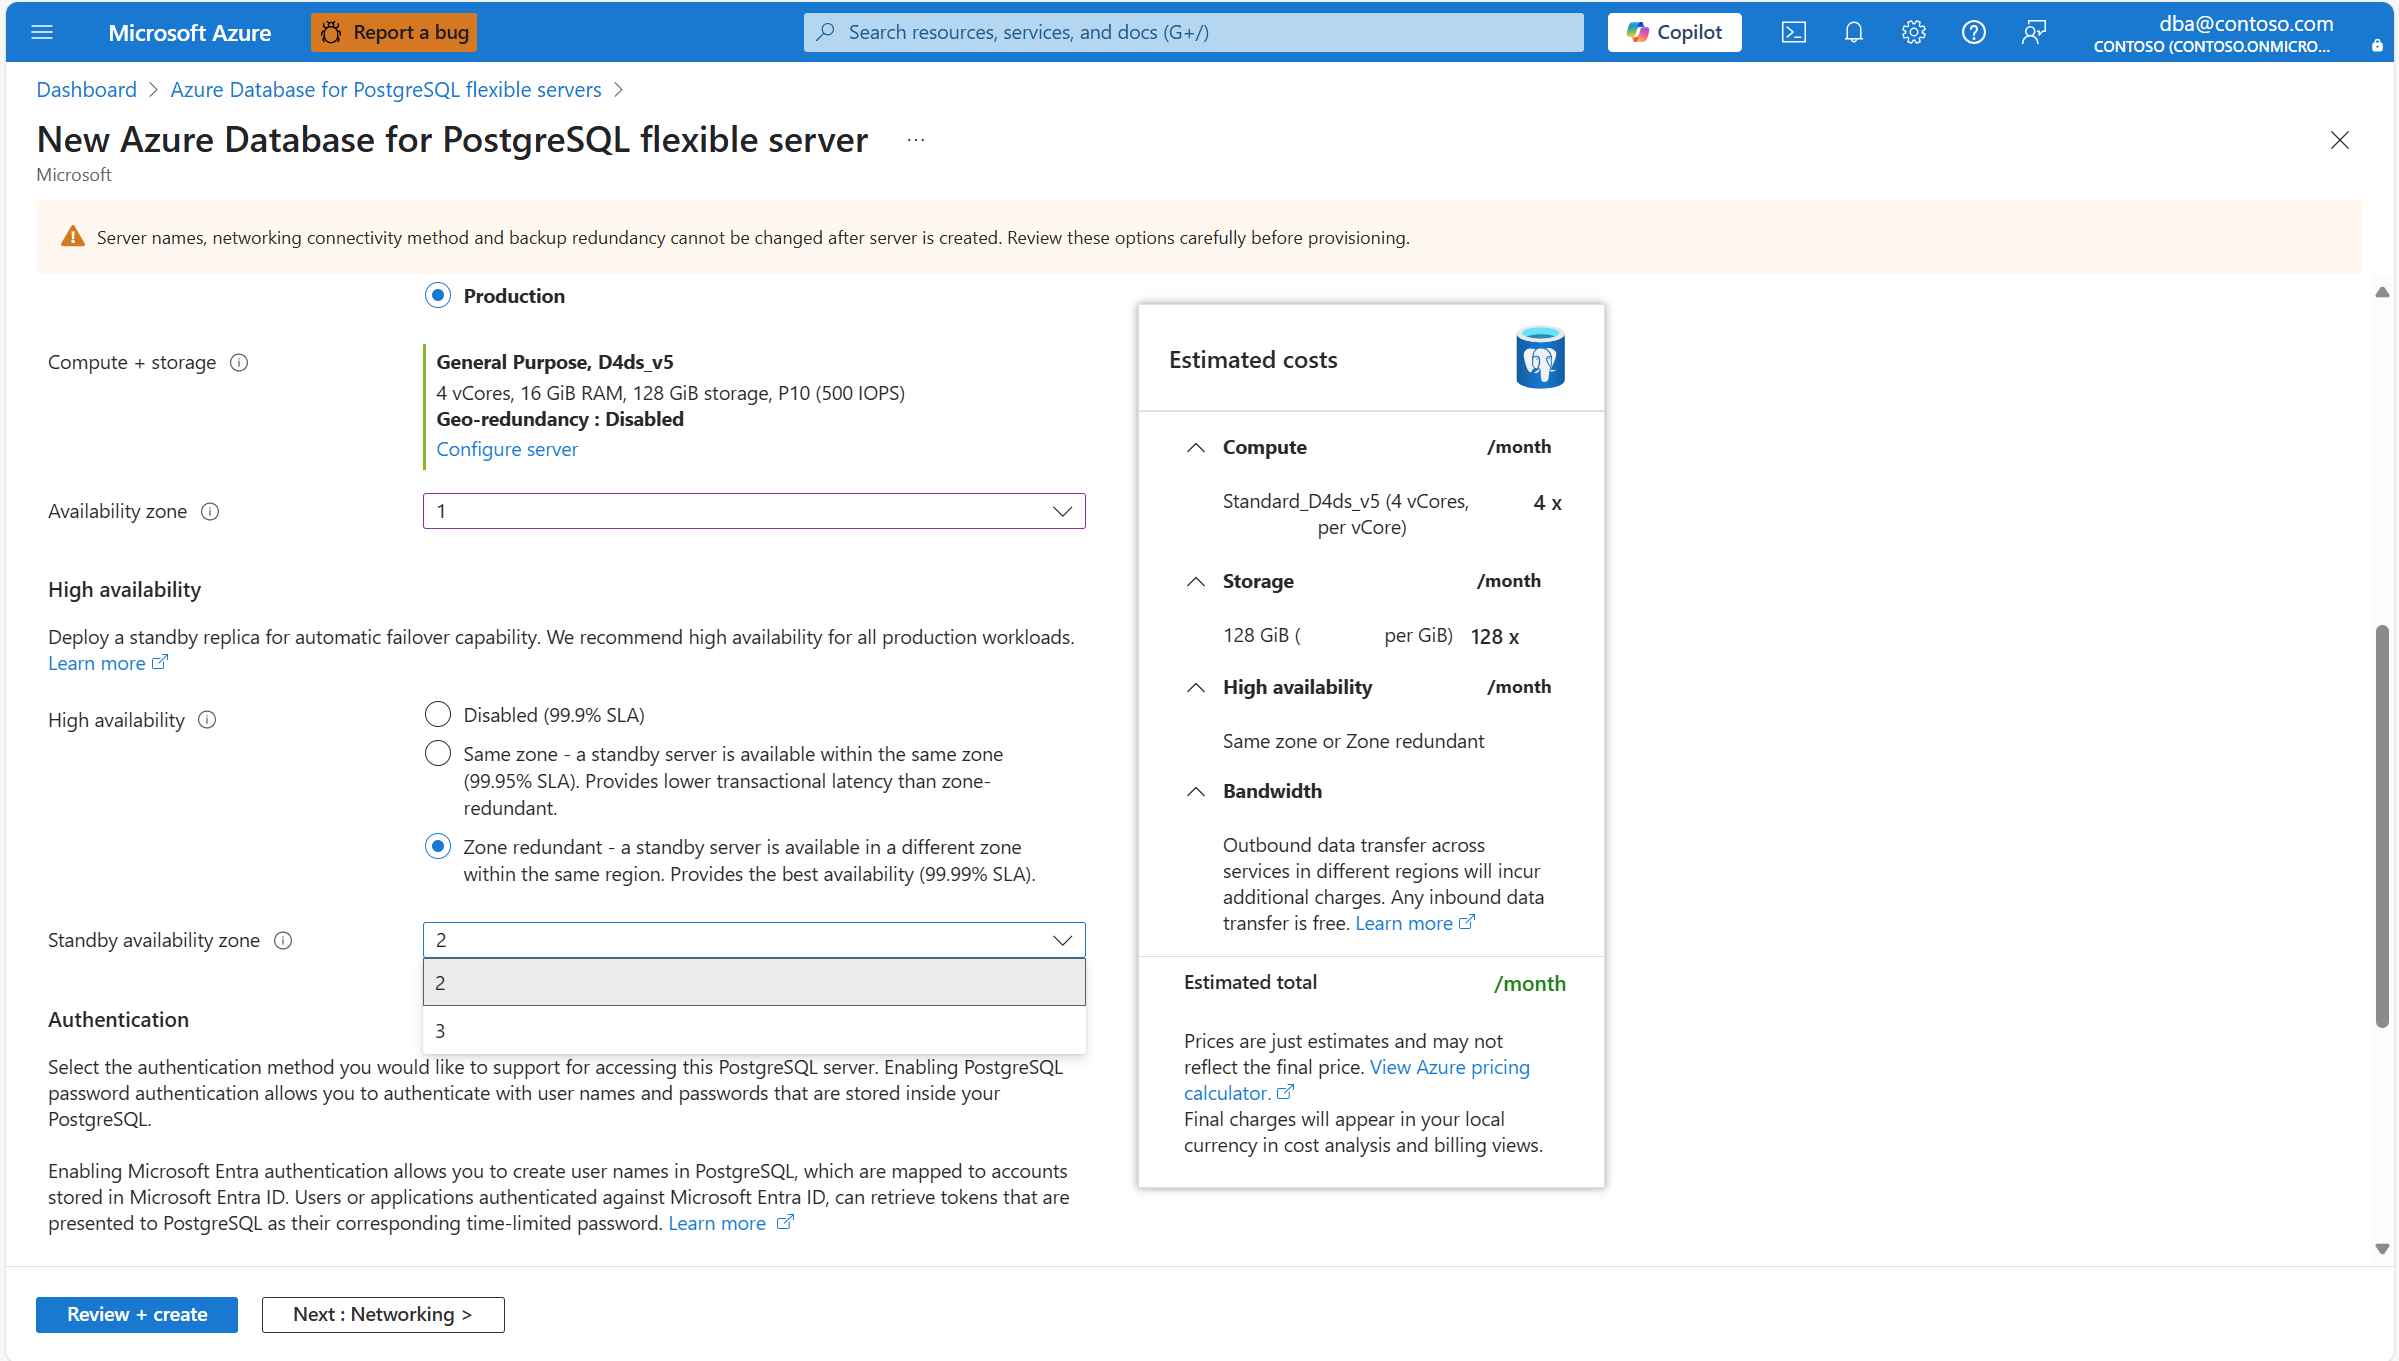
During provisioning of a new instance of Azure Database for PostgreSQL Flexible Server, in the High availability section, select Same zone or Zone redundant.

Note
If the region in which your server is created doesn't support high availability with zone redundancy, the Zone redundant option is grayed out and disabled.
Select a specific zone for the primary server by setting Availability zone to any value other than No preference.

When you select a specific availability zone for the primary server, and select Zone redundant.

You can also select an explicitly a value for the standby server in Standby availability zone. Setting the zones to specific zones is useful if you want to collocate your application in the same zone as the database, to reduce latency. Choose No preference if you want the standby server to deploy on an availability zone automatically chosen for you.


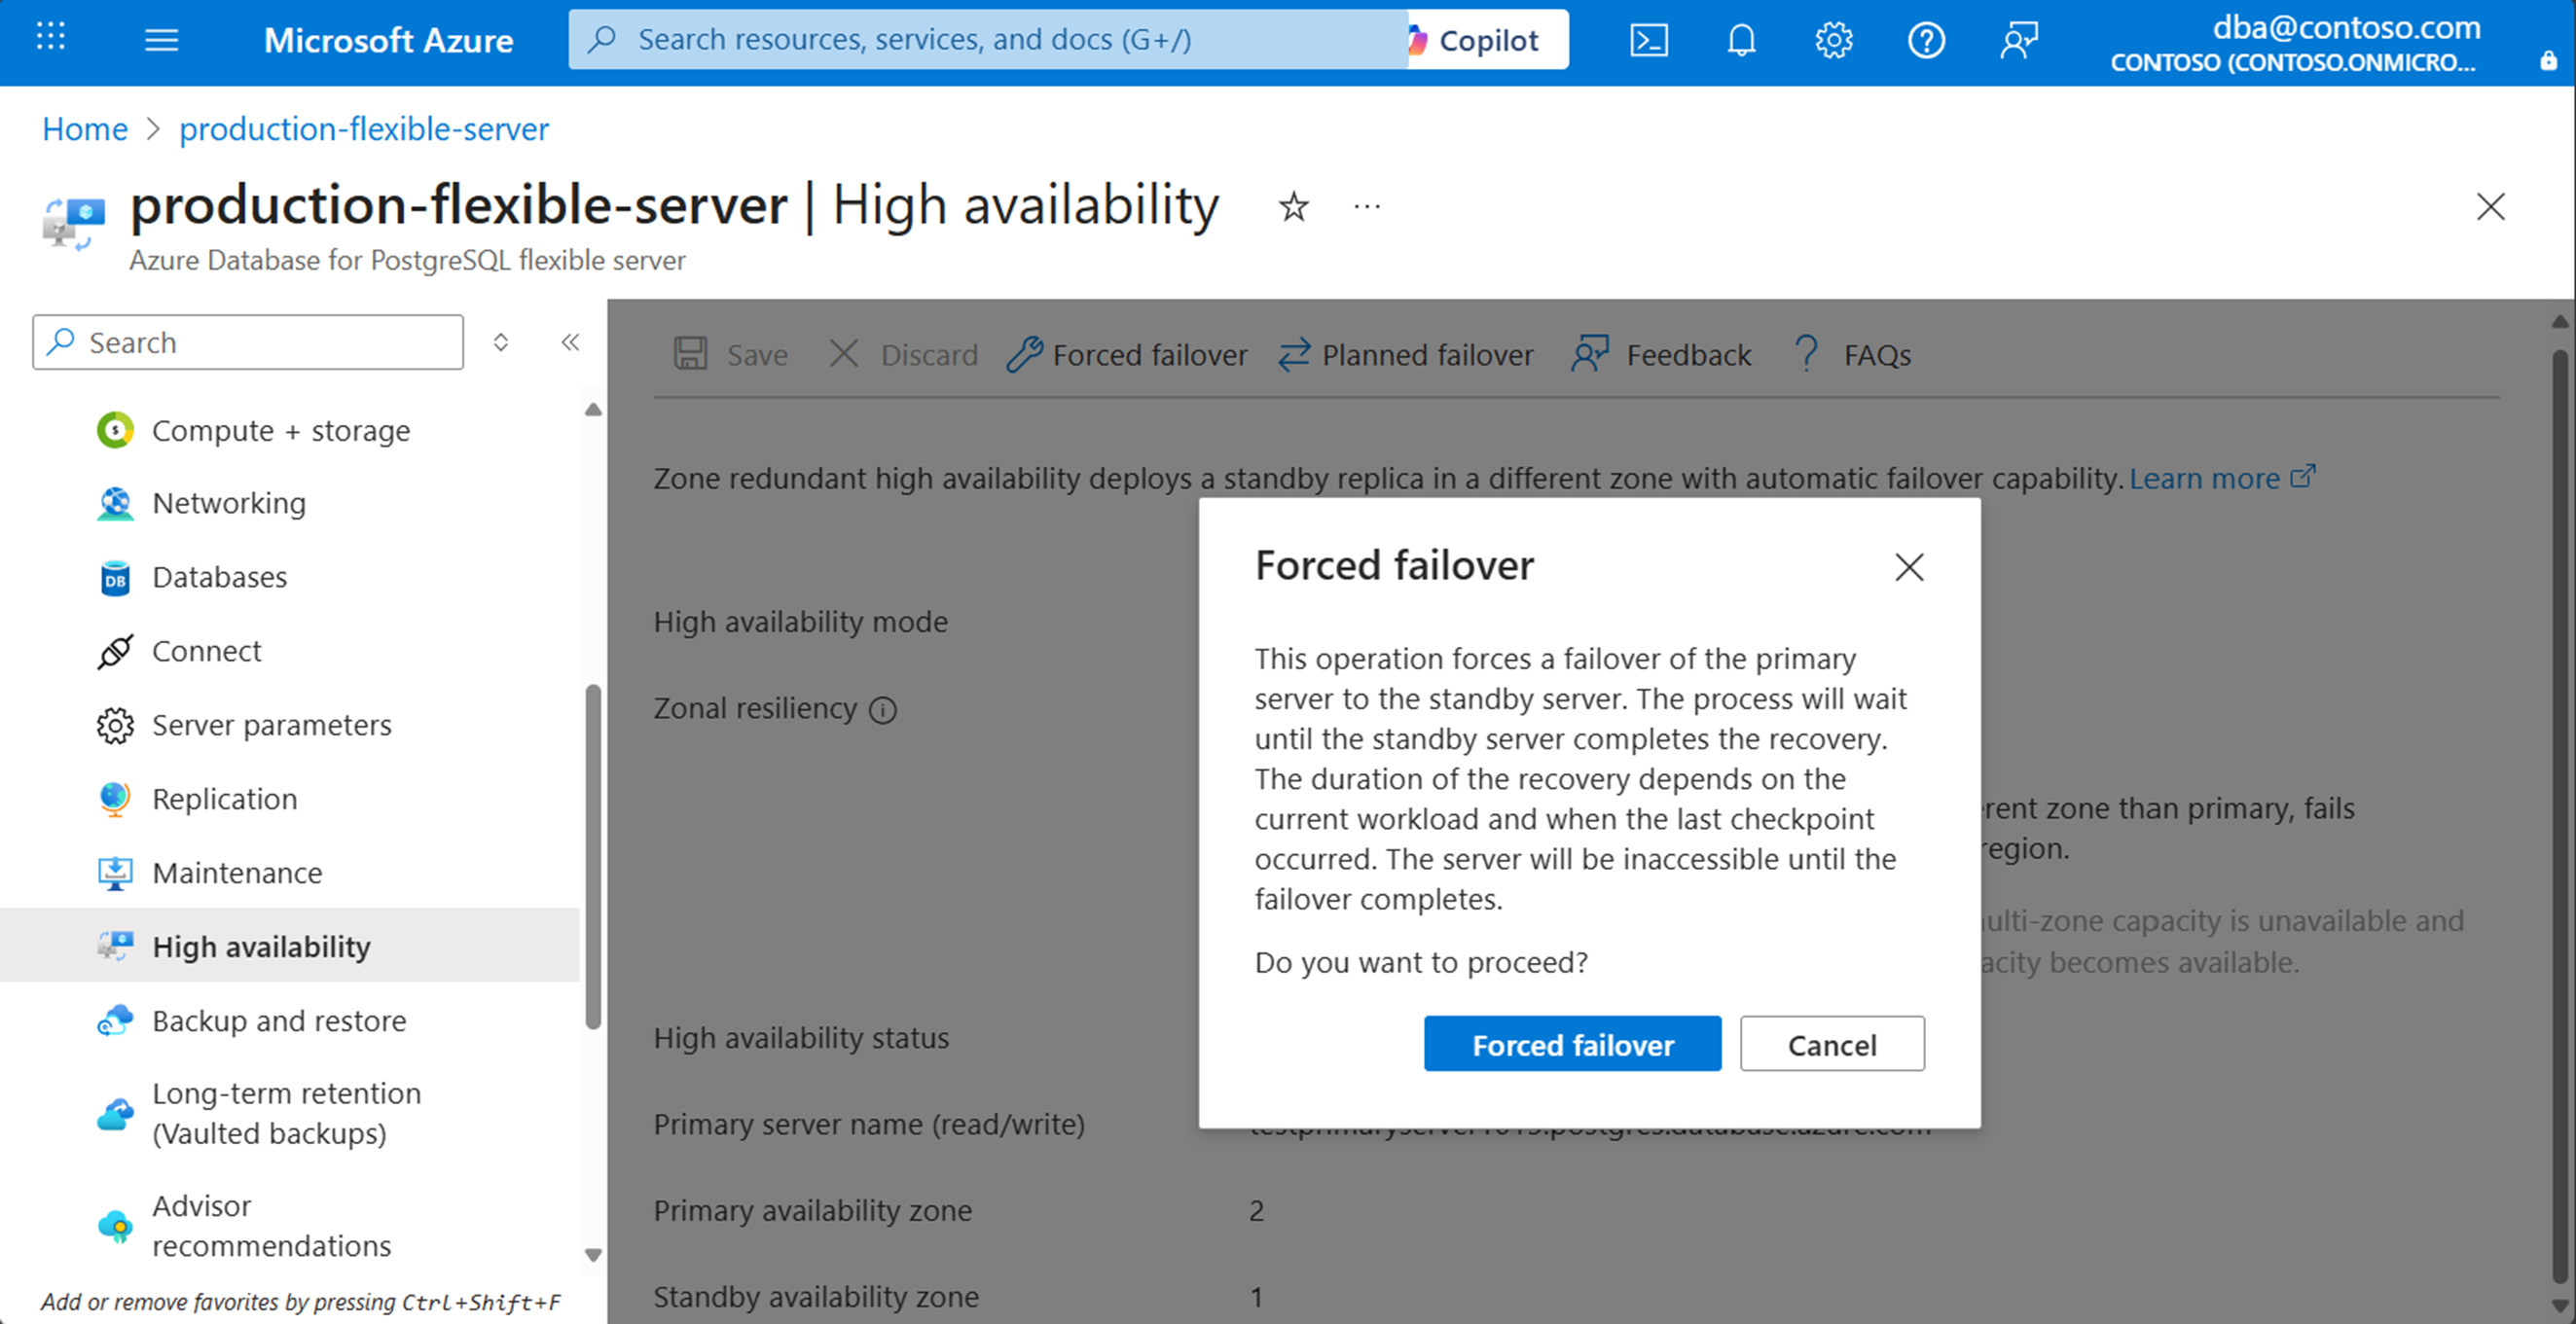
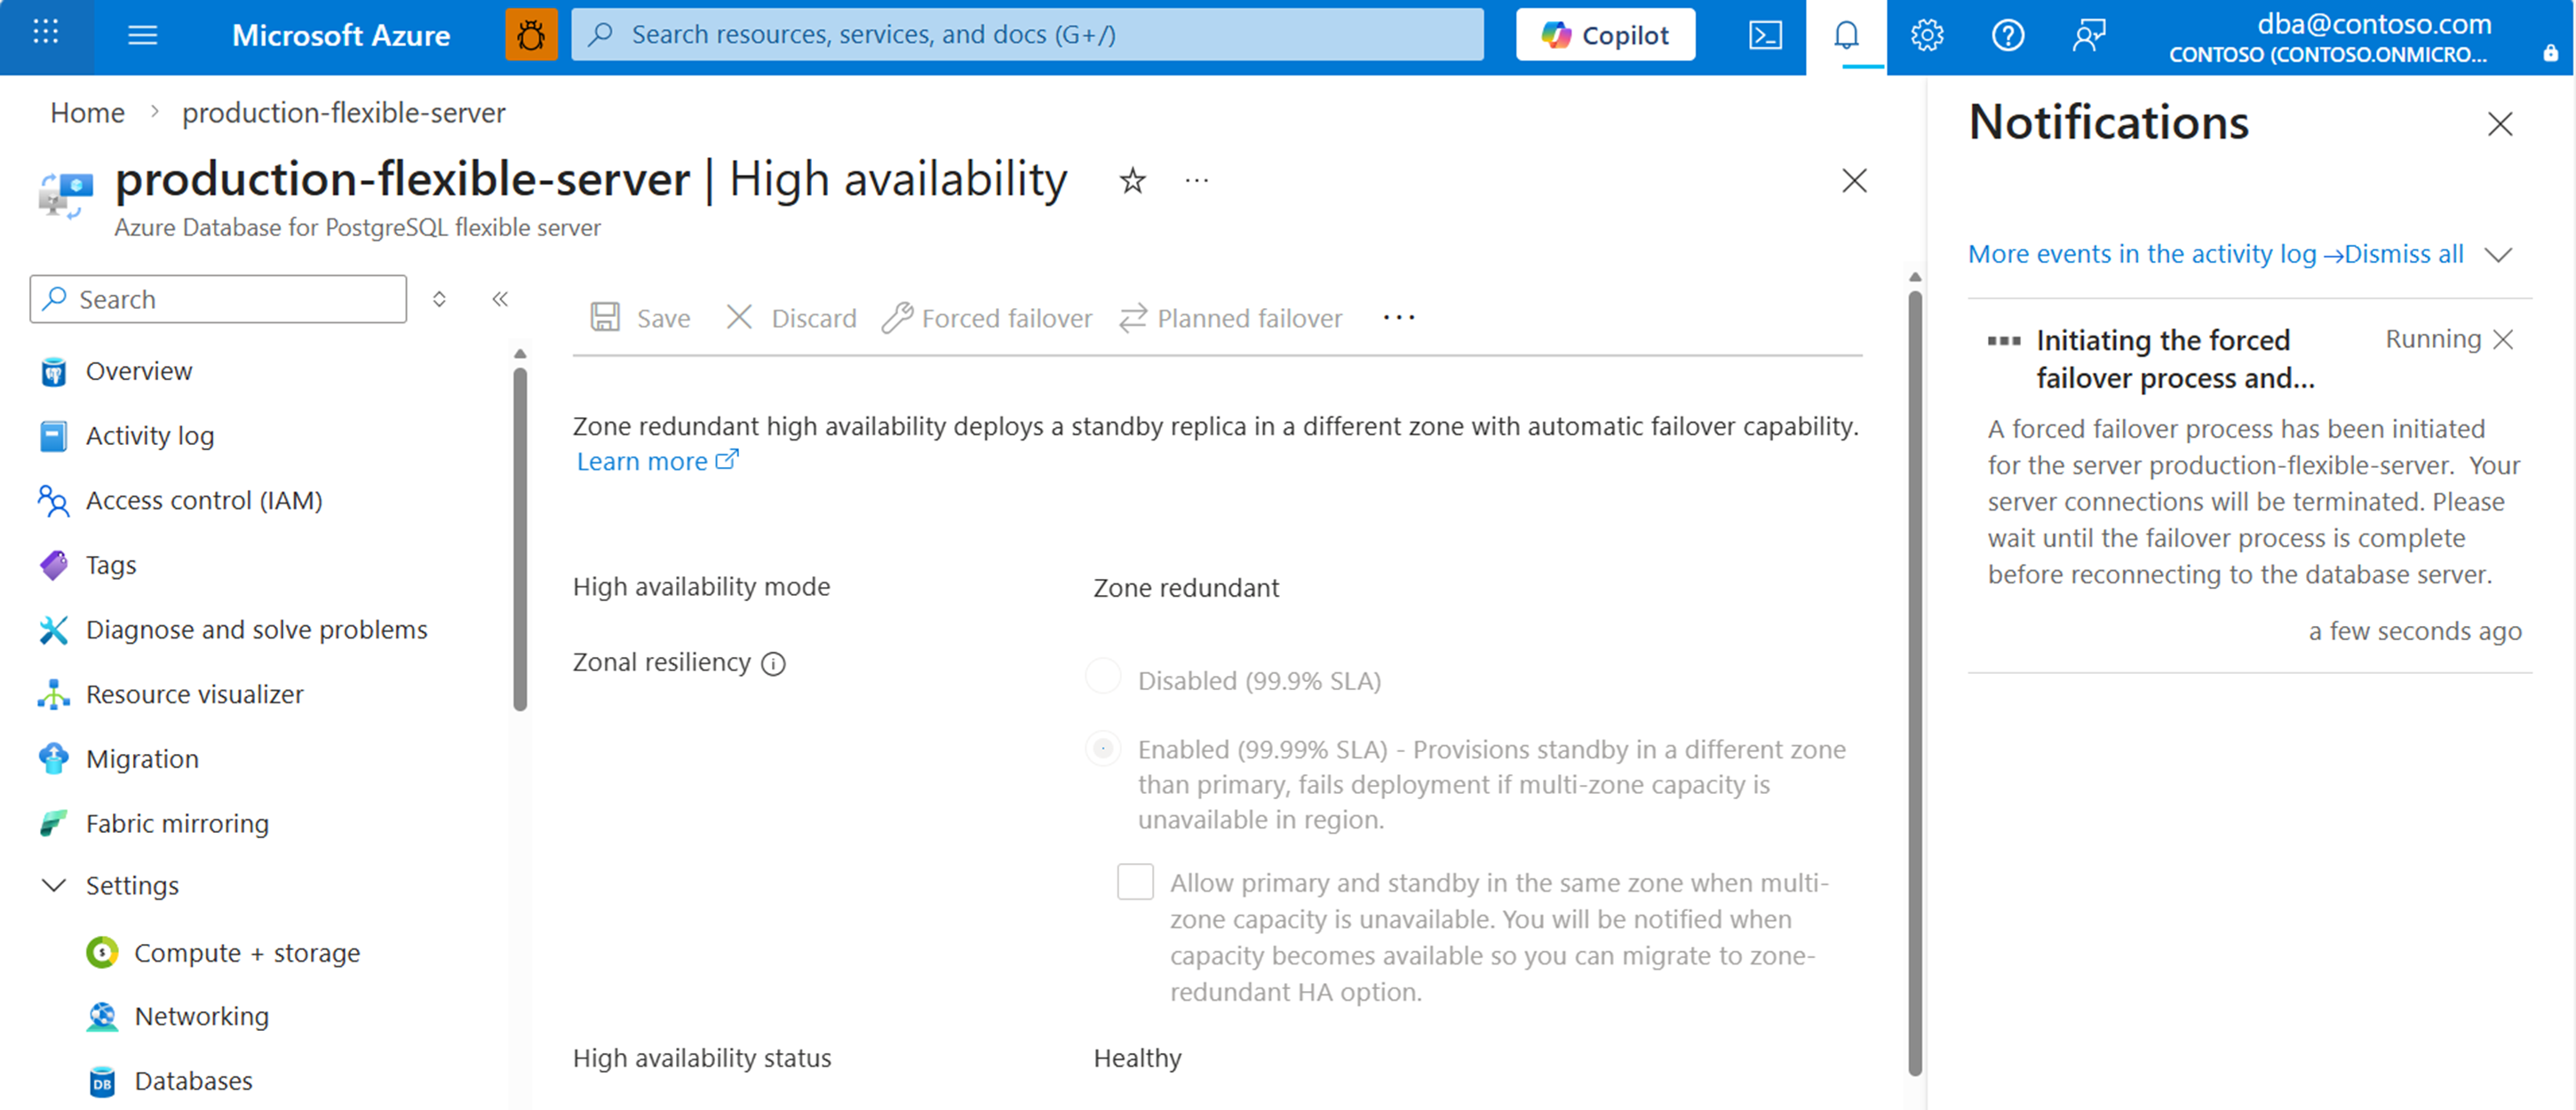
Steps to initiate a forced failover
Follow these steps to force a failover of your primary server to the standby server in an Azure Database for PostgreSQL flexible server. Initiating a forced failover immediately brings the primary server down, and triggers a failover to the standby server. Initiating a forced failover is useful for cases in which you want to test how a failover caused by an unplanned outage would affect your workload.
Important
Don't perform immediate, back-to-back failovers. Wait for at least 15-20 minutes between failovers. Such wait allows the new standby server to be fully established.
The overall end-to-end operation time, as reported on the portal, could be longer than the actual downtime experienced by the application. You should measure the downtime from the application perspective.
Using the Azure portal:
Select your Azure Database for PostgreSQL flexible server that has high availability enabled.
In the resource menu, under the Settings section, select High availability.
If high availability mode is set to Zone redundant mode, you might want to take note of the values assigned to Primary availability zone and Standby availability zone, as they should be reversed after the failover operation completes.

Select Forced failover to initiate the manual failover procedure. A dialog informs you of the expected downtime until the failover completes. If you decide to proceed, select Initiate forced failover.
A notification appears to mention that failover is in progress.
Once the failover to the standby server is complete, a notification informs you of the operation completion.
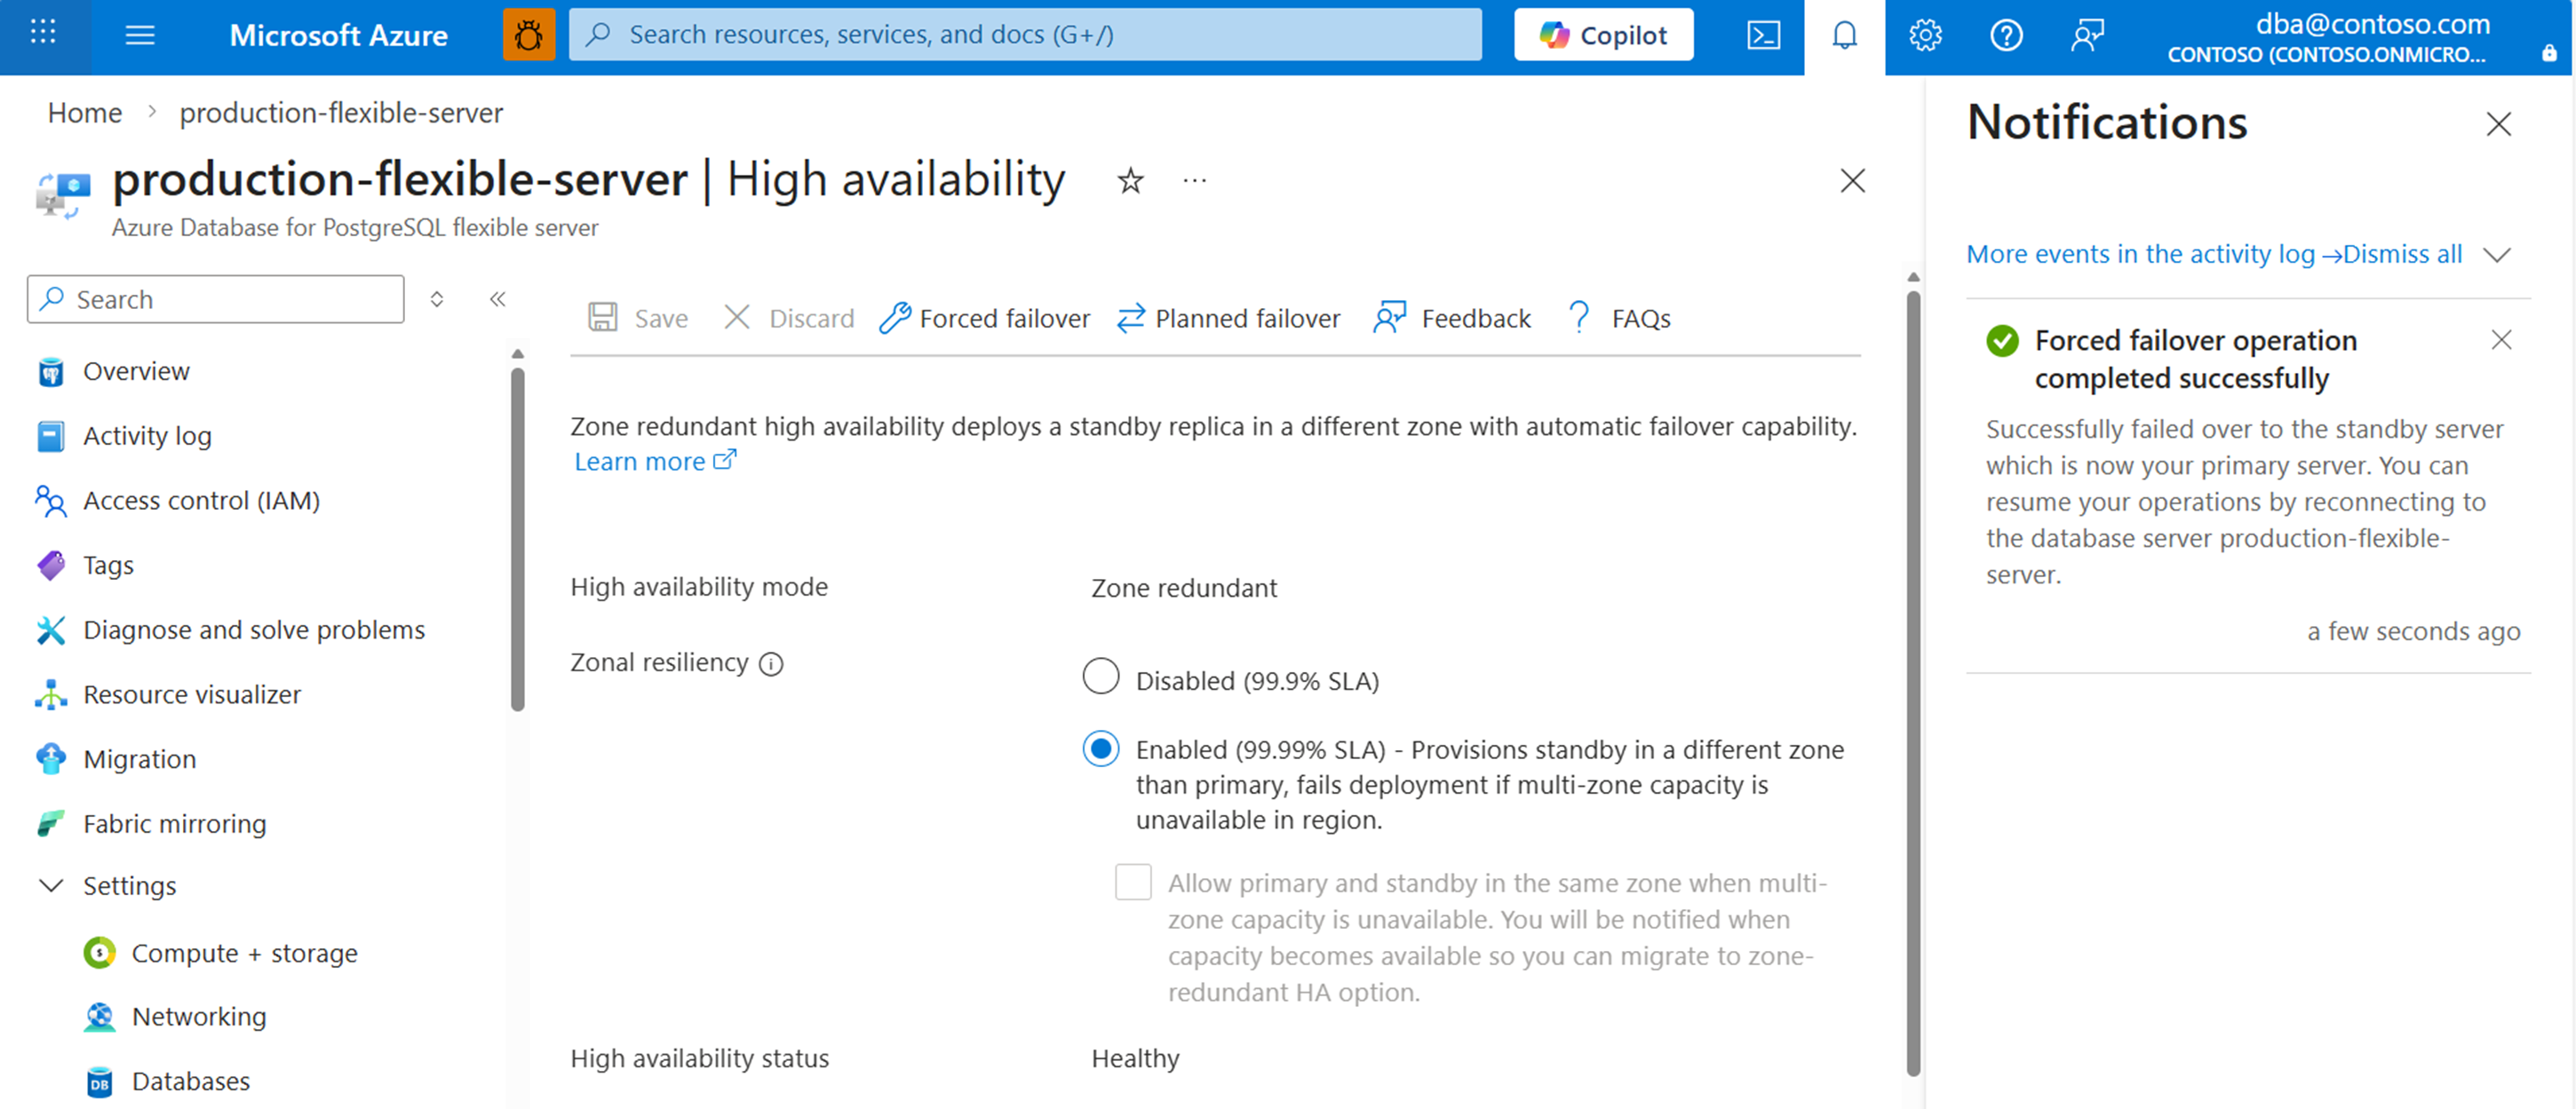
If the high availability mode is configured as zone redundant, confirm that the values of Primary availability zone and Standby availability zone are now reversed.


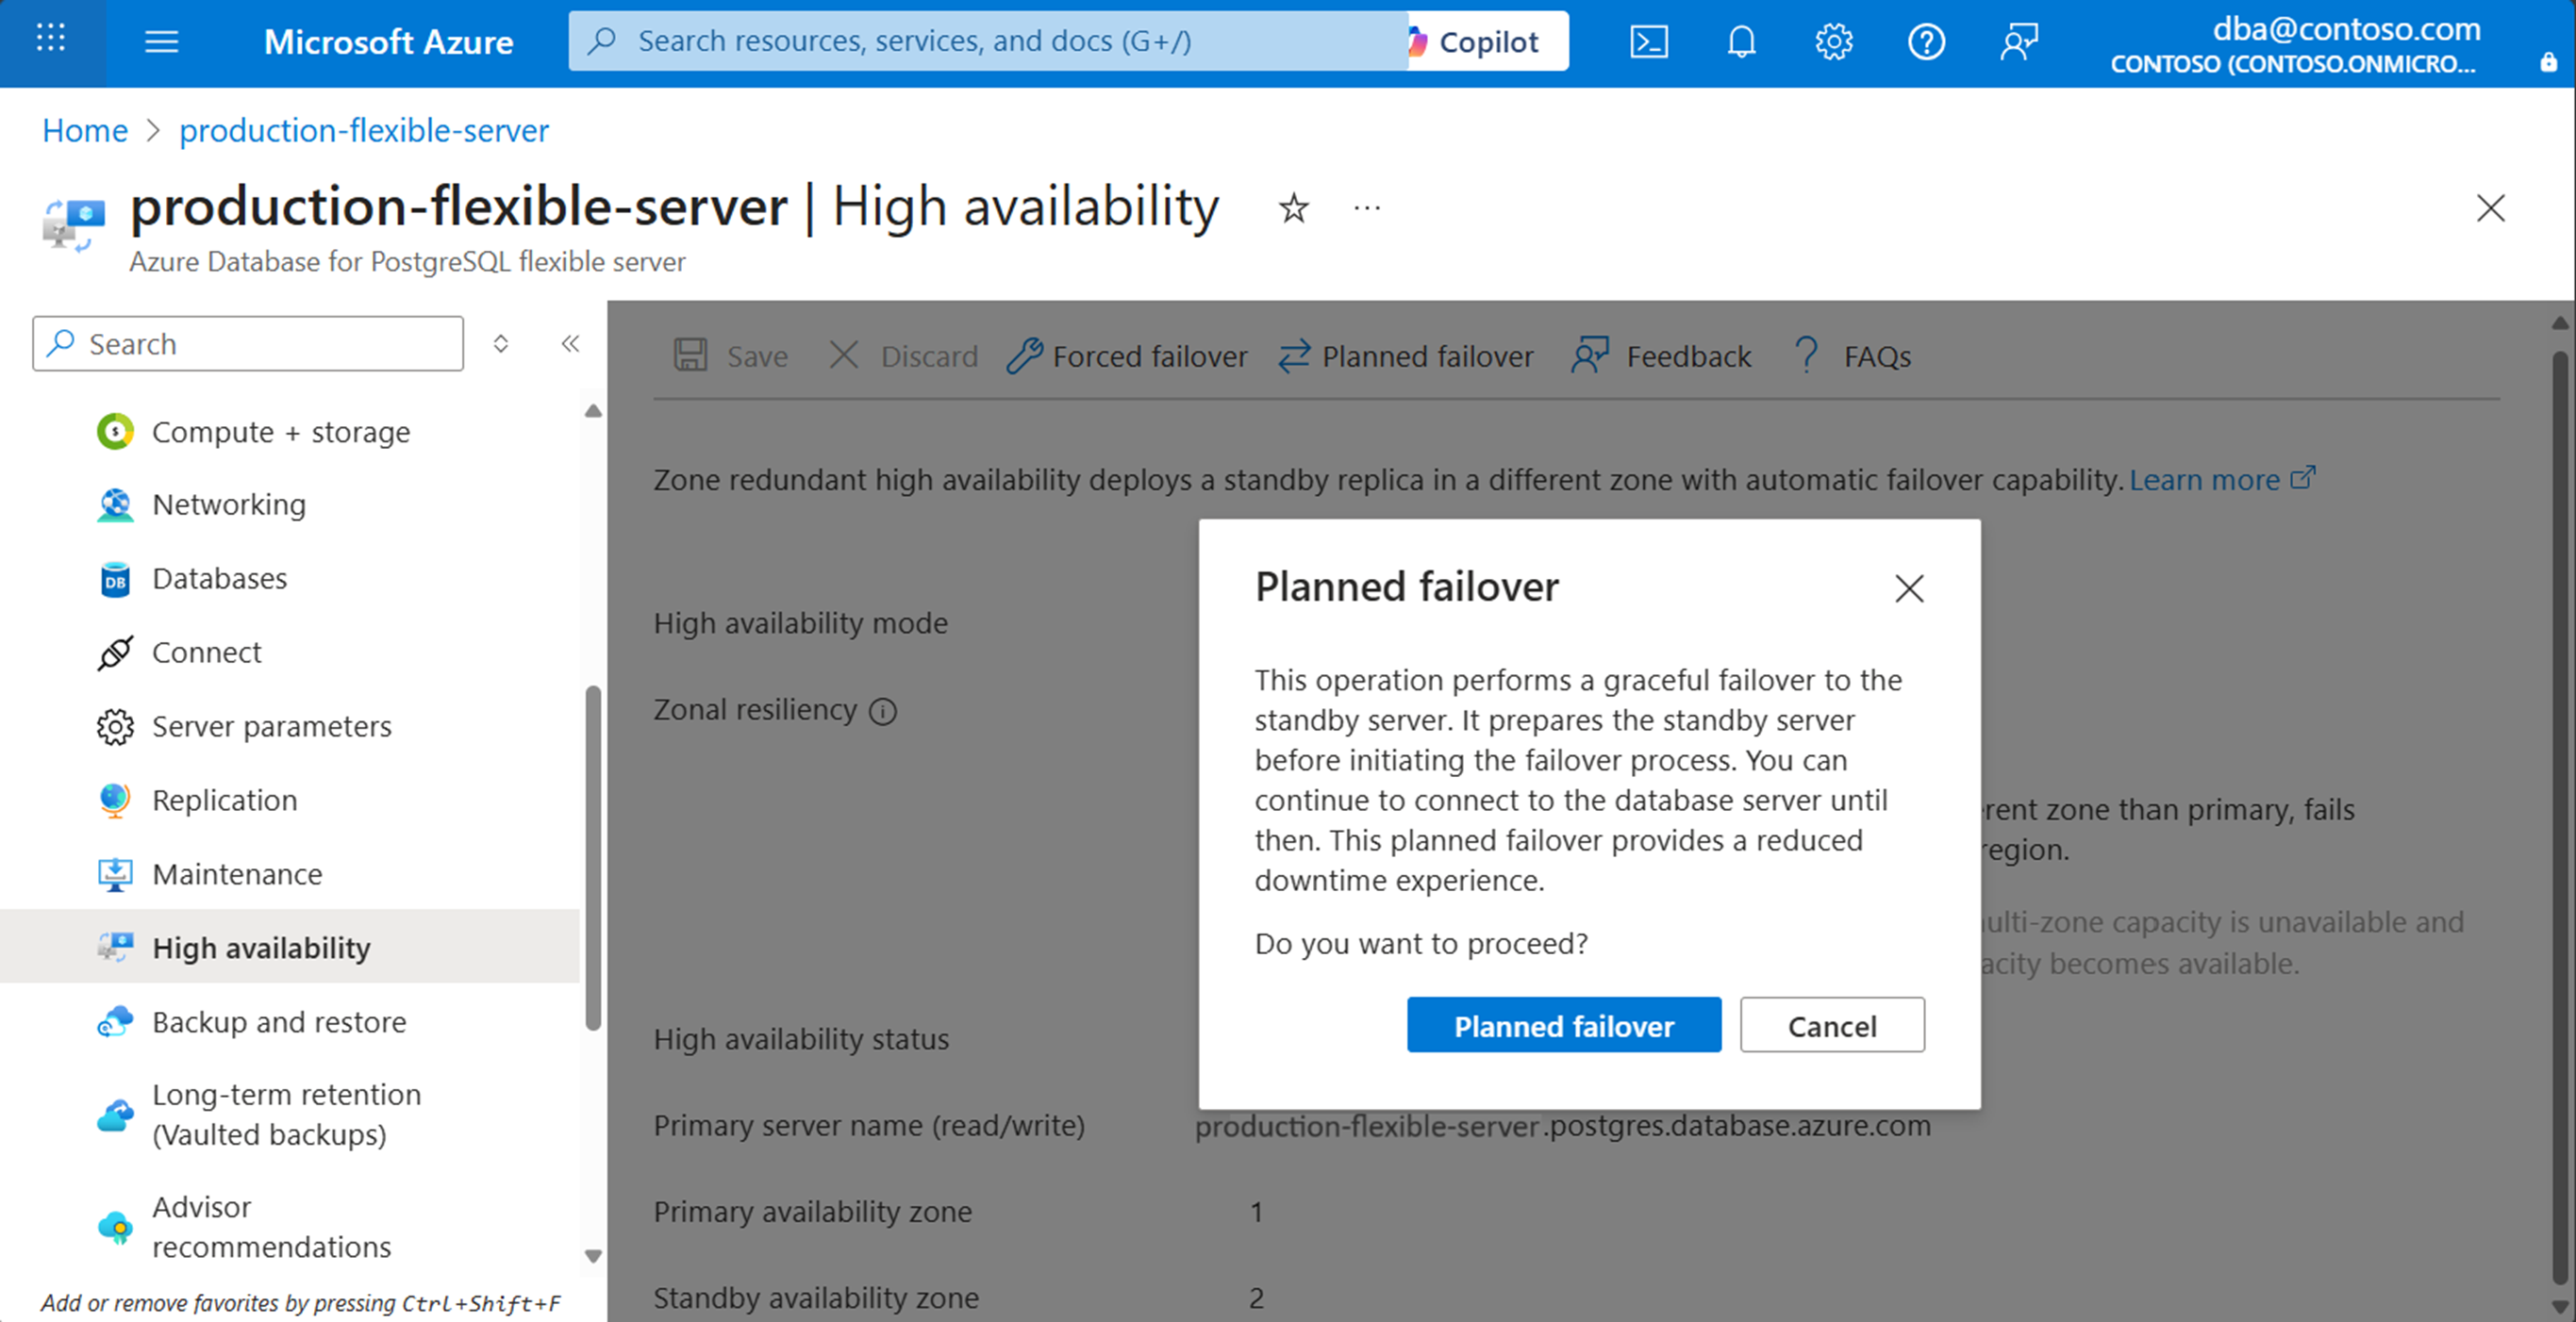
Steps to initiate a planned failover
Follow these steps to perform a planned failover from your primary server to the standby server in an Azure Database for PostgreSQL flexible server. Initiating this operation first prepares the standby server, and then performs the failover. This failover operation provides the least downtime, as it performs a graceful failover to the standby server. It's useful for situations like after an unexpected failover occurs, and you want to bring the primary server back to your preferred availability zone.
Important
Don't perform immediate, back-to-back failovers. Wait for at least 15-20 minutes between failovers. Such wait allows the new standby server to be fully established.
We recommended performing planned failovers during low activity periods.
The overall end-to-end operation time, as reported on the portal, could be longer than the actual downtime experienced by the application. You should measure the downtime from the application perspective.
Using the Azure portal:
Select your Azure Database for PostgreSQL flexible server that has high availability enabled.
In the resource menu, under the Settings section, select High availability.
If high availability mode is set to Zone redundant mode, you might want to take note of the values assigned to Primary availability zone and Standby availability zone, as they should be reversed after the failover operation completes.
Select Planned failover to initiate the manual failover procedure. A dialog informs you of the expected downtime until the failover completes. If you decide to proceed, select Initiate planned failover.
A notification appears to mention that failover is in progress.
Once the failover to the standby server is complete, a notification informs you of the operation completion.
If the high availability mode is configured as zone redundant, confirm that the values of Primary availability zone and Standby availability zone are now reversed.

Special considerations
Enabling or disabling high availability on an Azure Database for PostgreSQL flexible server doesn't change other settings, including networking configuration, firewall settings, server parameters, or backup retention. Enabling or disabling high availability is an online operation, and doesn't affect your application connectivity and operations.
High availability with both replicas deployed in the same zone is supported and available in all regions in which Azure Database for PostgreSQL flexible server is supported. However, high availability with zone redundancy is only available in certain regions.
High availability isn't supported in the Burstable tier. It's only supported in General purpose or Memory optimized tiers.
If you deploy a server in a region that consists of a single availability zone, you can enable high availability in same zone mode only. If the region is enhanced in the future with multiple availability zones, you can deploy new Azure Database for PostgreSQL flexible server with high availability configured as same zone or zone redundant. However, for any instances that were deployed in the region when the region consisted of a single availability zone, you can't directly enable high availability in zone redundant mode for them. As a workaround, you can restore those instances onto new instances, and then enable zone redundant high availability on the restored servers.
- Follow the instructions provided in Restore to latest restore point, to restore the existing instance on a new one, using the latest restore point.
- Once the new server is created, enable high availability with zone redundancy.
- After data verification, you can optionally delete the old server.
- Make sure that the connection strings of your clients are modified to point to your newly restored instance.