How to manage term templates for business glossary
Microsoft Purview allows you to create a glossary of terms that are important for enriching your data. Each new term added to your Microsoft Purview Data Catalog Glossary is based on a term template that determines the fields for the term. This article describes how to create a term template and custom attributes that can be associated to glossary terms.
Manage term templates and custom attributes
Using term templates, you can create custom attributes, group them together and apply a template while creating terms. Once a term is created, the template associated with the term can't be changed.
Open the Microsoft Purview Data Catalog.
If you're using the classic Microsoft Purview portal, select Glossary. If you're using the new Microsoft Purview portal under Business glossary, select Glossaries.
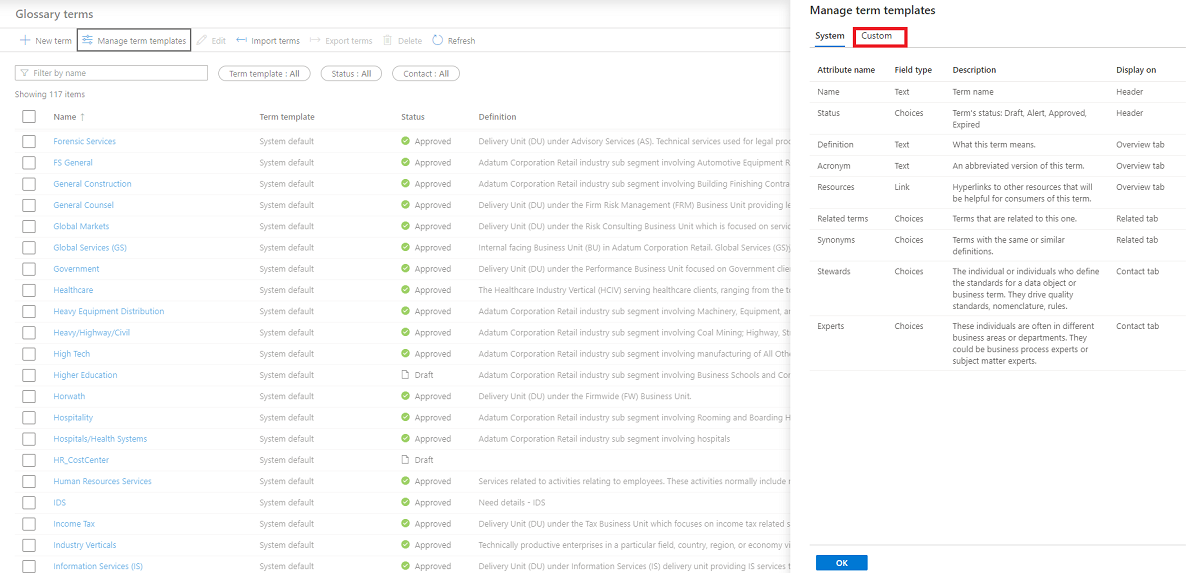
Select Manage term templates.

The page shows both system and custom attributes. Select the Custom tab to create or edit term templates.
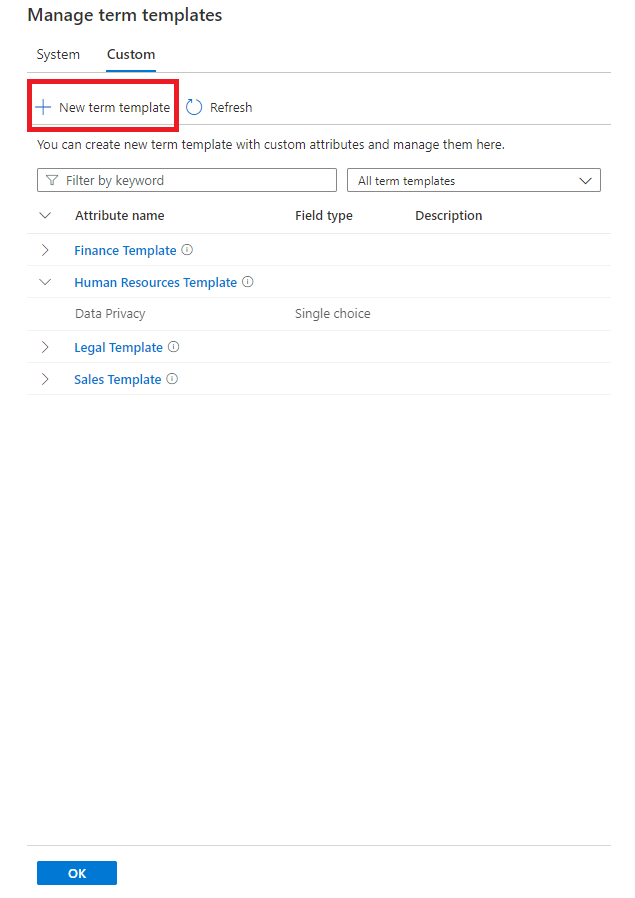
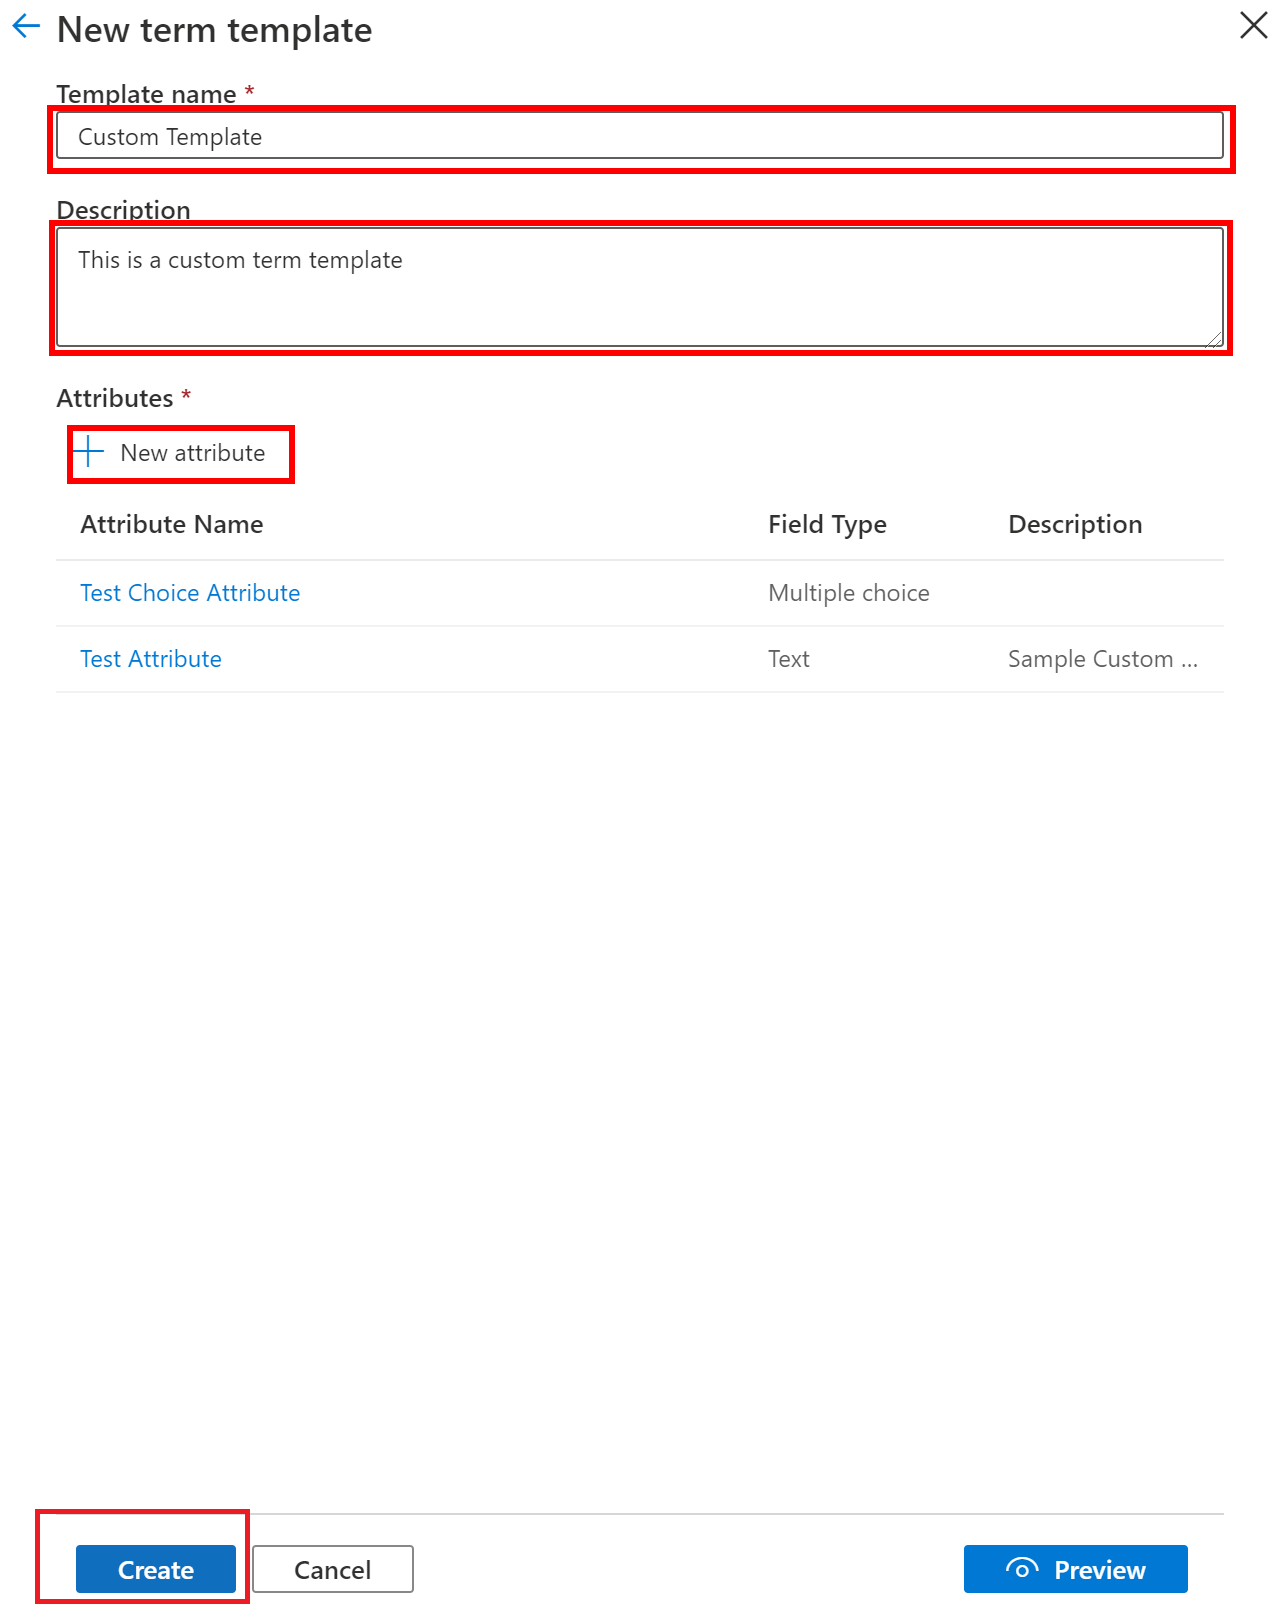
Select + New term template and enter a template name and description.
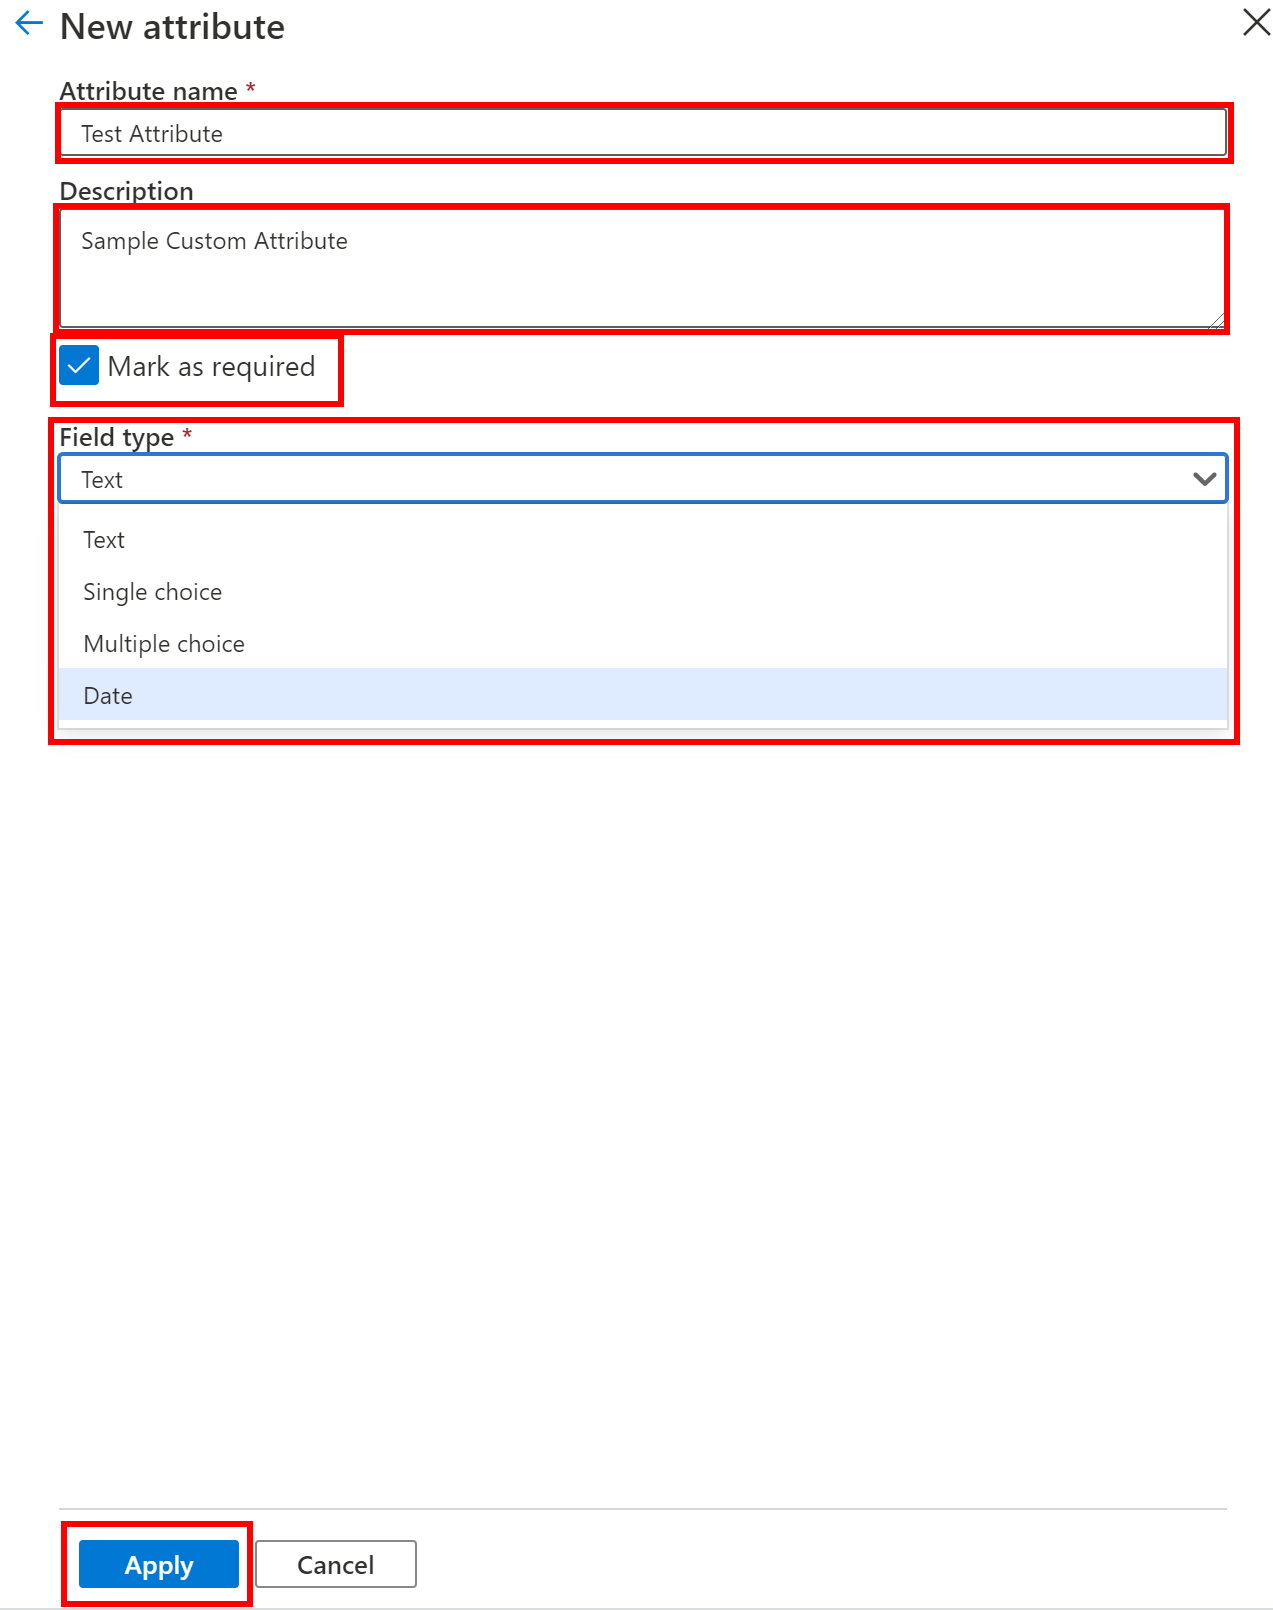
Select + New attribute to create a new custom attribute for the term template. Enter an attribute name, description. The custom attribute name must be unique within a term template but can be same name can be reused across templates.
Choose the field type from the list of options Text, Single choice, Multi choice, or Date. You can also provide a default value string for Text field types. The attribute can also be marked as required.
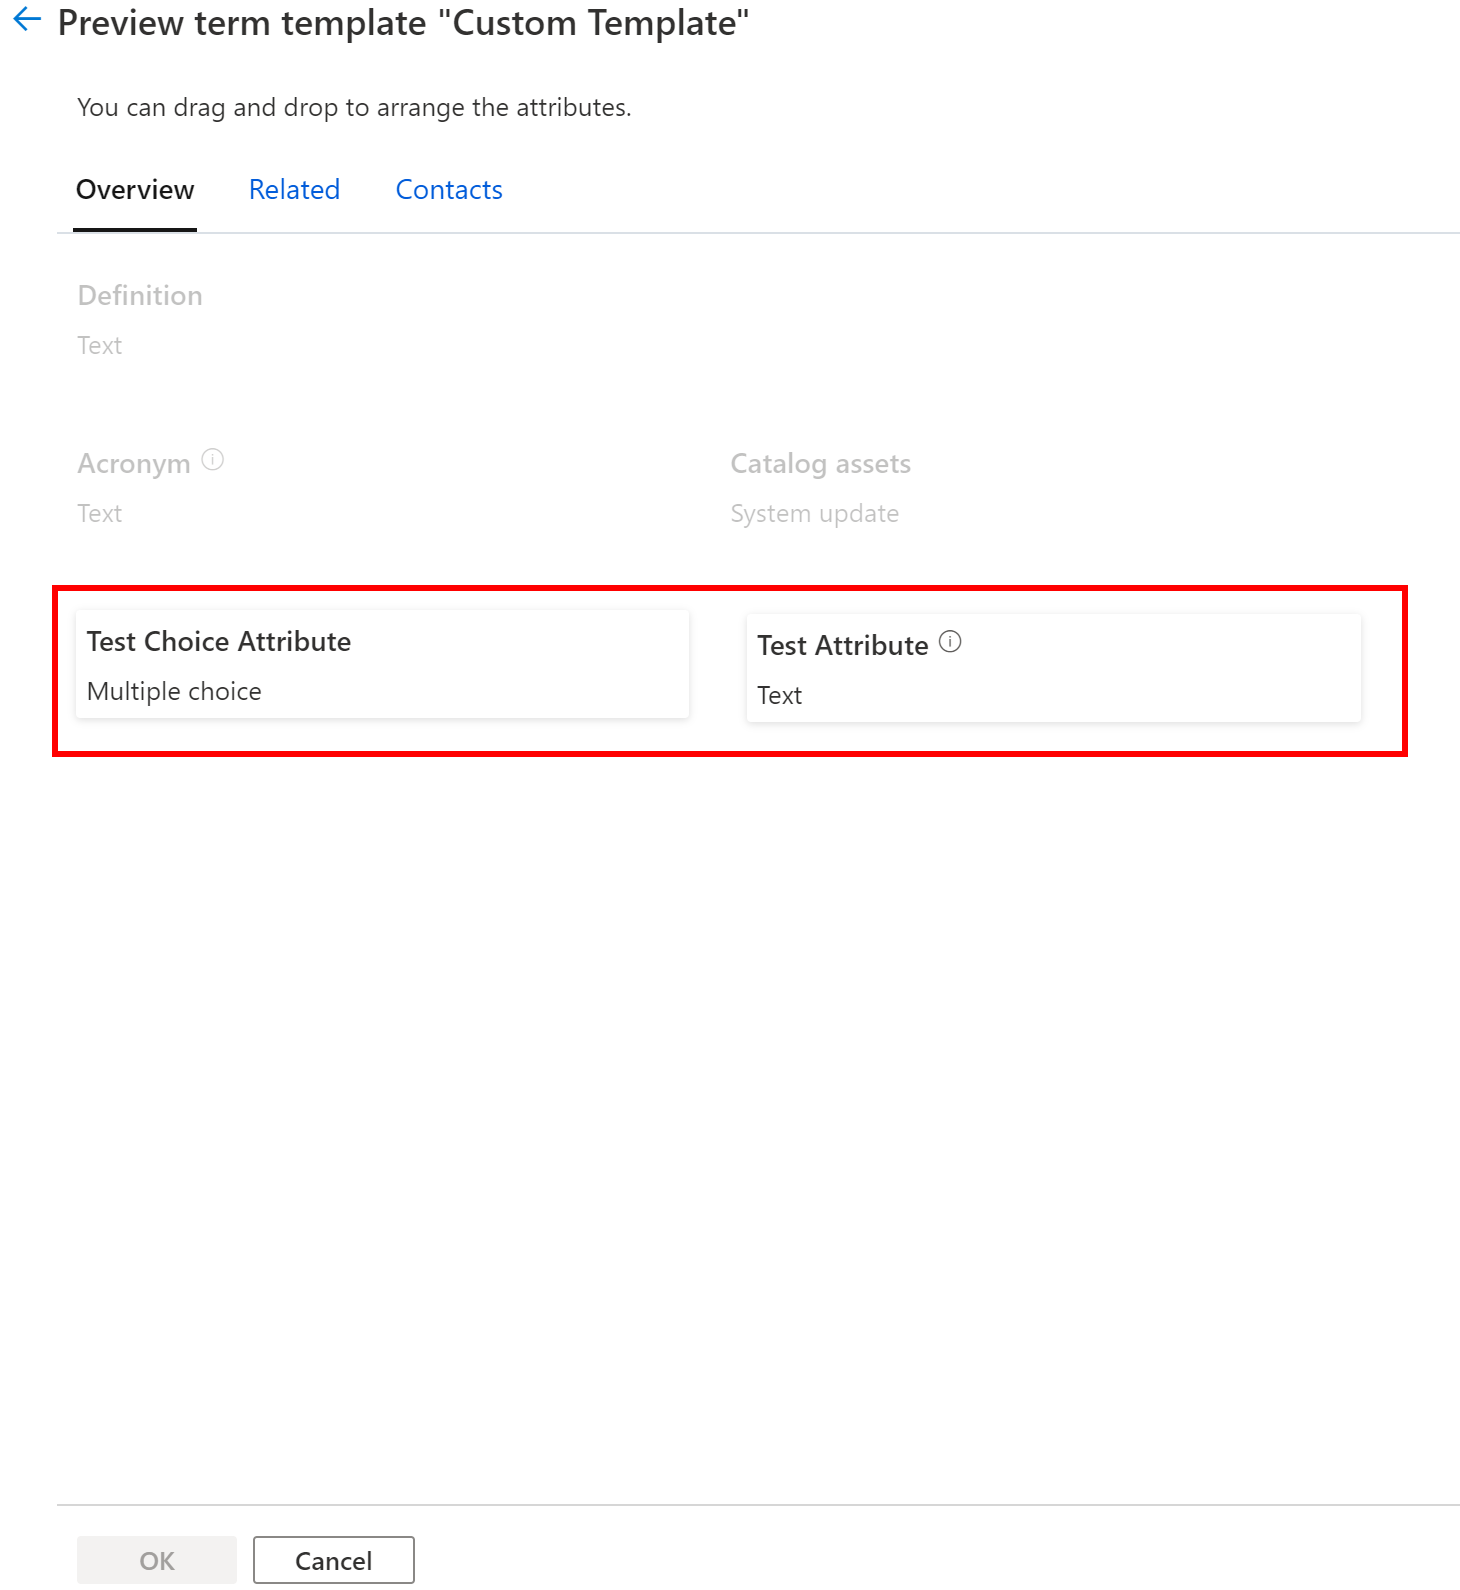
Once all the custom attributes are created, select Preview to arrange the sequence of custom attributes. You can drag and drop custom attributes in the desired sequence.
Once all the custom attributes are defined, select Create to create a term template with custom attributes.
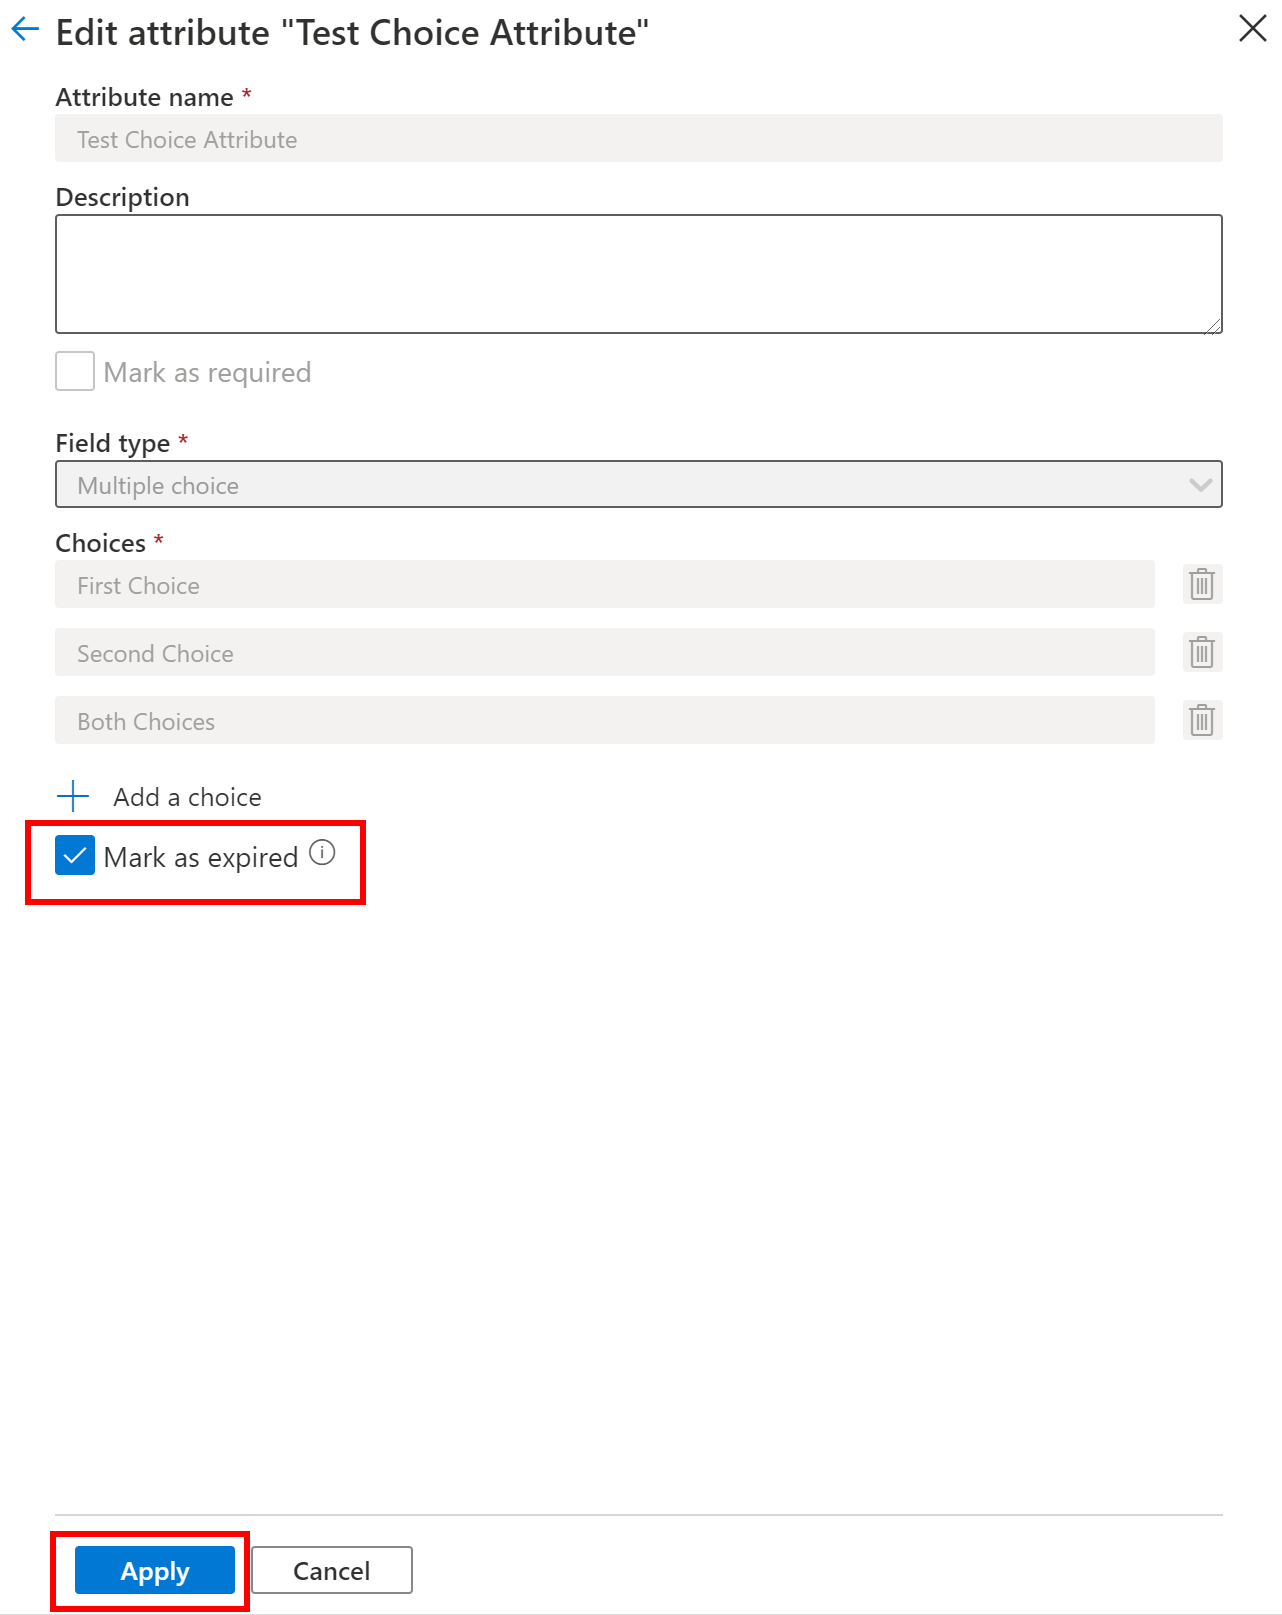
Existing custom attributes can be marked as expired by checking Mark as Expired. Once expired, the attribute can't be reactivated. The expired attribute is greyed out for existing terms. Future new terms created with this term template will no longer show the attribute that has been marked expired.
To delete a term template, open the template and select Delete. Note, if the term template is in use, you can't delete it until you remove the glossary terms to which it's assigned.
Next steps
Follow the Tutorial: Create and import glossary terms to learn more.
Feedback
Coming soon: Throughout 2024 we will be phasing out GitHub Issues as the feedback mechanism for content and replacing it with a new feedback system. For more information see: https://aka.ms/ContentUserFeedback.
Submit and view feedback for