Note
Access to this page requires authorization. You can try signing in or changing directories.
Access to this page requires authorization. You can try changing directories.
Applies to: ✔️ Windows ✔️ Flexible scale sets ✔️ Uniform scale sets
To configure virtual machines (VMs) in a quick and consistent manner, you can use the Custom Script Extension for Windows. In this tutorial you learn how to:
- Use the Custom Script Extension to install IIS.
- Create a VM that uses the Custom Script Extension.
- View a running IIS site after the extension is applied.
Launch Azure Cloud Shell
The Azure Cloud Shell is a free interactive shell that you can use to run the steps in this article. It has common Azure tools preinstalled and configured to use with your account.
To open the Cloud Shell, select Open Cloudshell from the upper right corner of a code block. You can also launch Cloud Shell in a separate browser tab by going to https://shell.azure.com/powershell. Select Copy to copy the blocks of code, paste it into the Cloud Shell, and press enter to run it.
Custom script extension overview
The Custom Script Extension downloads and executes scripts on Azure VMs. This extension is useful for post-deployment configuration, software installation, or any other configuration or management task. You can download scripts from Azure storage or GitHub, or you can provide scripts to the Azure portal at extension run time.
The Custom Script extension integrates with Azure Resource Manager templates and can be run by using the Azure CLI, PowerShell, Azure portal, or the Azure Virtual Machine REST API.
You can use the Custom Script Extension with both Linux and Windows VMs.
Create virtual machine
Set the administrator username and password for the VM with Get-Credential:
$cred = Get-Credential
Now you can create the VM with New-AzVM. The following example creates a VM named myVM in the EastUS location. If they don't already exist, the resource group myResourceGroupAutomate and supporting network resources are created. To allow web traffic, the cmdlet also opens port 80.
New-AzVm `
    -ResourceGroupName "myResourceGroupAutomate" `
    -Name "myVM" `
    -Location "East US" `
    -VirtualNetworkName "myVnet" `
    -SubnetName "mySubnet" `
    -SecurityGroupName "myNetworkSecurityGroup" `
    -PublicIpAddressName "myPublicIpAddress" `
    -OpenPorts 80 `
    -Credential $cred
The resources and VM take a few minutes to be created.
Automate IIS install
Use Set-AzVMExtension to install the Custom Script Extension. The extension runs powershell Add-WindowsFeature Web-Server to install the IIS webserver and then updates the Default.htm page to show the hostname of the VM:
Set-AzVMExtension -ResourceGroupName "myResourceGroupAutomate" `
    -ExtensionName "IIS" `
    -VMName "myVM" `
    -Location "EastUS" `
    -Publisher Microsoft.Compute `
    -ExtensionType CustomScriptExtension `
    -TypeHandlerVersion 1.8 `
    -SettingString '{"commandToExecute":"powershell Add-WindowsFeature Web-Server; powershell Add-Content -Path \"C:\\inetpub\\wwwroot\\Default.htm\" -Value $($env:computername)"}'
Test web site
Obtain the public IP address of your load balancer with Get-AzPublicIPAddress. The following example obtains the IP address for myPublicIPAddress created earlier:
Get-AzPublicIPAddress `
    -ResourceGroupName "myResourceGroupAutomate" `
    -Name "myPublicIPAddress" | select IpAddress
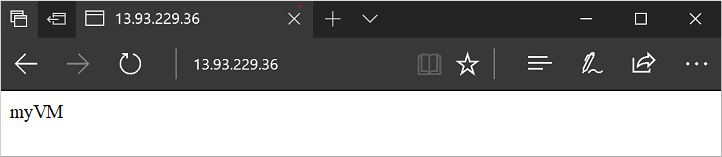
You can then enter the public IP address in to a web browser. The website is displayed, including the hostname of the VM that the load balancer distributed traffic to as in the following example:
Next steps
In this tutorial, you automated the IIS install on a VM. You learned how to:
- Use the Custom Script Extension to install IIS.
- Create a VM that uses the Custom Script Extension.
- View a running IIS site after the extension is applied.
Advance to the next tutorial to learn how to create custom VM images.