Create calendar events with the Office 365 Outlook Calendar adapter - BizTalk Server
Use the Office 365 Outlook Calendar adapter in BizTalk Server to create and receive calendar events from your Office 365 Outlook Calendar.
Create events using a send port
In the BizTalk Server Administration console, right-click Send Ports, select New, and select Static One-way send port.
Create a Send Port provides some guidance.
Enter a Name. In Transport, set the Type to Office 365 Outlook Calendar, and select Configure.
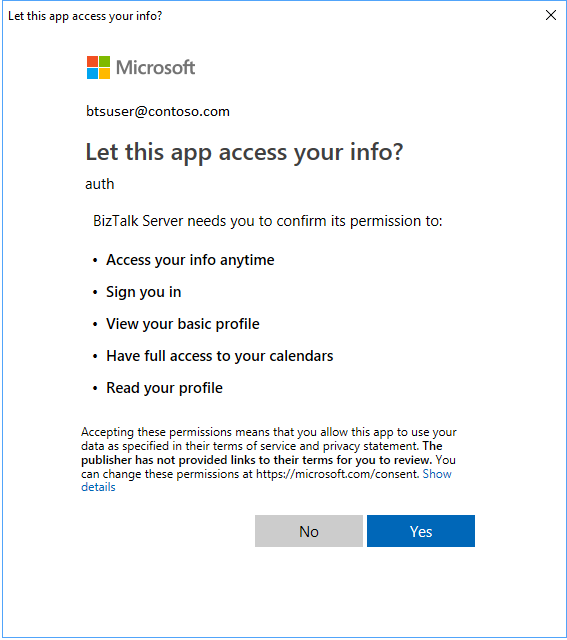
Select [Sign in …, and sign in to your Office 365 Account. The account is auto-populated with your email address.
Allow BizTalk Server approval for permission to access:
Configure your Office365 Outlook Calendar default properties:
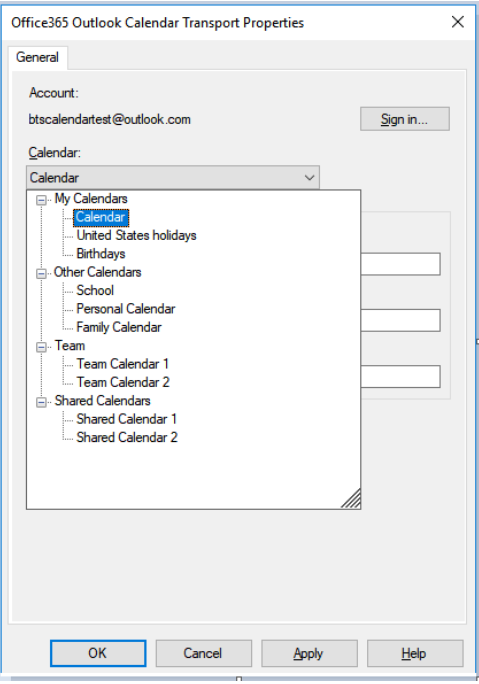
Use this To do this Calendar Select the calendar in which events will be created. Subject Set the default subject for events created. (256 character max) Required Attendees Enter your default required attendees email addresses separated by ';'. (256 character max) Optional Attendees Enter your default optional attendees email addresses separated by ';'. (256 character max) Select a calendar:
When finished, your properties look similar to the following:
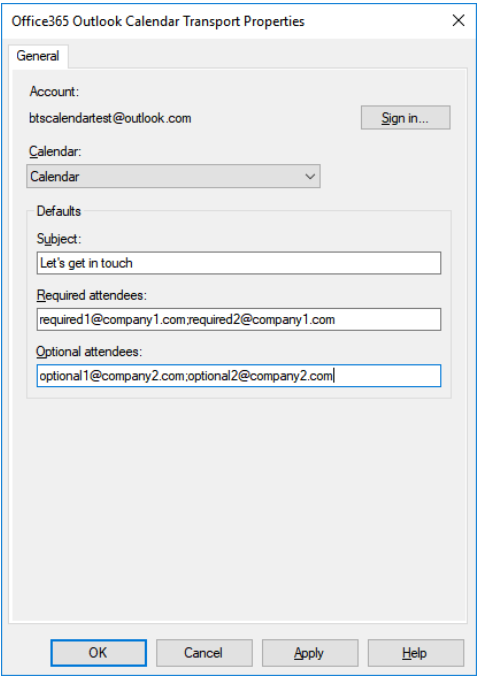
Select Ok to save your changes.
Test your send port
You can use a simple File receive port and location to create an event on your Office 365 Outlook Calendar.
Create a receive port using the File adapter. Within your receive location, set the Receive folder to C:\Temp\In\, and set the file mask to *.xml.
In your Office 365 Outlook Calendar adapter send port properties, set the Filters to
BTS.ReceivePortName == <Receive Port Name>.Paste the following into a text editor, and save the file as Office365Calendar.xml. This is your sample message.
<Event xmlns="http://schemas.microsoft.com/BizTalk/Office365OutlookCalendar/Send"> <subject>Test event 1</subject> <body> <contentType>html</contentType> <content><html> <head> <meta http-equiv="Content-Type" content="text/html; charset=utf-8"> <meta content="text/html; charset=us-ascii"> </head> <body> Test body for event Test event 1 </body> </html> </content> </body> </Event>The XML schema is provided as part of the SDK inside < BizTalk Installation Folder\SDK\Schemas >
Start the File receive location and the Office 365 Outlook Calendar adapter send port.
Copy Office365Calendar.xml sample message into the receive folder (C:\Temp\In). The send port creates an event in your Office 365 Outlook calendar based on the xml.
Receive events using a receive port
In the BizTalk Server Administration console, right-click Receive Ports, select New, and select One-Way receive port.
Create a receive port provides some guidance.
Enter a name, and select Receive Locations.
Select New, and Name the receive location. In Transport, select Office 365 Outlook Calendar from the Type drop-down list, and then select Configure.
Select Sign in …, and sign in to your Office 365 Account. The account is auto-populated with your email address.
Allow BizTalk Server approval for permission to access:
Configure the Endpoint properties:
Use this To do this Calendar Select the calendar from which events will be fetched. Starting within Select the time interval within which a calendar event has to start in order to be received by BizTalk (default is 15 minutes). Selecting a calendar:
When finished, your properties look similar to the following:
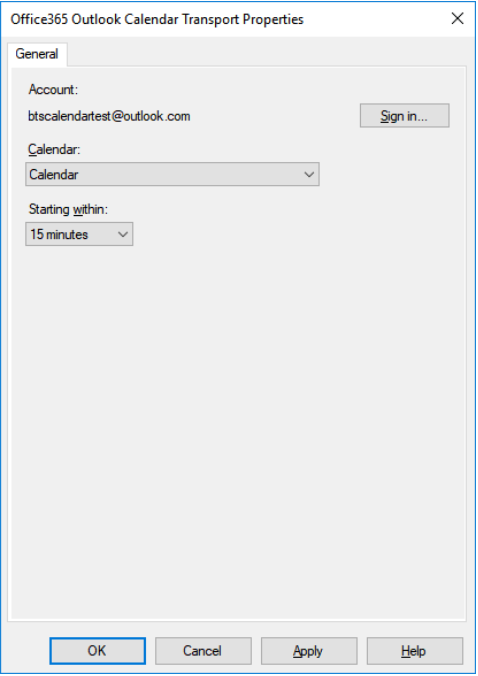
Select Ok to save your changes.
Test your receive settings
You can use a simple File send port to receive messages from your Office 365 Outlook Calendar.
- Create a send port using the File adapter. Within your send port properties, set the Destination folder to C:\Temp\Out\, and set the and File name to %MessageID%.xml.
- In your File send port properties, set the Filters to
BTS.ReceivePortName == <Receive Port Name>. - Start the Office 365 Outlook Calendar receive location and the File send port.
- Look for messages in the destination folder (c:\temp\out).
The XML schema is included in the SDK at
\Program Files (x86)\Microsoft BizTalk Server <your version>\SDK\Schemas.
Example of a received calendar event xml
<ns0:Event xmlns:ns0="http://schemas.microsoft.com/BizTalk/Office365OutlookCalendar/Receive">
<reminderMinutesBeforeStart>20160</reminderMinutesBeforeStart>
<importance>normal</importance>
<subject>Let's meet</subject>
<id>AQMkADAwATNiZmYAZC0xMQBlOC0yODQ1LTA</id>
<body>
<contentType>html</contentType>
<content><html>
<head>
<meta http-equiv="Content-Type" content="text/html; charset=utf-8">
<meta content="text/html; charset=us-ascii">
<meta name="ProgId" content="Word.Document">
<meta name="Generator" content="Microsoft Word 15">
<meta name="Originator" content="Microsoft Word 15">
<link rel="File-List" href="cid:filelist.xml@01D40724.27036CE0"><style>
<!--
@font-face
{font-family:"Cambria Math"}
@font-face
{font-family:Calibri}
p.MsoNormal, li.MsoNormal, div.MsoNormal
{margin:0in;
margin-bottom:.0001pt;
font-size:11.0pt;
font-family:"Calibri",sans-serif}
a:link, span.MsoHyperlink
{color:#0563C1;
text-decoration:underline}
a:visited, span.MsoHyperlinkFollowed
{color:#954F72;
text-decoration:underline}
span.EmailStyle17
{font-family:"Calibri",sans-serif;
color:windowtext}
.MsoChpDefault
{font-family:"Calibri",sans-serif}
@page WordSection1
{margin:1.0in 1.0in 1.0in 1.0in}
div.WordSection1
{}
-->
</style>
</head>
<body lang="EN-US" link="#0563C1" vlink="#954F72" style="">
<div class="WordSection1">
<p class="MsoNormal">Let’s sync up.</p>
</div>
</body>
</html>
</content>
</body>
<bodyPreview>Let’s sync up.</bodyPreview>
<attendees>
<type>required</type>
<status>
<response>none</response>
<time>0001-01-01T00:00:00Z</time>
</status>
<emailAddress>
<name>someone@contoso.com</name>
<address>someone@contoso.com</address>
</emailAddress>
</attendees>
<start>
<dateTime>2018-06-25T17:00:00</dateTime>
<timeZone>UTC</timeZone>
</start>
<end>
<dateTime>2018-06-25T17:30:00</dateTime>
<timeZone>UTC</timeZone>
</end>
<location>
<displayName>Your office</displayName>
<locationType>default</locationType>
<uniqueId>Your office</uniqueId>
<uniqueIdType>private</uniqueIdType>
</location>
<responseRequested>true</responseRequested>
<seriesMasterId />
<isCancelled>false</isCancelled>
<isOrganizer>true</isOrganizer>
<createdDateTime>2018-06-18T23:48:35.0164728Z</createdDateTime>
<lastModifiedDateTime>2018-06-18T23:48:22.178Z</lastModifiedDateTime>
<hasAttachments>false</hasAttachments>
<responseStatus>
<response>none</response>
<time>0001-01-01T00:00:00Z</time>
</responseStatus>
<changeKey>SFa3sLJfdiDEIpfwAAIAU=</changeKey>
<originalStartTimeZone>Pacific Standard Time</originalStartTimeZone>
<originalEndTimeZone>Pacific Standard Time</originalEndTimeZone>
<isReminderOn>false</isReminderOn>
<sensitivity>normal</sensitivity>
<isAllDay>false</isAllDay>
<showAs>busy</showAs>
<type>singleInstance</type>
<onlineMeetingUrl />
<recurrence />
<locations>
<displayName>Your office</displayName>
<locationType>default</locationType>
<uniqueId>Your office</uniqueId>
<uniqueIdType>private</uniqueIdType>
</locations>
<organizer>
<emailAddress>
<name>someone@contoso.com</name>
<address>/O=FIRST ORGANIZATION/OU=EXCHANGE ADMINISTRATIVE GROUP(FYDIBOH3SPDLT)/CN=RECIPIENTS/CN=0003B11E8245</address>
</emailAddress>
</organizer>
</ns0:Event>
Next steps
See all the Office 365 adapters.