Note
Access to this page requires authorization. You can try signing in or changing directories.
Access to this page requires authorization. You can try changing directories.
Deploy Microsoft Defender for Endpoint on enrolled iOS devices by using the Microsoft Defender app and Microsoft Intune. The deployment options support supervised devices, unsupervised devices, and devices that use Intune User Enrollment.
The procedures in this article require Microsoft Intune. Intune is a separate product that isn't part of Microsoft Defender for Endpoint, and it isn't included in all subscriptions. To use Intune, you need a subscription that includes it, or you can buy it separately as a standalone subscription or add-on. For more information, see Microsoft Intune licensing.
Prerequisites
Use accounts with the following permissions:
Microsoft Intune: Assign both the Application Manager and Policy and Profile Manager built-in roles, or use a custom role with equivalent permissions:
- Application Manager provides the mobile app and managed app permissions needed to add, configure, and assign the Microsoft Defender app.
- Policy and Profile Manager provides the device configuration and enrollment permissions needed to create and assign the profiles in this article.
Scope the role assignments to the users and devices that you manage. For the permissions included in each role, see Built-in role permissions for Microsoft Intune.
Microsoft Defender portal: In Microsoft Defender XDR Unified role-based access control (RBAC), assign Security operations \ Security data \ Security data basics (read), with access to the device groups that contain the enrolled devices. In organizations that still use Defender for Endpoint RBAC, assign View data > Security operations and access to the applicable device groups.
Enroll your users' iOS devices in Intune. For more information, see Enroll iOS and iPadOS devices in Microsoft Intune.
Assign users a Defender for Endpoint license to use the Microsoft Defender app. For instructions, see Assign licenses to users.
If your enrollment method requires the Company Portal app, verify that users installed and signed in to the app and completed enrollment. For just-in-time (JIT) registration scenarios where the Company Portal app isn't required, deploy the Microsoft Authenticator app as a required app. Authenticator provides the SSO extension that JIT registration uses.
Note
The Microsoft Defender app is available in the Apple App Store.
Deploy the app to supervised and unsupervised devices
Add the Microsoft Defender app to Intune for deployment to supervised and unsupervised iOS devices.
Add iOS store app
Skip this procedure if you deploy the Microsoft Defender app as a volume-purchased app.
Add the Microsoft Defender app to Intune as an iOS store app. For detailed instructions, see Add iOS store apps to Microsoft Intune (link opens in a new tab in the Intune documentation).
On the Apps | All apps page in the Microsoft Intune admin center at https://intune.microsoft.com/#view/Microsoft_Intune_DeviceSettings/AppsMenu/~/allApps, select  Create, and use these specific settings:
- Platform: Select iOS/iPadOS.
- App type: Select iOS store app in the Store app section.
In the Add app wizard, configure the following settings on the App information tab:
- Select Search the App Store, search for Defender, then select Microsoft Defender: Security.
- Minimum operating system: Select iOS 17.0.
After you create the app, the app details page opens. To return to the page later, select Microsoft Defender: Security on the Apps | All apps page. On the app details page, under Monitor, select Device install status to verify that installation completed successfully.
Complete deployment for supervised devices
The Microsoft Defender app offers enhanced capabilities on supervised iOS/iPadOS devices by using the advanced management features of the platform. It also delivers Web Protection without requiring a local VPN on the device. This configuration protects users from phishing and other web-based threats.
Configure supervised devices with an app configuration policy and a device configuration profile.
Configure supervised mode by using Microsoft Intune
Configure supervised mode for the Microsoft Defender app through an app configuration policy and a device configuration profile.
App configuration policy
Note
This app configuration policy for supervised devices applies only to managed devices. As a best practice, assign the policy to All Devices.
Create a Managed devices app configuration policy. For detailed instructions, see Create an app configuration policy (link opens in a new tab in the Intune documentation).
On the Apps | Configuration page in the Microsoft Intune admin center at https://intune.microsoft.com/#view/Microsoft_Intune_DeviceSettings/AppsMenu/~/configuration, select
Create > Managed devices.
In the Create app configuration policy wizard, configure the following settings:
Basics tab:
- Platform: Select iOS/iPadOS.
- Targeted app: Select Select app, find and select Microsoft Defender: Security, and then select OK.
Settings tab:
- Configuration settings format: Select Use configuration designer.
- Configuration key: Enter
issupervised. - Value type: Select String.
- Configuration value: Enter
{{issupervised}}.

Assignments tab: As a best practice for this scenario, assign the policy to All Devices. If you assign the policy to user groups instead, users must sign in to their devices before the policy applies. For more information, see Assign user and device profiles.

Device configuration profile (Control Filter)
Note
On supervised iOS/iPadOS devices, the custom ControlFilter .mobileconfig profile enables Web Protection without setting up the local loopback VPN on the device. This configuration protects users from phishing and other web-based attacks without requiring the local VPN.
However, the ControlFilter profile doesn't work with Always-On VPN (AOVPN) due to platform restrictions.
Deploy one of the following profiles:
Zero touch (Silent) Control Filter: This profile enables silent onboarding for users. Download the configuration profile from ControlFilterZeroTouch.
Control Filter: Download the configuration profile from ControlFilter.
After you download the selected profile, create a custom device configuration profile. For detailed instructions, see Add custom settings to Apple devices in Microsoft Intune (link opens in a new tab in the Intune documentation).
When you create the policy on the Policies tab of the Devices | Configuration page in the Microsoft Intune admin center at https://intune.microsoft.com/#view/Microsoft_Intune_DeviceSettings/DevicesMenu/~/configuration, by selecting Create >
New policy, use these specific settings:
- Platform: Select iOS/iPadOS.
- Profile type: Select Templates.
- Template name: Select Custom.
In the Custom wizard, configure the following settings:
- Configuration settings tab: For Configuration profile file, find and select the
.mobileconfigfile that you downloaded. - Assignments tab: As a best practice for this scenario, assign the profile to all managed iOS devices.
Set up automated onboarding for unsupervised devices
Automate onboarding to Defender for Endpoint by using zero-touch onboarding or automatic onboarding of the VPN profile.
Set up zero-touch onboarding
Note
Zero-touch can't be configured on iOS devices that are enrolled without user affinity, such as userless or shared devices.
Set up Microsoft Defender for Endpoint for silent deployment and activation by creating a deployment profile. Users receive an installation notification, and Defender for Endpoint installs without requiring them to open the app.
Create a VPN device configuration profile. For detailed instructions, see Create a device configuration profile (link opens in a new tab in the Intune documentation). For information about the available VPN settings, see Configure VPN settings for Apple devices in Microsoft Intune.
When you create the policy on the Policies tab of the Devices | Configuration page in the Microsoft Intune admin center at https://intune.microsoft.com/#view/Microsoft_Intune_DeviceSettings/DevicesMenu/~/configuration, by selecting Create >
New policy, use these specific settings:
- Platform: Select iOS/iPadOS.
- Profile type: Select Templates.
- Template name: Select VPN.
In the VPN wizard, use these specific settings on the Configuration settings tab:
- Connection type: Select Custom VPN.
- Base VPN section:
- Connection name: Enter
Microsoft Defender for Endpoint. - VPN server address: Enter
127.0.0.1. - Authentication method: Select Username and password.
- Split tunneling: Verify Disable is selected.
- VPN identifier: Enter
com.microsoft.scmx. - Enter key and value pairs for the custom VPN attributes:
- Key: Enter
SilentOnboard. - Value: Enter
True. - By default, users can't change the toggle from within the app. To allow users to change the VPN toggle from within the app, add the following key-value pair:
- Key: Enter
EnableVPNToggleInApp. - Value: Enter
True.
- Key: Enter
- Key: Enter
- Connection name: Enter
- Automatic VPN section:
- Type of automatic VPN: Select On-demand VPN.
- On-demand rules: Select Add, select I want to do the following > Establish VPN, and then select I want to restrict to > All domains.
- Block users from disabling automatic VPN: Select Yes to prevent users from disabling the VPN. By default, this setting isn't configured, and users can disable the VPN only in Settings.
- Type of automatic VPN: Select On-demand VPN.
After Intune syncs the profile to the targeted iOS devices:
- Defender for Endpoint is deployed and silently onboarded. The device is visible in the Microsoft Defender portal after it's onboarded.
- A provisional notification is sent to the user's device.
- Web Protection and other features are activated.
In some cases, such as after password changes or multifactor authentication prompts, zero-touch onboarding might require users to manually sign in to the Microsoft Defender app.
For first-time onboarding: Users receive a silent notification.
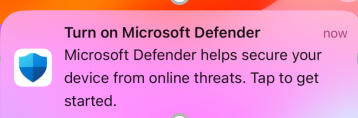
Users take the following steps:
- Open the Microsoft Defender app or tap the notification.
- Select the enrolled enterprise account from the account picker screen.
- Sign in.
The device is onboarded and starts reporting to the Microsoft Defender portal.
For previously onboarded devices: Users receive a silent notification.
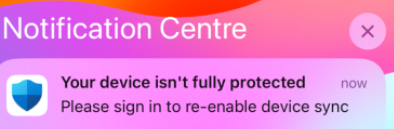
To resume reporting to the Microsoft Defender portal:
- Open the Microsoft Defender app, or tap the notification.
- When prompted by the Microsoft Defender app, sign in.
The device starts reporting to the Microsoft Defender portal again.
Note
- Zero-touch setup can take up to 5 minutes to complete in the background.
- For supervised devices, set up zero-touch onboarding with the ZeroTouch Control Filter profile. In this case, the Defender for Endpoint VPN profile isn't installed on the device, and the Control Filter profile provides Web Protection.
Set up automatic onboarding of the VPN profile
Note
This option simplifies onboarding by setting up the VPN profile. If you use zero-touch onboarding, don't configure this option.
For unsupervised devices, a local loopback VPN provides Web Protection. The VPN doesn't send traffic outside the device.
Configure automatic setup of the Defender for Endpoint VPN profile so users don't have to set up the profile during onboarding.
Create a VPN device configuration profile. For detailed instructions, see Create a device configuration profile (link opens in a new tab in the Intune documentation). For information about the available VPN settings, see Configure VPN settings for Apple devices in Microsoft Intune.
When you create the policy on the Policies tab of the Devices | Configuration page in the Microsoft Intune admin center at https://intune.microsoft.com/#view/Microsoft_Intune_DeviceSettings/DevicesMenu/~/configuration, by selecting Create >
New policy, use these specific settings:
- Platform: Select iOS/iPadOS.
- Profile type: Select Templates.
- Template name: Select VPN.
In the VPN wizard, use these specific settings on the Configuration settings tab:
- Connection type: Select Custom VPN.
- Base VPN section:
- Connection name: Enter
Microsoft Defender for Endpoint. - VPN server address: Enter
127.0.0.1. - Authentication method: Select Username and password.
- Split tunneling: Verify Disable is selected.
- VPN identifier: Enter
com.microsoft.scmx. - Enter key and value pairs for the custom VPN attributes:
- Key: Enter
AutoOnboard. - Value: Enter
True. - By default, users can't change the toggle from within the app. To allow users to change the VPN toggle from within the app, add the following key-value pair:
- Key: Enter
EnableVPNToggleInApp. - Value: Enter
True.
- Key: Enter
- Key: Enter
- Connection name: Enter
- Automatic VPN section:
- Type of automatic VPN: Select On-demand VPN.
- On-demand rules: Select Add, select I want to do the following > Establish VPN, and then select I want to restrict to > All domains.
- Block users from disabling automatic VPN: Select Yes to prevent users from disabling the VPN. By default, this setting isn't configured, and users can disable the VPN only in Settings.
Set up Intune User Enrollment
Use the following steps to deploy the Microsoft Defender app to iOS devices that use Intune User Enrollment.
Administrator setup
To configure Intune User Enrollment for Defender for Endpoint:
Set up an Apple User Enrollment profile in Intune. For new enrollments, use account-driven Apple User Enrollment. User Enrollment with Company Portal is available only for devices that already use this profile type.
Set up the Microsoft Enterprise single sign-on (SSO) plug-in. The Microsoft Authenticator app, which provides the SSO extension, is required for User Enrollment on an iOS device.
Create a device configuration profile in Intune. For more information, see Microsoft Enterprise SSO plug-in for Apple devices. Add the following settings to the profile:
- App bundle ID: Add the Microsoft Defender app bundle ID,
com.microsoft.scmx. - Another configuration: Add the key
device_registration, select the String type, and enter{{DEVICEREGISTRATION}}as the value.
- App bundle ID: Add the Microsoft Defender app bundle ID,
Set up the app configuration key for User Enrollment.
Create a Managed devices app configuration policy. For detailed instructions, see Create an app configuration policy (link opens in a new tab in the Intune documentation).
On the Apps | Configuration page in the Microsoft Intune admin center at https://intune.microsoft.com/#view/Microsoft_Intune_DeviceSettings/AppsMenu/~/configuration, select
Create > Managed devices.In the Create app configuration policy wizard, configure these specific settings:
Basics tab:
- Platform: Select iOS/iPadOS.
- Targeted app: Select Select app, find and select Microsoft Defender: Security, and then select OK.
Settings tab:
- Configuration settings format: Select Use configuration designer.
- Configuration key: Enter
UserEnrolmentEnabled. - Value type: Select String.
- Configuration value: Enter
True.
Deploy the Microsoft Defender app from Intune as a required, user-licensed volume-purchased app.
User onboarding
After the Microsoft Defender app is installed on users' devices, each user signs in and completes onboarding. After the device is onboarded, it appears on the Device inventory page in the Microsoft Defender portal.
Supported features and limitations
- Defender for Endpoint capabilities on iOS include Web Protection, Network Protection, jailbreak detection, vulnerability management for the operating system and apps, and alerts in the Microsoft Defender portal.
- Zero-touch deployment and automatic onboarding of the VPN profile aren't supported with User Enrollment because administrators can't deploy a device-wide VPN profile for this enrollment type.
- For app vulnerability management, only apps in the managed Apple File System (APFS) volume are visible.
- Newly onboarded devices might take up to 10 minutes to show as compliant when targeted by compliance policies.
For more information, see Apple User Enrollment limitations and unsupported capabilities.
Complete onboarding and check status
To complete onboarding and verify the device status:
After Intune installs Defender for Endpoint on the iOS device, the app icon appears.

Tap the Defender for Endpoint app icon, and follow the on-screen instructions to complete onboarding. Users accept the iOS permissions required by the Microsoft Defender app.
Note
Skip this step if you configured zero-touch onboarding. You don't need to manually open the app when zero-touch onboarding is configured.
After onboarding is complete, verify that the device appears in the Device inventory list in the Microsoft Defender portal.

