Note
Access to this page requires authorization. You can try signing in or changing directories.
Access to this page requires authorization. You can try changing directories.
In this tutorial, you learn how to build an object detection model using ML.NET Model Builder and Azure Machine Learning to detect and locate stop signs in images.
- Prepare and understand the data
- Create a Model Builder config file
- Choose the scenario
- Choose the training environment
- Load the data
- Train the model
- Evaluate the model
- Use the model for predictions
Prerequisites
For a list of prerequisites and installation instructions, visit the Model Builder installation guide.
Model Builder object detection overview
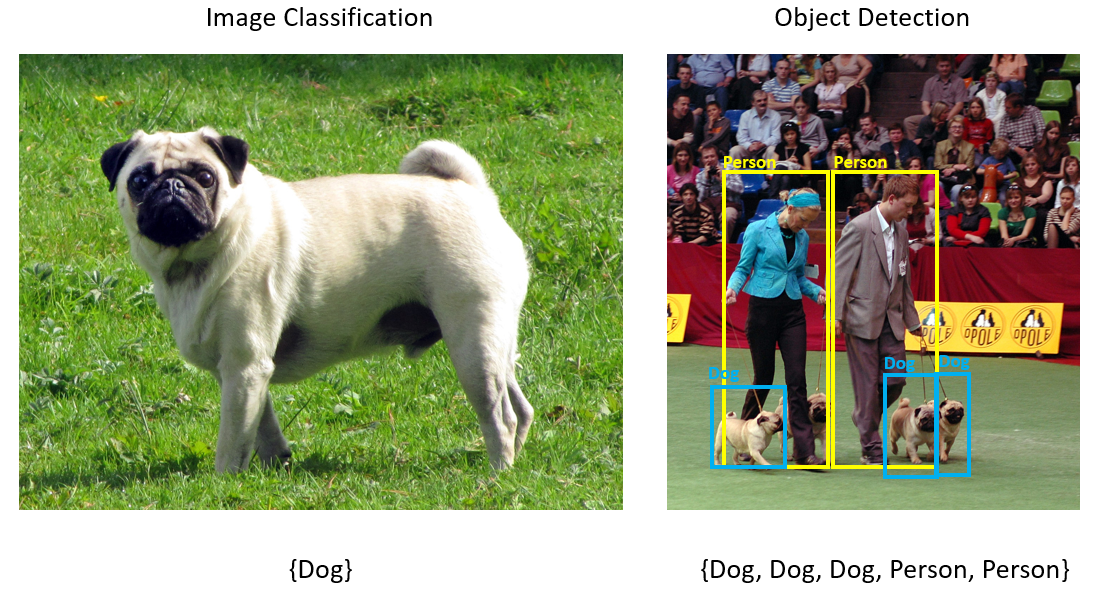
Object detection is a computer vision problem. While closely related to image classification, object detection performs image classification at a more granular scale. Object detection both locates and categorizes entities within images. Object detection models are commonly trained using deep learning and neural networks. See Deep learning vs machine learning for more information.
Use object detection when images contain multiple objects of different types.
Some use cases for object detection include:
- Self-Driving Cars
- Robotics
- Face Detection
- Workplace Safety
- Object Counting
- Activity Recognition
This sample creates a C# console application that detects stop signs in images using a machine learning model built with Model Builder. You can find the source code for this tutorial at the samples browser.
Prepare and understand the data
The Stop Sign dataset consists of 50 images downloaded from Unsplash, each of which contain at least one stop sign.
Create a new VoTT project
Download the dataset of 50 stop sign images and unzip.
Download VoTT (Visual Object Tagging Tool).
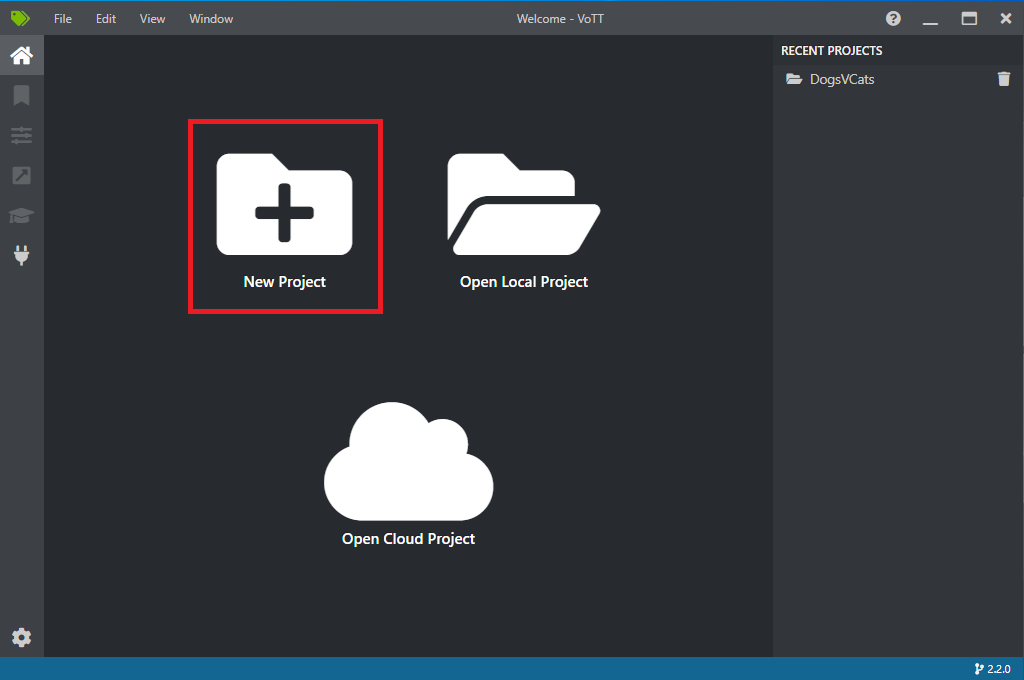
Open VoTT and select New Project.
In Project Settings, change the Display Name to "StopSignObjDetection".
Change the Security Token to Generate New Security Token.
Next to Source Connection, select Add Connection.
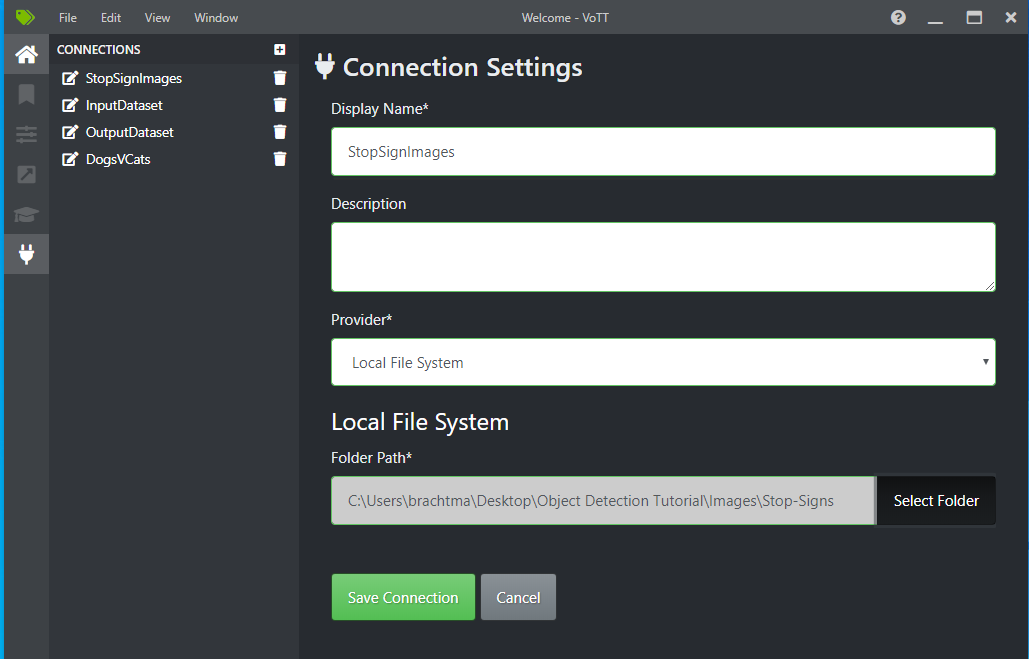
In Connection Settings, change the Display Name for the source connection to "StopSignImages", and select Local File System as the Provider. For the Folder Path, select the Stop-Signs folder which contains the 50 training images, and then select Save Connection.
In Project Settings, change the Source Connection to StopSignImages (the connection you just created).
Change the Target Connection to StopSignImages as well. Your Project Settings should now look similar to this screenshot:
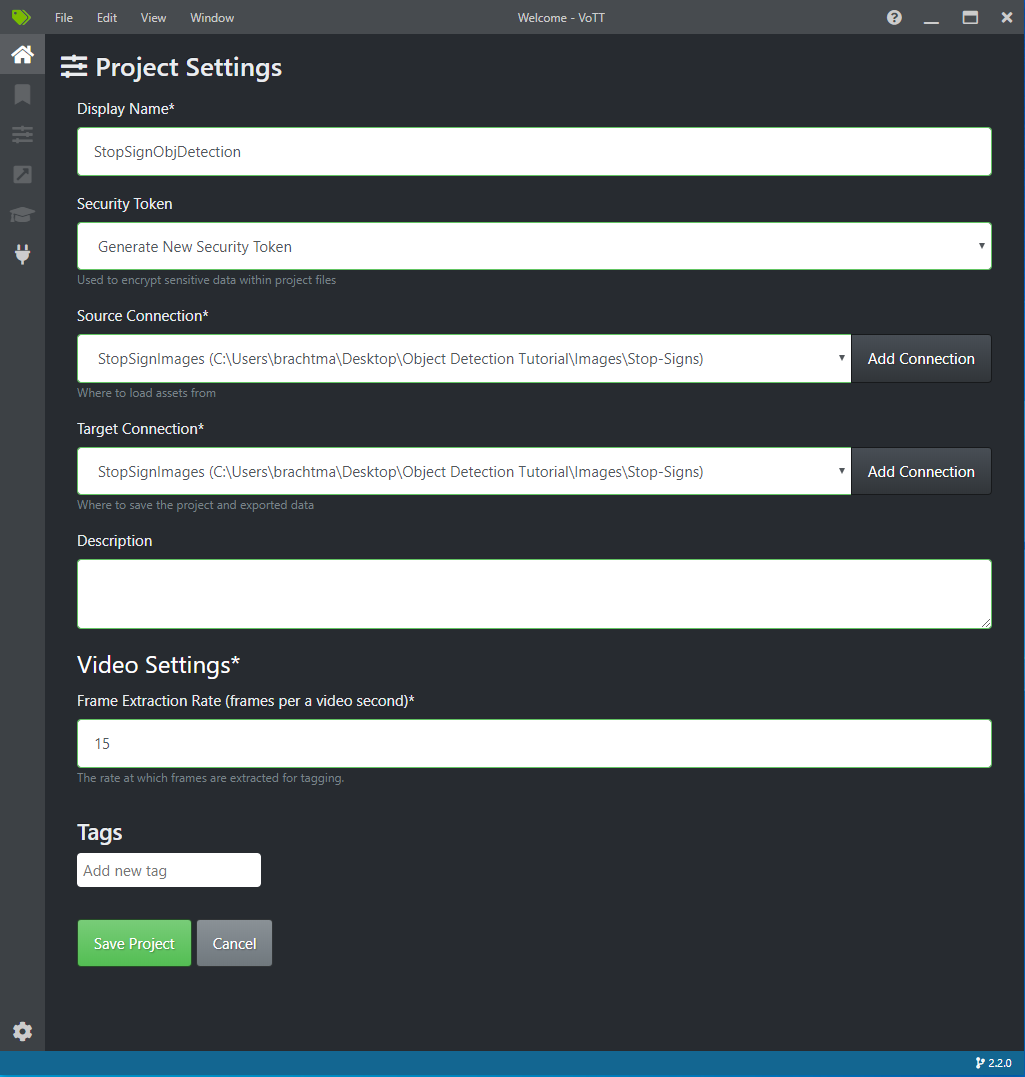
Select Save Project.
Add tag and label images
You should now see a window with preview images of all the training images on the left, a preview of the selected image in the middle, and a Tags column on the right. This screen is the Tags editor.
Select the first (plus-shaped) icon in the Tags toolbar to add a new tag.

Name the tag "Stop-Sign" and hit Enter on your keyboard.

Click and drag to draw a rectangle around each stop sign in the image. If the cursor does not let you draw a rectangle, try selecting the Draw Rectangle tool from the toolbar on the top, or use the keyboard shortcut R.
After drawing your rectangle, select the Stop-Sign tag that you created in the previous steps to add the tag to the bounding box.
Click on the preview image for the next image in the dataset and repeat this process.
Continue steps 3-4 for every stop sign in every image.
Export your VoTT JSON
Once you have labeled all of your training images, you can export the file that will be used by Model Builder for training.
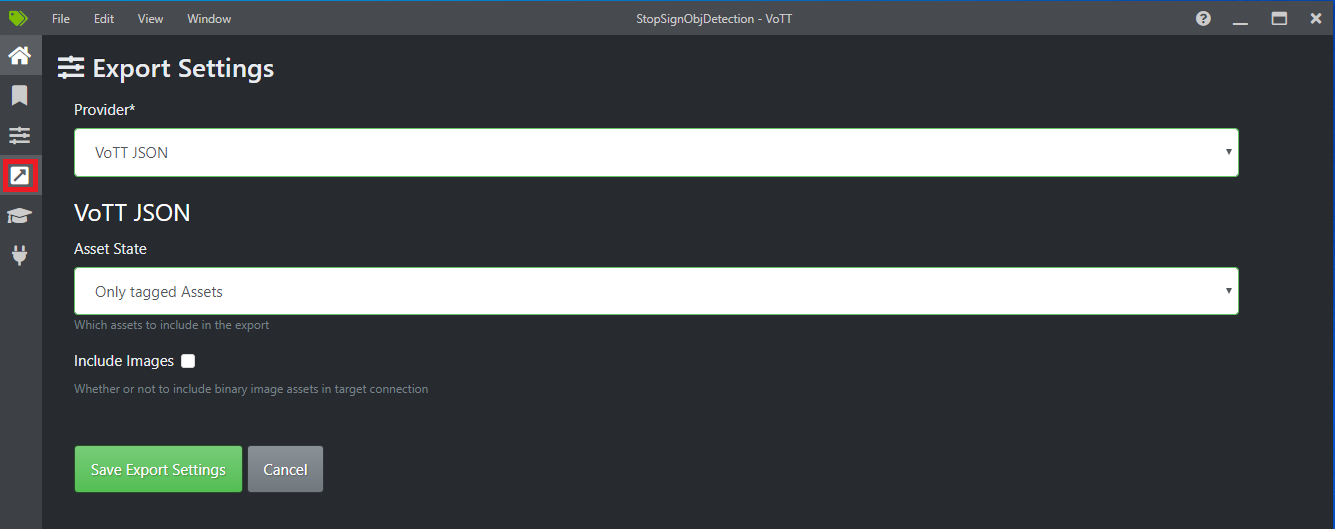
Select the fourth icon in the left toolbar (the one with the diagonal arrow in a box) to go to the Export Settings.
Leave the Provider as VoTT JSON.
Change the Asset State to Only tagged Assets.
Uncheck Include Images. If you include the images, then the training images will be copied to the export folder that is generated, which is not necessary.
Select Save Export Settings.
Go back to the Tags editor (the second icon in the left toolbar shaped like a ribbon). In the top toolbar, select the Export Project icon (the last icon shaped like an arrow in a box), or use the keyboard shortcut Ctrl+E.

This export will create a new folder called vott-json-export in your Stop-Sign-Images folder and will generate a JSON file named StopSignObjDetection-export in that new folder. You will use this JSON file in the next steps for training an object detection model in Model Builder.
Create a console application
In Visual Studio, create a C# console application called StopSignDetection.
Create an mbconfig file
- In Solution Explorer, right-click the StopSignDetection project, and select Add > Machine Learning Model to open the Model Builder UI.
- In the dialog, name the Model Builder project StopSignDetection, and click Add.
Choose a scenario
For this sample, the scenario is object detection. In the Scenario step of Model Builder, select the Object Detection scenario.
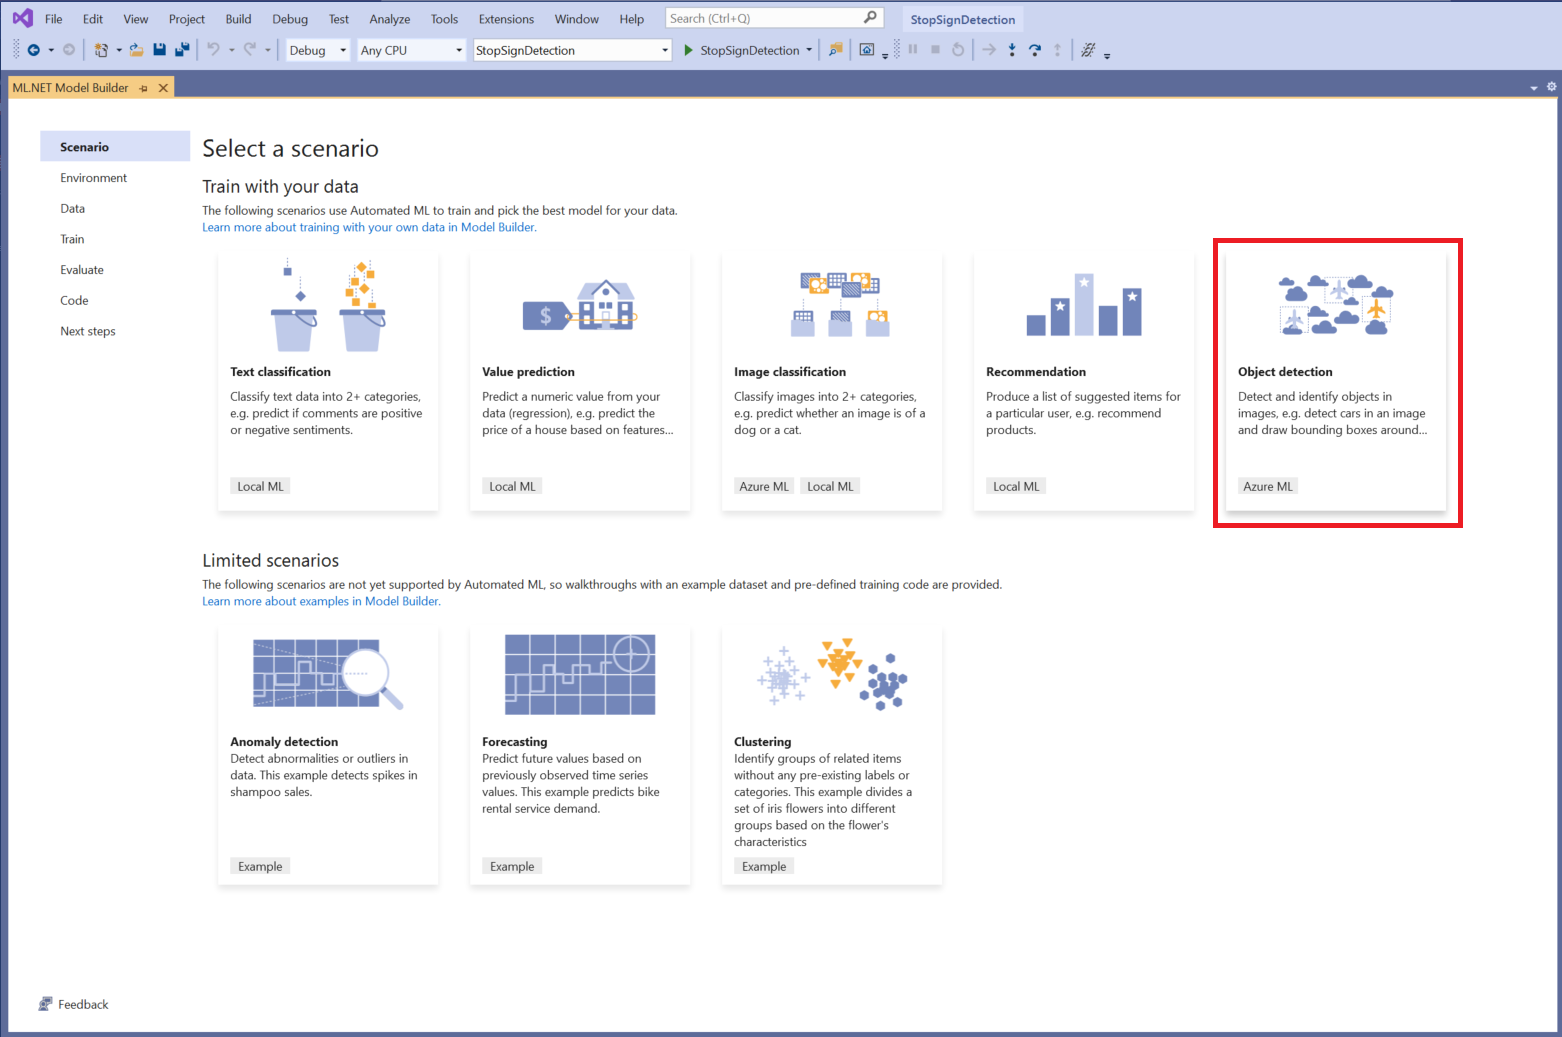
If you don't see Object Detection in the list of scenarios, you may need to update your version of Model Builder.
Choose the training environment
Currently, Model Builder supports training object detection models with Azure Machine Learning only, so the Azure training environment is selected by default.
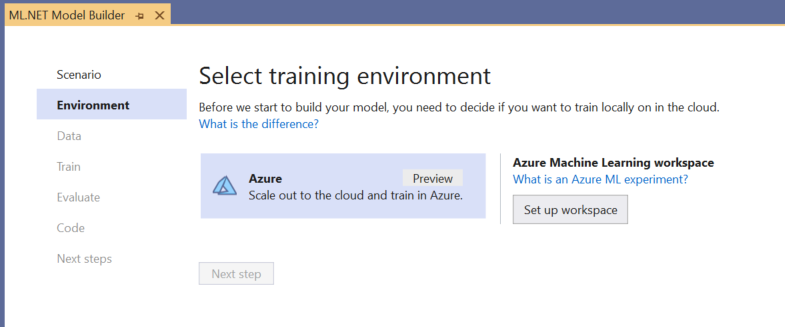
To train a model using Azure ML, you must create an Azure ML experiment from Model Builder.
An Azure ML experiment is a resource that encapsulates the configuration and results for one or more machine learning training runs.
To create an Azure ML experiment, you first need to configure your environment in Azure. An experiment needs the following to run:
- An Azure subscription
- A workspace: an Azure ML resource that provides a central place for all Azure ML resources and artifacts created as part of a training run.
- A compute: an Azure Machine Learning compute is a cloud-based Linux VM used for training. Learn more about compute types supported by Model Builder.
Set up an Azure ML workspace
To configure your environment:
Select the Set up workspace button.
In the Create new experiment dialog, select your Azure subscription.
Select an existing workspace or create a new Azure ML workspace.
When you create a new workspace, the following resources are provisioned:
- Azure Machine Learning workspace
- Azure Storage
- Azure Application Insights
- Azure Container Registry
- Azure Key Vault
As a result, this process may take a few minutes.
Select an existing compute or create a new Azure ML compute. This process may take a few minutes.
Leave the default experiment name and select Create.

The first experiment is created, and the experiment name is registered in the workspace. Any subsequent runs (if the same experiment name is used ) are logged as part of the same experiment. Otherwise, a new experiment is created.
If you’re satisfied with your configuration, select the Next step button in Model Builder to move to the Data step.
Load the data
In the Data step of Model Builder, you will select your training dataset.
Important
Model Builder currently only accepts the format of JSON generated by VoTT.
Select the button inside Input section and use the File Explorer to find the
StopSignObjDetection-export.jsonwhich should be located in the Stop-Signs/vott-json-export directory.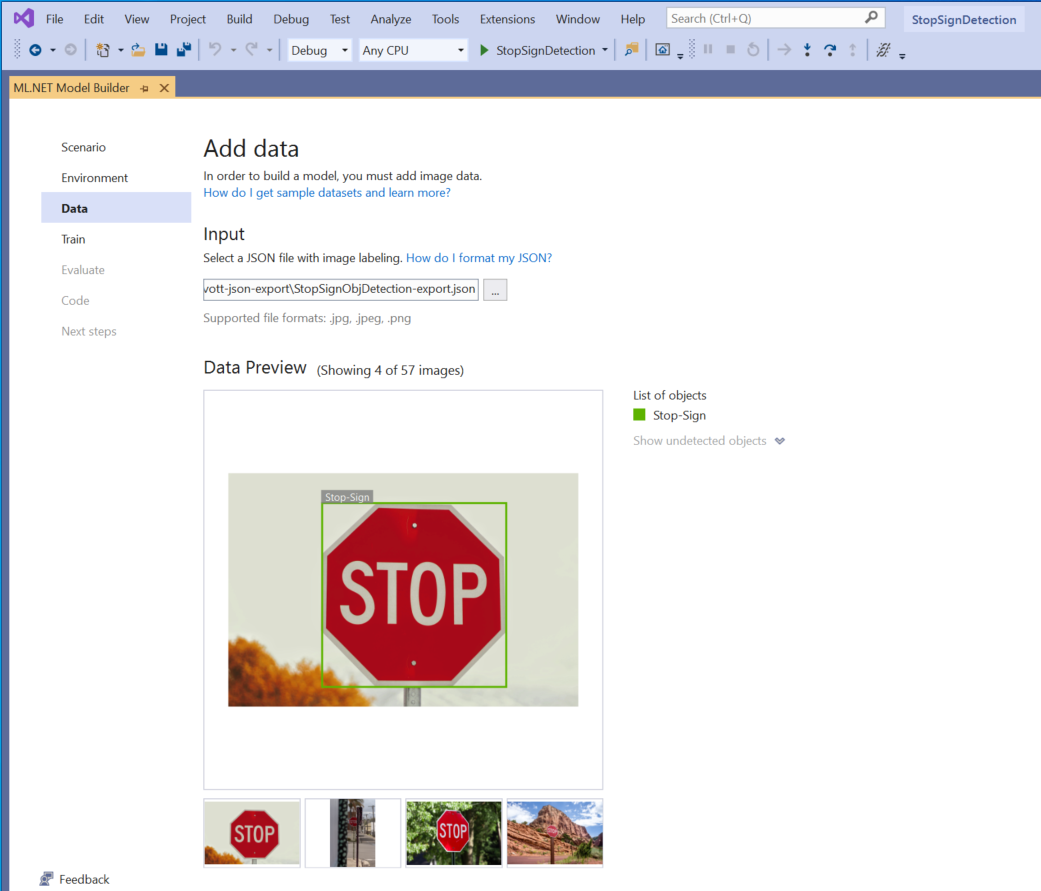
If your data looks correct in the Data Preview, select Next step to move on to the Train step.
Train the model
The next step is to train your model.
In the Model Builder Train screen, select the Start training button.
At this point, your data is uploaded to Azure Storage and the training process begins in Azure ML.
The training process takes some time, and the amount of time may vary depending on the size of compute selected as well as the amount of data. The first time a model is trained in Azure, you can expect a slightly longer training time because resources have to be provisioned. For this sample of 50 images, training took about 16 minutes.
You can track the progress of your runs in the Azure Machine Learning portal by selecting the Monitor current run in Azure portal link in Visual Studio.
Once training is complete, select the Next step button to move on to the Evaluate step.
Evaluate the model
In the Evaluate screen, you get an overview of the results from the training process, including the model accuracy.

In this case, the accuracy says 100%, which means that the model is more than likely overfit due to too few images in the dataset.
You can use the Try your model experience to quickly check whether your model is performing as expected.
Select Browse an image and provide a test image, preferably one that the model did not use as part of training.
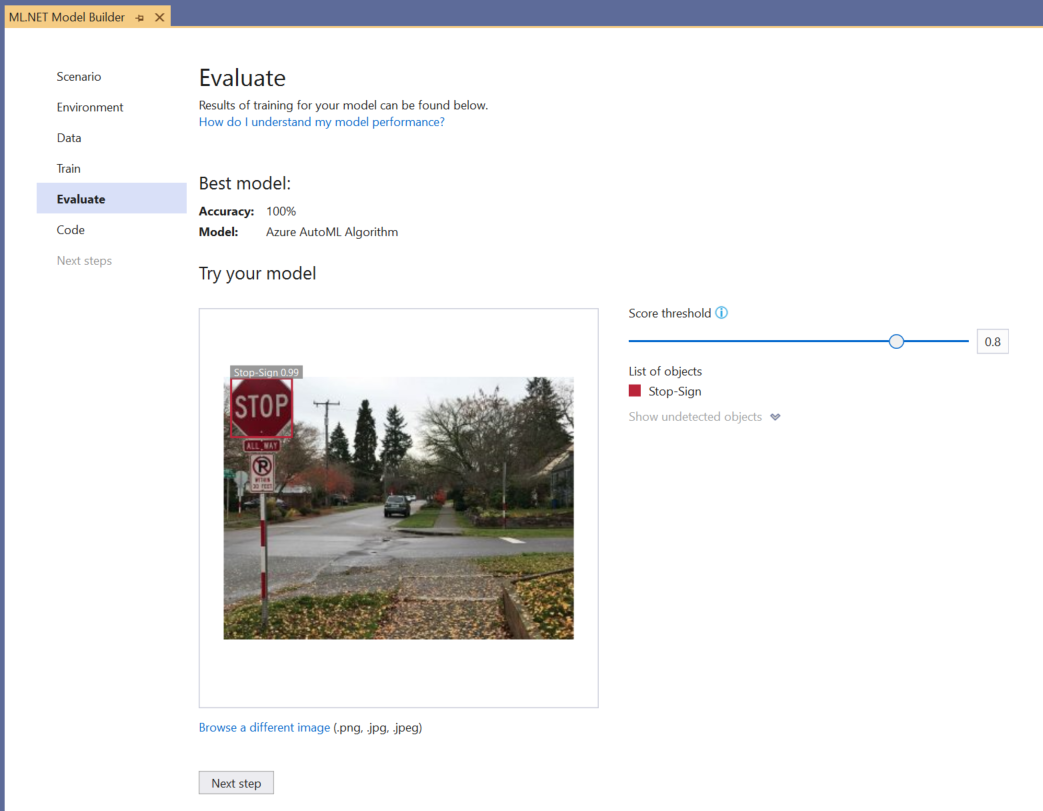
The score shown on each detected bounding box indicates the confidence of the detected object. For instance, in the screenshot above, the score on the bounding box around the stop sign indicates that the model is 99% sure that the detected object is a stop sign.
The Score threshold, which can be increased or decreased with the threshold slider, will add and remove detected objects based on their scores. For instance, if the threshold is .51, then the model will only show objects that have a confidence score of .51 or above. As you increase the threshold, you will see less detected objects, and as you decrease the threshold, you will see more detected objects.
If you're not satisfied with your accuracy metrics, one easy way to try to improve model accuracy is to use more data. Otherwise, select the Next step link to move on to the Consume step in Model Builder.
(Optional) Consume the model
This step will have project templates that you can use to consume the model. This step is optional and you can choose the method that best suits your needs on how to serve the model.
- Console App
- Web API
Console App
When adding a console app to your solution, you will be prompted to name the project.
Name the console project StopSignDetection_Console.
Click Add to solution to add the project to your current solution.
Run the application.
The output generated by the program should look similar to the snippet below:
Predicted Boxes:

Top: 73.225296, Left: 256.89764, Right: 533.8884, Bottom: 484.24243, Label: stop-sign, Score: 0.9970765
Web API
When you add a web API to your solution, you're prompted to name the project.
Name the Web API project StopSignDetection_API.
Select Add to solution to add the project to your current solution.
Run the application.
Open PowerShell and enter the following code where PORT is the port your application is listening on.
$body = @{
     ImageSource = <Image location on your local machine>
 }

 Invoke-RestMethod "https://localhost:<PORT>/predict" -Method Post -Body ($body | ConvertTo-Json) -ContentType "application/json"
If successful, the output should look similar to the following text.
boxes labels scores boundingBoxes ----- ------ ------ ------------- {339.97797, 154.43184, 472.6338, 245.0796} {1} {0.99273646} {}- The
boxescolumn gives the bounding box coordinates of the object that was detected. The values here belong to the left, top, right, and bottom coordinates respectively. - The
labelsare the index of the predicted labels. In this case, the value 1 is a stop sign. - The
scoresdefines how confident the model is that the bounding box belongs to that label.
- The
Note
(Optional) The bounding box coordinates are normalized for a width of 800 pixels and a height of 600 pixels. To scale the bounding box coordinates for your image in further post-processing, you need to:
Multiply the top and bottom coordinates by the original image height, and multiply the left and right coordinates by the original image width.
Divide the top and bottom coordinates by 600, and divide the left and right coordinates by 800.
For example, given the original image dimensions,
actualImageHeightandactualImageWidth, and aModelOutputcalledprediction, the following code snippet shows how to scale theBoundingBoxcoordinates:var top = originalImageHeight * prediction.Top / 600; var bottom = originalImageHeight * prediction.Bottom / 600; var left = originalImageWidth * prediction.Left / 800; var right = originalImageWidth * prediction.Right / 800;
An image can have more than one bounding box, so the same process needs to be applied to each of the bounding boxes in the image.
Congratulations! You've successfully built a machine learning model to detect stop signs in images using Model Builder. You can find the source code for this tutorial at the samples browser.
Additional resources
To learn more about topics mentioned in this tutorial, visit the following resources:
Collaborate with us on GitHub
The source for this content can be found on GitHub, where you can also create and review issues and pull requests. For more information, see our contributor guide.