Creating Power BI reports for displaying list data in Business Central
Dynamics 365 Business Central includes a Power BI FactBox control element on many key list pages. The purpose of this FactBox is to display Power BI reports that are related to records in the lists, providing extra insight into the data. The idea is that as you move between rows in the list, the report updates for the selected entry.
Dynamics 365 Business Central comes ready with some of these reports. You can also create your own custom reports that display in this FactBox. Creating these reports is similar to other reports. But there are a few design rules you have to follow to make sure the reports display as expected. These rules are explained in this article.
Note
For general information about creating and publishing Power BI reports for Business Central, see Building Power BI Reports to Display Dynamics 365 Business Central Data.
Prerequisites
- A Power BI account.
- Power BI Desktop.
Create a report for a list page
Start Power BI Desktop.
Select Get Data, and start choosing the data source for the report.
Specify the Business Central list pages that contain the data that you want in the report. For example, to create a report for the Sales Invoices list, include pages related to sales.
For more information, follow the instructions Add Business Central as a data source in Power BI Desktop.
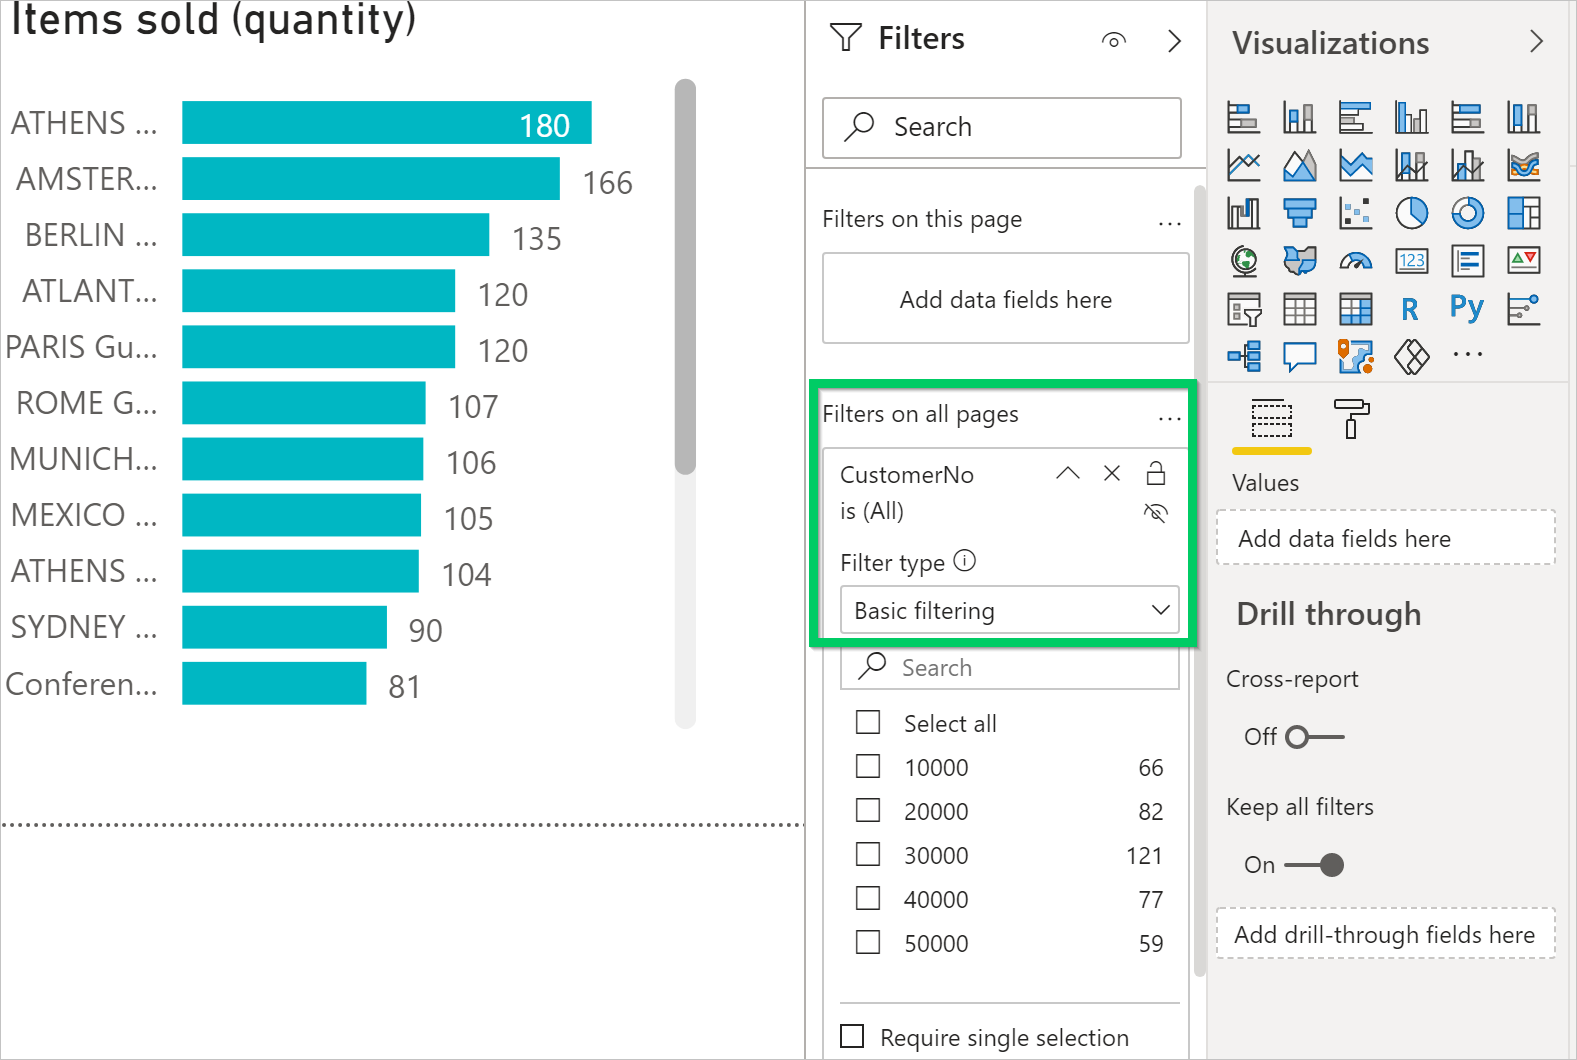
Set the report filter.
To make the data update to the selected record in the list, you add a filter to the report. The filter must include a field of the data source that's used to uniquely identify each record in the list. In developer terms, this field is the primary key. In most cases, the primary key for a list is the No. field.
To set the filter, do the following steps:
- In the Filters, select the primary key field from the list of available fields.
- Drag the field to Filters pane and drop it in the Filters on all pages box.
- Set the Filter type to Basic filtering. It can't be page, visual, or advanced filter.
Design the report layout.
Create the layout by dragging fields and adding visualisations. For more information, see, Work with Report view in Power BI Desktop in the Power BI documentation.
See the next sections about sizing the report and using multiple pages.
Save and name the report.
Give the report a name that contains the name of the list page associated with the report, as it is in the client. The name isn't case-sensitive though. Suppose the report is for the Sales Invoices list page. In this case, include the words sales invoices somewhere in the name, like my sales invoices.pbix or my_Sales Invoices_list.pbix.
This naming convention isn't a requirement. However, it makes selecting reports in Business Central quicker. When the report selection page opens from a list page, it's automatically applied a filter based on the page name. The filter has the syntax:
@*<caption>*, like@*Sales Invoices*. This filtering is done to limit the reports that are displayed. Users can clear the filter to get a full list of reports available in Power BI.When you're done, publish the report as usual.
For more information, see Publishing a Report.
Test the report.
Once the report's been published to your workspace, it should be available from the Power BI FactBox on the list page in Business Central.
To test it, do the following steps.
- Open Business Central and go to the list page.
- If you don't see the Power BI FactBox, go the action bar, then select Actions>Display>Show/Hide Power BI Reports.
- In the Power BI FactBox, select Select Reports, select the Enable box for the report, then select OK.
If designed correctly, the report displays.
Set the report size and colour
The size of the report must be set to 325 pixels by 310 pixels. This size provides the proper scaling of the report in the available space of the Power BI FactBox control in Business Central. To define the size of the report, place focus outside of the report layout area, and then choose the paint roller icon.
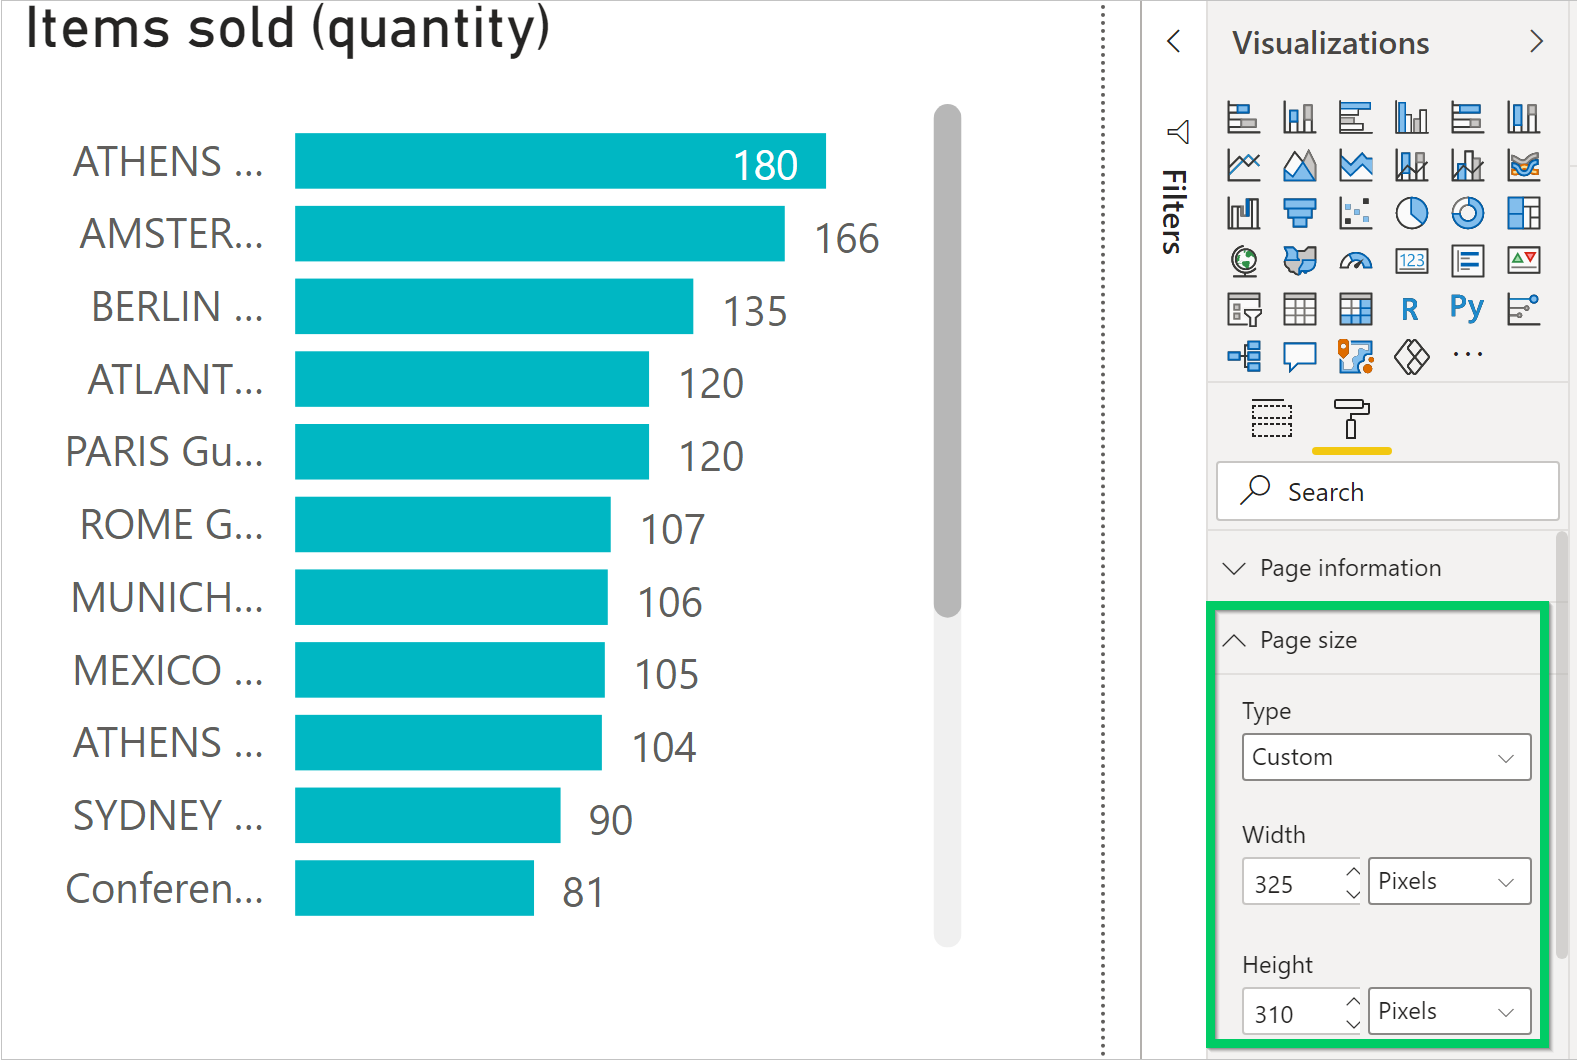
You can change the width and height of the report by choosing Custom in the Type field.
If you want the background of the report to blend with the background colour of the Power BI FactBox control, set report background colour to #FFFFFF (white).
Tip
Use the Business Central theme file to build reports with the same colour styling as the Business Central apps. For more information, see Use the Business Central report theme.
Reports with multiple pages
With Power BI, you can create a single report with multiple pages. However, for reports that display with list pages, we recommend that they don't have more than one page. The Power BI FactBox only shows the first page of your report.
Fixing problems
This section explains how to fix problems that you might run into when you try to view a Power BI report for a list page in Business Central.
You can't see the Power BI FactBox on a list page
By default, the Power BI FactBox is hidden from view. To show the FactBox on a page, from the action bar, select Actions>Display>Show/Hide Power BI Reports.
You can't see the report in the Select Report pane
The report's name doesn't contain the name of the list page that's being shown. Clear the filter to get a full list of Power BI reports available.
Report is loaded but blank, not filtered, or filtered incorrectly
Verify the report filter contains the right primary key. In most cases, this field is the No. field, but in the G/L Entry table, for example, you must use the Entry No. field.
Report is loaded, but it shows a page you didn't expect
Verify that the page you want displayed is the first page in your report.
Report appears with an unwanted grey border, or it's too small or too large
Verify that the report size is set to 325 pixels x 310 pixels. Save the report, and then refresh the list page.
See also
Enabling Your Business Data for Power BI
Use Business Central as a Power BI Data Source
Getting Ready for Doing Business
Setting Up Business Central
Finance