Set up Power Automate integration
APPLIES TO: Business Central online
This article describes how you can set up Power Automate integration for Business Central users. The instructions explain how you can control access to the Power Automate features that let users create and run instant flows from inside the Business Central client. These features are available in the Automation action group on the most list, card, and document pages in the action bar .

As an administrator, you can hide the Automation action group and its actions from all users or individual users.
Important
This article is related only to the Automate action group on pages in the Business Central. The instructions won't affect the user's ability to create and run flows directly in Power Automate—even with flows that interact with Business Central data.
Access Power Automate features
By default, all users have access to the Power Automate features. The features are available from the Automation action group on most list, card, and document pages. Sometimes, you find the Power Automate features by selecting More options... in the action bar.
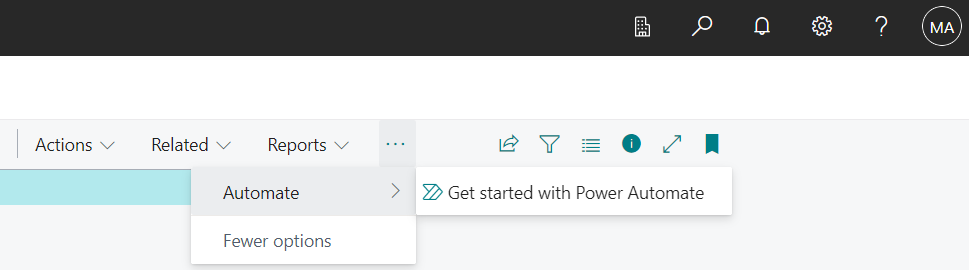
But before users can access the features, they must agree to privacy notice. Users can agree to the terms by selecting the Automate > Get Started with Power Automate action and running the Set Up Power Automate assisted setup. Agreeing to the terms turns on the Power Automate features for the user, activates the following actions in the Automation action group:
- The Create approval flow action lets users create a new request approval flow from a template or scratch. This action is only available on card and document type pages.
- The Create automated flow action lets users create a new automated flow from a template or scratch.
- The Create action based on a flow action lets users create a new Power Automate instant flow from scratch or from a template. The new flow is added as an action in the Automation action group.
- The Manage Flows action signs users in to Power Automate, where they can create, edit, and test both automated and instant flows.
As an administrator, you can change this behavior and control which users can access Power BI features. There are two levels of controlling access. The first level is done by a system permission that you assign to users. The next level is turning the Power Automate features on or off using on the privacy notice agreement.
Grant users permission to Power Automate features
To grant individual users or groups access to the Power Automate features, assign them the system permission Allow Action Automate (ID 9630) in a permission set used on their account. You can also use the predefined permission set AUTOMATE - EXEC, which includes the Allow Action Automate permission. Users that have the Allow Action Automate permission can see the Automate action group on various pages in the client.
To prohibit individual users or groups from accessing the Power Automate features, remove the system permission Allow Action Automate from their assigned permissions sets. In this case, the Automate action group doesn't appear on pages in the client.
For more information about assigning permissions and permissions sets, see Assign Permissions to Users and Groups.
Turn Power Automate features on or off for all users
To turn on Power Automate features as an administrator, you consent to the privacy terms on behalf of all users, so they don't have to do it themselves. When you turn on Power Automate for users, the Automate action group will no longer include the Get Started with Power Automate action. Instead, the Automate action group will include the Create Flows and Manage Flows actions and links that run existing instant flows.
There are two ways you can do this task. One way is to use the Get Started with Power Automate action to consent on behalf of all users. The other way is to use the Privacy Notices Status page.
Turn on by using the Get Started with Power Automate action
- In Business Central, open a list, card, or document page.
- In the action bar, select More options ...> Automate > Power Automate > Get Started with Power Automate.
- Follow the pages on-screen. When you get to the Privacy Notices Status page, read the information. If you agree, choose Agree.
Note
If you choose Disagree, the setup closes without making any changes. If you want to turn on Power Automate later, just run Get Started with Power Automate again.
Turn on by using the Privacy Notices Status page
- In Business Central, search for and open the Privacy Notices Status page.
- In the Microsoft Power Automate row, select the Agree for everyone check box.
Turn off for all users
Complete these steps to remove the Automate action group and its action from pages for all users.
- In Business Central, search for and open the Privacy Notices Status page.
- In the Microsoft Power Automate row, select the Disagree for Everyone check box.
Telemetry
We recommend you use the Business Central app in Power BI to keep track of workflows. It shows the usage of connectors for tenants you manage or own. The app also uses Application Insights telemetry that you have set up in the Business Central administration center.
Get the telemetry app at https://aka.ms/bctelemetryreport.
Next steps
The next step is to set up flows. For more information, see Create automated flows and Create instant flows.