Anchor a guide in Dynamics 365 Guides by using a circular code anchor
Use a printed circular code anchor to anchor your guide to the real world in Guides. Review best practices for circular code anchors.
Set up a circular code anchor
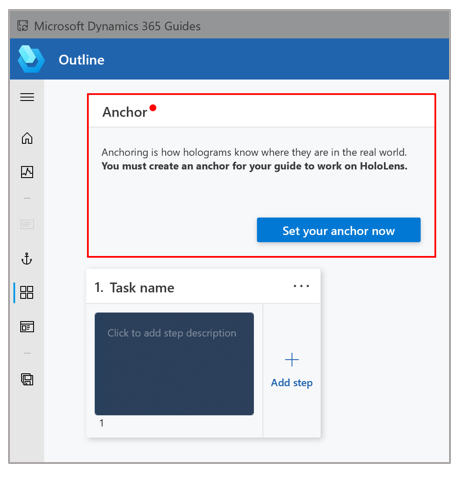
You can access the Anchor wizard from the Outline page in the PC app. The Outline page automatically appears after you create or open a guide.
On the Outline page, select Set your anchor now.

On the Choose an anchor method page, under Circular Code, select Select.
In step 1 of the wizard, select Download circular code to create a PDF file that is named Guides-CircularCodeAnchor. This file includes the anchor that you will print in step 6.

On your computer, in Adobe Acrobat Reader, open the Guides-CircularCodeAnchor file.
Important
Guides supports one size of circular code anchor. To ensure the best possible alignment accuracy, it's crucial that you print the anchor at the specified size. If you use Adobe Acrobat Reader, you can set the specified size to get the best printing results.
Select File > Print, and then, under Page Sizing & Handling, select the Actual size option.

Print the last page of the document on matte stock and don't laminate it. Glossy materials can affect scanning and decreases the anchor detection rate. Bubble jet printers produce a better matte finish.
Note
Make sure the anchor is always positioned flat. Don't distort or place it on a curved surface as this negatively affects alignment and detection.
Make sure that the printed marker spacing matches the measurements shown in the following illustration as the size of the anchor can change depending on the printer used. The anchor measurements must be exact.

Note
If the anchor spacing isn't within +/– 0.1 mm, in the Print dialog box, select the Custom Scale option, and then change the percentage to compensate for the size discrepancy. For example, if the result is 49 mm when you print the anchor, change the scale to 100.4 percent to get 49.196 mm, which is within tolerance.
Attach the circular code anchor to a physical object in the real world, and then take a picture to help the operator find it.
Go back to the Anchor wizard in the PC app, and then select Next two times. (You can skip step 2 of the wizard if you took a picture of the location in the previous step.)
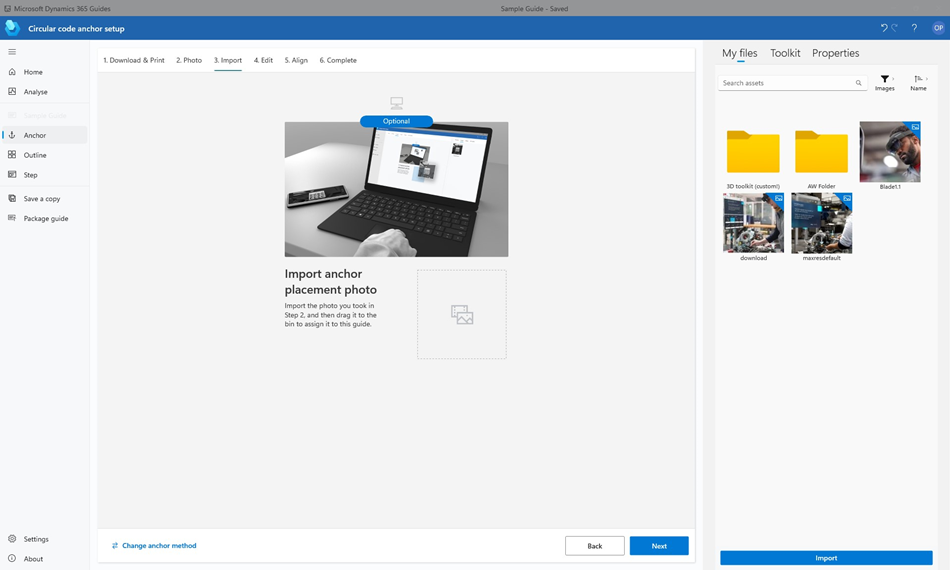
In step 3 of the wizard, select Import to import the picture that you took in step 8. Then drag it to the Import anchor placement photo box. When you've finished, select Next to move to the next step.
Tip
The filter is automatically set to Images, but you can change it.

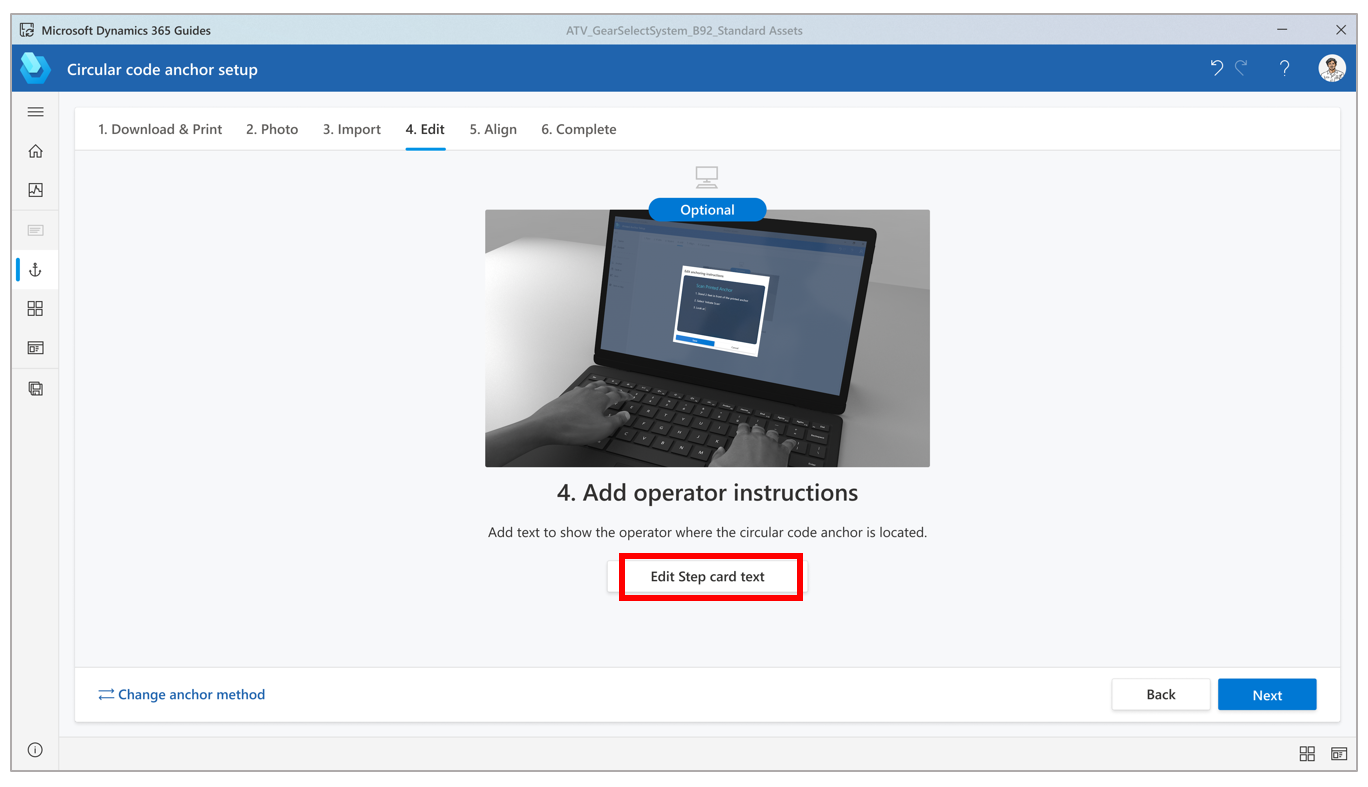
In step 4 of the wizard, if you want to change the default instructions for the operator, select Edit Step card text, and then enter your instructions. When you've finished, select Next to move to the next step.

Put on your HoloLens, open your guide, and then gaze at the circular code anchor to anchor the guide.