Quickstart: Get started with the Microsoft Entra External ID extension for Visual Studio Code (preview)
Integrating authentication into your consumer and business customer applications is essential for securing resources and customer data. The Microsoft Entra External ID extension for Visual Studio Code lets you quickly add authentication to applications for customer identity and access management (CIAM) scenarios. Using the application samples provided, you can see how to set up a customized, branded sign-in experience for external users of your application without leaving the development environment.
This extension provides a basic setup that automatically creates a tenant for applications and prepares it for users. It also streamlines your workflow by automatically populating values such as application IDs into your configuration file for a smoother setup process.
External ID is a service that can be added to an Azure subscription. If you already have one, you can easily include External ID. Otherwise, set up a free trial of Microsoft Entra External ID within Visual Studio Code and start by configuring a sample app.
Install the extension
The Microsoft Entra External ID extension is available in the Visual Studio Code Marketplace.
- If you don’t already have Visual Studio Code installed, download Visual Studio Code and complete the installation steps.
- Open Visual Studio Code. In the activity bar on the left, select the Extensions button.
- In the Extensions Marketplace search box, search for and select Microsoft Entra External ID.
- On the Get Started with Microsoft Entra External ID overview page, select the Install button.
- Restart Visual Studio Code when prompted.
After the extension is installed, you can access it using the icon on the activity bar.
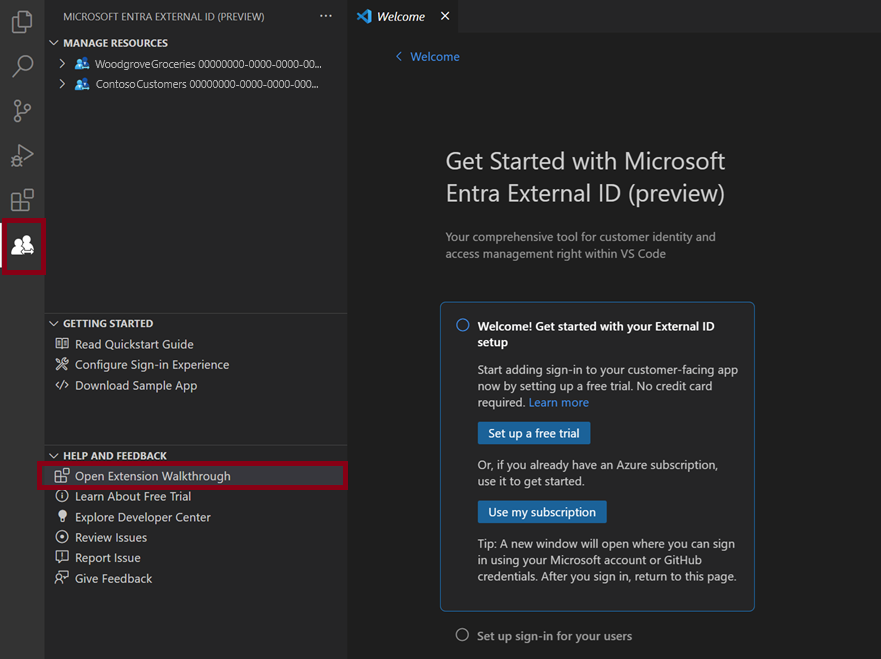
You can also open the extension from Visual Studio Code Welcome page: Select Help > Welcome, and then under Walkthroughs, select Get started with Microsoft Entra External ID. You might need to select More… to expand the list of extensions.
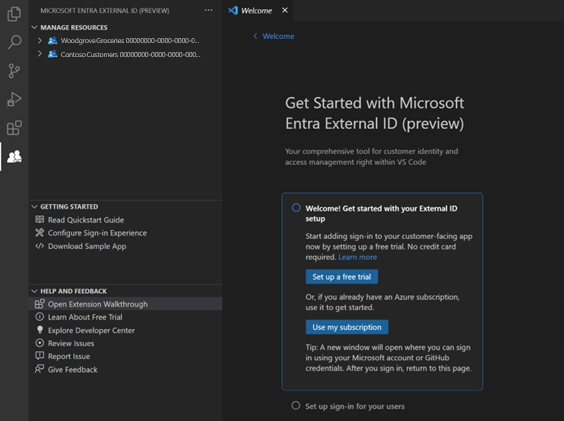
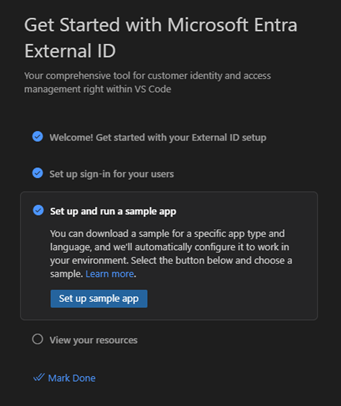
Get started with your External ID setup
The Microsoft Entra External ID extension creates a tenant in an external configuration, which contains your app and directory of external users. You can add this new tenant to your existing Azure subscription. Or if you don’t have an Azure subscription, create a trial tenant that doesn't require one (learn more).
On the Get Started with Microsoft Entra External ID welcome page, choose an option:
- If you don't already have an Azure Account, select Set up a free trial.
- If you already have an Azure account, select Use Azure subscription.
Set up a free trial
Select Set up a free trial.
In the sign-in confirmation message, select Allow.
A new browser window opens. Sign in using your personal account, Microsoft account (MSA), or GitHub account. Once you’re signed in, close the browser window.
Return to Visual Studio Code. In the Where should the tenant be located? menu, select a location for your tenant data. This selection can't be changed later.
Enter a name for the tenant.

The extension creates your trial tenant. You can view the progress by opening the View > Output window. When the process is complete, The tenant is created appears.
Use your subscription
Select Use my subscription.
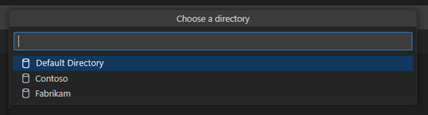
If there are multiple tenants associated with your account, the Choose a directory menu appears. Select the directory (tenant) associated with the subscription you want to use.
Note
If the message No subscriptions available appears, you can set up a free trial instead.
A browser page opens where you can sign in to your account. After you sign in, return to Visual Studio Code.
In the Add a subscription menu, select your subscription.
In the Select a resource group menu, choose a resource group.
In the Where should the tenant be located? menu, select a location for your tenant data. This selection can't be changed later.
Enter a name for the tenant, and then select Enter to create the tenant.
Note
The tenant creation process can take up to 30 minutes. Once the tenant is created, you can access it in both the Microsoft Entra admin center and the Azure portal.
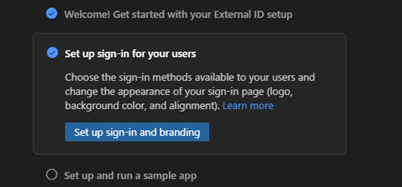
Set up sign-in for your users
You can configure your app to allow users to sign in with their email and a password or a one-time passcode. You can also design the look and feel of the user experience by adding your company logo, changing the background color, or adjusting the sign-in layout. These changes apply to the look and feel of all your apps in this new tenant.
Under Set up sign-in for your users, select Set up sign-in and branding.
You’re prompted to sign in to the new tenant. Select Allow, and in the browser window that opens, choose the account you’re currently using and sign in. Return to Visual Studio Code.
In the How would you like your users to sign in? menu at the top, choose the sign-in method you want to make available to your users: Email and password or Email and one-time passcode.
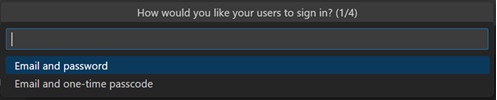
Select OK.
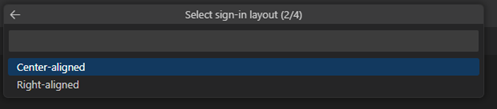
Choose where you want the sign-in page to appear in the browser window, either Center-aligned or Right-aligned.
Select a background color for your sign-up page.

Next, a File Explorer window opens so you can add your company logo. Browse to your company logo file, and then select Upload.
Note
Image requirements are as follows:
- Image size 245 x 36 px
- Maximum file size 50 KB
- File type: Transparent PNG or JPEG
The message Configuring sign-in flow appears. You can view the progress in the Output window. When configuration is finished, the message User flow setup is complete appears.
Set up and run a sample app
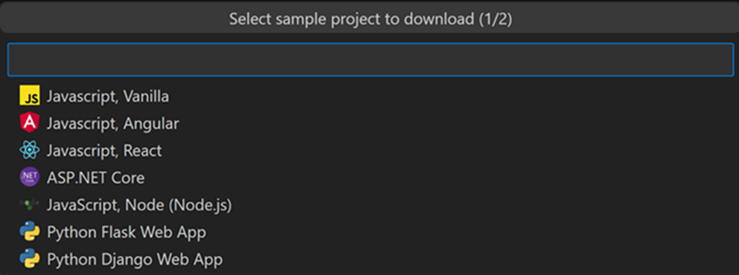
The extension contains several code samples that demonstrate how authentication is implemented in different application types and development languages. Choose a single page application (JavaScript, React, Angular) sample from within the extension, and the extension automatically configures the application with your sign-in experience.
Under select Set up and run a sample app, select the Set up sample app button.
In the menu, select the type of app you want to download. If you're prompted to select your account again, choose the same account you’ve been using.
A File Explorer window opens so you can choose where you want to save the sample repository. Select a folder, and then select Download repository here.
When the download completes, a new Visual Studio Code project workspace opens with the downloaded app folder displayed in the Explorer.
Open a new terminal in the Visual Studio Code window.
In the top menu, select Run > Run without debugging. The Debug Console shows the launch script progress. There's a short delay while the project is set up and the build script runs.
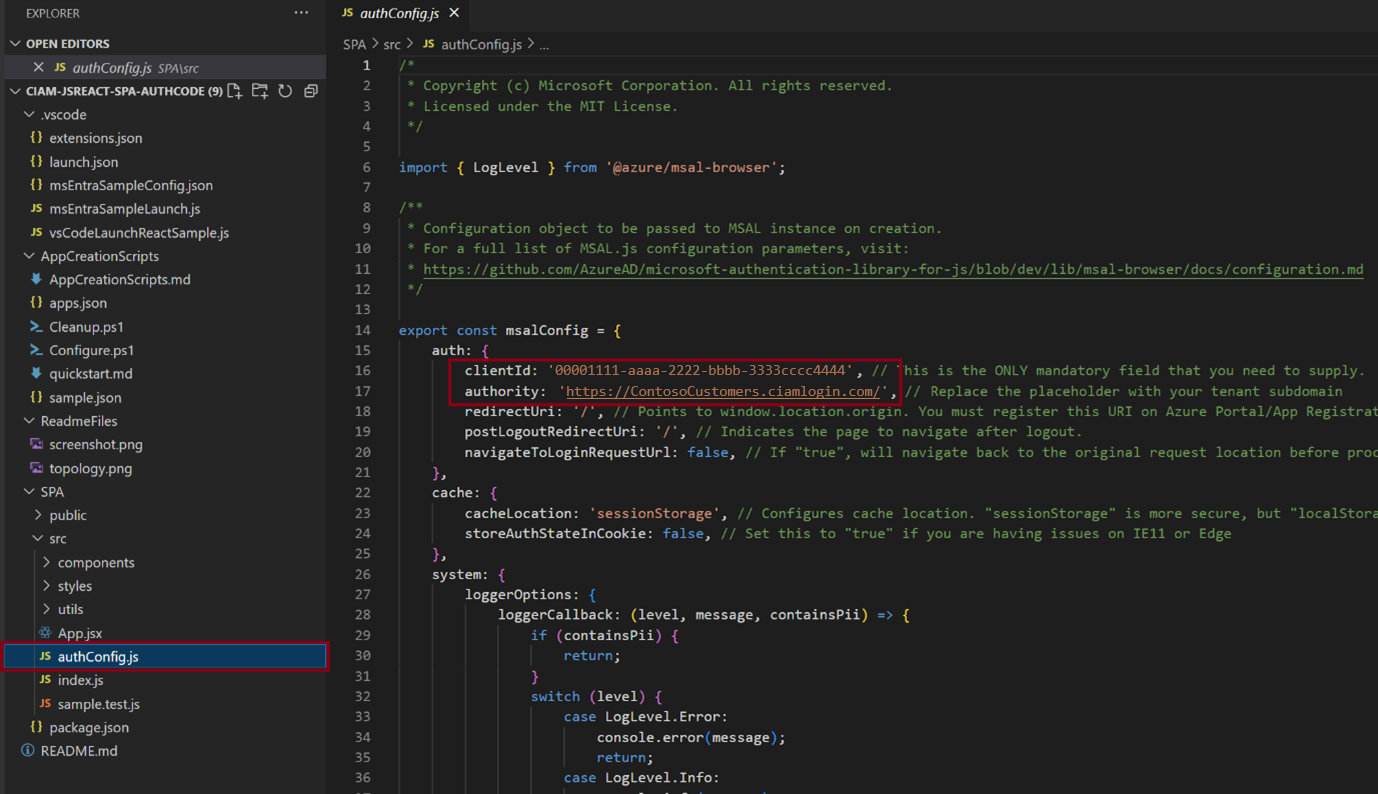
When the extension downloads the application, it automatically updates the Microsoft Authentication Library (MSAL) configuration to connect to your new tenant and to use the experience you set up. No further configuration is needed; you can run the application as soon as the project is built. For example in the authConfig file, the clientId is set to your application ID and the authority is set to the subdomain for your new tenant.
Run the experience
After setup is complete, try out the sign-in experience by entering the local host redirect URI for the application in a browser. The redirect URL is available in the application’s README.md file.
Use the Explorer view
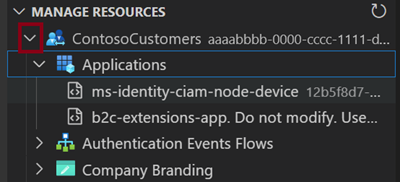
The Explorer view displays the registered applications and authentication user flows in your tenant. You can view configuration information or navigate directly to the Microsoft Entra admin center to further configure or manage the resource. To access the Explorer view, open the Microsoft Entra External ID extension by selecting the icon in the activity bar.
Manage resources
To view project resources, expand the nodes in the left panel under Manage Resources.
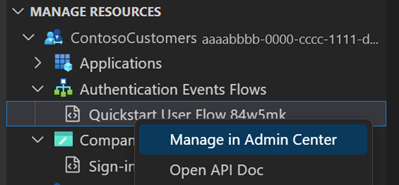
In the Explorer view, you can select a resource and go directly to the Microsoft Entra admin center to manage or configure it. For example, right-click an application and select Open in admin center. You’re prompted to sign in, and then the Microsoft Entra admin center opens directly to the app registration page for that application.
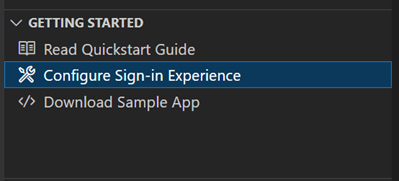
Getting Started actions
In the Getting Started section, you can access documentation for the free trial, or go directly to the sign-in experience configuration or sample app download pages without opening the extension walkthrough.
Next steps
Feedback
Coming soon: Throughout 2024 we will be phasing out GitHub Issues as the feedback mechanism for content and replacing it with a new feedback system. For more information see: https://aka.ms/ContentUserFeedback.
Submit and view feedback for