Note
Access to this page requires authorization. You can try signing in or changing directories.
Access to this page requires authorization. You can try changing directories.
This article explains how to create workspaces in Microsoft Fabric. In workspaces, you create collections of items such as lakehouses, warehouses, and reports. For more background, see the Workspaces article.
To create a workspace:
In the nav pane, select Workspaces.
At the bottom of the Workspace pane that opens, select New workspace.
The Create a workspace pane opens.
Give the workspace a unique name (mandatory).
Provide a description of the workspace (optional).
Assign the workspace to a domain (optional).
If you are a domain contributor for the workspace, you can associate the workspace to a domain, or you can change an existing association. For information about domains, see Domains in Fabric.
When done, either continue to the advanced settings, or select Apply.
You can open and work across multiple workspaces side by side. Items are color-coded and numbered to indicate which workspace they belong to. To learn more see, object explorer and tabbed navigation in Fabric portal.
Advanced settings
Expand Advanced and you see advanced setting options:
Contact list
Contact list is a place where you can put the names of people as contacts for information about the workspace. Accordingly, people in this contact list receive system email notifications for workspace level changes.
By default, the first workspace admin who created the workspace is the contact. You can add other users or groups according to your needs. Enter the name in the input box directly, it helps you to automatically search and match users or groups in your org.

Workspace type
Different workspace types provide different sets of features for your workspace. You can change the workspace type after creating a workspace. You can do so from the workspace settings, but some migration effort is needed.
Note
Currently, if you want to downgrade the workspace type from a Power BI Premium to a Power BI Pro (Shared capacity), you must first remove any non-Power BI Fabric items that the workspace contains. Only after you remove such items will you be allowed to downgrade the capacity. For more information, see Moving data around.
Default storage format
Power BI semantic models can store data in a highly compressed in-memory cache for optimized query performance, enabling fast user interactivity. With Premium capacities, large semantic models beyond the default limit can be enabled with the Large semantic model storage format setting. When enabled, semantic model size is limited by the Premium capacity size or the maximum size set by the administrator. Learn more about large semantic model storage format.
Template apps
Power BI template apps are developed for sharing outside your organization. If you check this option, a special type of workspace (template app workspace) is created. It's not possible to revert it back to a normal workspace after creation.
Dataflow storage (preview)
Data used with Power BI is stored in internal storage provided by Power BI by default. With the integration of dataflows and Azure Data Lake Storage Gen 2 (ADLS Gen2), you can store your dataflows in your organization's Azure Data Lake Storage Gen2 account. Learn more about dataflows in Azure Data Lake Storage Gen2 accounts.
Reassign a workspace to a different capacity
When you create a workspace, it's assigned to a capacity. The capacity that new workspaces are assigned to by default is determined by the capacity type and/or by the configuration of Fabric or capacity administrators. After a workspace is created, you can reassign it to another available capacity if you have the workspace admin role, the capacity admin role, or the capacity contributor role.
You can reassign a workspace to a different capacity via workspace types in the workspace settings.
Open the workspace settings and choose Workspace type. Information about the current workspace type is displayed.
Select Edit. The list of available workspace types appears.
Select the desired workspace type and specify the capacity the workspace will be hosted on.
Note
- You can choose specific capacities only when you select one of the Fabric workspace types. Fabric automatically reserves shared capacity for Power BI workspace types.
- The types of items contained in the workspace can affect the ability to change workspace types and/or move the workspace to a capacity in a different region. See Moving data around for detail.
Give users access to your workspace
Now that you've created the workspace, you'll want to add other users to roles in the workspace, so you can collaborate with them. See these articles for more information:
Pin workspaces
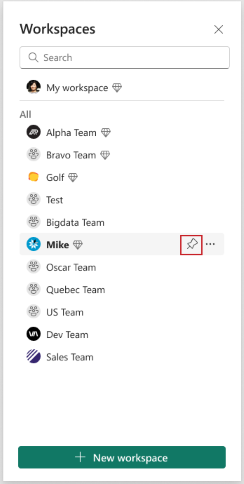
Quickly access your favorite workspaces by pinning them to the top of the workspace flyout list.
Open the workspace flyout from the nav pane and hover over the workspace you want to pin. Select the Pin to top icon.
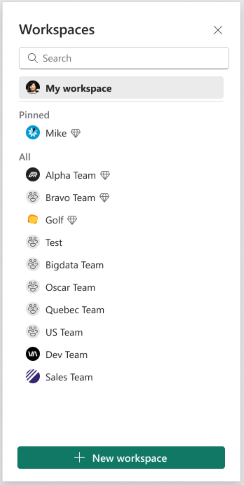
The workspace is added in the Pinned list.
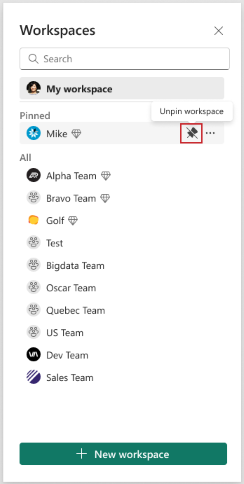
To unpin a workspace, select the unpin button. The workspace is unpinned.
Related content
- Read about workspaces