Note
Access to this page requires authorization. You can try signing in or changing directories.
Access to this page requires authorization. You can try changing directories.
This tutorial is a quick guide to creating a lakehouse and getting started with the basic methods of interacting with it. After completing this tutorial, you'll have a lakehouse provisioned inside of Microsoft Fabric working on top of OneLake.
Create a lakehouse
Sign in to Microsoft Fabric.
Select Workspaces from the left-hand menu.
To open your workspace, enter its name in the search textbox located at the top and select it from the search results.
In the upper left corner of the workspace home page, select New item and then choose Lakehouse from the Store data section.
Give your lakehouse a name and select Create.
A new lakehouse is created and, if this lakehouse is your first OneLake item, OneLake is provisioned behind the scenes.
At this point, you have a lakehouse running on top of OneLake. Next, add some data and start organizing your lake.
Load data into a lakehouse
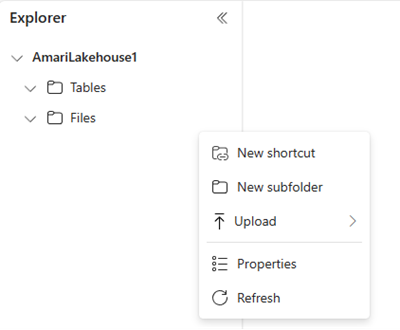
In the file browser on the left, select more options (...) next to Files and then select New subfolder. Name your subfolder and select Create.

You can repeat this step to add more subfolders as needed.
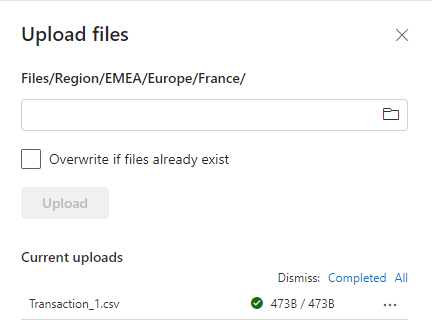
Select more options (...) next to your folder, and then select Upload > Upload files from the menu.
Choose the file you want from your local machine and then select Upload.

You now have data in OneLake. To add data in bulk or schedule data loads into OneLake, use the Get data button to create pipelines. Find more details about options for getting data in Microsoft Fabric decision guide: copy activity, dataflow, or Spark.
Select more options (...) for the file you uploaded and select Properties from the menu.
The Properties screen shows the various details for the file, including the URL and Azure Blob File System (ABFS) path for use with Notebooks. You can copy the ABFS into a Fabric Notebook to query the data using Apache Spark. To learn more about notebooks in Fabric, see Explore the data in your lakehouse with a notebook.
Now you have your first lakehouse with data stored in OneLake.
Related content
Learn how to connect to existing data sources with OneLake shortcuts.
