Software Center user guide
Applies to: Configuration Manager (current branch)
Your organization's IT admin uses Software Center to install applications, software updates, and upgrade Windows. This user guide explains the functionality of Software Center for users of the computer.
Software Center is installed automatically on Windows devices that your IT organization manages. To get started, see How to open Software Center.
General notes about Software Center functionality:
This article describes the latest features of Software Center. If your organization is using an older but still supported version of Software Center, not all features are available. For more information, contact your IT admin.
Your IT admin may disable some aspects of Software Center. Your specific experience may vary.
If multiple users are using a device at the same time, the user with the lowest session ID will be the only one to see all available deployments in Software Center. For example, multiple users on a remote desktop environment. Users with higher session IDs may not see some of the deployments in Software Center. For example, the users with higher session IDs may see deployed Applications, but not deployed Packages or Task Sequences. Meanwhile the user with the lowest session ID will see all deployed Applications, Packages, and Task Sequences. The Users tab of Windows Task Manager shows all users and their session IDs.
Your IT admin may change the color of Software Center, and add your organization's logo.
How to open Software Center
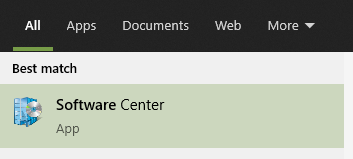
Software Center is installed automatically on Windows devices that your IT organization manages. For the simplest method to start Software Center, go to Start and type Software Center. You may not need to type the entire string for Windows to find the best match.
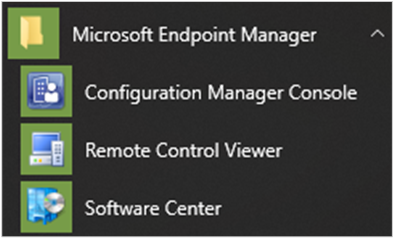
To navigate the Start menu, look under the Microsoft Endpoint Manager group for the Software Center icon.
Note
The above Start menu path is for versions from November 2019 (version 1910) or later. In earlier versions, the folder name is Microsoft System Center.
If you can't find Software Center in the Start menu, contact your IT administrator.
Applications

Select the Applications tab (1) to find and install applications that your IT admin deploys to you or this computer.
All (2): Shows all available applications that you can install.
Required (3): Your IT admin enforces these applications. If you uninstall one of these applications, Software Center reinstalls it.
Filters (4): Your IT admin may create categories of applications. If available, select the drop-down list to filter the view to only those applications in a specific category. Select All to show all applications.
Sort by (5): Rearrange the list of applications. By default this list sorts by Most recent. Recently available applications display with a New banner that's visible for seven days.
Search (6): Still can't find what you're looking for? Enter keywords in the Search box to find it!
Switch the view (7): Select the icons to switch the view between list view and tile view. By default the applications list shows as graphic tiles.
| Icon | View | Description |
|---|---|---|

|
Multi-select mode | Install more than one application at a time. For more information, see Install multiple applications. |

|
List view | This view displays the application icon, name, publisher, version, and status. |

|
Tile view | Your IT admin can customize the icons. Below each tile displays the application name, publisher, and version. |
Install an application
Select an application from the list to see more information about it. Select Install to install it. If an app is already installed, you may have the option to Uninstall.
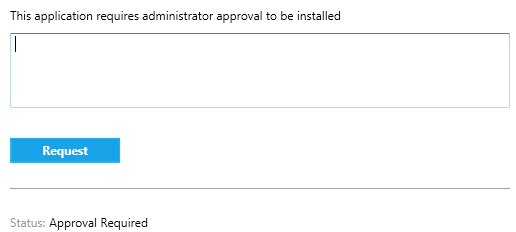
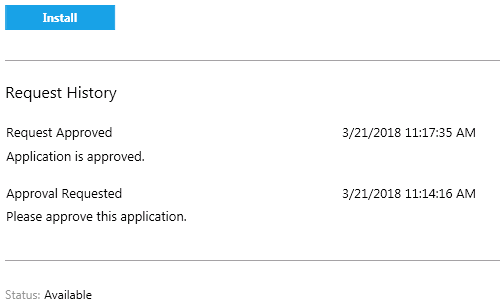
Some apps may require approval before they install.
When you try to install it, you can enter a comment and then Request the app.
Software Center shows the request history, and you can cancel the request.
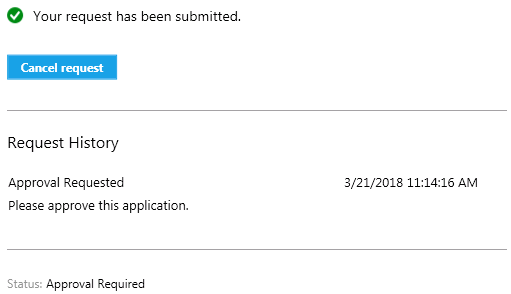
When an administrator approves your request, you can install the app. If you wait, Software Center automatically installs the app during your non-business hours.
Install multiple applications
Install more than one application at a time instead of waiting for one to finish before starting the next. The selected apps need to qualify:
- The app is visible to you
- The app isn't already downloading or installed
- Your IT admin doesn't require approval to install the app
To install more than one application at a time:
Select the multi-select icon in the upper right corner:
Select two or more apps to install. Select the checkbox to the left of each app in the list.
Select the Install Selected button to start.
The apps install as normal, only now in succession.
Share an application
To share a link to a specific app, after you select the app, select the Share icon in the upper right corner: ![]()
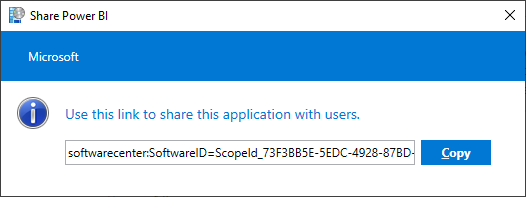
Copy the string, and paste elsewhere, such as an email message. For example, softwarecenter:SoftwareID=ScopeId_73F3BB5E-5EDC-4928-87BD-4E75EB4BBC34/Application_b9e438aa-f5b5-432c-9b4f-6ebeeb132a5a. Anyone else in your organization with Software Center can use the link to open the same application.
Featured Apps
Featured tab in Software Center displays featured apps. With this tab, IT admin can mark apps as "featured" and encourage end users to use these apps. Currently, this feature is available only for "User Available" apps. Also, admins can make the Featured tab of Software Center as the default tab from Client Settings.
If an app is marked as Featured and it's deployed to a User Collection as an Available app, it will show under the Featured pivot in Software Center.

Updates

Select the Updates tab (1) to view and install software updates that your IT admin deploys to this computer.
All (2): Shows all updates that you can install
Required (3): Your IT admin enforces these updates.
Sort by (4): Rearrange the list of updates. By default this list sorts by Application name: A to Z.
Search (5): Still can't find what you're looking for? Enter keywords in the Search box to find it!
To install updates, select Install All (6).
To only install specific updates, select the icon to enter multi-select mode (7):
Check the updates to install, and then select Install Selected.
Operating Systems

Select the Operating Systems tab (1) to view and install versions of Windows that your IT admin deploys to this computer.
All (2): Shows all Windows versions that you can install
Required (3): Your IT admin enforces these upgrades.
Sort by (4): Rearrange the list of updates. By default this list sorts by Application name: A to Z.
Search (5): Still can't find what you're looking for? Enter keywords in the Search box to find it!
Installation status
Select the Installation status tab to view the status of applications. You may see the following states:
Installed: Software Center already installed this application on this computer.
Downloading: Software Center is downloading the software to install on this computer.
Failed: Software Center wasn't able to install the software.
Scheduled to install after: Shows the date and time of the device's next maintenance window to install upcoming software. Maintenance windows are defined by your IT admin.
The status can be seen in the All and the Upcoming tab.
You can install before the maintenance window time by selecting the Install Now button.
Device compliance
Select the Device compliance tab to view the compliance status of this computer.
Select Check compliance to evaluate this device's settings against the security policies defined by your IT admin.
Options
Select the Options tab to view additional settings for this computer.
Work information
Indicate the hours that you typically work. Your IT admin may schedule software installations outside your business hours. Allow at least four hours each day for system maintenance tasks. Your IT admin can still install critical applications and software updates during business hours.
Select the earliest and latest hours that you use this computer. By default these values are from 5:00 AM through 10:00 PM.
Select the days of the week that you typically use this computer. By default Software Center only selects the weekdays.
Specify whether you regularly use this computer to do your work. Your administrator might automatically install applications or make additional applications available to primary computers. If the computer you're using is a primary computer, select I regularly use this computer to do my work.
Power management
Your IT admin may set power management policies. These policies help your organization conserve electricity when this computer isn't in use.
To make this computer exempt from these policies, select Do not apply power settings from my IT department to this computer. By default this setting is disabled and the computer applies power settings.
Computer maintenance
Specify how Software Center applies changes to software before the deadline.
Automatically install or uninstall required software and restart the computer only outside of the specified business hours: This setting is disabled by default.
Suspend Software Center activities when my computer is in presentation mode: This setting is enabled by default.
Note
These settings are designed to be managed by end users and do not impact deployment deadlines.
When instructed by your IT admin, select Sync Policy. This computer checks with the servers for anything new, such as applications, software updates, or operating systems.
Remote Control
Specify remote access and remote control settings for your computer.
Use remote access settings from your IT department: By default, your IT department defines the settings to remotely assist you. The other settings in this section show the state of the settings that your IT department defines. To change any settings, first disable this option.
Level of remote access allowed
- Do not allow remote access: IT administrators can't remotely access this computer to assist you.
- View only: An IT administrator can only remotely view your screen.
- Full: An IT administrator can remotely control this computer. This setting is the default option.
Allow remote control of this computer by administrators when I am away. This setting is Yes by default.
When an administrator tries to control this computer remotely
- Ask for permission each time: This setting is the default option.
- Do not ask for permission
Show the following during remote control: These visual notifications are both enabled by default to let you know that an administrator is remotely accessing the device.
- Status icon in the notification area
- A session connection bar on the desktop
Play sound: This audible notification lets you know that an administrator is remotely accessing the device.
- When session begins and ends: This setting is the default option.
- Repeatedly during session
- Never
Custom tabs
Your IT admin can remove the default tabs or add additional tabs to Software Center. Custom tabs are named by your admin, and they open a web site that the admin specifies. For instance, you might have a tab called "Help Desk" that opens your IT organization's help desk web site.
More information for IT administrators
More information is available for IT administrators on how to plan for and configure Software Center in the following articles:
Feedback
Coming soon: Throughout 2024 we will be phasing out GitHub Issues as the feedback mechanism for content and replacing it with a new feedback system. For more information see: https://aka.ms/ContentUserFeedback.
Submit and view feedback for