Record and replay user flows and measure performance
Use the Recorder tool to record a series of steps in the browser window or tab where DevTools is opened, and then replay the steps automatically, while optionally also measuring performance.
When to use the Recorder tool
Use the Recorder tool when you want to speed up repetitive tasks by automatically replaying a series of user interactions in the browser.
The Recorder tool records user interactions, such as mouse clicks, keyboard input, and page navigation events, and lets you replay the interactions automatically. You can also use the Recorder tool to measure the runtime performance while replaying the recorded user interactions. The Recorder tool lets you record as many user flows as you want, and replay them as many times as you want.
For the rest of this article, we'll use the Recorder tool to automate adding tasks to the demo TODO app.
Open the Recorder tool
Open the TODO app in a new tab or window.
To open DevTools, right-click the webpage, and then select Inspect. Or, press Ctrl+Shift+I (Windows, Linux) or Command+Option+I (macOS). DevTools opens.
In DevTools, on the Activity Bar, select the Recorder tab. If that tab isn't visible, click the More tools (
 ) button, and then select Recorder. The Recorder tool opens:
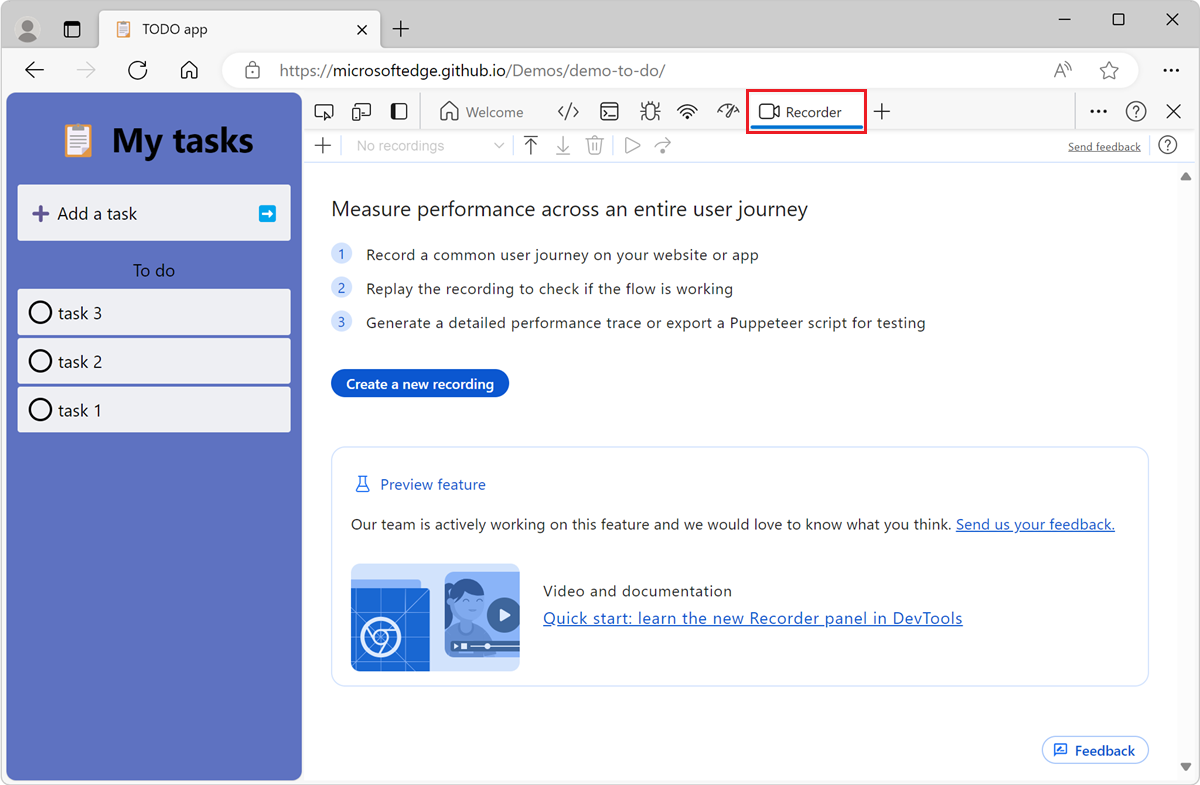
Record a user flow
To start recording a new user flow:
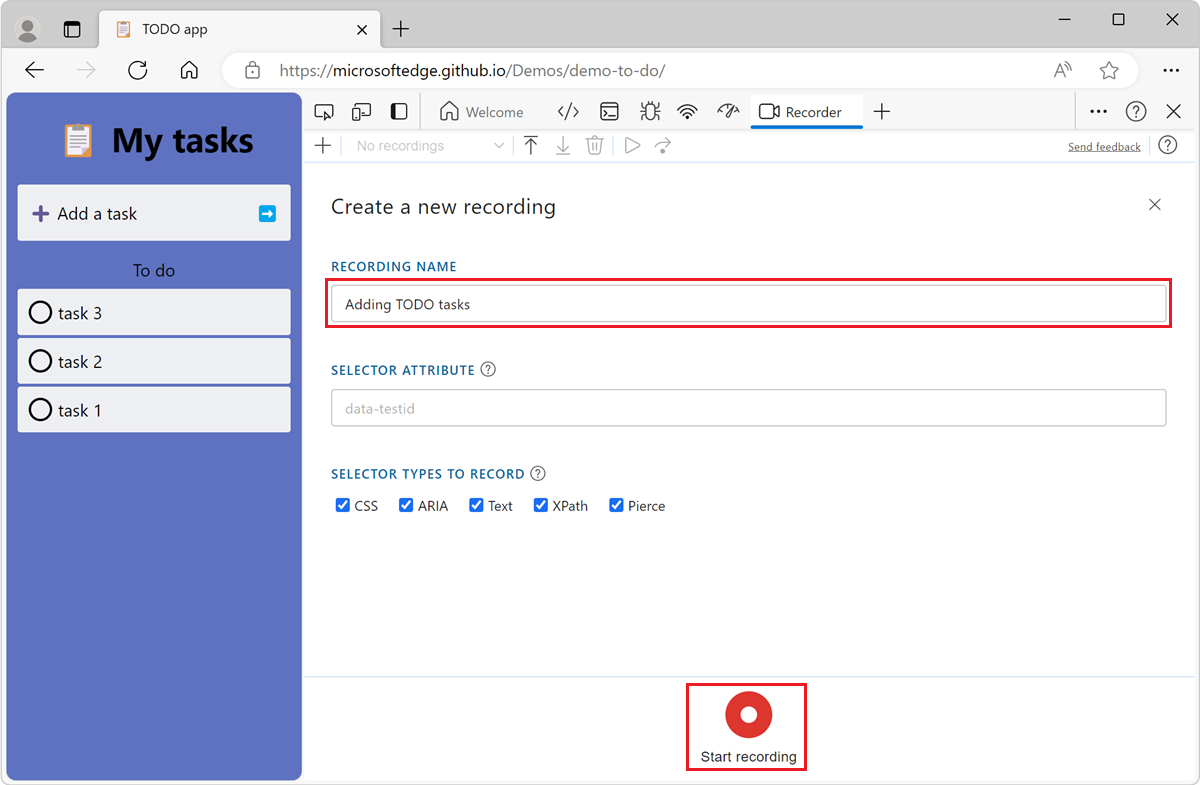
Click Create a new recording.
Under Recording name, enter a name for the recording, such as "Adding TODO tasks".
Click Start recording at the bottom of the Recorder tool:
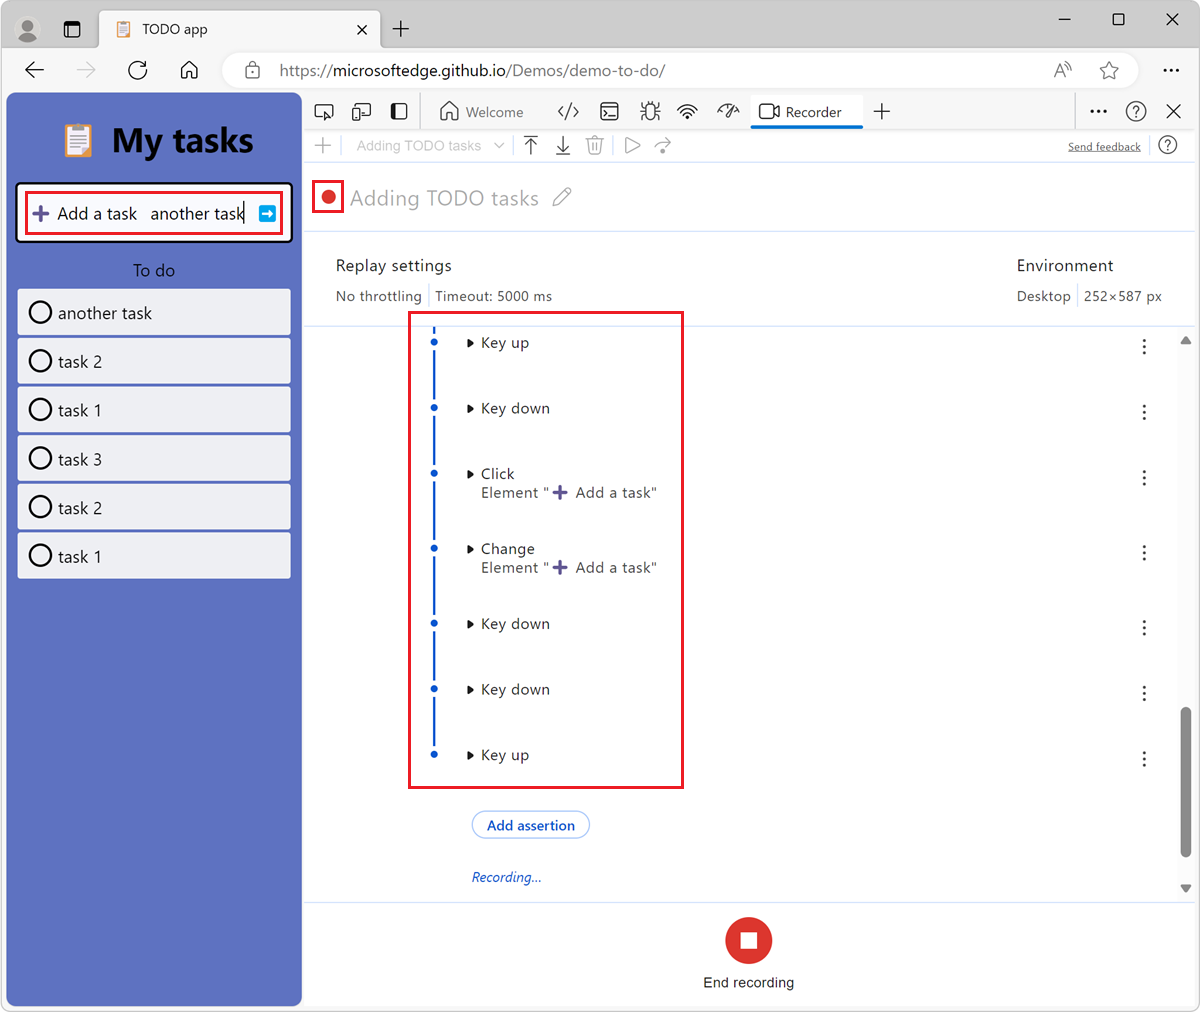
In the rendered webpage, interact with the page. For example, enter "task 1" in the Add a task input box, and then press Enter. Repeat these steps multiple times.
A red circle appears next to the recording name, indicating that the recording is in progress. The Recorder tool records your interactions and displays them as a list of steps:
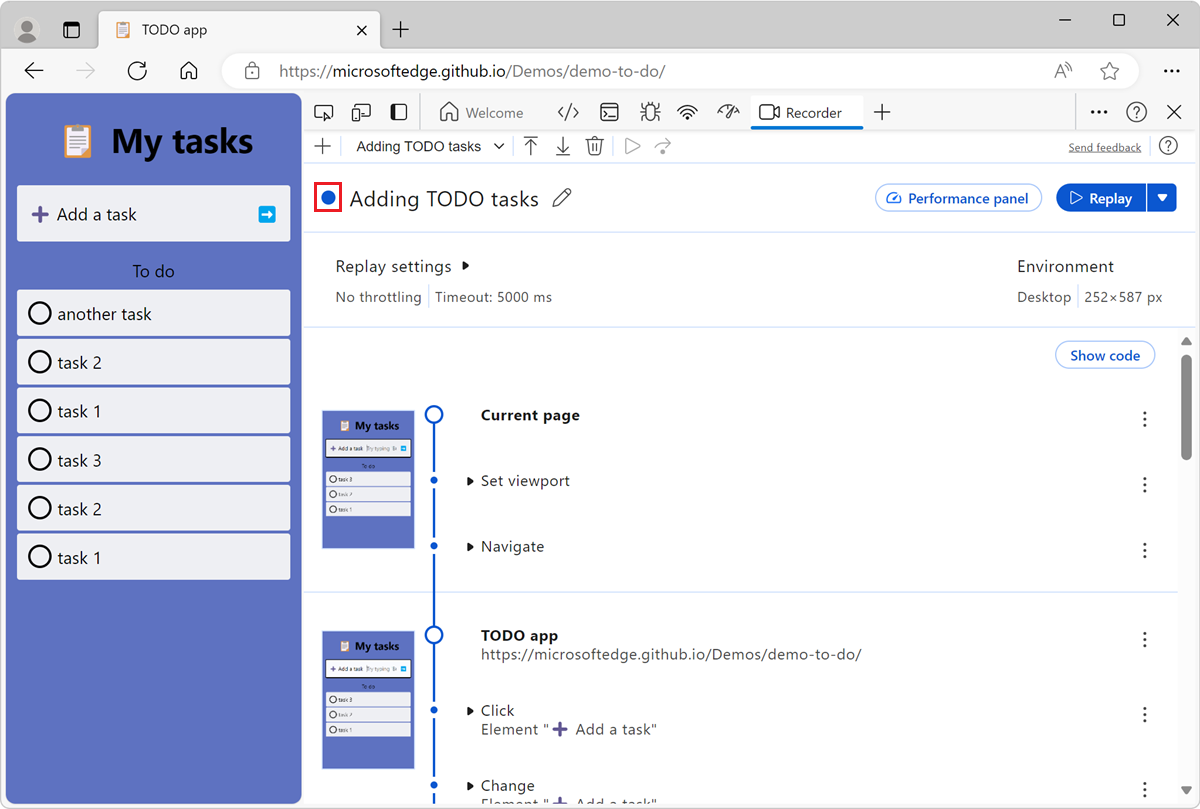
To stop the recording, at the bottom of the list of recorded interactions, click the End recording button.
The recording stops, and the circle next to the recording name turns blue, indicating that the recording is complete:
Record other user flows
To record a new user flow, after you've stopped the recording of the previous user flow:
Click the Create a new recording (
 ) button in the top-left corner of the Recorder tool:
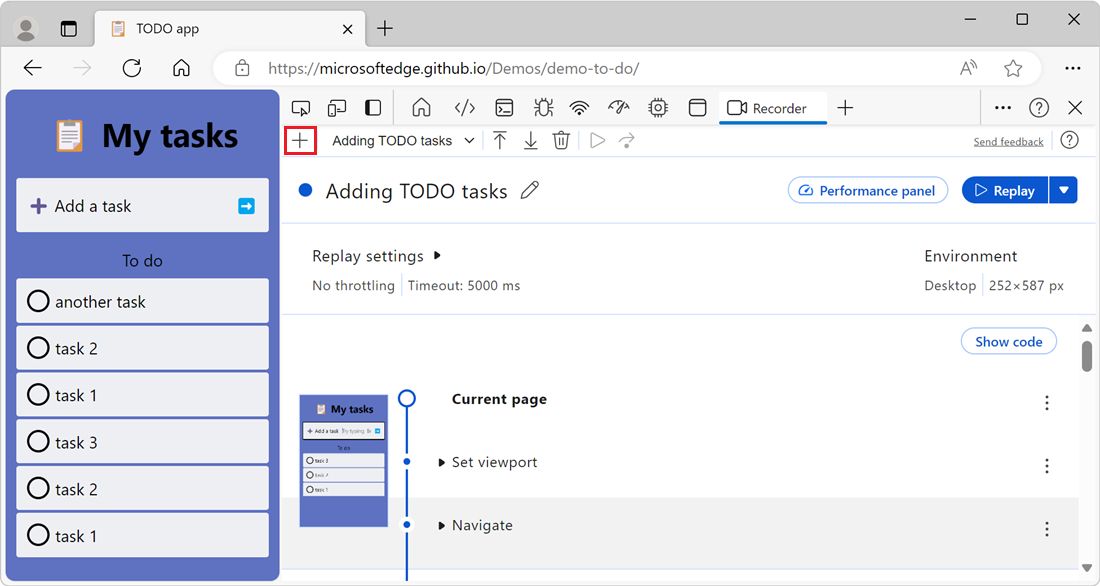
Repeat the steps from Record a user flow, above.
Replay a user flow
You can replay user flows either from the list of recorded user flows, or when viewing the details of a given user flow.
To view the list of recorded user flows, click the dropdown menu that's in the Recorder tool toolbar, at the top, and then select 2 recording(s). The label might show a different number of recordings, depending on how many recordings you've made.
To view the details of a given user flow, click the dropdown list that's in the Recorder tool toolbar, at the top, and then click the name of a user flow.
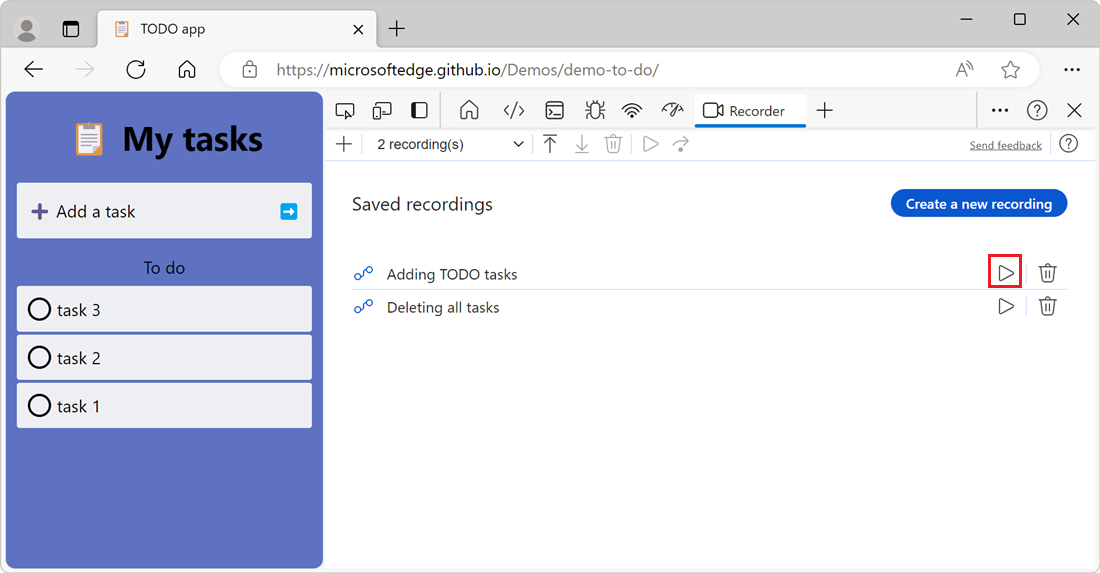
Replay a user flow from the list of recordings
Click the Play recording button next to a recording:
Wait while the Recorder tool replays the previously recorded user interactions. An animation of the steps that are being replayed appears in the Recorder tool:
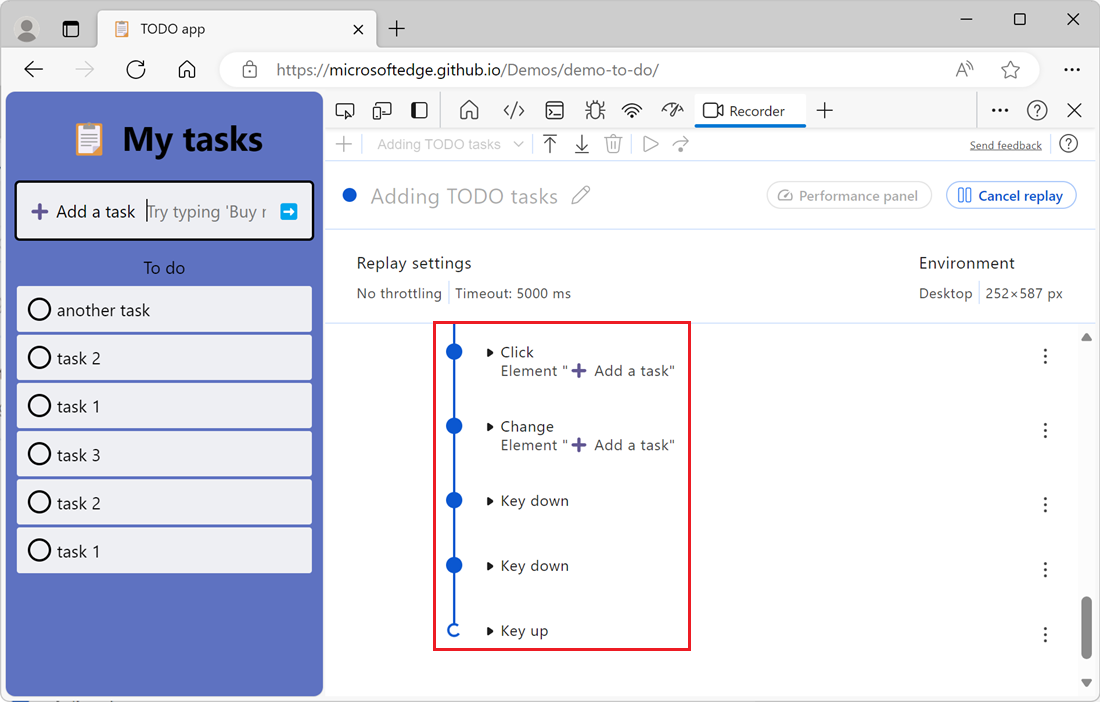
When the replay is complete, the animation stops, and the Recorder tool displays the recording's steps.
Replay a user flow from a recording
Click the Replay button in the top-right corner of the Recorder tool:

Wait while the Recorder tool replays the previously recorded user interactions. An animation of the steps that are being replayed appears in the Recorder tool:
When the replay is complete, the animation stops, and the Recorder tool displays the recording's steps.
Slowly replay a user flow to investigate issues
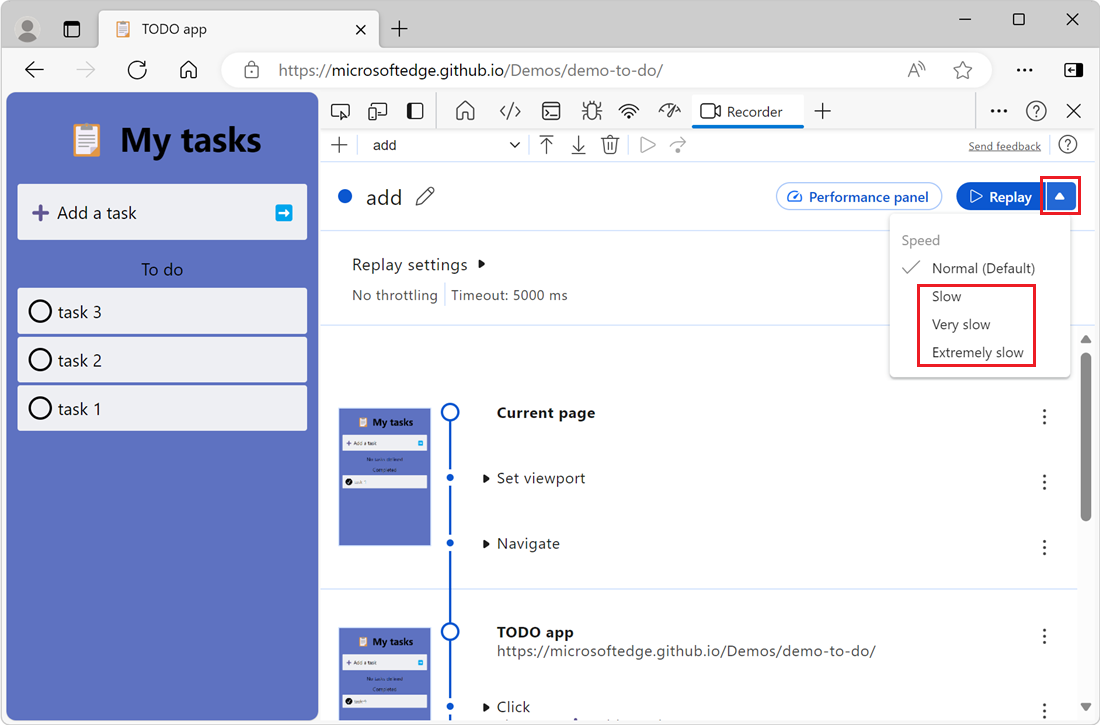
To see what's happening in the rendered page while the user interactions are being replayed, slow down the replay speed. By default, the Recorder tool replays user flows as fast as it can.
To slow down the replay speed:
Click the dropdown arrow next to Replay in the top-right corner of the Recorder tool, and then select a speed from the dropdown menu, such as Slow, Very slow, or Extremely slow:
Pause while replaying a user flow, by using breakpoints
To inspect the rendered webpage at a specific point of the user flow, pause the replay by using a breakpoint.
To add a breakpoint to a user flow:
Next to the flow step at which to pause, click the Open step actions (
 ) button , and then select Add breakpoint:
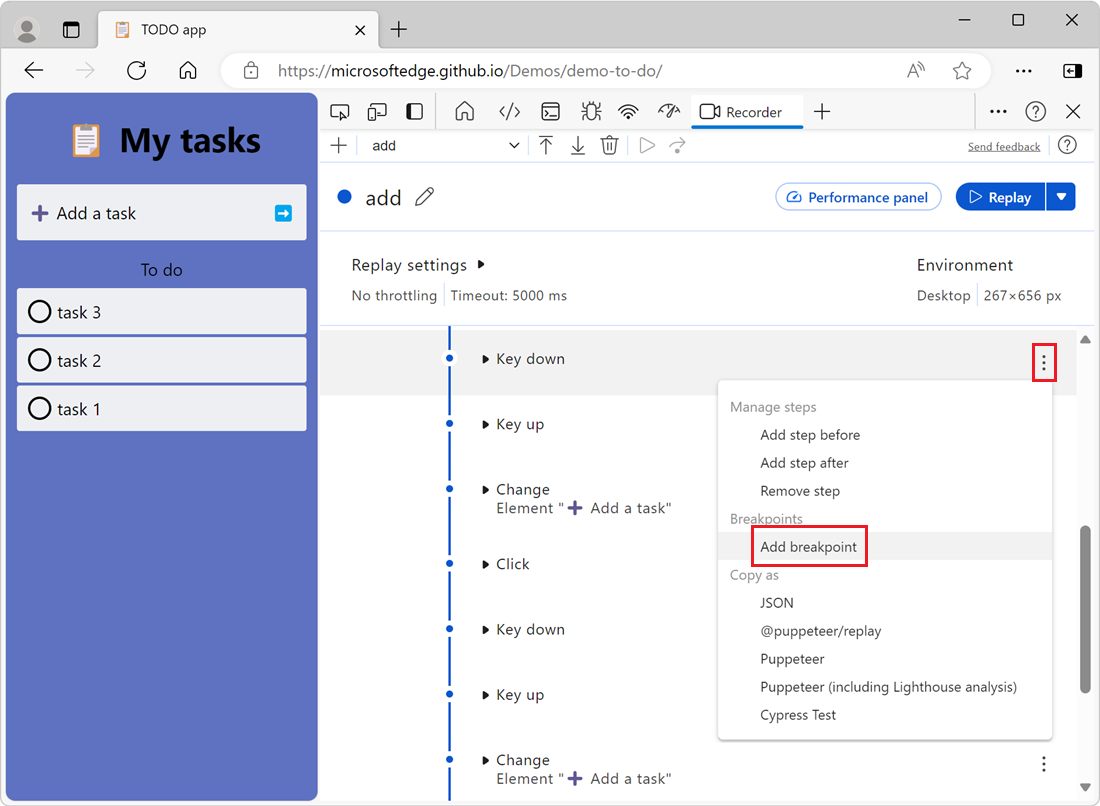
To start the user flow, click Replay in the top-right corner of the Recorder tool.
The replay pauses when it reaches the step that has a breakpoint. The Continue and Execute one step buttons also become available in the toolbar:

Click the Execute one step button to execute the next step and pause again, or click the Continue button to continue the replay until the next breakpoint (or the end of the user flow) is reached.
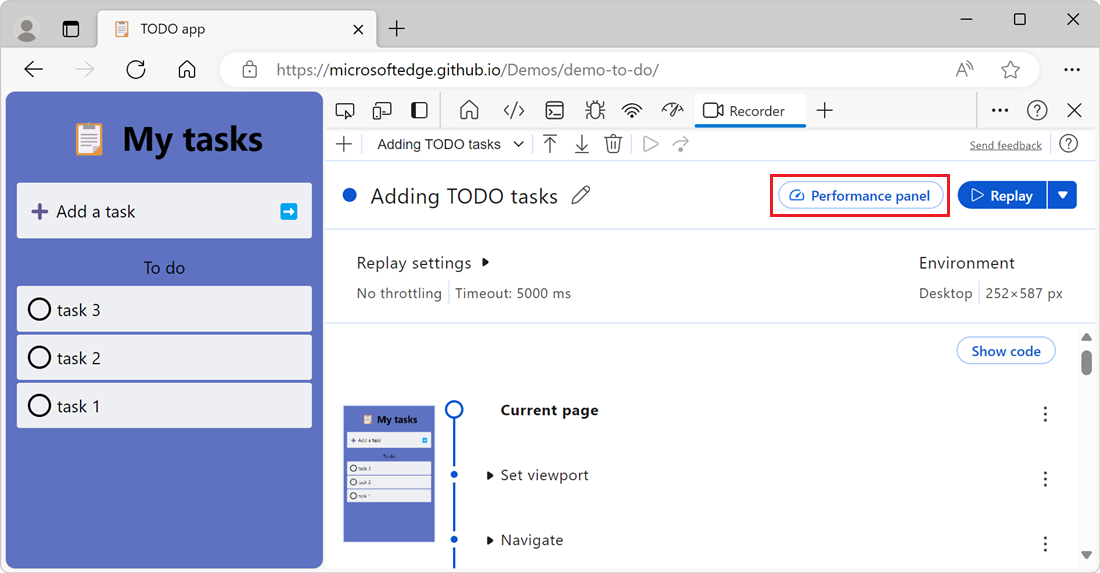
Measure performance
To measure how fast a website runs while replaying a series of user interactions, use the Recorder tool. By recording a user flow once, you can replay the recording many times, while working on improving the runtime performance of the website.
To record a new user flow, follow the steps from Record a user flow.
To replay the user flow while measuring performance, click Performance panel in the top-right corner of the Recorder tool:
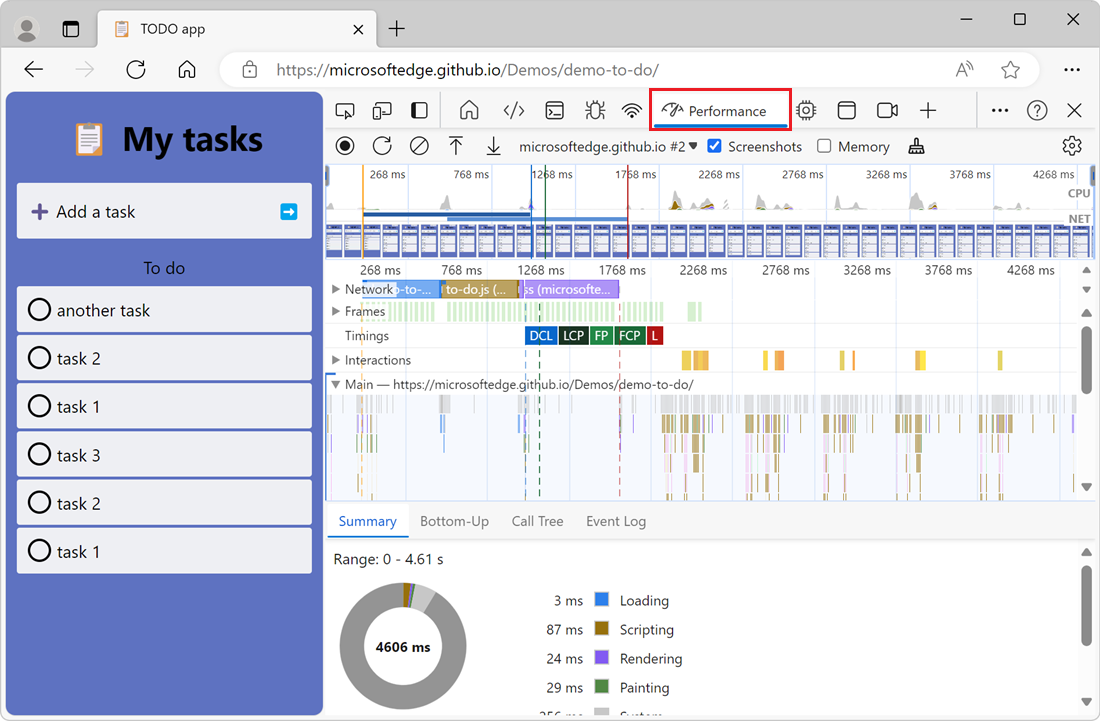
Wait while the Recorder tool replays the previously recorded user interactions.
The Performance tool opens, and displays a recording of the performance of the website while the user interactions were being replayed:
Edit the steps of a user flow
After you've recorded a user flow, you can edit the steps of the user flow. For example, you can add new steps, remove existing steps, or edit the details of a step.
Add a new step
To add a new step to an existing user flow:
Click the Open step actions (
) button next to the step before or after which you want to add a new step, and then select Add step before or Add step after: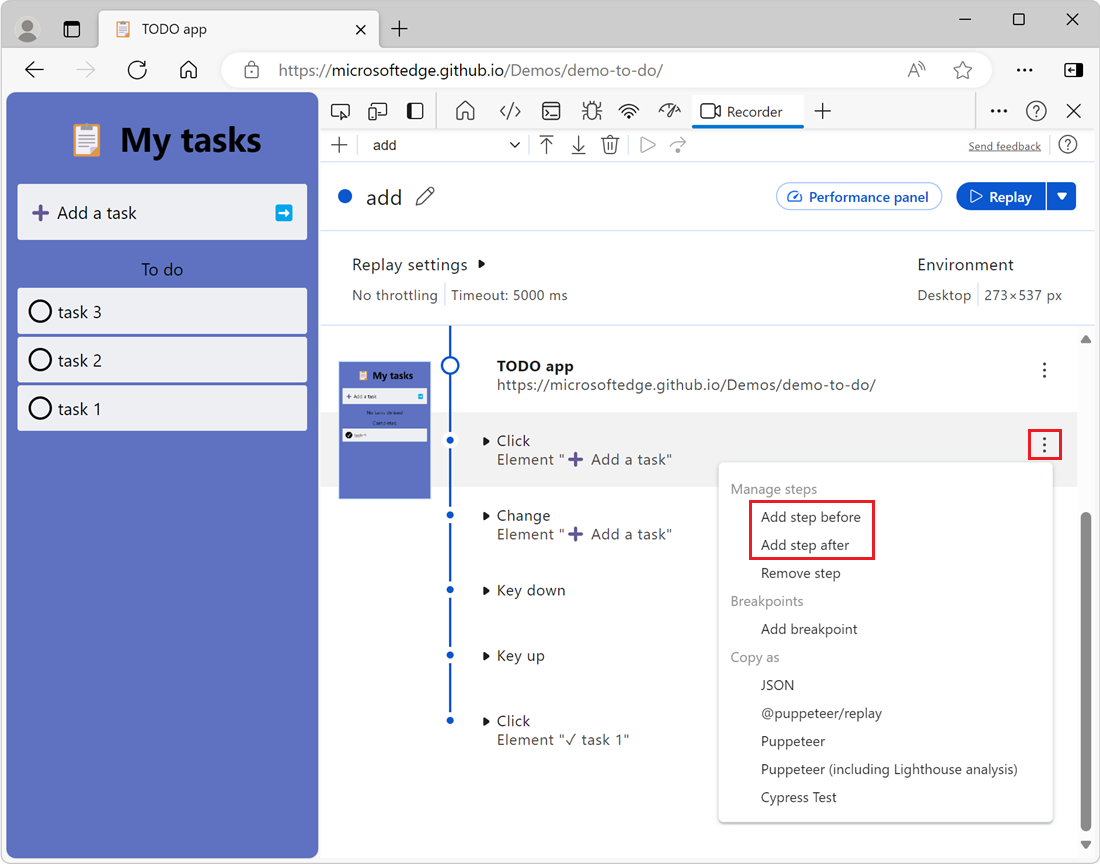
Follow the instructions in Edit a step below, to edit the details of the new step that you added. The new step is temporarily named Wait for element.
Edit a step
To edit the details of an existing step:
To open the details section of the step you want to edit, click the triangle (
 ) button next to the step. The details section of the step opens:
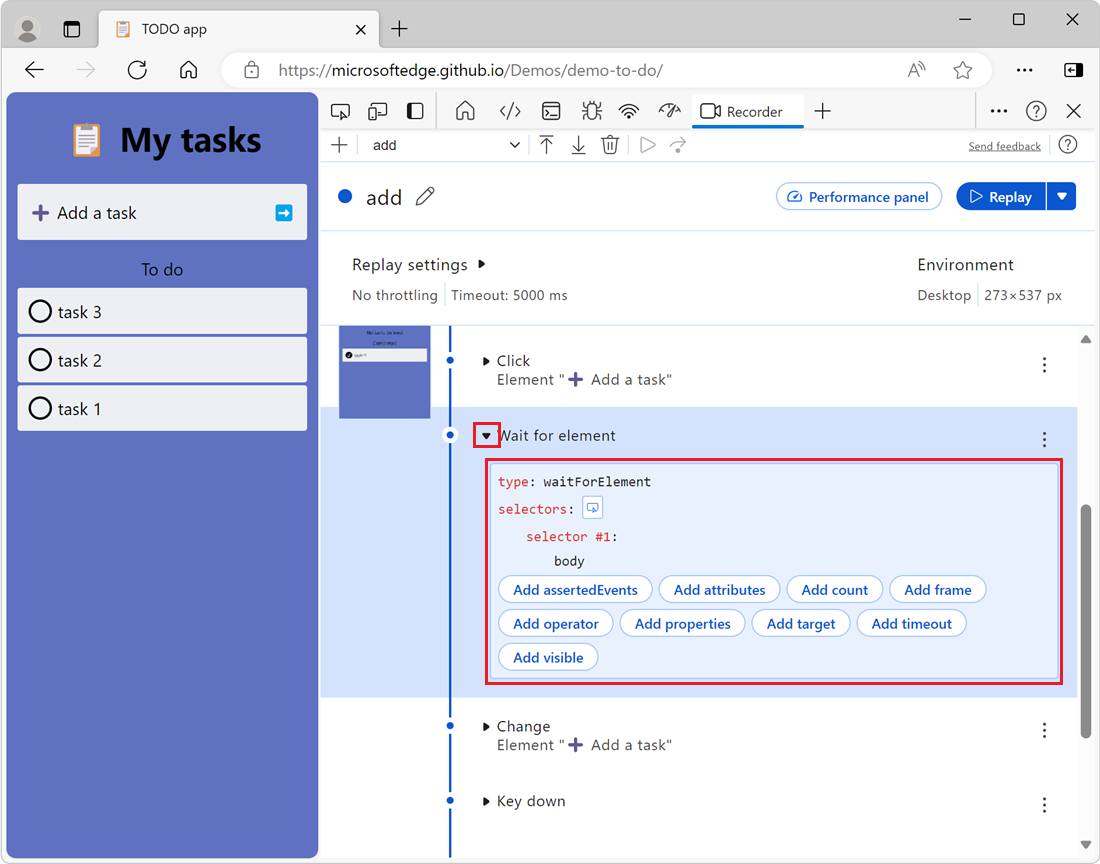
Edit the details of the step, such as the type of step, the selectors of the DOM element the step applies to, or the properties of the step. The various types of steps and their properties are listed in the section below. Your changes are saved automatically.
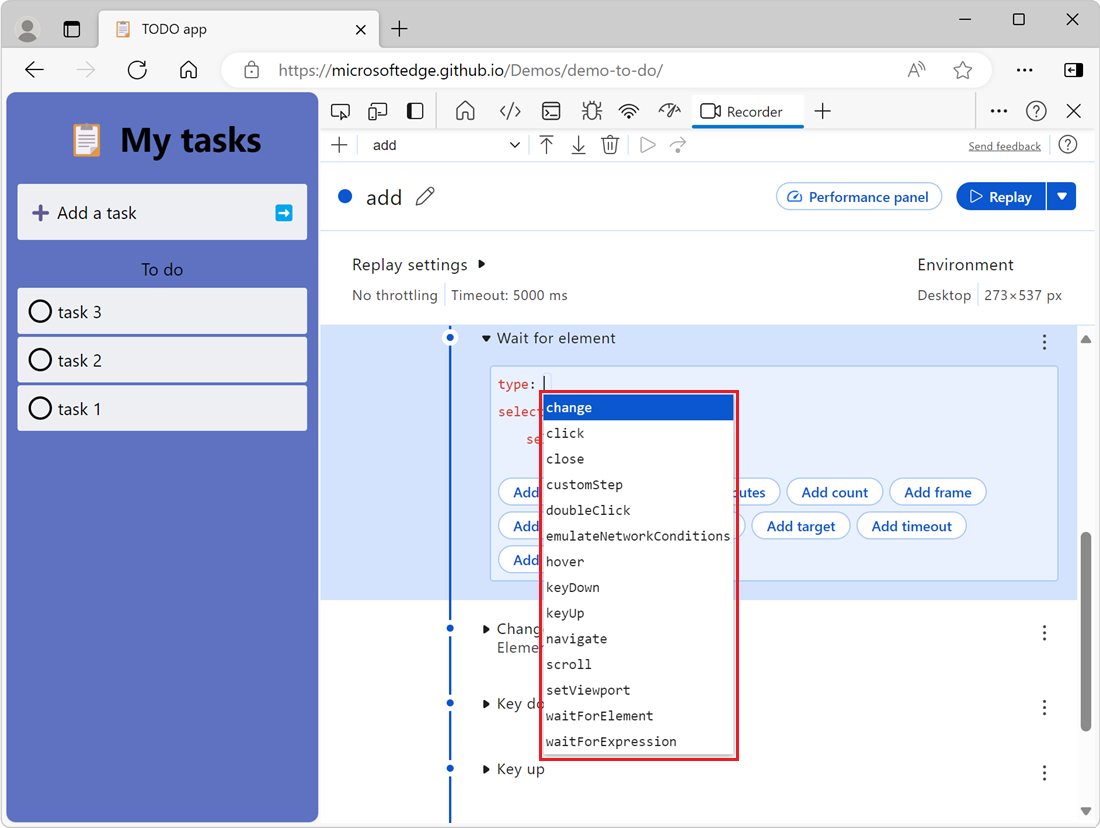
Change the type of step
To change the type of step when editing the details of a step:
Click the input box next to type. For example, if the step you're editing has the type waitForElement, click the input box that contains the value waitForElement.
Delete the contents of the input box, and then select the new type of step you want to use from the dropdown menu that appears:
You can use the following types of steps when editing a step in a user flow. Each step type has a list of properties that apply to the step.
| Step type | Description | Properties |
|---|---|---|
change |
Change the value of a form input field. | selectors: Ways to find the element that this step applies to. value: The value to set the form input field to. |
click |
Click an element. | selectors: Ways to find the element this step applies to. offsetX/offsetY: How far from the top left corner of the element to click. |
close |
Close the browser window. | None. |
doubleClick |
Double-click an element. | selectors: Ways to find the element that this step applies to. offsetX/offsetY: How far from the top left corner of the element to double-click. |
emulateNetworkConditions |
Emulate different network conditions. | download/upload: The download and upload speeds, in bytes per second. latency: The minimum latency from a request being sent to the response being received, in milliseconds. |
hover |
Emulate the pointer hovering over an element. | selectors: Ways to find the element that this step applies to. |
keyDown |
Press a key down. | selectors: Ways to find the element that this step applies to. key: Which key to press. |
keyUp |
Release a pressed key. | selectors: Ways to find the element that this step applies to. key: Which key to release. |
navigate |
Navigate to a different webpage. | url: The URL of the page to navigate to. |
scroll |
Scroll to a position in the webpage. | x/y: The optional horizontal and vertical coordinates of the position to scroll to in the page. |
setViewport |
Change the viewport size, device pixel ratio, and capabilities. | width/height: The size of the viewport. deviceScaleFactor: The device pixel ratio. isMobile: Whether the viewport is a mobile device viewport. hasTouch: Whether the viewport supports touch events. isLandscape: Whether the viewport is in a landscape orientation. |
waitForElement |
Wait for an element, or for multiple elements, to be present in the webpage. | selectors: Ways to find the element that this step applies to. |
waitForExpression |
Wait until a JavaScript expression evaluates to true. |
expression: The JavaScript expression to evaluate. |
Edit the selectors of a step
Many step types have a selectors property, which specifies the DOM element that the step applies to. For example, a click step has a selectors property to define which element in the page is clicked when that step of the user flow runs.
The selectors property is a list of one or more selectors. Each selector in the list can be a different way to find the element in the page. The Recorder tool tries each selector in the list, in order, until it finds an element in the page that matches the selector.
A selector can be any of the following types:
- A CSS selector, such as
#my-element-with-idor.my-class. - A XPath selector, prefixed with
xpath/, such asxpath//html/body/form/div/label. - The text content of the element, prefixed with
text/, such astext/Add a task.
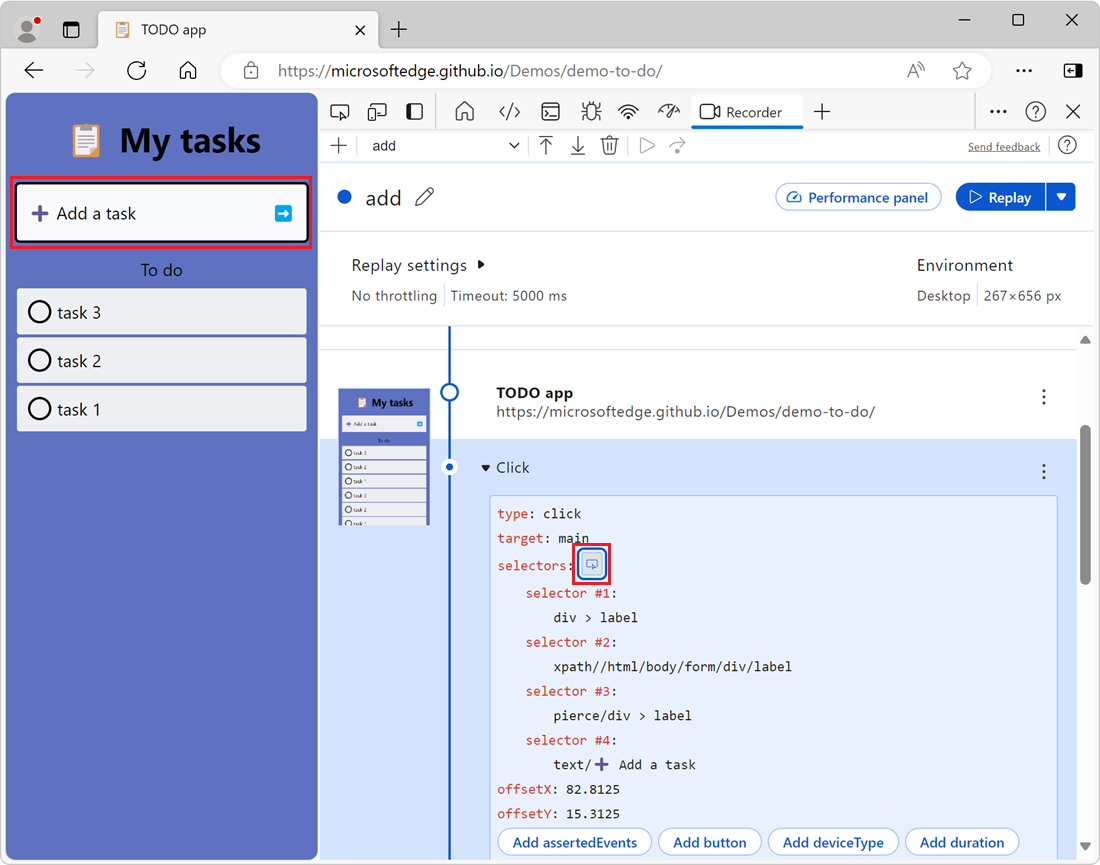
You can edit the selectors of a step by either approach:
Selecting an element in the rendered webpage.
Manually add, remove, or modify a selector.
To edit the selectors by selecting an element in the rendered webpage, click Select an element in the page to update selectors, and then click the element in the rendered webpage that you want to select. The Recorder tool updates the list of selectors to match the selected element:
You can manually add, remove, or modify a selector:
To add or remove a selector, under Selectors, hover over a selector, and then click Add a selector or Remove a selector:
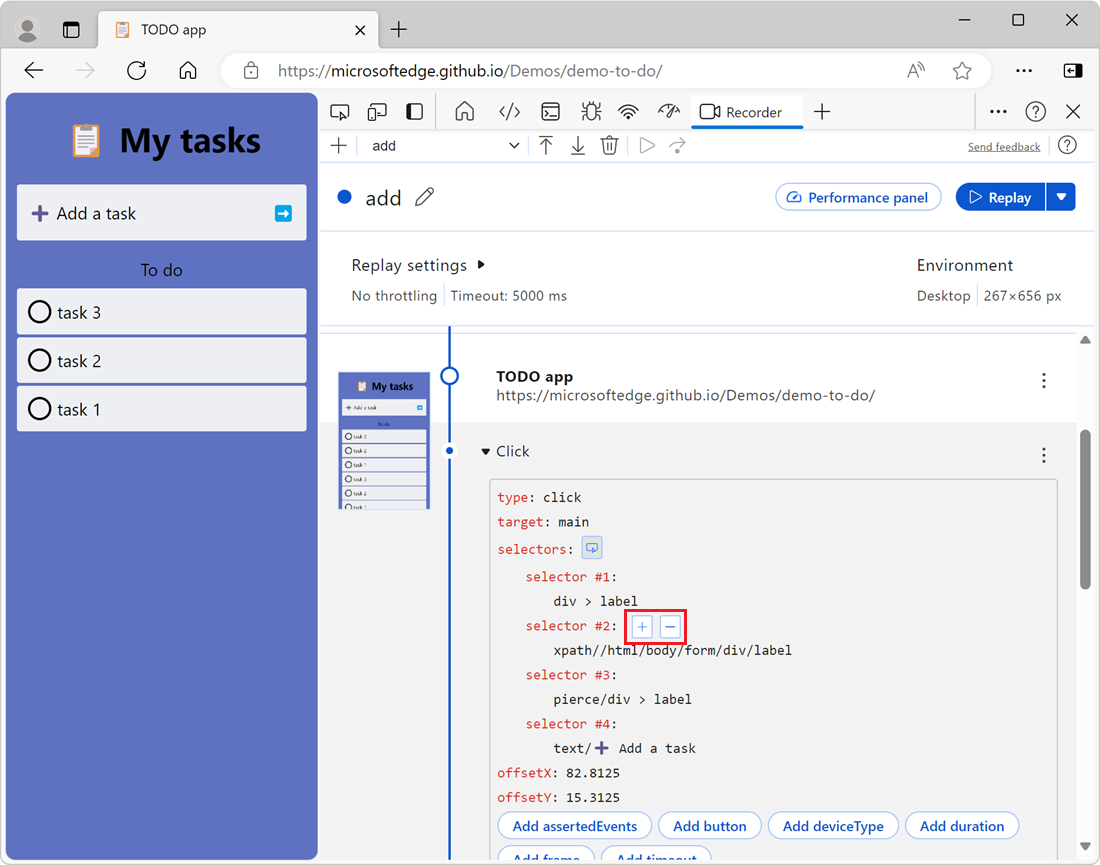
To modify the value of a selector, under Selectors, click the input box that contains the value of the selector, and then enter the new value for the selector:

Delete a step
To delete a step from an existing user flow:
Click the Open step actions (
) button next to the step you want to delete, and then select Remove step: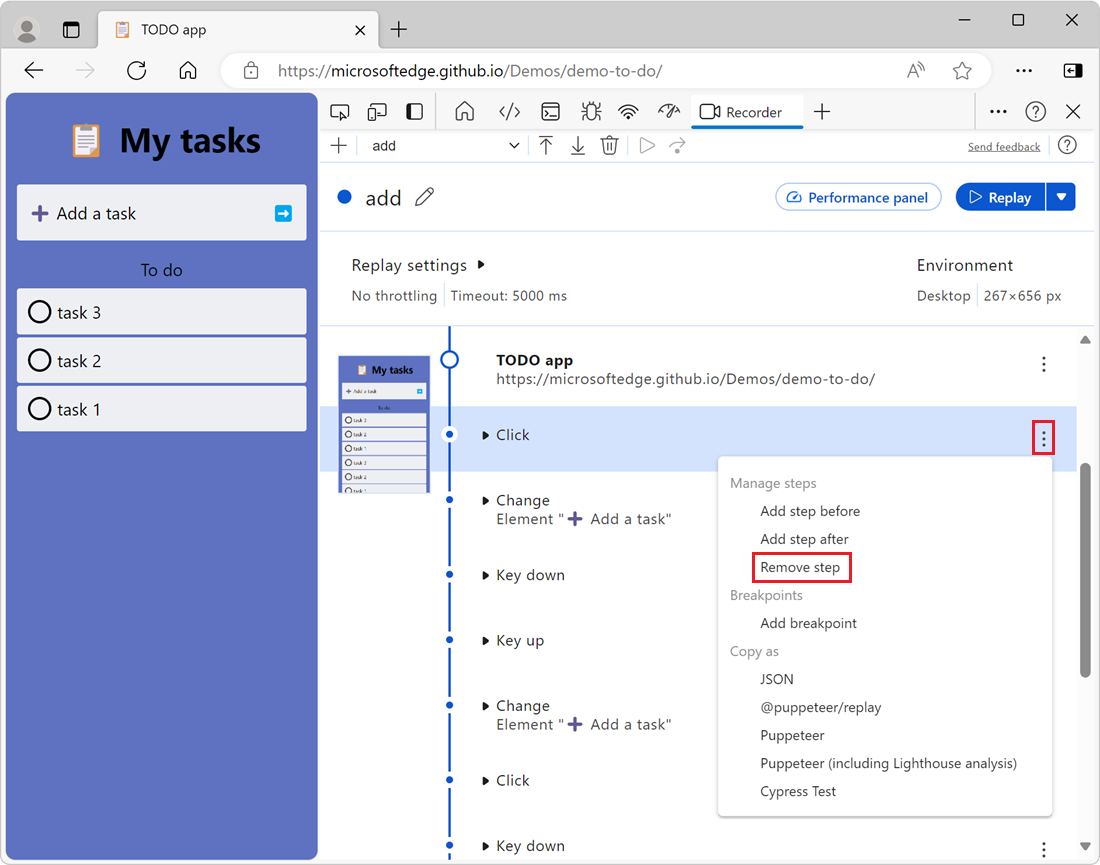
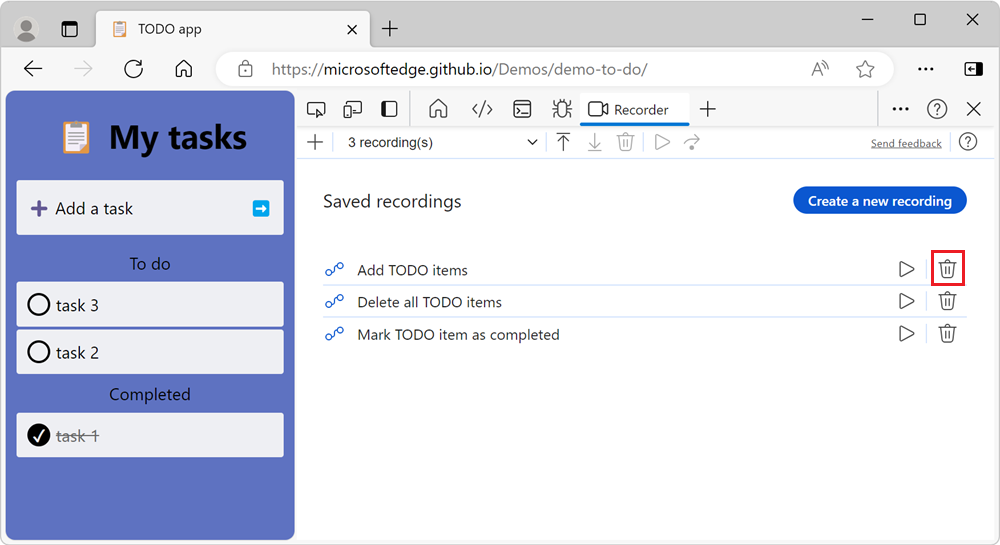
Delete a user flow
To delete a previously recorded user flow, when viewing the list of recordings, click Delete recording (![]() ) next to the recording you want to delete:
) next to the recording you want to delete:
Export and import user flows as files
To share a user flow with other people, export your recorded user flow as a JSON file. For example, sharing a user flow can help other people reproduce a bug by running the same set of steps as you.
Export a user flow as a file
To share a user flow with another person, export the user flow as a JSON file:
When viewing the steps of a user flow, click the Export (
 ) button in the Recorder tool toolbar, and then select JSON:
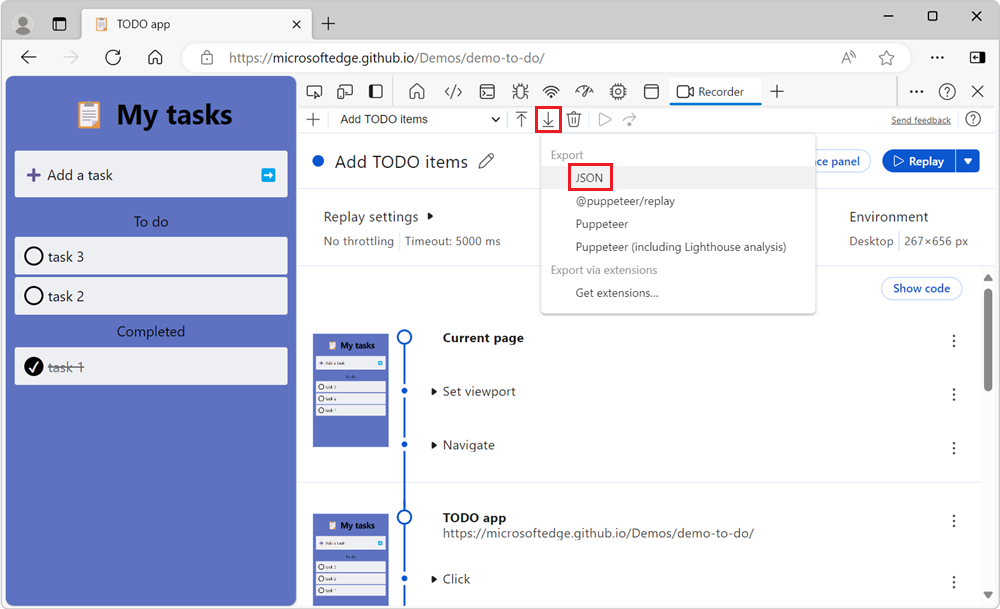
Select a location at which to save the file. The file is saved with the name of the user flow, and the extension
.json.
Import a user flow from a file
To import a user flow from a JSON file:
In the Recorder tool toolbar, click the Import recording (
 ) button:
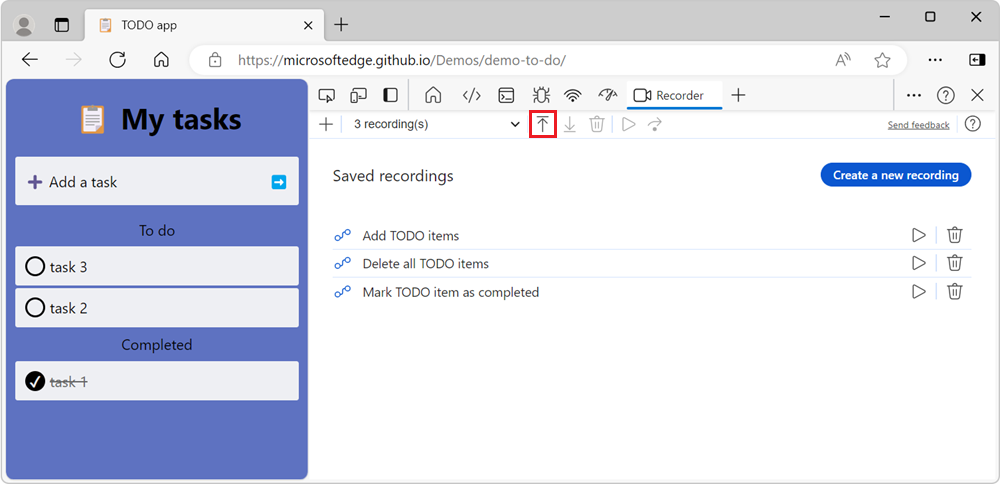
In the file chooser dialog that opens, select a user flow JSON file, and then click the Open button. The user flow is imported, and appears in the list of recordings in the Recorder tool.
Export a user flow for test automation
To generate a test script and run it automatically with a test automation framework, export a user flow as a .js test script file, as follows:
When viewing the steps of a user flow, in the Recorder tool toolbar, click the Export (
) button, and then select an export format: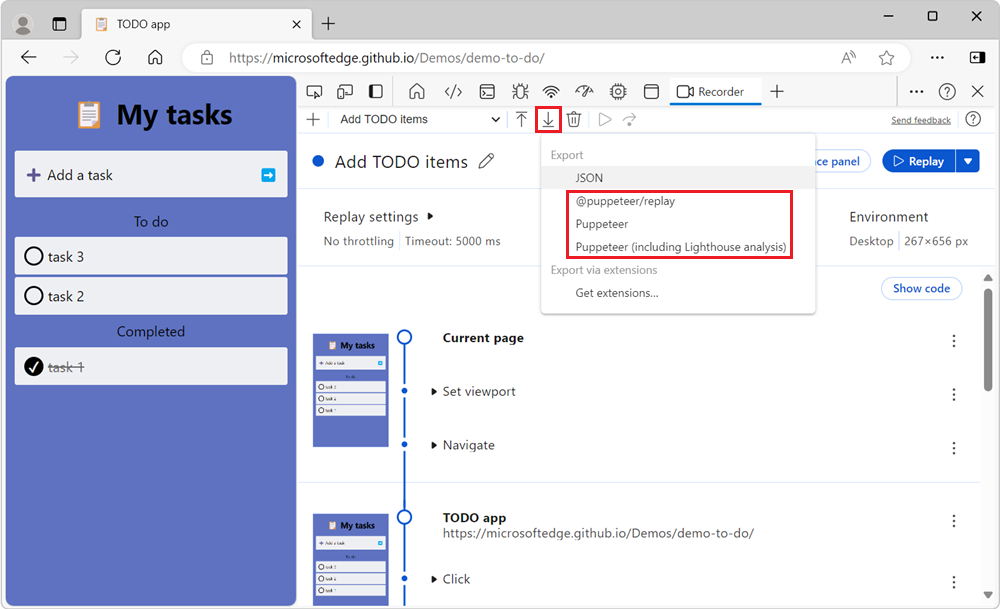
Export format Test automation framework @puppeteer/replayExports the user flow as a test script for the Replay library. See the puppeteer / replay repo. Puppeteer Exports the user flow as a test script for the Puppeteer test automation framework. See Puppeteer. Puppeteer (including Lighthouse analysis) Exports the user flow as a test script for the Puppeteer test automation framework, and includes a Lighthouse analysis of the performance of the website. The Save As dialog opens.
Select a location in which to save the file. The file is saved with the name of the user flow, and the extension
.js.
Feedback
Coming soon: Throughout 2024 we will be phasing out GitHub Issues as the feedback mechanism for content and replacing it with a new feedback system. For more information see: https://aka.ms/ContentUserFeedback.
Submit and view feedback for