Note
Access to this page requires authorization. You can try signing in or changing directories.
Access to this page requires authorization. You can try changing directories.
You can create bots in Microsoft Teams that access resources on behalf of the user, such as a mail service. You can use Azure Bot Service v4 SDK authentication, based on OAuth 2.0. This method makes it easier to develop a bot that can use authentication tokens based on the user's credentials. The key is the use of identity providers.
OAuth 2.0 is an open standard for authentication and authorization used by Microsoft Entra ID and many other identity providers. A basic understanding of OAuth 2.0 is a prerequisite for working with authentication in Teams.
See OAuth 2 Simplified for a basic understanding, and OAuth 2.0 for the complete specification.
For more information about how the Azure Bot Service handles authentication, see user authentication within a conversation.
In this article you'll learn:
- How to create an authentication-enabled bot. Use cs-auth-sample to handle user sign-in credentials and the generating the authentication token.
- How to deploy the bot to Azure and associate it with an identity provider. The provider issues a token based on user sign-in credentials. The bot can use the token to access resources, such as a mail service, which require authentication. For more information, see Microsoft Teams authentication flow for bots.
- How to integrate the bot within Microsoft Teams. Once the bot is integrated, you can sign in and exchange messages with it in a chat.
Prerequisites
Knowledge of bot basics, managing state, the dialogs library, and how to implement sequential conversation flow.
Knowledge of Azure and OAuth 2.0 development.
The latest versions of Microsoft Visual Studio and Git.
Azure account. If needed, you can create an Azure free account.
The following sample:
Sample BotBuilder version Demonstrates Bot authentication in cs-auth-sample v4 OAuthCard support Bot authentication in js-auth-sample v4 OAuthCard support Bot authentication in py-auth-sample v4 OAuthCard support
Create the resource group
The resource group and the service plan aren't strictly necessary, but they allow you to conveniently release the resources you create. We recommend that you keep your resources organized and manageable.
You use a resource group to create individual resources for the Bot Framework. For performance, ensure that these resources are located in the same Azure region.
- In your browser, sign into the Microsoft Azure portal.
- In the left navigation panel, select Resource groups.
- In the upper left of the displayed window, select Add tab to create a new resource group. Provide the following details:
- Subscription. Use your existing subscription.
- Resource group. Enter the name for the resource group. An example could be TeamsResourceGroup. Remember that the name must be unique.
- From the Region dropdown menu, select West US, or a region close to your applications.
- Select the Review and create button. You should see a banner that reads Validation passed.
- Select the Create button. It might take a few minutes to create the resource group.
Tip
As with the resources you'll create later in this tutorial, it's a good idea to pin this resource group to your dashboard for easy access. If you'd like to do so, select the pin icon 📌 in the upper right of the dashboard.
Create the service plan
- In the Azure portal, on the left navigation panel, select Create a resource.
- In the search box, type App Service Plan. Select the App Service Plan card from the search results.
- Select Create.
- Provide the following information:
- Subscription. You can use an existing subscription.
- Resource Group. Select the group you created earlier.
- Name. Enter the name for the service plan. An example could be TeamsServicePlan. Remember that the name must be unique, within the group.
- Operating System. Select Windows or your applicable OS.
- Region. Select West US or a region close to your applications.
- Pricing Tier. Select Standard S1, which is the default value.
- Select the Review and create button. You should see a banner that reads Validation passed.
- Select Create. It might take a few minutes to create the app service plan. The plan is listed in the resource group.
Create Azure Bot resource registration
The Azure Bot resource registration registers your web service as a bot with the Bot Framework, which provides you with a Microsoft App ID and App password (client secret).
Important
You only need to register your bot if it's not hosted in Azure. If you created a bot through the Azure portal then it's already registered with the service. If you created your bot through the Bot Framework or Developer Portal your bot isn't registered in Azure.
Visit Azure portal and search for Azure Bot in Create a resource section.
Open the Azure Bot and select Create.
Enter bot handle name in Bot handle field.
Select your Subscription from the dropdown list.
Select your Resource group from the dropdown list.
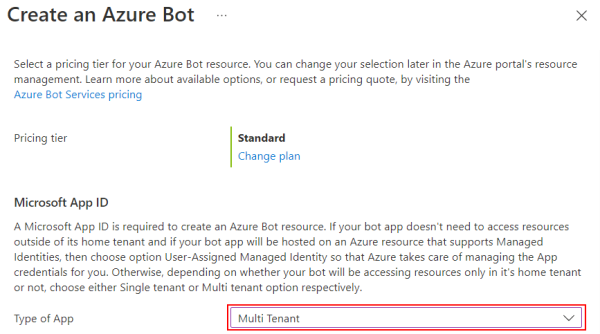
Select Type of App as Multi Tenant for Microsoft App ID.
Select Review + create.
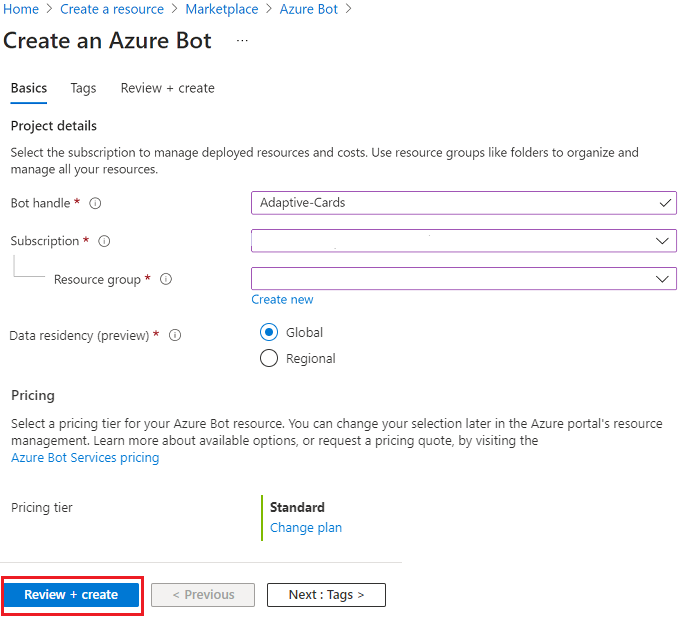
If the validation passes, select Create.
Azure provisions your bot in a few moments.

Select Go to resource. The bot and the related resources are listed in the resource group.

Your Azure bot is created.

To create client secret:
In Settings, select Configuration. Save the Microsoft App ID (client ID) for future reference.
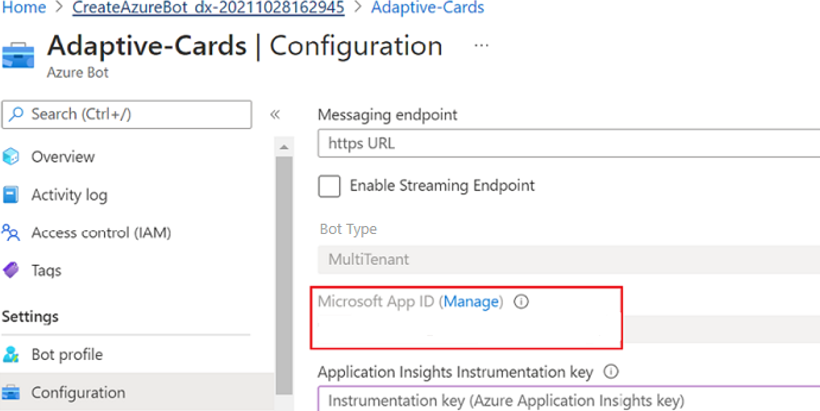
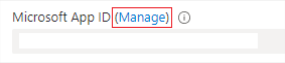
Next to Microsoft App ID, select Manage.
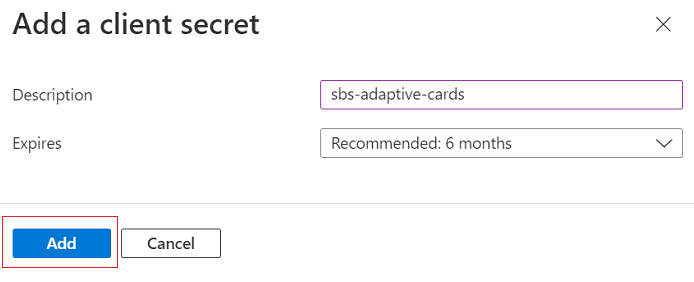
In the Client secrets section, select New client secret.Add a client secret window appears.

Enter Description and select Add.
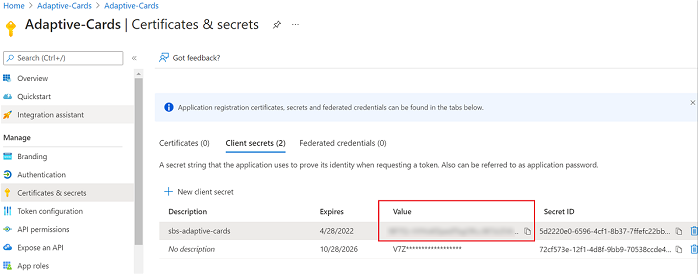
In the Value column, select Copy to clipboard and save the client secret ID for future reference.
To add the Microsoft Teams channel:
Go to Home.
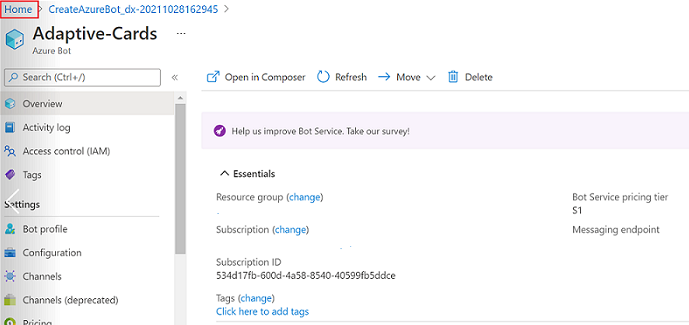
Open your bot from the Recent resources section.
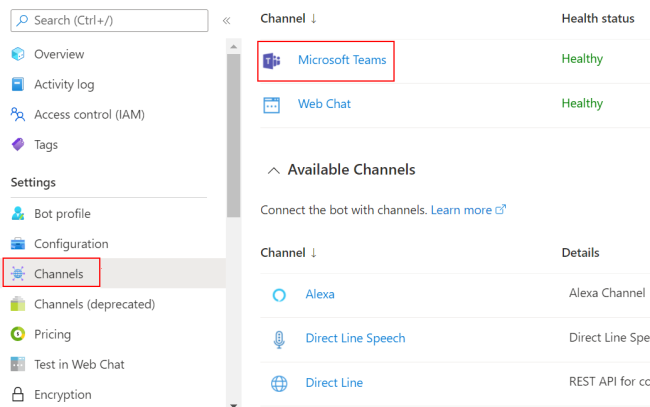
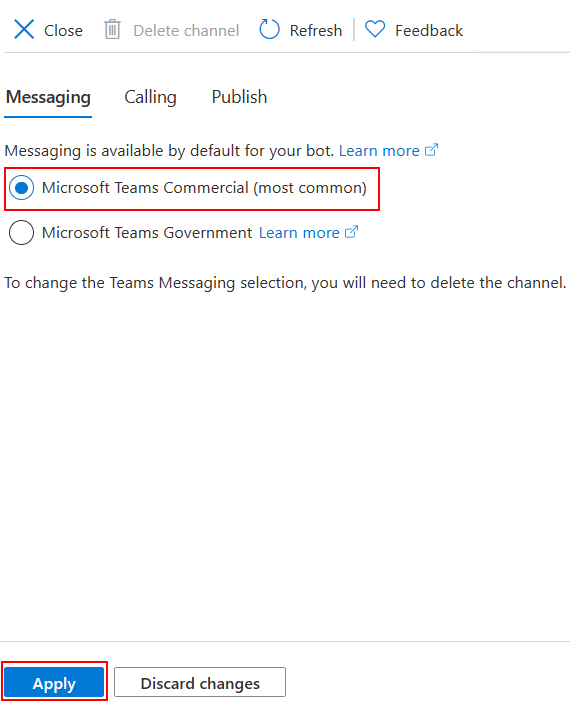
Select Channels in the left pane and select Microsoft Teams
 .
.
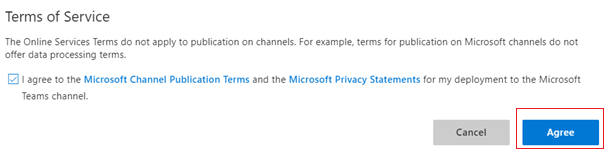
Select the checkbox to accept the terms of service and select Agree.
Select Save.
For more information, see Create a bot for Teams.
Create the identity provider
You need an identity provider for authentication. In this procedure, you use a Microsoft Entra provider. Alternatively, you can also use other Microsoft Entra ID supported identity providers.
In the Azure portal, on the left navigation panel, select Microsoft Entra ID.
Tip
You must create and register this Microsoft Entra resource in a tenant in which you can consent to delegate permissions requested by an application. For instructions on creating a tenant, see Access the portal and create a tenant.
In the left panel, select App registrations.
In the right panel, select the New registration tab, in the upper left.
Provide the following information:
- Name. Enter the name for the application. An example could be BotTeamsIdentity. Remember that the name must be unique.
- Select the Supported account types for your application. Select Accounts in any organizational directory (Any Microsoft Entra ID tenant - Multitenant) and personal Microsoft accounts (e.g. Skype, Xbox).
- For the Redirect URI:
✓Select Web.
✓ Set the URL tohttps://token.botframework.com/.auth/web/redirect. - Select Register.
After Azure creates the app, it displays the Overview page for the app. Copy and save the following information to a file:
- The Application (client) ID value. Use this value later as the Client ID when you register this Azure identity application with your bot.
- The Directory (tenant) ID value. Use this value later as the Tenant ID when you register this Azure identity application with your bot.
In the left panel, select Certificates & secrets to create a client secret for your application.
- Under Client secrets, select ➕ New client secret.
- Add a description to identify this secret from others you might need to create for this app, such as Bot identity app in Teams.
- Set Expires to your selection.
- Select Add.
- Before leaving this page, record the secret. Use this value later as the Client secret when you register your Microsoft Entra application with your bot.
Configure the identity provider connection and register it with the bot
Note
There are two options for Service Providers here, Azure Active Directory v1 and Azure Active Directory v2. The differences between the two providers are summarized here, but in general, v2 provides more flexibility with respect to changing bot permissions. Graph API permissions are listed in the scopes field, and as new ones are added, bots will allow users to consent to the new permissions on the next sign in. For v1, the bot consent must be deleted by the user for new permissions to be prompted in the OAuth dialog.
Microsoft Azure Active Directory (Azure AD) v1
In the Azure portal, select your resource group from the dashboard.
Select your bot registration link.
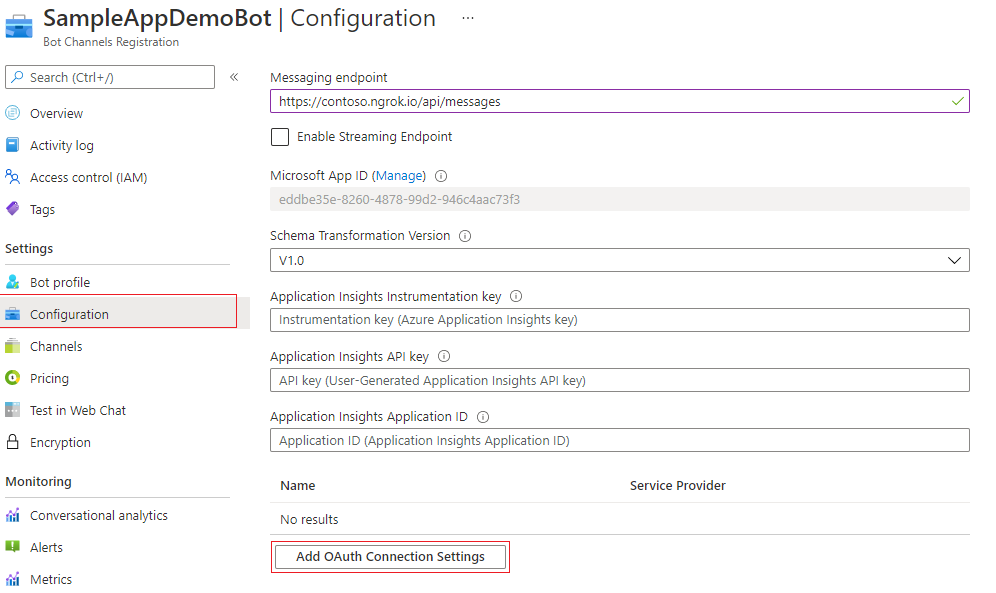
Open the resource page and select Configuration under Settings.
Select Add OAuth Connection Settings. The following image displays the corresponding selection in the resource page:
Complete the form as follows:
Name. Enter a name for the connection. You use this name in your bot in the
appsettings.jsonfile. For example, BotTeamsAuthADv1.Service Provider. Select Azure Active Directory. Once you select this option, the Azure Active Directory-specific fields are displayed.
Client id. Enter the Application (client) ID that you recorded for your Azure identity provider app.
Client secret. Enter the secret that you recorded for your Azure identity provider app.
Grant Type. Enter
authorization_code.Login URL. Enter
https://login.microsoftonline.com.Tenant ID, enter the Directory (tenant) ID that you recorded earlier for your Azure identity app or common depending on the supported account type selected when you created the identity provider app. To decide which value to assign, follow these criteria:
If you selected either Accounts in this organizational directory only (Microsoft only - Single tenant) or Accounts in any organizational directory (Any Microsoft Entra ID tenant - Multitenant), enter the tenant ID you recorded earlier for the Microsoft Entra app. This will be the tenant associated with the users who can be authenticated.
If you selected Accounts in any organizational directory (Any Microsoft Entra ID tenant - Multitenant) and personal Microsoft accounts (e.g. Skype, Xbox) enter the word common instead of a tenant ID. Otherwise, the Microsoft Entra app verifies through the tenant whose ID was selected and exclude personal Microsoft accounts.
h. For Resource URL, enter
https://graph.microsoft.com/. This URL isn't used in the code sample.
i. Leave Scopes blank. The following image is an example:
Select Save.
Microsoft Azure Active Directory (Azure AD) v2
In the Azure portal, select your Azure Bot from the dashboard.
In the resource page, select Configuration under Settings.
Select Add OAuth Connection Settings.
The following image displays the corresponding selection in the resource page:
Complete the form as follows:
Name. Enter a name for the connection. Use this name in your bot in the
appsettings.jsonfile. For example, BotTeamsAuthADv2.Service Provider. Select Azure Active Directory v2. Once you select this option, the Azure AD v2 specific fields are displayed.
Client id. Enter the Application (client) ID that you recorded for your Azure identity provider app.
Client secret. Enter the secret that you recorded for your Azure identity provider app.
Token Exchange URL. Leave this blank.
Tenant ID, enter the Directory (tenant) ID that you recorded earlier for your Azure identity app or common depending on the supported account type selected when you created the identity provider app. To decide which value to assign, follow these criteria:
If you selected either Accounts in this organizational directory only (Microsoft only - Single tenant) or Accounts in any organizational directory (Any Microsoft Entra ID tenant - Multitenant), enter the tenant ID you recorded earlier for the Microsoft Entra app. This will be the tenant associated with the users who can be authenticated.
If you selected Accounts in any organizational directory (Any Microsoft Entra ID tenant - Multitenant) and personal Microsoft accounts (e.g. Skype, Xbox) enter the word common instead of a tenant ID. Otherwise, the Microsoft Entra app verifies through the tenant whose ID was selected and exclude personal Microsoft accounts.
For Scopes, enter a space-delimited list of graph permissions this application requires, such as User.Read, User.ReadBasic.All, or Mail.Read.
Select Save.
Test the connection
Select the connection entry to open the connection you created.
Select Test Connection at the top of the Service Provider Connection Setting panel.
For the first time, it opens a new browser window asking you to select an account. Select the one you want to use.
Next, allow to the identity provider to use your data (credentials). The following image is an example:

Select Accept.
A Test Connection to <your-connection-name> Succeeded page opens. Refresh the page if you get an error. The following image is an example:
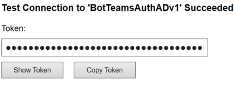
The bot code uses the connection name to retrieve user authentication tokens.
Prepare the bot sample code
With the preliminary settings done, let's focus on the creation of the bot to use in this article.
Clone cs-auth-sample.
Open Visual Studio.
From the toolbar, select File > Open > Project/Solution and open the bot project.
In C#, Update appsettings.json as follows:
- Set
ConnectionNameto the name of the identity provider connection you added to the bot registration. The name we used in this example is BotTeamsAuthADv1. - Set
MicrosoftAppIdto the bot App ID you saved at the time of the bot registration. - Set
MicrosoftAppPasswordto the customer secret you saved at the time of the bot registration.
Depending on the characters in your bot secret, you might need to XML escape the password. For example, any ampersands (&) must be encoded as
&.{ "MicrosoftAppType": "", "MicrosoftAppId": "", "MicrosoftAppPassword": "", "ConnectionName": "",- Set
In the Solution Explorer, go to the
TeamsAppManifestfolder, openmanifest.jsonand setidandbotIdto the bot App ID you saved at the time of the bot registration. For more information, see app manifest.
Deploy the bot to Azure
To deploy the bot, follow the steps in the How to Deploy your bot to Azure.
Alternatively, while in Visual Studio, you can follow these steps:
In Visual Studio Solution Explorer, select and hold (or right-click) the project name.
In the dropdown menu, select Publish.
In the displayed window, select the New link.
In the dialog window, select App Service and Create New.
Select the Publish button.
In the next dialog window, enter the required information.
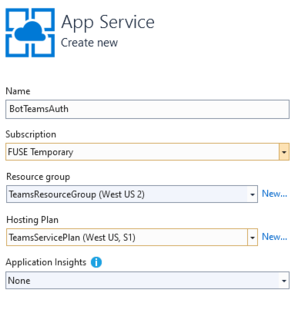
Select Create.
If the deployment completes successfully, you should see it reflected in Visual Studio. A page opens in your default browser with the message Your bot is ready!. The URL is similar to
https://botteamsauth.azurewebsites.net/. Save it to a file.In your browser, go to the Azure portal.
Check your resource group, the bot is listed along with the other resources. The following image is an example:

In the resource group, select the bot registration name (link).
In the left panel, select Settings.
In the Messaging endpoint box, enter the URL you just obtained followed by
api/messages. For example,https://botteamsauth.azurewebsites.net/api/messages.Note
Only one messaging endpoint is allowed for a bot.
Select the Save button in the upper left.
Test the bot using the Emulator
Install Microsoft Bot Framework Emulator. For more information, see test and debug with the Emulator.
In order for the bot sample sign-in to work, you must configure the Emulator.
Configure the Emulator for authentication
If a bot requires authentication, you must configure the Emulator. To configure:
- Start the Emulator.
- In the Emulator, select the gear icon ⚙ in the bottom left, or the Emulator Settings tab in the upper right.
- Check the box by Use version 1.0 authentication tokens.
- Enter the local path to the ngrok tool. See the Bot Framework Emulator / ngrok tunneling integration Wiki. For more tool information, see ngrok.
- Check the box by Run ngrok when the Emulator starts up.
- Select the Save button.
When the bot displays a sign-in card and the user selects the sign-in button, the Emulator opens a page that the user can use to sign in with the authentication provider. Once the user does so, the provider generates a user token and sends it to the bot. After that, the bot can act on behalf of the user.
Test the bot locally
After you configure the authentication mechanism, you can perform the actual bot testing.
Run the bot sample locally on your machine, via Visual Studio for example.
Start the Emulator.
Select the Open bot button.
In the Bot URL, enter the bot's local URL. Usually,
http://localhost:3978/api/messages.In the Microsoft App ID, enter the bot's app ID from
appsettings.json.In the Microsoft App password, enter the bot's app password from the
appsettings.json.Select Connect.
After the bot is up and running, enter any text to display the sign-in card.
Select the Sign in button.
A pop-up dialog appears to Confirm Open URL to authenticate the bot's user (you).
Select Confirm.
If asked, select the applicable user's account.
Depending which configuration you used for the Emulator, you get one of the following options:
- Using sign-in verification code
✓ A window opens displaying the validation code.
✓ Copy and enter the validation code into the chat box to complete the sign-in. - Using authentication tokens.
✓ You're signed in based on your credentials.
The following image is an example of the bot UI after you sign in:
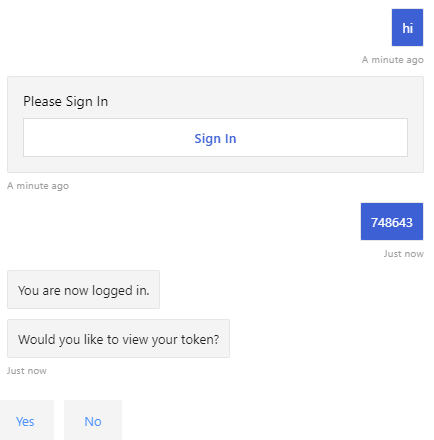
- Using sign-in verification code
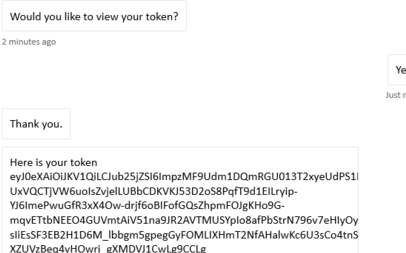
If you select Yes when the bot asks Would you like to view your token?, you get the following response:
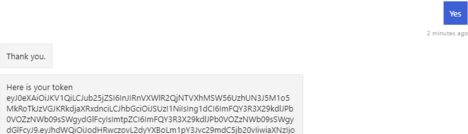
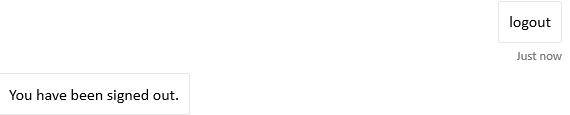
Enter logout in the input chat box to sign out. It releases the user token, and the bot won't be able to act on your behalf until you sign in again.
Note
Bot authentication requires use of the Bot Connector Service. The service accesses the bots registration information for your bot.
Test the deployed bot
In your browser, go to the Azure portal.
Find your resource group.
Select the resource link. The resource page is displayed.
In the resource page, select Test in Web Chat. The bot starts and displays the predefined greetings.
Type anything in the chat box.
Select the Sign in box.
A pop-up dialog appears to Confirm Open URL to authenticate the bot's user (you).
Select Confirm.
If asked, select the applicable user's account. The following image is an example of the bot UI after you sign in:
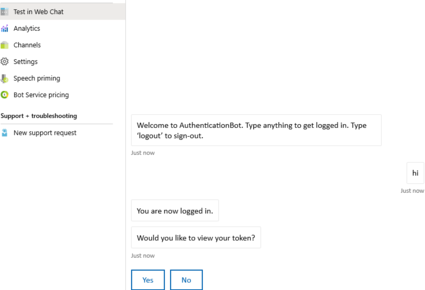
Select the Yes button to display your authentication token. The following image is an example:
Enter logout in the input chat box to sign out.
Note
If you're having problems signing in, try to test the connection again as described in the previous steps. This could recreate the authentication token. With the Bot Framework Web Chat client in Azure, you may need to sign in several times before the authentication is established correctly.
Install and test the bot in Teams
In your bot project, ensure that the
TeamsAppManifestfolder contains themanifest.jsonalong with anoutline.pngandcolor.pngfiles.In Solution Explorer, go to the
TeamsAppManifestfolder. Editmanifest.jsonby assigning the following values:- Ensure that the bot App ID you received at the time of the bot registration is assigned to
idandbotId. - Assign this value:
validDomains: [ "token.botframework.com" ].
- Ensure that the bot App ID you received at the time of the bot registration is assigned to
Select and zip the
manifest.json,outline.png, andcolor.pngfiles.Open Microsoft Teams.
In the left panel, at the bottom, select the Apps icon.
In the right panel, at the bottom, select Upload a custom app.
Go to the
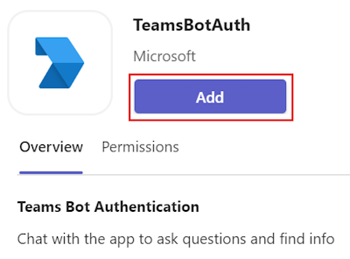
TeamsAppManifestfolder and upload the zipped manifest.Select Add to install the app to Teams.
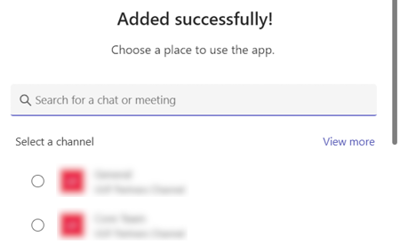
Search and select the required scope or select a channel or chat from the list, and move through the dialog to select Go.
Note
OAuth isn't supported in the group chat or channel scopes directly. If you enable authentication and users install your bot in group chats or channels, they must authenticate in their personal scopes before they can use the bot in the group chat or channel.
Select the three dots (●●●) in the left panel. Then select the Developer Portal icon.
Select the Manifest editor tab. You should see the icon for the bot you uploaded.
Also, you should be able to see the bot listed as a contact in the chat list that you can use to exchange messages with the bot.
Testing the bot locally in Teams
Teams is an entirely cloud-based product. It requires all services it accesses to be available from the cloud using HTTPS endpoints. Therefore, to enable the bot (our sample) to work in Teams, you need to either publish the code to the cloud of your choice, or make a locally running instance externally accessible via a tunneling tool. We recommend ngrok, which creates an externally addressable URL for a port you open locally on your machine. To set up ngrok in preparation for running your Teams app locally, follow these steps:
In a terminal window, go the directory where you have
ngrok.exeinstalled. We suggest setting the environment variable path to point to it.Run, for example,
ngrok http 3978 --host-header=localhost:3978. Replace the port number as needed. It launches ngrok to listen on the port you specify. In return, it gives you an externally addressable URL, valid for as long as ngrok is running. The following image is an example: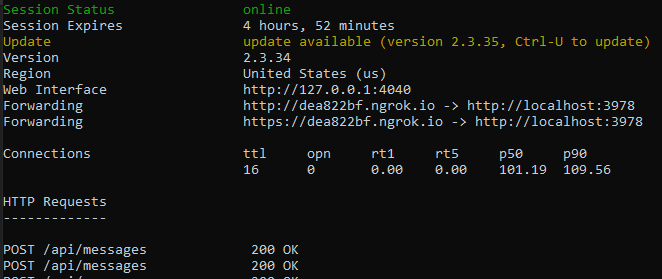
Copy the forwarding HTTPS address that is similar to:
https://dea822bf.ngrok.io/.Append
/api/messagesto obtainhttps://dea822bf.ngrok.io/api/messages, which is the messages endpoint for the bot running locally on your machine and reachable over the web in a chat in Teams.One final step to perform is to update the messages endpoint of the deployed bot. In the example, we deployed the bot in Azure. So let's perform these steps:
- In your browser, go to the Azure portal.
- Select your Bot Registration.
- In the left panel, select Settings.
- In the right panel, in the Messaging endpoint box, enter the ngrok URL, in our example,
https://dea822bf.ngrok.io/api/messages.
Start your bot locally, for example in Visual Studio debug mode.
Test the bot while running locally using the Bot Framework portal's Test Web chat. Like the Emulator, this test doesn't allow you to access Teams-specific functionality.
In the terminal window where
ngrokis running you can see HTTP traffic between the bot and the web chat client. If you want a more detailed view, in a browser window enterhttp://127.0.0.1:4040you obtained from the previous terminal window. The following image is an example: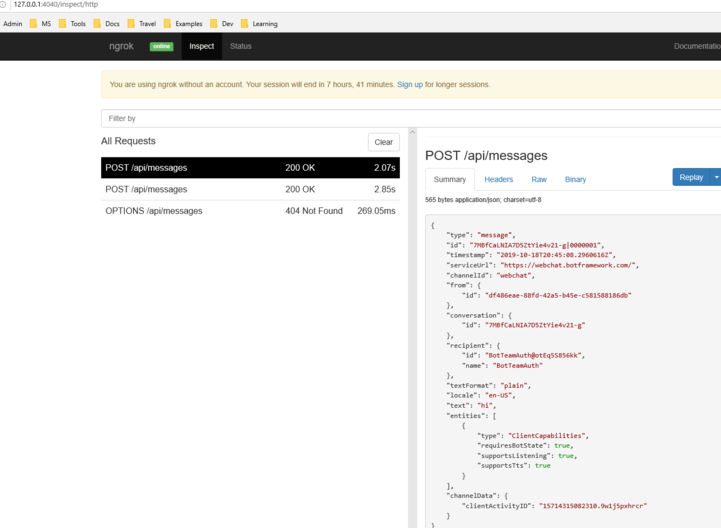
Note
If you stop and restart ngrok, the URL changes. To use ngrok in your project, and depending on the capabilities you're using, you must update all URL references.
Additional information
TeamsAppManifest/manifest.json
This manifest contains information needed by Teams to connect with the bot:
{
  "$schema": "https://developer.microsoft.com/json-schemas/teams/v1.8/MicrosoftTeams.schema.json",
  "manifestVersion": "1.5",
  "version": "1.0.0",
  "id": "",
  "developer": {
    "name": "TeamsBotAuth",
    "websiteUrl": "https://www.microsoft.com",
    "privacyUrl": "https://www.teams.com/privacy",
    "termsOfUseUrl": "https://www.teams.com/termsofuse"
  },
  "icons": {
    "color": "color.png",
    "outline": "outline.png"
  },
  "name": {
    "short": "TeamsBotAuth",
    "full": "Teams Bot Authentication"
  },
  "description": {
    "short": "TeamsBotAuth",
    "full": "Teams Bot Authentication"
  },
  "accentColor": "#FFFFFF",
  "bots": [
    {
      "botId": "",
      "scopes": [
        "personal",
        "groupchat",
        "team"
      ],
      "supportsFiles": false,
      "isNotificationOnly": false
    }
  ],
  "permissions": [
    "identity",
    "messageTeamMembers"
  ],
  "validDomains": [ "token.botframework.com" ]
}
With authentication, Teams behaves differently than other channels.
Handling Invoke Activity
An Invoke Activity is sent to the bot rather than the Event Activity used by other channels, which is done by subclassing the ActivityHandler.
Bots/DialogBot.cs
/// and the requirement is that all BotState objects are saved at the end of a turn.
/// </summary>
/// <typeparam name="T">The type of Dialog to be run.</typeparam>
public class DialogBot<T> : TeamsActivityHandler where T : Dialog
{
    protected readonly BotState _conversationState;
    protected readonly Dialog _dialog;
    protected readonly ILogger _logger;
    protected readonly BotState _userState;

    /// <summary>
    /// Initializes a new instance of the <see cref="DialogBot{T}"/> class.
    /// </summary>
    /// <param name="conversationState">The conversation state.</param>
    /// <param name="userState">The user state.</param>
    /// <param name="dialog">The dialog to be run.</param>
    /// <param name="logger">The logger.</param>
    public DialogBot(ConversationState conversationState, UserState userState, T dialog, ILogger<DialogBot<T>> logger)
    {
        _conversationState = conversationState;
        _userState = userState;
        _dialog = dialog;
        _logger = logger;
    }

    /// <summary>
    /// Called at the end of each turn. Saves any state changes that might have occurred during the turn.
    /// </summary>
    /// <param name="turnContext">The context object for this turn.</param>
    /// <param name="cancellationToken">A cancellation token.</param>
    /// <returns>A task that represents the work queued to execute.</returns>
    public override async Task OnTurnAsync(ITurnContext turnContext, CancellationToken cancellationToken = default)
    {
Bots/TeamsBot.cs
The Invoke Activity must be forwarded to the dialog if the OAuthPrompt is used.
/// </summary>
/// <param name="membersAdded">The list of members added to the conversation.</param>
/// <param name="turnContext">The context object for this turn.</param>
/// <param name="cancellationToken">A cancellation token.</param>
/// <returns>A task that represents the work queued to execute.</returns>
protected override async Task OnMembersAddedAsync(IList<ChannelAccount> membersAdded, ITurnContext<IConversationUpdateActivity> turnContext, CancellationToken cancellationToken)
{
    foreach (var member in turnContext.Activity.MembersAdded)
    {
TeamsActivityHandler.cs
protected virtual Task OnInvokeActivityAsync(ITurnContext<IInvokeActivity> turnContext, CancellationToken cancellationToken)
{
    switch (turnContext.Activity.Name)
    {
        case "signin/verifyState":
            return OnSigninVerifyStateAsync(turnContext, cancellationToken);

        default:
            return Task.CompletedTask;
    }
}

protected virtual Task OnSigninVerifyStateAsync(ITurnContext<IInvokeActivity> turnContext, CancellationToken cancellationToken)
{
    return Task.CompletedTask;
}
Code sample
This section provides Bot authentication v3 SDK sample.
| Sample name | Description | .NET | Node.js | Python | Manifest |
|---|---|---|---|---|---|
| Bot authentication | This sample app demonstrates how a bot can use Teams authentication. | View | View | View | View |
| Tab, Bot, and Message Extension (ME) SSO | This sample app demonstrates Teams SSO integration for tabs, bots, and message extensions, using C# and Microsoft Entra ID for secure authentication. | View | View | NA | View |
See also
Collaborate with us on GitHub
The source for this content can be found on GitHub, where you can also create and review issues and pull requests. For more information, see our contributor guide.
Platform Docs