Upload your app in Teams
You can upload Microsoft Teams apps without having to publish to your organization or the Microsoft Teams Store in the following scenarios:
- You want to test and debug an app locally yourself or with other developers.
- You built an app for yourself to automate a workflow.
- You built an app for a small set of users, such as, your work group.
Important
- Custom app upload is possible only in Government Community Cloud (GCC) and isn't possible in GCC-High and Department of Defense (DOD).
- App installation is supported only on Teams desktop client.
- We recommend you to avoid multiple uploads of your message extension app to Teams, as it results in multiple instances of the message extension.
From January 31 2024, users can't chat with bots that aren't connected to a Microsoft Teams app such as Azure bots created through the Bot Framework or Power Virtual Agents. We recommend you to create a new Teams app connected to the Azure Bot using the Developer Portal, publish it to Teams, and allow users to install the app using the app permission policies.
If you want to test the app, you can assign users an app setup policy that allows uploading custom apps and chat with the Azure bot through a direct link to a chat.
Prerequisites
- Ensure to create your app package and validate it for errors.
- Enable custom app uploading in Teams.
- Ensure that your app is running and accessible using HTTPs.
Upload your app
You can upload your app to a team, chat, meeting, or for personal use depending on how you configured your app's scope.
Log in to the Teams client with your Microsoft 365 development account.
Select Apps > Manage your apps and Upload an app.
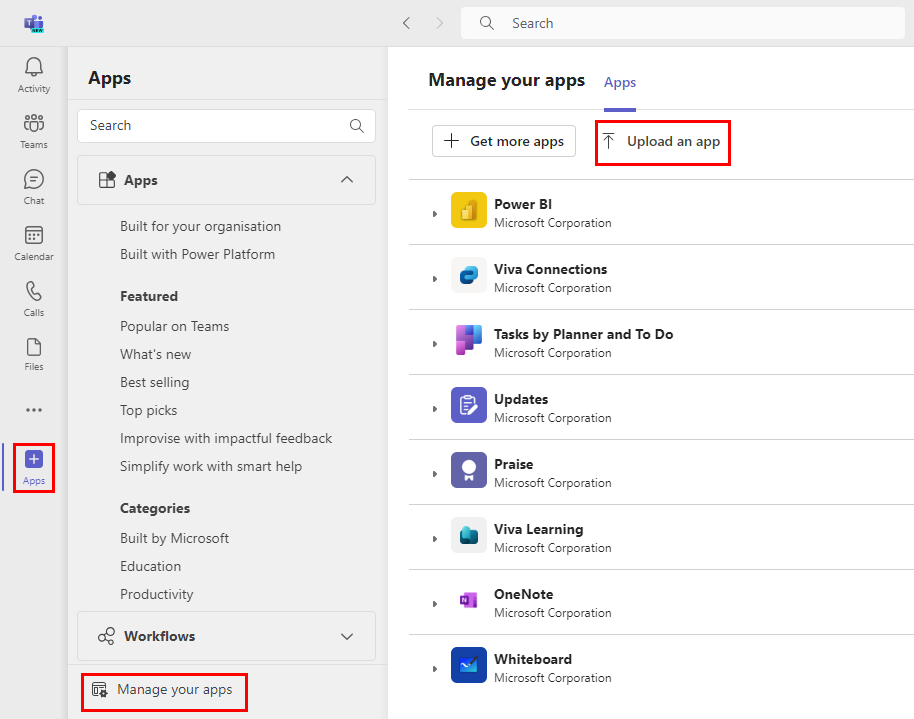
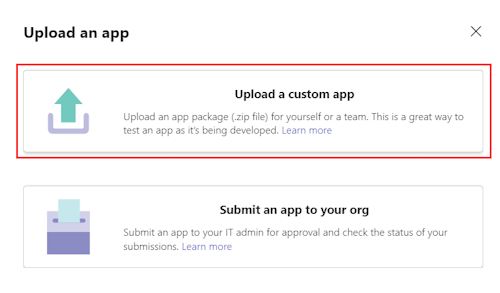
Select Upload a custom app.
Select your app package .zip file.
Add your app to Teams as per your requirement:
a. Select Add to add your personal app.
b. Use the dropdown menu to add your app to a Team or chat.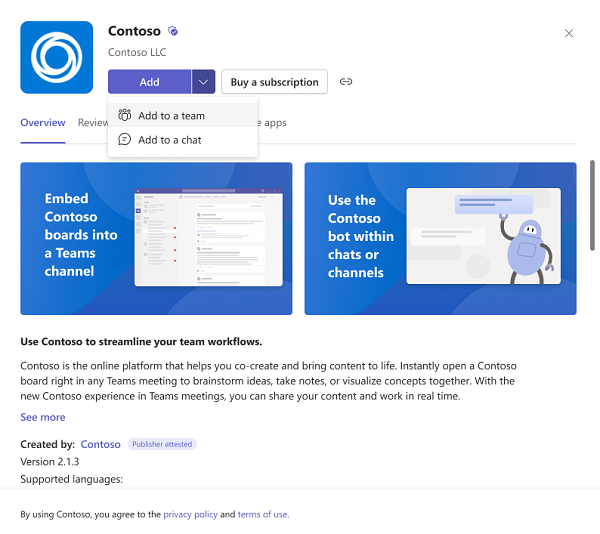
Troubleshoot
If your app fails to upload or encounters any issues to upload, check the following options:
- Ensure that you follow all the instructions for creating your app package.
- Validate your app package.
- Ensure your app manifest matches with the latest schema.
Manage your apps
Manage your apps allows users to have a dedicated place to manage, update and remove their apps, permissions, and subscriptions on the Teams client. The users can install the apps from Manage your apps.
Access your app
To access apps through Manage your apps, follow the steps:
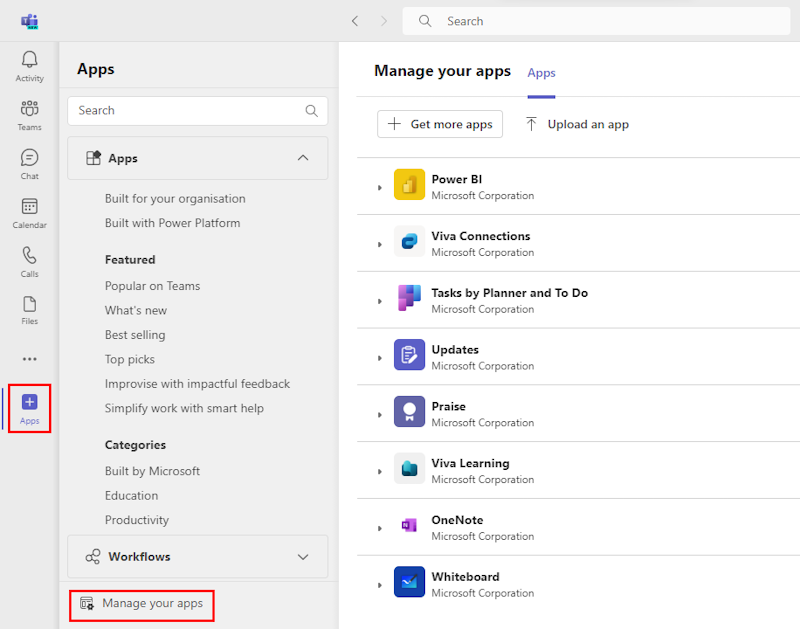
Go to Apps and select Manage your apps in Teams to view the installed apps across all your channels or for personal use in a list format.
Select the app dropdown to view the list of scopes where the app is installed.
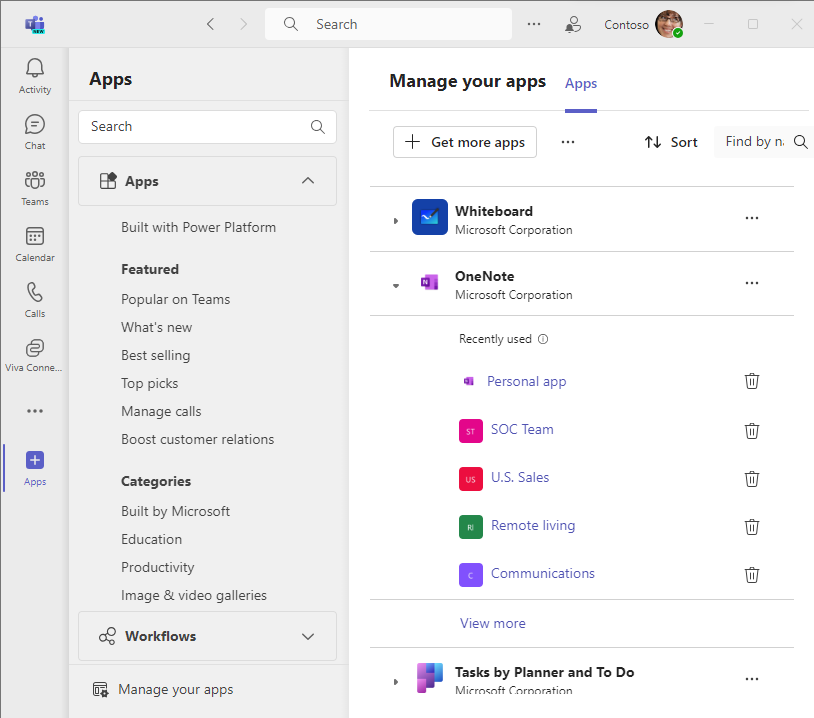
Select the scope of app to go to the app in the channel or personal view. The list of scopes consists of personal scope and teams scope only. Apps installed in group chat scope aren't displayed in this view.
Teams provides several ways to open apps. For more information, see access your apps in Teams.
Update your app
You don't have to upload your custom app again if you make code changes (these are reflected in Teams in real-time). However, you must reinstall if you change any app configurations. For more information, see Role of an admin in upgrading Teams apps.
When a Teams app receives an update, the user must consent to update the app in any one context, and the app is automatically updated in all the related contexts (chats, channels, and meetings) where the app is installed. The user can update the app from any context.
If an update is available for your app, follow these steps to update your app from the Teams Store:
Go to Microsoft Teams.
Select Apps > Manage your apps.
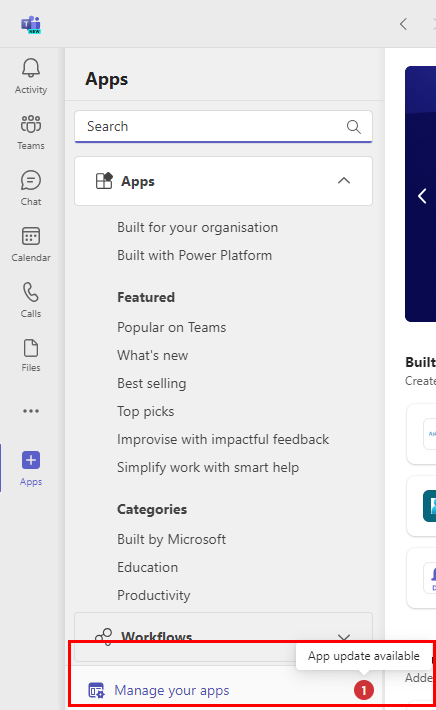
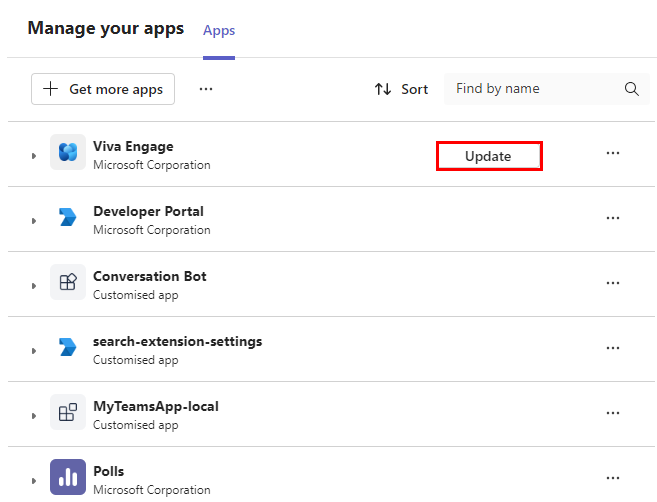
Under the Apps tab, check for the Update option next to the app.
Select Update.
Select Update now.
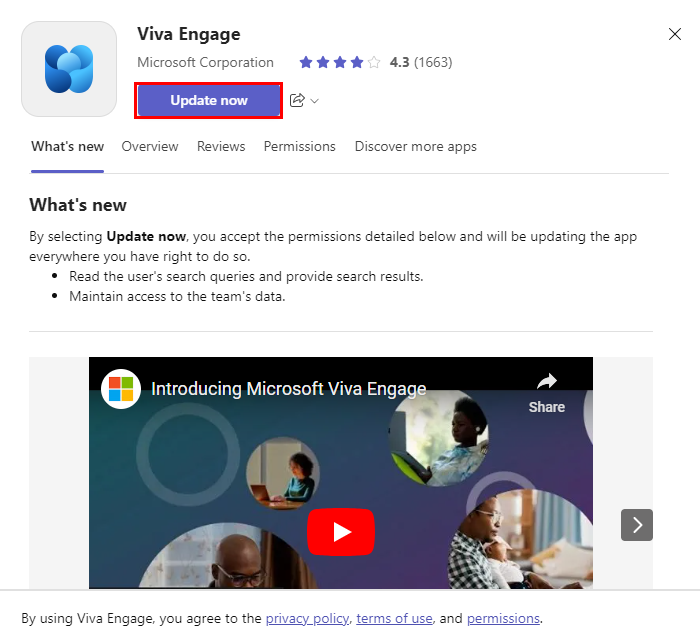
The app is automatically updated in all the related contexts (chats, channels, and meetings) where the app is installed.
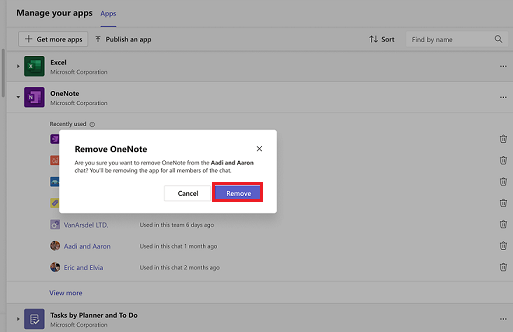
Remove your app
To remove app from Teams, follow the steps:
Find the app in Manage your apps.
Select
 at the scope of the installed app.
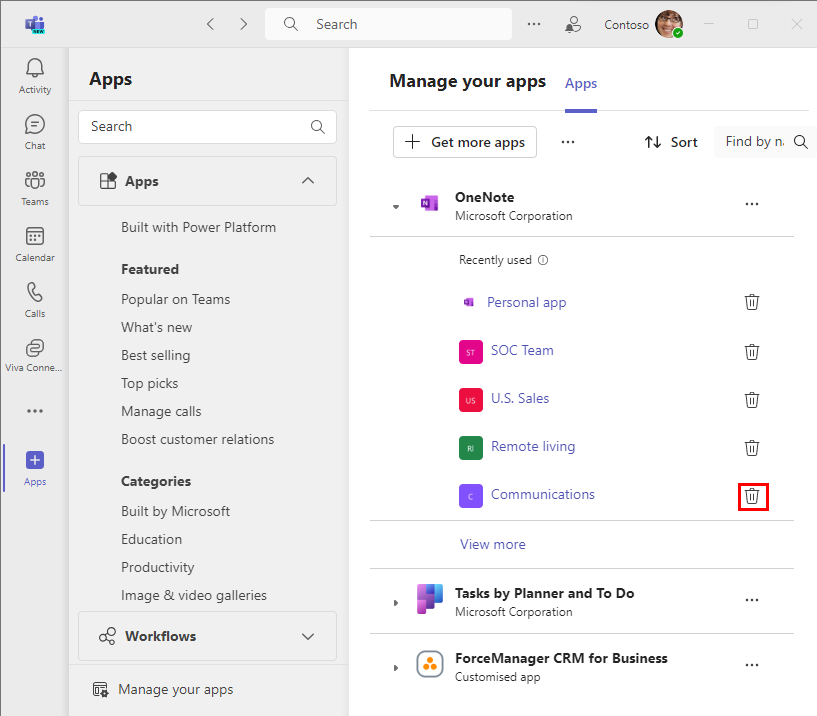
Select Remove to remove your app.
Note
- You can't remove personal bot activity entirely. If you remove the app and add it again, new communication with the bot appends to the previous conversation with it.
- You can't migrate your custom app to the Teams Store. If you want to list your app to the Teams Store, see how to publish your app to the Teams Store.
Next step
See also
Platform Docs