Note
Access to this page requires authorization. You can try signing in or changing directories.
Access to this page requires authorization. You can try changing directories.
Use worksheet display settings to make dashboards, reports, and printouts easier to read. By using the Excel JavaScript API, your add-in can control page layout, page breaks, data type icons, gridlines, and headings so users see the worksheet the way you intend.
Key points
- Use
Worksheet.horizontalPageBreaksandWorksheet.verticalPageBreaksto control manual page breaks. - Use
Worksheet.pageLayoutto control print settings such as centering, title rows, and print area. - Use worksheet properties to show or hide data type icons, gridlines, and headings.
- Changes to worksheet display settings are saved with the worksheet.
Configure page layout and print settings
Use worksheet page layout settings when your add-in prepares a worksheet for printing or sharing. These settings help you control where pages break and which parts of the worksheet print.
Add a manual page break
The Worksheet.horizontalPageBreaks and Worksheet.verticalPageBreaks properties return PageBreakCollection objects. Each collection contains PageBreak objects that define where Excel inserts manual page breaks.
The following code sample adds a horizontal page break before row 21.
await Excel.run(async (context) => {
    const sheet = context.workbook.worksheets.getActiveWorksheet();
    sheet.horizontalPageBreaks.add("A21:E21"); // The page break precedes this range.
    await context.sync();
});
Set print layout options
The Worksheet.pageLayout property returns a PageLayout object. Use it to control print settings that don't depend on a specific printer, such as margins, orientation, page numbering, title rows, and print area.
The following code sample centers the page, repeats the first row at the top of every printed page, and limits printing to range A1:D100.
await Excel.run(async (context) => {
    const sheet = context.workbook.worksheets.getActiveWorksheet();

    // Center the page in both directions.
    sheet.pageLayout.centerHorizontally = true;
    sheet.pageLayout.centerVertically = true;

    // Set the first row as the title row for every page.
    sheet.pageLayout.setPrintTitleRows("$1:$1");

    // Limit the printed area to the range "A1:D100".
    sheet.pageLayout.setPrintArea("A1:D100");

    await context.sync();
});
Control worksheet visuals
Use the following properties to reduce visual clutter in a worksheet before users review or present it.
Show or hide data type icons
Data types can display an icon next to the value in a cell. In large tables, those icons can distract from the data.
![]()
Use the Worksheet.showDataTypeIcons property to show or hide data type icons. This property is equivalent to the user selecting View > Data Type Icons. The setting is saved with the worksheet and is visible to coauthors when it changes. For more information about data types and their icons, see Overview of data types in Excel add-ins.
If a linked data type shows a ? icon, you can't toggle that icon. Excel requires the user to disambiguate the cell value first. For more information, see Excel data types: Stocks and geography.
The following code sample hides data type icons on the active worksheet.
await Excel.run(async (context) => {
    const sheet = context.workbook.worksheets.getActiveWorksheet();
    sheet.showDataTypeIcons = false;
    await context.sync();
});
Show or hide gridlines
Gridlines are the faint lines between cells on a worksheet. They can distract from shapes, icons, or custom borders in a report.
Use the Worksheet.showGridlines property to show or hide gridlines. This property is equivalent to the user selecting View > Gridlines. The setting is saved with the worksheet and is visible to coauthors when it changes.
The following code sample hides gridlines on the active worksheet.
await Excel.run(async (context) => {
    const sheet = context.workbook.worksheets.getActiveWorksheet();
    sheet.showGridlines = false;
    await context.sync();
});
Show or hide headings
Headings are the row numbers on the left side of the worksheet and the column letters across the top. In a polished report view, you might want to hide them.
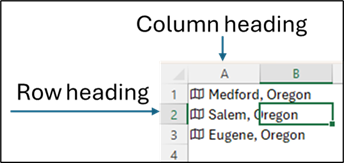
Use the Worksheet.showHeadings property to show or hide headings. This property is equivalent to the user selecting View > Headings.
The following code sample hides headings on the active worksheet.
await Excel.run(async (context) => {
    const sheet = context.workbook.worksheets.getActiveWorksheet();
    sheet.showHeadings = false;
    await context.sync();
});
See also
Collaborate with us on GitHub
The source for this content can be found on GitHub, where you can also create and review issues and pull requests. For more information, see our contributor guide.
Office Add-ins