Note
Access to this page requires authorization. You can try signing in or changing directories.
Access to this page requires authorization. You can try changing directories.
The plug-in registration tool (PRT) includes a designer to create custom API. The PRT is a Windows client application that is part of the developer tools you can download from NuGet. See Dataverse development tools for information about downloading these tools.
Connect using the Plug-in Registration tool
Open the Plug-in Registration tool by executing the PAC CLI
pac tool prtcommand.Select +Create new connection to connect to your Dataverse environment.
Make sure Office 365 is checked.
If you are connecting using a Microsoft account other than one you are currently using, select Show Advanced and enter your credentials. Otherwise, leave Sign-in as current user selected.
Note
If your user account employs multifactor authentication (MFA), make sure the Show Advanced checkbox isn't checked.
If your Microsoft Account provides access to multiple environments, select Display list of available organizations.
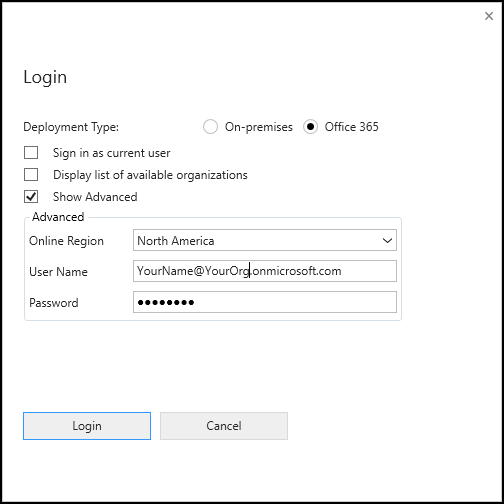
Select Login.
If you selected Display list of available organizations, select the organization you would like to connect to and select Login.
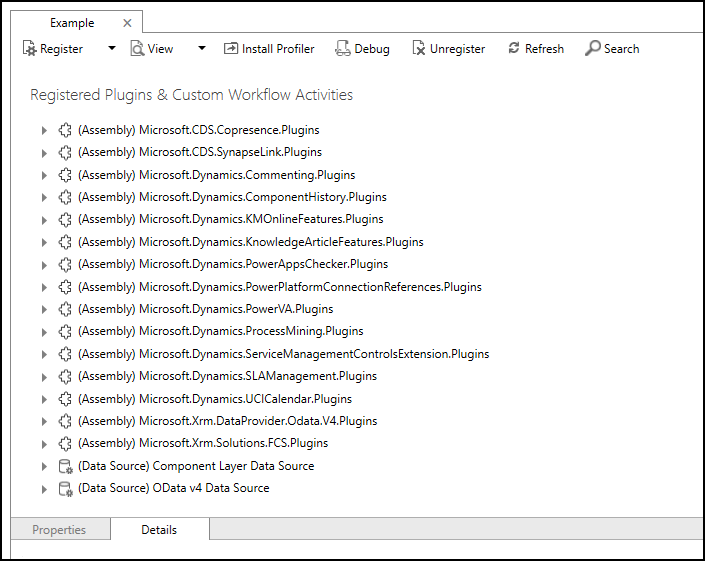
After you're connected, you'll see any existing registered plug-ins, custom workflow activities, and data providers.
Create a custom API
In the Register menu, select the Register new Custom API command. This will open the form to create a custom API.
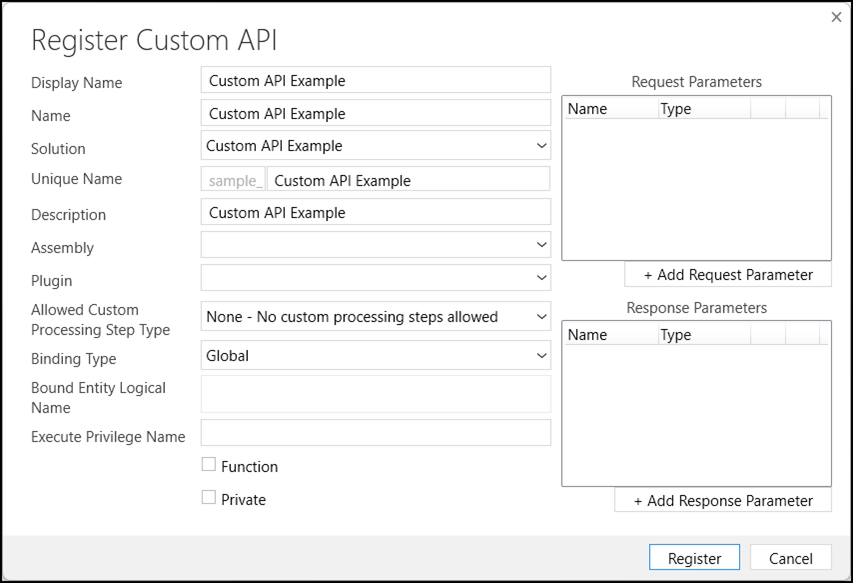
Use the information in the table below to create the Custom API. For more details, see Custom API table columns
Important
Some options cannot be changed after you save the custom API. Make sure you understand the purpose of each setting that cannot be changed. If you later need to change this setting, you must delete and re-create the custom API. This will also delete any request parameters or response properties that are associated with it.
| Label | Description | Can be changed |
|---|---|---|
| Display Name | A localizable name. | Yes |
| Name | A friendly, non-localizable name. | Yes |
| Solution | Create a new solution or select an existing one. Setting this value will set the appropriate customization prefix for the Unique Name field. | Yes |
| Unique Name | The name of the custom API. This value should contain only alphanumeric characters and no spaces. The full name includes the customization prefix determined by selecting the solution. |
No |
| Description | A localizable description. For use when the message is exposed to be called in an app. For example, as a ToolTip. | Yes |
| Assembly | Optional. Select an assembly that contains a plug-in type that will define what the custom API does. | Yes |
| Plugin | Optional. Select a plug-in type within the selected assembly. You may set this later. | Yes |
| Allowed Custom Processing Step Type | Which types of processing steps you will allow. More Information: Select a Custom Processing Step Type | No |
| Binding Type | What kind of entity binding. More Information: Select a Binding Type | No |
| Bound Entity Logical Name | If you select Binding Type Entity or EntityCollection you should enter the logical name of the table representing that type. | No |
| Execute Privilege Name | The name of a privilege that will control whether someone can use the API. This must be a valid Name value from the Privilege table. More information: Secure your custom API by requiring a privilege | Yes |
| Function | Whether to create a Function. More Information: When to create a Function | No |
| Private | Whether the custom API should be private. More Information: When to make your custom API private | Yes |
Note
- The PRT custom API designer doesn't expose the Enabled For Workflow (
WorkflowSdkStepEnabled) property. If you want to create a custom API that will work for Workflows, you need to use a different method. - The PRT custom API designer doesn't expose the Is Customizable managed property. You can set this in Power Apps. More information Custom API Customization
You can continue to add Request Parameters and Response Properties, or save the custom API and add them later.
Create Request parameters
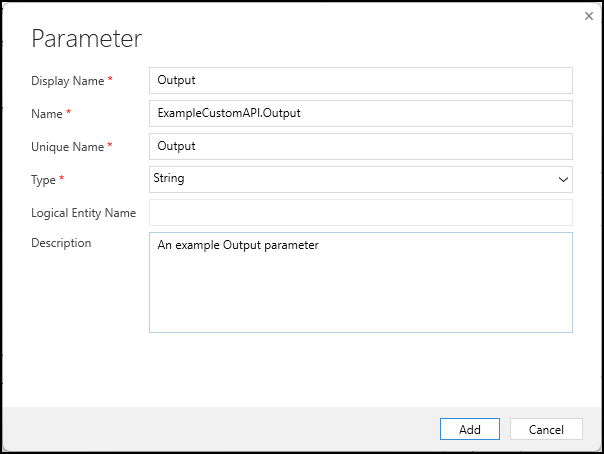
A custom API isn't required to have any request parameters. While creating a custom API or when editing an existing one, you can create new request parameters by clicking + Add Request Parameter. This will open the Parameter form.
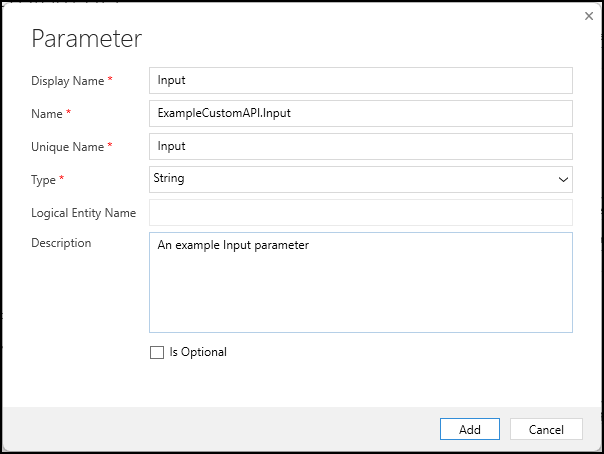
Use the information in the table below to create the Request Parameter. For more details see CustomAPIRequestParameter Table Columns
| Label | Description | Can be changed |
|---|---|---|
| Display Name | Localizable display name. | Yes |
| Name | The primary name of the custom API request parameter. This naming convention is recommended to differentiate this parameter from others that share a common Unique Name: {Custom API Unique Name}.{Parameter UniqueName} |
Yes |
| Unique Name | This will be the name of the parameter when you call the custom API. | No |
| Type | Select the type of the parameter. Boolean DateTime Decimal Entity EntityCollection EntityReference Float Integer Money Picklist String StringArray Guid |
No |
| Logical Entity Name | When Entity, EntityCollection, or EntityReference is selected as the Type, you can specify the table. | No |
| Description | Localizable description. | Yes |
| Is Optional | Whether a value for the parameter is required by the caller. | No |
Create Response properties
A custom API for an action isn't required to have any response properties. While creating a custom API or when editing an existing one, you can create new response properties by clicking + Add Response Parameter. This will open the Parameter form.
Use the information in the table below to create the Response Property. For more details see CustomAPIResponseProperty Table Columns
| Label | Description | Can be changed |
|---|---|---|
| Display Name | Localizable display name. | Yes |
| Name | The primary name of the custom API response property. This naming convention is recommended to differentiate this parameter from others that share a common Unique Name: {Custom API Unique Name}.{Property UniqueName} |
Yes |
| Unique Name | This will be the name of the property returned when you call the custom API. | No |
| Type | Select the type of the property. Boolean DateTime Decimal Entity EntityCollection EntityReference Float Integer Money Picklist String StringArray Guid |
No |
| Logical Entity Name | When Entity or EntityReference are selected as the Type, you can specify the table. You cannot specify a Logical Entity Name when you choose EntityCollection as the Type. | No |
| Description | Localizable description. | Yes |
View a list of custom API
To view a list of custom API, from the View menu select the Display by Message command.
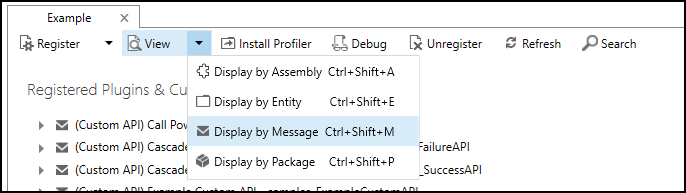
Any messages that were created as custom API will be prefixed by (Custom API).
Delete custom API
When viewing a list of custom API, select the one you want to delete and click the Unregister command.
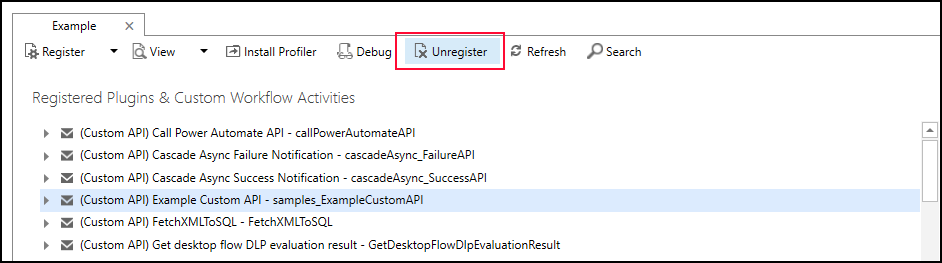
Or right-click the item and select Unregister from the context menu.
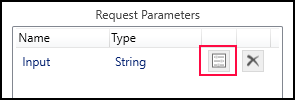
Update custom API Request Parameters or Response Properties
In the list of Request parameters or Response properties, select this column to edit:
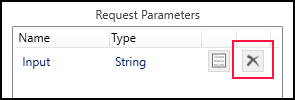
Delete custom API Request Parameters or Response Properties
In the list of Request parameters or Response properties, select this column to delete:
Next steps
If you haven't set the IsPrivate property for your custom API, after you have created your custom API you can retrieve the service definition from the CSDL $metadata document using a GET request, even from your browser. If the url for your environment is https://yourorg.crm.dynamics.com, you can type this URL in your browser address field to retrieve the $metadata: https://yourorg.crm.dynamics.com/api/data/v9.1/$metadata.
Search the result to find the name of the custom API and you will find the Action or Function created together with any related ComplexType to represent the return value. For example:
<ComplexType Name="sample_CustomAPIExampleResponse">
    <Property Name="StringProperty"
        Type="Edm.String"
        Unicode="false"/>
</ComplexType>
<Action Name="sample_CustomAPIExample">
    <Parameter Name="StringParameter"
        Type="Edm.String"
        Nullable="false"
        Unicode="false"/>
    <ReturnType Type="mscrm.sample_CustomAPIExampleResponse"
        Nullable="false"/>
</Action>
Even if you haven't set a Plugin for your custom API, you can test it to verify the signature. Any response properties will return their default values because there is no plug-in to set the values. More information: Invoking custom APIs
If you will add a plug-in, you must write it and register the assembly. Then update your custom API to set the Assembly and Plugin to specify what code to run in response to your custom API. More information: Write a Plug-in for your custom API
See also
Create and use custom APIs
Create a custom API in Power Apps
Create a custom API with code
Create a custom API with solution files
Create your own messages
Custom API table columns