Get started with an organization premium account
Power Automate enables regular and power users to create flows that automate routine repetitive tasks. For example, build flows from premade actions, or record windows and web browser activity in real time.
Unlock the full spectrum of RPA features such as premium cloud connectors, the ability to run your flows automatically, detailed monitoring, and many more.
Power Automate gives you the option to share your flows among your colleagues so that you can improve automations and build on top of them.
Access your flows from anywhere, harnessing the power of the cloud to establish a robust and flexible RPA system. Take full advantage of multiple environments to organize and manage users’ flows.
If you currently use Power Automate with a work or school account or your license doesn't include attended RPA, you can still use Power Automate for your desktop automation needs. Start a trial to preview all the features by selecting Go premium on the Power Automate console.
Creating a flow
Begin by signing in to the Power Automate portal. Then, navigate to Create > Power Automate for desktop.
After you assign a name to the flow, you'll be prompted to launch Power Automate for desktop. Select Open to do so.
In the flow designer, start building the flow by double-clicking on actions, or dragging them from the actions pane on the left into the central workspace pane.
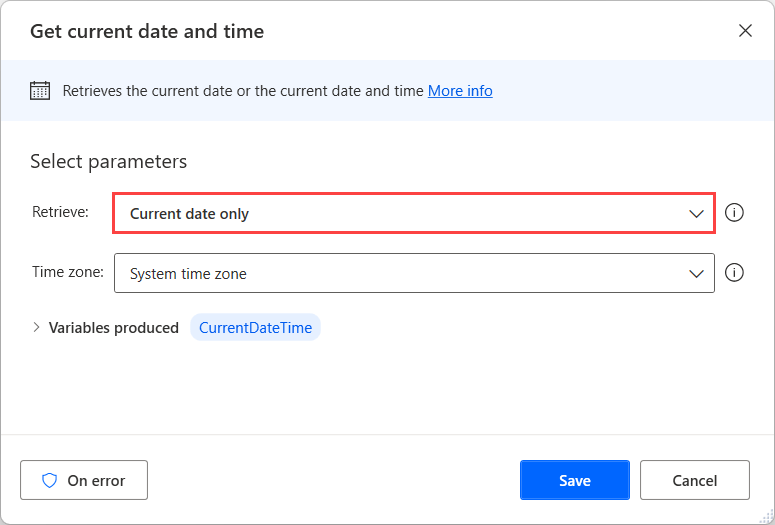
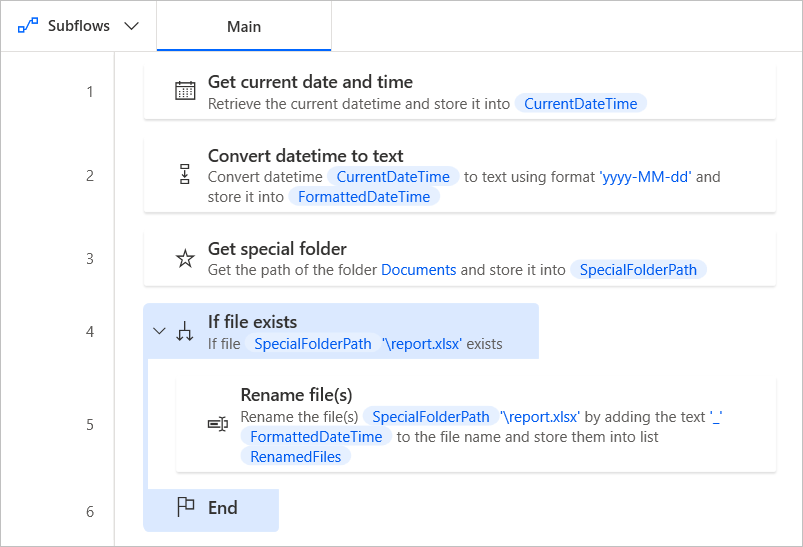
Expand the Datetime category, and select the Get current date and time action. Configure it to only retrieve the date.
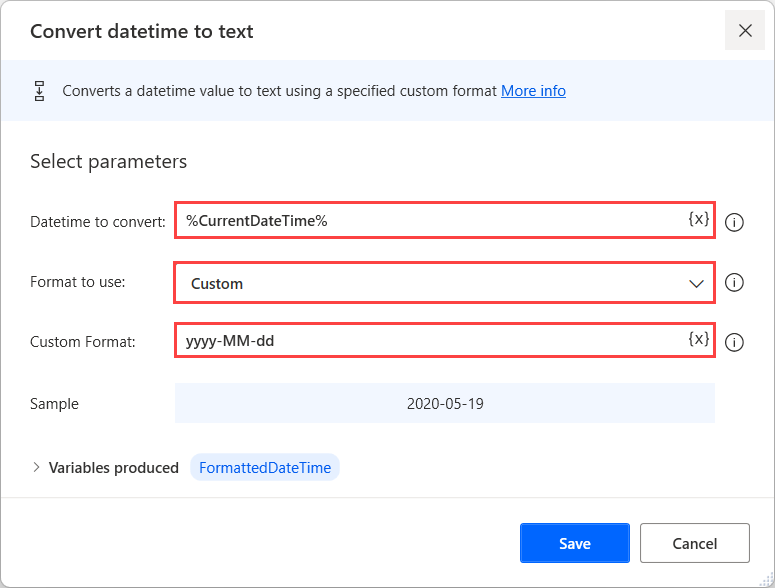
Next, expand the Text category, and configure the Convert datetime to text actions as follows. This step will ensure that the current date is displayed in a filename-friendly format.
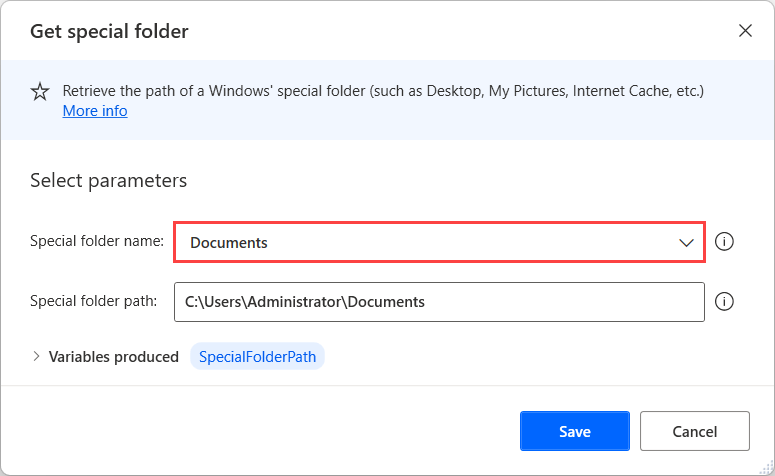
Use the Get special folder action to retrieve the path of the documents folder.
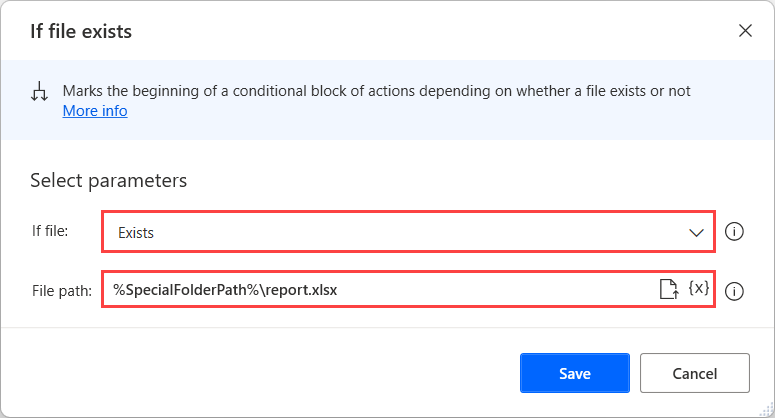
Add the If file exists action from the Conditionals category, and configure it to check whether the file report.xlsx is present in the documents folder.
Finally, add the current date to the file's name by using the Rename file(s) action from the File category.

The resulting flow should look like the following figure:
Following this example, it's possible to imagine a wide range of scenarios where Power Automate can be used to automate tasks. The abundance of actions, combined with cloud management capabilities, affords endless possibilities to individual users and organizations.
Next Steps
Learn how to set up Power Automate.
Begin your journey in Power Automate by creating a Power Automate desktop flow.
Get familiar with the console and the flow designer.
Find the list of actions in the Actions reference.
Learn how to apply unattended RPA licenses to your flows.