Events
Power BI DataViz World Championships
14 Feb, 16 - 31 Mar, 16
With 4 chances to enter, you could win a conference package and make it to the LIVE Grand Finale in Las Vegas
Learn moreThis browser is no longer supported.
Upgrade to Microsoft Edge to take advantage of the latest features, security updates, and technical support.
Power BI provides two ways you can endorse your valuable, high-quality content to increase its visibility: promotion and certification.
Promotion: Promotion is a way to highlight content you think is valuable and worthwhile for others to use. It encourages the collaborative use and spread of content within an organization.
Any content owner or member with write permissions on the workspace where the content is located, can promote the content when they think it's good enough for sharing.
Certification: Certification means that the content meets the organization's quality standards and can be regarded as reliable, authoritative, and ready for use across the organization.
Only authorized reviewers (defined by the Power BI administrator) can certify content. Content owners who wish to see their content certified and aren't authorized to certify it themselves need to follow their organization's guidelines about getting their content certified.
Currently it's possible to endorse:
If semantic model discoverability is enabled in your organization, endorsed semantic models can be made discoverable. When a semantic model is discoverable, users who don't have access to it are able to find it and request access. See: Semantic model discoverability for more detail.
This article describes how to promote content, how to certify content if you're an authorized reviewer, and how to request certification if you're not.
See Endorsement: Promoting and certifying Power BI content to learn more about endorsement.
To promote content, you must have write permissions the workspace where the content you want to promote is located.
Note
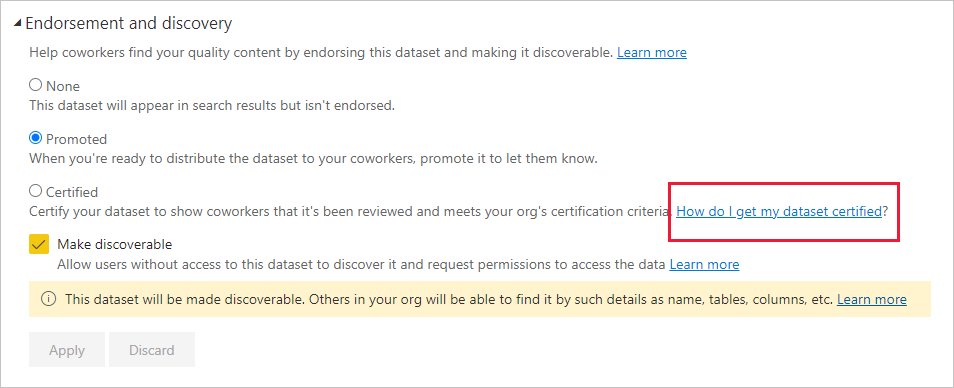
For the purposes of illustration, the endorsement dialog for semantic models is shown below. The dialogs for the other content types are almost identical, with the same radio button options.
Go to the settings of the content you want to promote.
Expand the endorsement section and select Promoted.
If you are promoting a semantic model and see a Make discoverable checkbox, it means you can make it possible for users who don't have access to the semantic model to find it. See semantic model discovery for more detail.
If you're promoting a semantic model, make sure the semantic model has an informative description. The description is important; it's what users see in the semantic model info tooltip in the semantic models hub and on the semantic model's details page. A description helps users quickly identify semantic models that might be useful for them. See Semantic model description for details about how to provide a semantic model description.
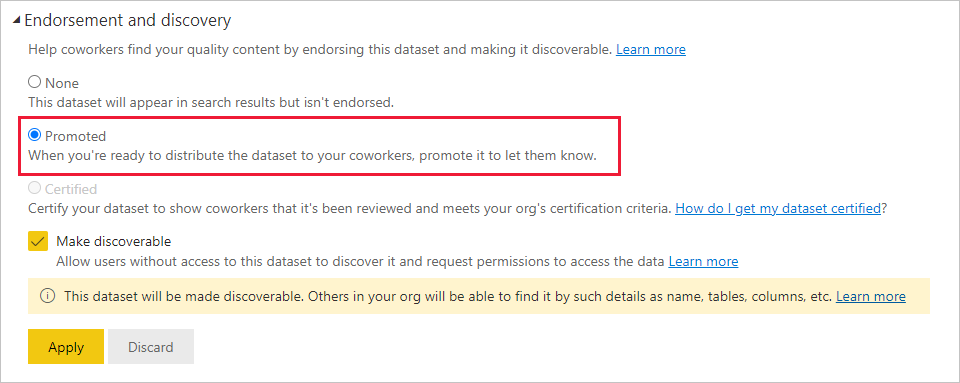
Select Apply.
Content certification is a big responsibility, and only authorized users can certify content. Other users can request content certification. This section describes how to certify content.
Note
For the purposes of illustration, the endorsement dialog for semantic models is shown below. The dialogs for the other content types are almost identical, with the same radio button options.
Get write permissions on the workspace where the content you want to certify is located. You can request these permissions from the content owner or from anyone with admin permissions on the workspace.
Carefully review the content and determine whether it meets your organization's certification standards.
If you decide to certify the content, go to the workspace where it resides, and then open the settings of the content you want to certify.
Expand the endorsement section and select Certified.
If you're certifying a semantic model and see a Make discoverable checkbox, it means you can make it possible for users who don't have access to the semantic model to find it. See semantic model discovery for more detail.
If you're certifying a semantic model, make sure the semantic model has an informative description. The description is important; it's what users see in the semantic model info tooltip in the semantic models hub and on the semantic model's details page. A description helps users quickly identify semantic models that might be useful for them. See Semantic model description for details about how to provide a semantic model description.
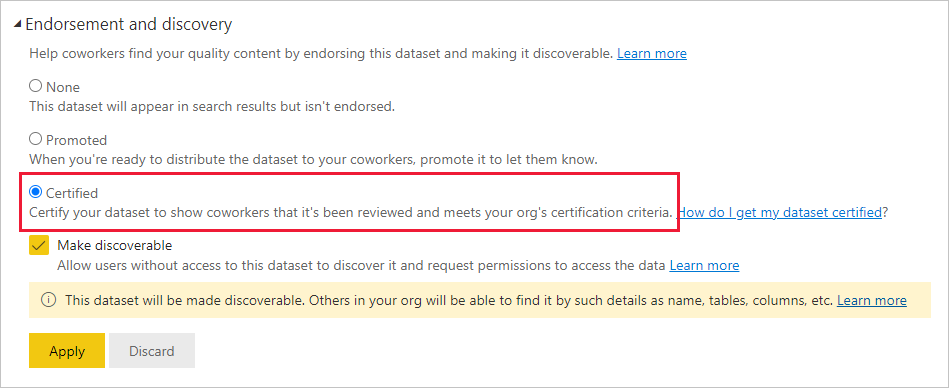
Select Apply.
If you would like to certify your content but aren't authorized to do so, follow the steps below.
Note
For the purposes of illustration, the endorsement dialog for semantic models is shown below. The dialogs for the other content types are almost identical, with the same radio button options.
Go to the workspace where the content you want to be certified is located, and then open the settings of that content.
Expand the endorsement section. The Certified button is greyed out since you aren't authorized to certify content. Click the link about how to get your content certified.
Note
If you clicked the link above but got redirected back to this note, it means that your Power BI admin has not made any information available. In this case, contact the Power BI admin directly.
The Endorsement dialog is accessed through the settings of the content you want to endorse. Follow the instructions below to get to the settings for each content type.
Semantic models: In list view, hover over the semantic model you want to endorse, click More options (...), and then choose Settings from the menu that appears.
Dataflows: In list view, hover over the dataflow you want to endorse, click More options (...), and then choose Settings from the menu that appears.
Reports: In list view, hover over the report you want to endorse, click More options (...), and then choose Settings from the menu that appears. Alternatively, if the report is open, choose File > Settings.
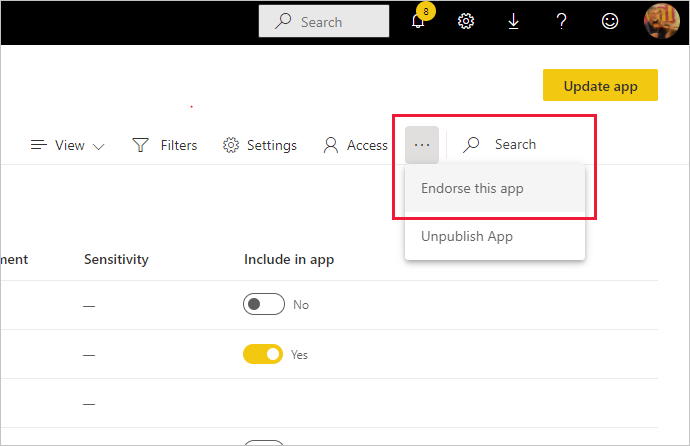
Apps: Go to the app workspace, click More options (...) on the menu bar, and choose Endorse this app.
Events
Power BI DataViz World Championships
14 Feb, 16 - 31 Mar, 16
With 4 chances to enter, you could win a conference package and make it to the LIVE Grand Finale in Las Vegas
Learn moreTraining
Module
Secure, publish, and share data in Power BI - Training
Learn how to secure, share, and publish Microsoft Power BI reports as part of the Power BI service. Understand workspaces and certification.
Certification
Microsoft Certified: Power BI Data Analyst Associate - Certifications
Demonstrate methods and best practices that align with business and technical requirements for modeling, visualizing, and analyzing data with Microsoft Power BI.