How to create and modify Dataverse forms by using the Data workspace
The Forms tab displays the forms used in the basic forms that are embedded in the site, and all other forms in the environment that are associated with the respective table. It only shows the main form type that is supported in portals.
You use the data workspace to create and modify Dataverse table forms directly in the Power Pages design studio.
Note
You'll need to ensure that the changes you make to forms are published before you create basic and advanced form components on pages.
Tip
We've created a series of tutorials and videos for you to learn to use Power Pages and how create and add a form to a page. For more information, go to Tutorial: Add a form to a page.
Use the Data workspace
Go to Power Pages.
Select a site, and then select Edit.
On the left toolbelt, select Data.
Form designer
On the left pane of the Data workspace, in the Tables in this site section, you'll see a list of tables that are used in basic forms created in the site. The Other tables section is a list of all Dataverse tables in the environment.
Create or modify a form
From the Tables in this site or Other tables section, select the table that you want to either create or modify a form for.
In the table designer, select the Forms tab.
Do one of the following:
To create a new form, select New form.
Enter a name and a description for your form.
Select Create.
To modify an existing form, select the form from Forms in this site or Forms available for this table.
The form will appear in the form designer, which is the same designer used for model-driven apps in Power Apps.
The form can now be configured by adding fields and arranging fields, tabs, and sections.
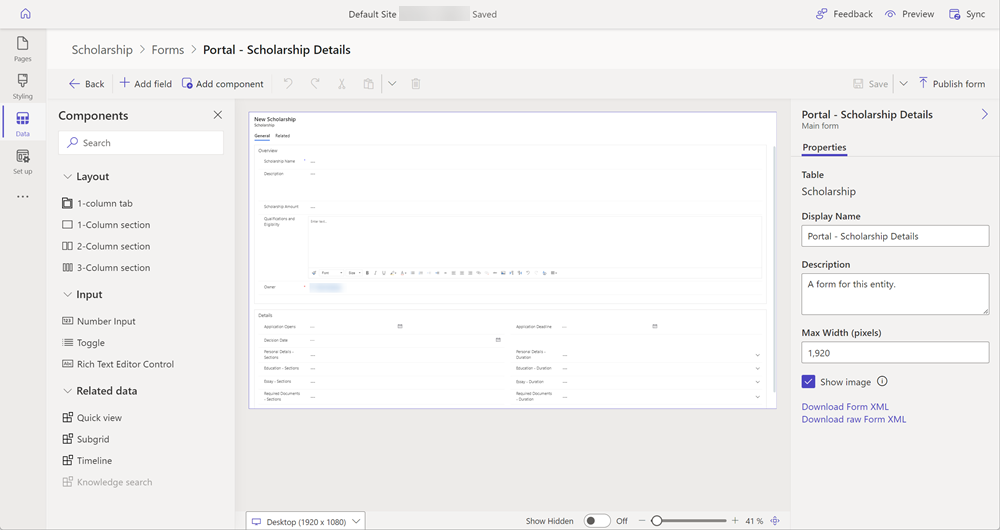
Form designer overview
The form designer provides a modern WYSIWYG authoring experience when you modify or create forms. The forms can be used to add a form component to a page on your site.
Changes to the form are instantly reflected in the preview. An always-available property pane makes the common task of updating properties quick and easy. Updates to properties are also instantly reflected in the form preview. The columns pane with searching and filtering capabilities helps makers quickly find and add columns to the form.
The form designer interface has the following areas.
Command bar
| Item | Description |
|---|---|
| Back | Go back to the table designer. |
| Add field | Open the tables column pane to search and select a column to place on the form. You can also create a new table column. |
| Add component | Open the components pane to search and select form components such as tab and section layouts, input components, and related data views. |
| Undo/Redo | Undo or redo the last action taken—or last edit made—on the form. |
| Cut | Cut a component from the form. |
| Paste | Paste a component on the form. |
| Delete | Delete a component from the form. |
| Save | Save the form. |
| Publish form | Publish the form and make it available to add as a form to a page. |
Other features
| Item | Description |
|---|---|
| Property pane | Displays properties of the selected element. You can make changes here. |
| Preview size switcher | Changes the size of the form preview, helping you to see how the form will appear on various screen sizes. |
| Show hidden | Displays hidden columns in the form preview area. By default, this option is turned off, and hidden columns don't appear on the form preview and are visible only from the tree view pane. When enabled, columns that are hidden are indicated in the form preview area. |
| Zoom slider | Zooms in or out of the form preview, helping you take a closer look. |
| Fit to width | Fits the form preview to the available width. |
| Component | Bind a custom code component to the field on the form. The code component can be enabled on a form using the Pages workspace. |
See also
Feedback
Coming soon: Throughout 2024 we will be phasing out GitHub Issues as the feedback mechanism for content and replacing it with a new feedback system. For more information see: https://aka.ms/ContentUserFeedback.
Submit and view feedback for