Note
Access to this page requires authorization. You can try signing in or changing directories.
Access to this page requires authorization. You can try changing directories.
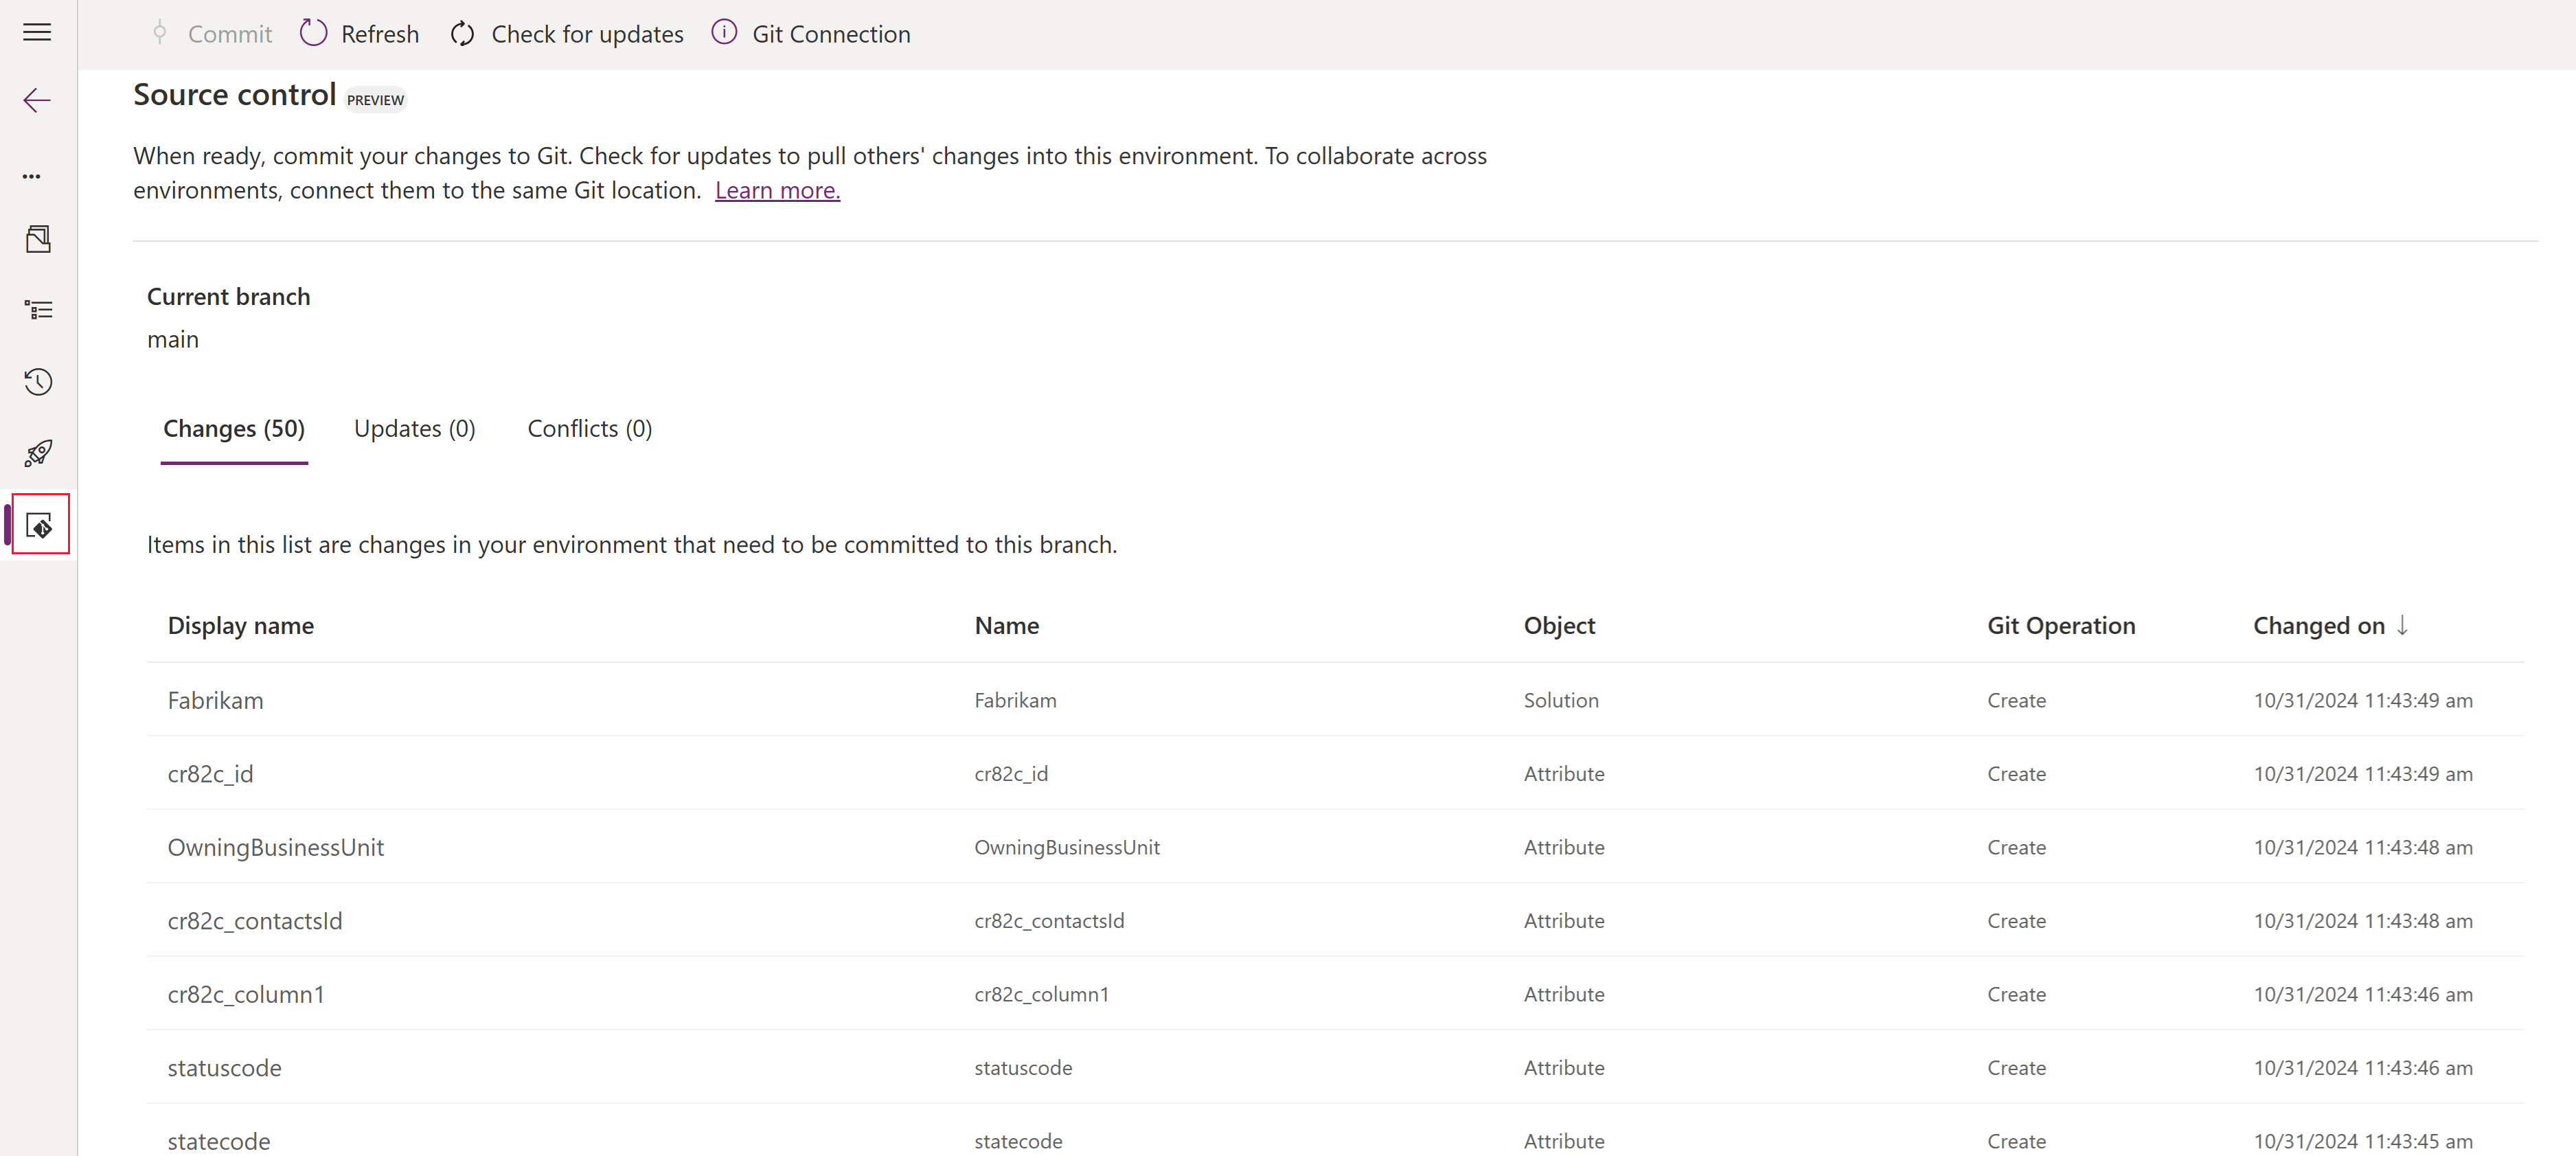
After you connect to Git, your changes are tracked in Microsoft Dataverse. You can view a list of unmanaged changes on the Source control page within your unmanaged Solution. Objects that are part of the managed layer aren't included in the commit.
View changes in the solutions area
After making a change or adding an object in an unmanaged solution, go to the Solutions area in Power Apps.
Open the solution that you made changes to and select Source Control on the left navigation pane.
The source control screen provides a list of Changes available to commit from your environment to source control. Select Refresh to refresh the list if you made changes in another browser tab. Selecting Check for updates queries your source code repository and identifies whether there are Updates in Git available to pull into your environment. When detected, you need to resolve Conflicts detected between objects in your environment and Git.
Conflict resolution
The system detects if there are conflicting changes to your source repository. It lists these issues on the conflicts tab. You should resolve all conflicts before pulling or committing. Select each conflict listed, then choose to keep existing changes if you want to keep the changes originated in your environment or accept incoming changes if you want to accept the changes that were made in your source code repository.
If you choose to keep existing changes, those objects are moved to the Changes tab and are available to commit to your source code repository. If you choose to accept incoming changes, those objects are moved to the Updates tab and are available to pull into your environment. Making the selection in the Conflicts tab doesn't perform any immediate action with source control, but it resolves the conflict so that your next pull or commit action performs the changes that you selected without further conflict.
Pull changes available from source control repository
To import updates available from your source control repository into your environment, switch to the Updates tab and select Check for updates. Next, review the updates available, and then select Pull on the command bar. We recommend that you validate the application experiences that might have been impacted by those incoming changes.
If an object was deleted in Git, you're prompted to either remove the object from your solution (object remains in the environment) or delete the object from your environment. This is necessary before updates are pulled from Git.
Commit changes to source control repository
To commit the changes to source control, switch to the Changes tab and review the changes. Select Commit from the top menu, enter a comment about your commit, and then select Commit again.
Once your changes are committed, you can either navigate directly to Azure DevOps to view your commit or select the commit number provided on the information bar item that notifies you of your successful commit.
Note
It's a best practice to resolve your conflicts first, then pull any changes from source code into your environment, validate your application is still functional and operating as designed, and then commit your changes to source control. This practice ensures that source code commits are of the best quality.
