Note
Access to this page requires authorization. You can try signing in or changing directories.
Access to this page requires authorization. You can try changing directories.
Note
This connector is owned and provided by Profisee.
Summary
| Property | Value |
|---|---|
| Connector |  Profisee |
| Products | Power BI (semantic models) Power Query Online |
| Release state | General availability |
| Category | Online Services |
| Authentication kinds | OAuth |
| Data source kind | Profisee |
| Function Reference Documentation | Profisee.Tables |
| Support link | Support |
Note
Some capabilities might be present in one product but not others due to deployment schedules and host-specific capabilities.
Prerequisites
Before using the Profisee connector, you must have:
- A Profisee account (username and password)
- A running Profisee instance (version 2022.R1 or higher)
Supported capabilities
- Import
Parameters
Entry point: Profisee.Tables
Required parameter count: 1
Navigation Table returning Profisee entities.
| Parameter | Display name | Required | Type | Description | Sample values | Nullable | Additional metadata |
|---|---|---|---|---|---|---|---|
| url | Profisee Instance URL | Yes | text | Enter your Profisee Instance URL | "https://server/profisee" | false | {"Documentation.Category": "", "Documentation.Examples": [], "Documentation.LongDescription": "The type that represents a text URI.", "Documentation.Name": "Uri.Type", "Documentation.Description": "The type that represents a text URI."} |
Connect from Power Query Desktop
To use the Profisee connector:
Open Power BI Desktop.
Select the Get Data option in the Home ribbon to open the Get Data dialogue.
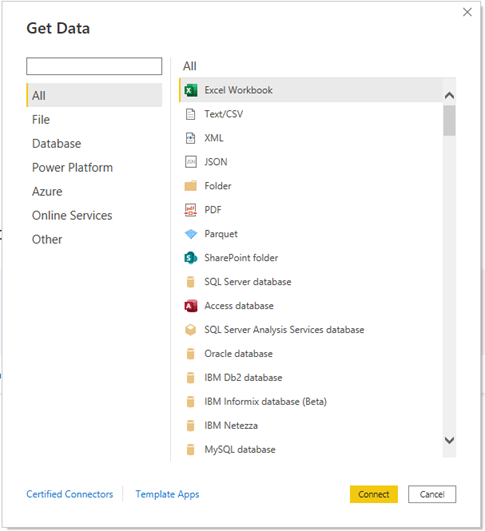
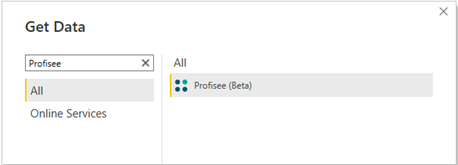
Enter Profisee into the search box or select Online Services and select Profisee from the list, then select Connect.
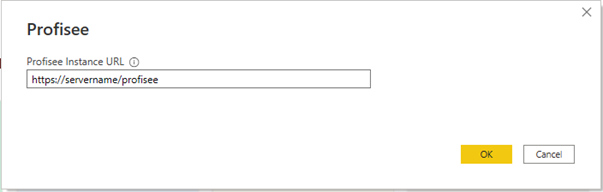
Enter the URL for your Profisee instance, then select OK.
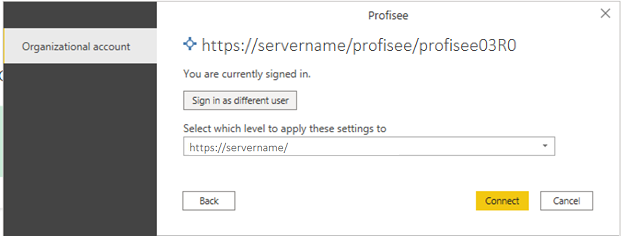
If it's your first time connecting, you're prompted to sign in using an authentication service.
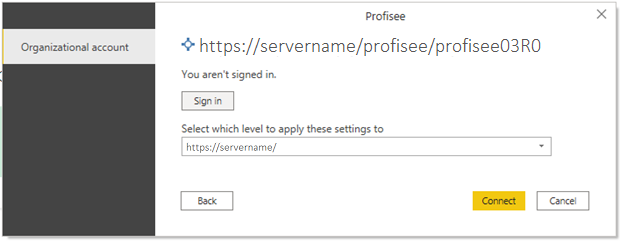
Select Connect.
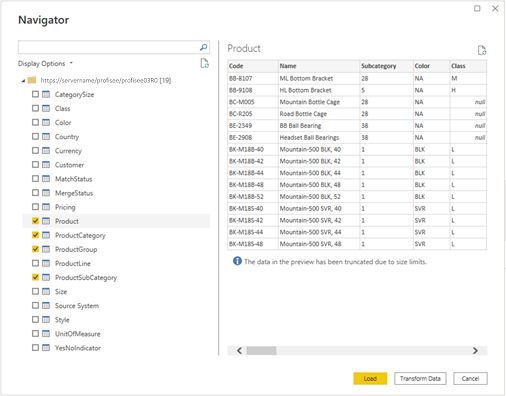
Once connected, the Navigator is displayed. This display lists all entities in your Profisee instance. You can scroll through the navigator to locate specific entities, or search for entities by name using the search bar.

Select the entities that you want to import into Power BI. You can preview the data and choose to either first Transform Data if you want to edit the attribute columns, apply filters, and so on, or Load the data directly into Power BI Desktop.
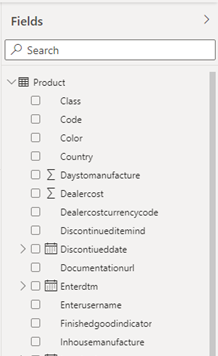
Once loaded, the entities appear in the model view, and you can view the attributes ready for use in Power BI in the Fields dialog.
Connect from Power Query Online
To connect to Profisee data:
Select Profisee from the Power Query Connect to data source page.
In the Profisee dialog, enter the URL for your Profisee instance.
Select Sign in to sign in with your organizational account.
Once you successfully sign in, select Next.
In the Choose data page, select the entities you want to load, and then select Transform data to transform the data in Power Query Editor.
Note
Relationships in Profisee aren't created in the model in Power BI. After the entities are loaded, you can view the model and create or modify relationships as desired.