Channel and group tabs in Python Flask
Explore how to create custom channel and group tabs for Microsoft Teams using Python Flask in this comprehensive sample application. This guide provides detailed steps for setting up your development environment, configuring the app manifest, and testing the integration with local tunneling solutions like dev tunnels, enabling seamless interaction within Teams.
Interaction with app
Included Features
- Tabs
- Channel and Group Tab Configuration
Prerequisites
Python version 3.8 or higher
Check Python version:
python --versionpip (Python package installer)
dev tunnel or Ngrok (For local environment testing) latest version (any other tunneling software can also be used)
Teams Microsoft Teams is installed and you have an account
Microsoft 365 Agents Toolkit for VS Code (Optional but recommended)
Run the app (Using Microsoft 365 Agents Toolkit for VS Code)
The simplest way to run this sample in Teams is to use Microsoft 365 Agents Toolkit for VS Code.
- Install Visual Studio Code
- Install Microsoft 365 Agents Toolkit extension
- Open the project folder in VS Code
- Press F5 or select Run and Debug > Debug in Teams (Chrome)
- Sign in to Microsoft 365 Agents Toolkit with a Microsoft 365 work or school account
- The toolkit will automatically:
- Start the dev tunnel
- Install Python dependencies
- Start the Flask application
- Launch Teams with your app
If you do not have permission to upload custom apps (sideloading), Microsoft 365 Agents Toolkit will recommend creating and using a Microsoft 365 Developer Program account - a free program to get your own dev environment sandbox that includes Teams.
Manual Setup
Clone the repository
git clone https://github.com/OfficeDev/Microsoft-Teams-Samples.git
cd Microsoft-Teams-Samples/samples/tab-channel-group/python
Set up Python virtual environment
python -m venv .venvInstall dependencies
pip install flaskStart dev tunnel (point to port 3978)
devtunnel host -p 3978 --allow-anonymousNote the tunnel URL (e.g.,
https://abc123.devtunnels.ms)Update environment configuration
App Registration
Register your application with Azure AD
- Register a new application in the Microsoft Entra ID – App Registrations portal.
- Select New Registration and on the register an application page, set following values:
- Set name to your app name.
- Choose the supported account types (any account type will work)
- Leave Redirect URI empty.
- Choose Register.
- On the overview page, copy and save the Application (client) ID, Directory (tenant) ID. You'll need those later when updating your Teams application manifest and in the appsettings.json.
- Navigate to API Permissions, and make sure to add the follow permissions:
- Select Add a permission
- Select Microsoft Graph -> Delegated permissions.
User.Read(enabled by default)- Click on Add permissions. Please make sure to grant the admin consent for the required permissions.
Update
env/.env.localwith your tunnel domain:TAB_DOMAIN=abc123.devtunnels.ms TAB_ENDPOINT=https://abc123.devtunnels.msUpdate the manifest
In
appManifest/build/manifest.local.json, replace:- All instances of
localhost:3978with your tunnel domain - Update
validDomainsto include your tunnel domain
- All instances of
Run the Flask application
python app.pyThe app will start on
https://localhost:3978Create Teams app package
python create_package.pyUpload to Teams
- Go to Microsoft Teams
- From the lower left corner, select Apps
- Choose Upload a custom App
- Navigate to
appManifest/build/folder - Select
appManifest.local.zipand choose Open
Useful Commands
# Check if app is running
curl -k https://localhost:3978/health

# Sync domains automatically
python sync_domains.py

# Create new app package
python create_package.py

# Check tunnel status
devtunnel show

# SSL Certificate Commands
# Check if SSL certificates exist
dir "%USERPROFILE%\.fx\certificate\"

# View SSL certificate details (requires OpenSSL)

openssl x509 -in "%USERPROFILE%\.fx\certificate\localhost.crt" -text -noout # Windows

# Test HTTPS connection
curl -k https://localhost:3978/health

# Generate new localhost SSL certificate (if needed)
# Note: Teams Toolkit automatically generates these certificates
Configuration
Environment Variables (.env.local)
TEAMSFX_ENV=local
TEAMS_APP_ID=your-app-id
TAB_DOMAIN=your-tunnel-domain
TAB_ENDPOINT=https://your-tunnel-domain
SSL_CRT_FILE=%USERPROFILE%\.fx\certificate\localhost.crt
SSL_KEY_FILE=%USERPROFILE%\.fx\certificate\localhost.key
SSL Certificate Configuration
The app automatically uses SSL certificates for HTTPS, which is required by Microsoft Teams:
Certificate Location:
%USERPROFILE%\.fx\certificate\localhost.crt  # SSL Certificate (Windows)
%USERPROFILE%\.fx\certificate\localhost.key  # Private Key (Windows)
$HOME/.fx/certificate/localhost.crt         # SSL Certificate (macOS/Linux)
$HOME/.fx/certificate/localhost.key         # Private Key (macOS/Linux)
Automatic Behavior:
- If certificates exist: Runs on
https://localhost:3978 - If certificates missing: Falls back to
http://localhost:3978 - Teams Toolkit automatically generates certificates during setup
Manifest Configuration
The manifest supports environment variable substitution:
${{TEAMS_APP_ID}}- Your Teams app ID${{TAB_DOMAIN}}- Your tunnel domain- Automatic processing during deployment
Running the sample
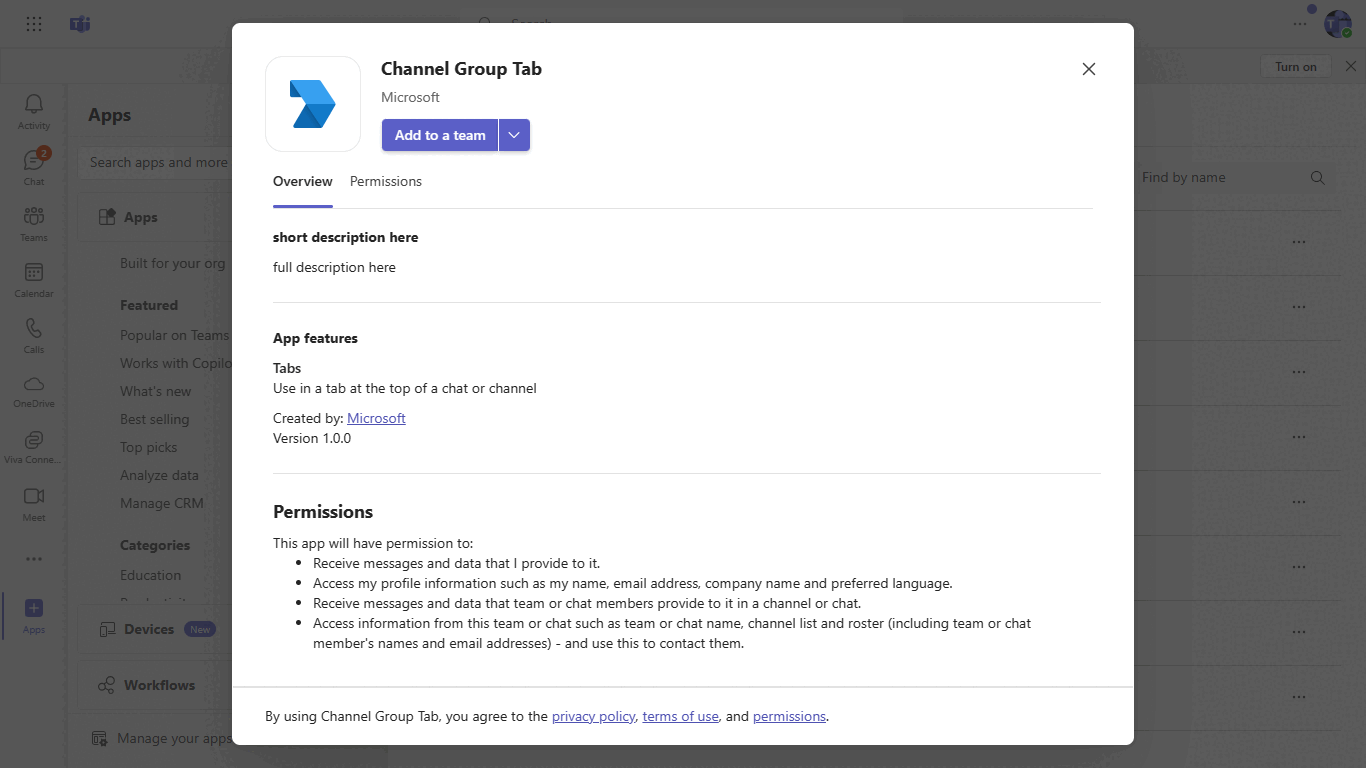
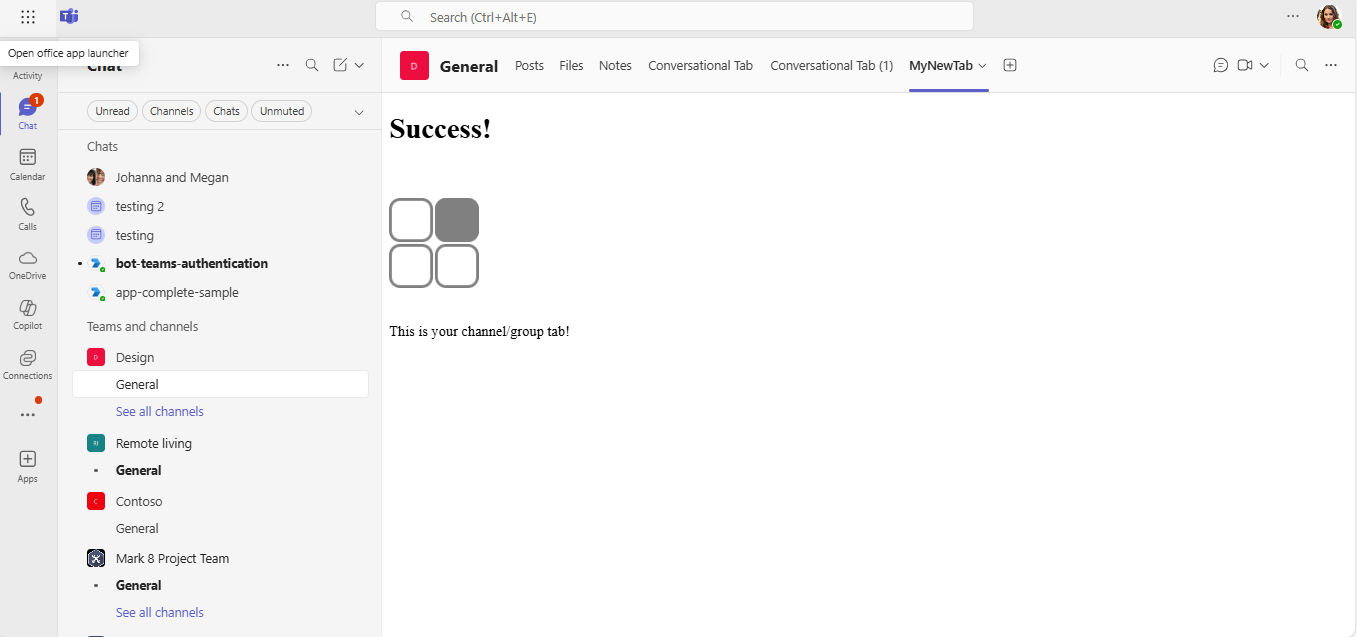
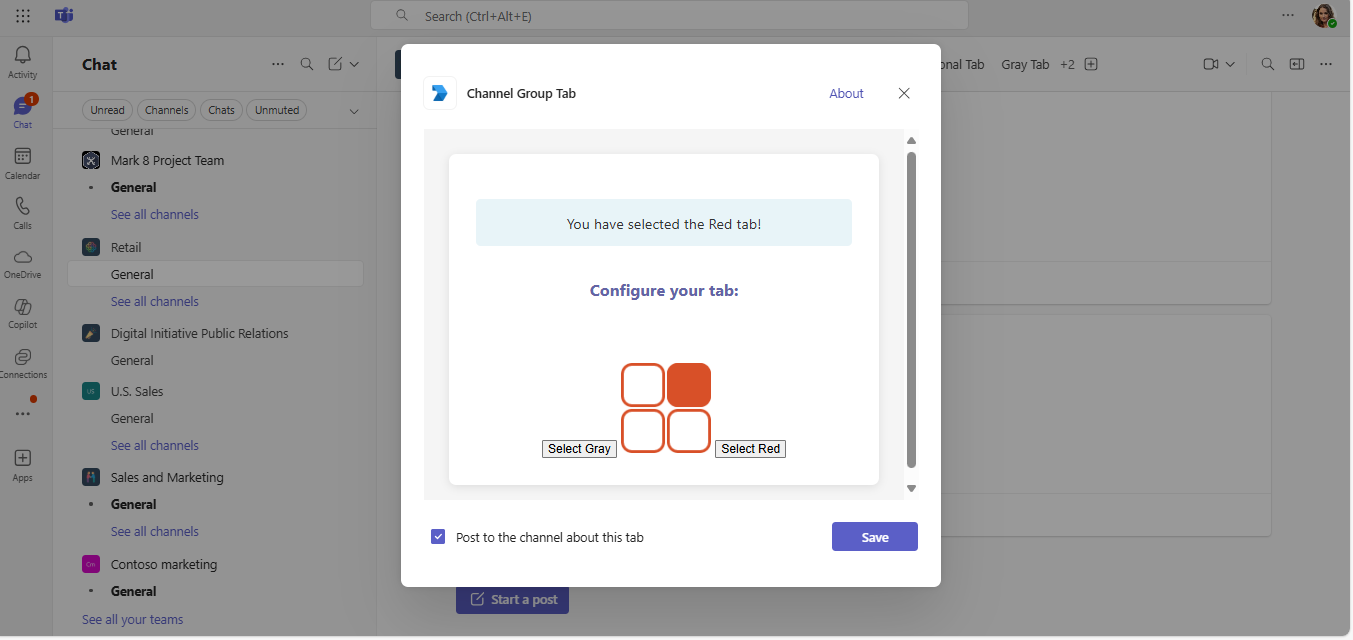
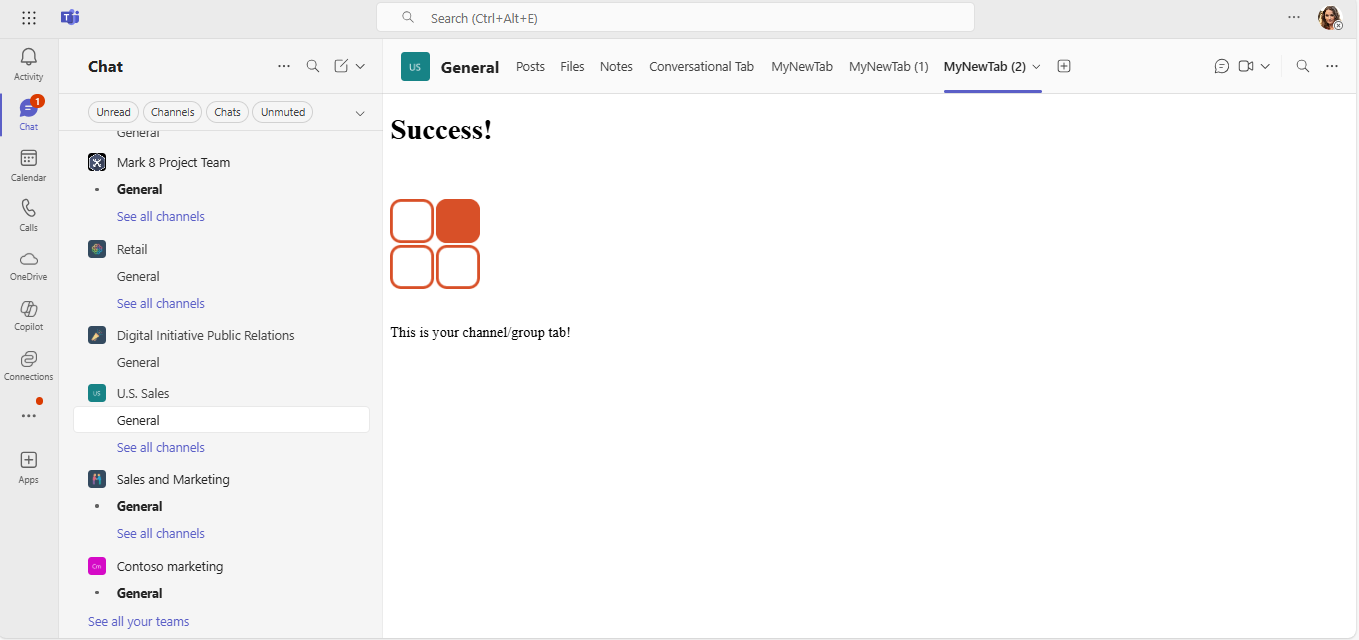
The app allows users to configure custom tabs in Microsoft Teams channels and group chats, with options to select between Gray and Red themed tabs.
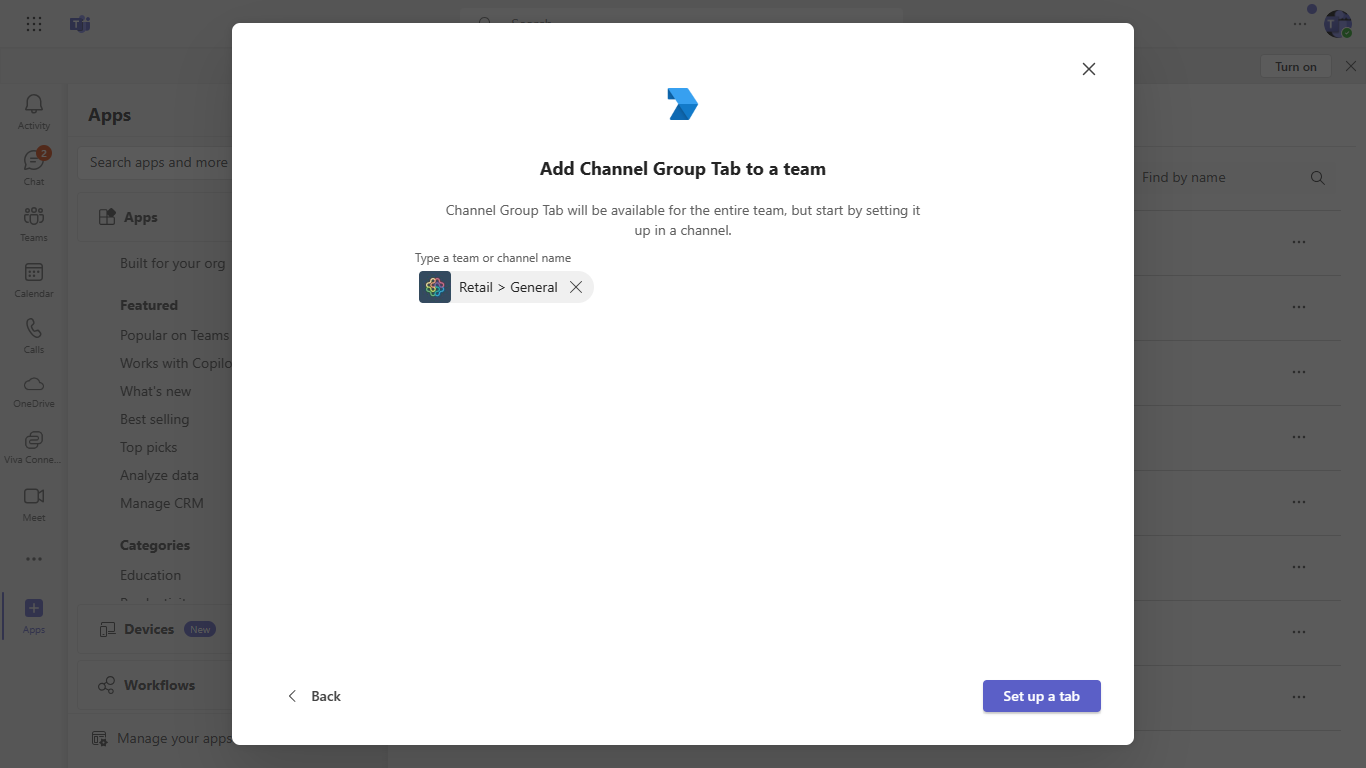
Configuration Flow
Step 1: Configure Teams
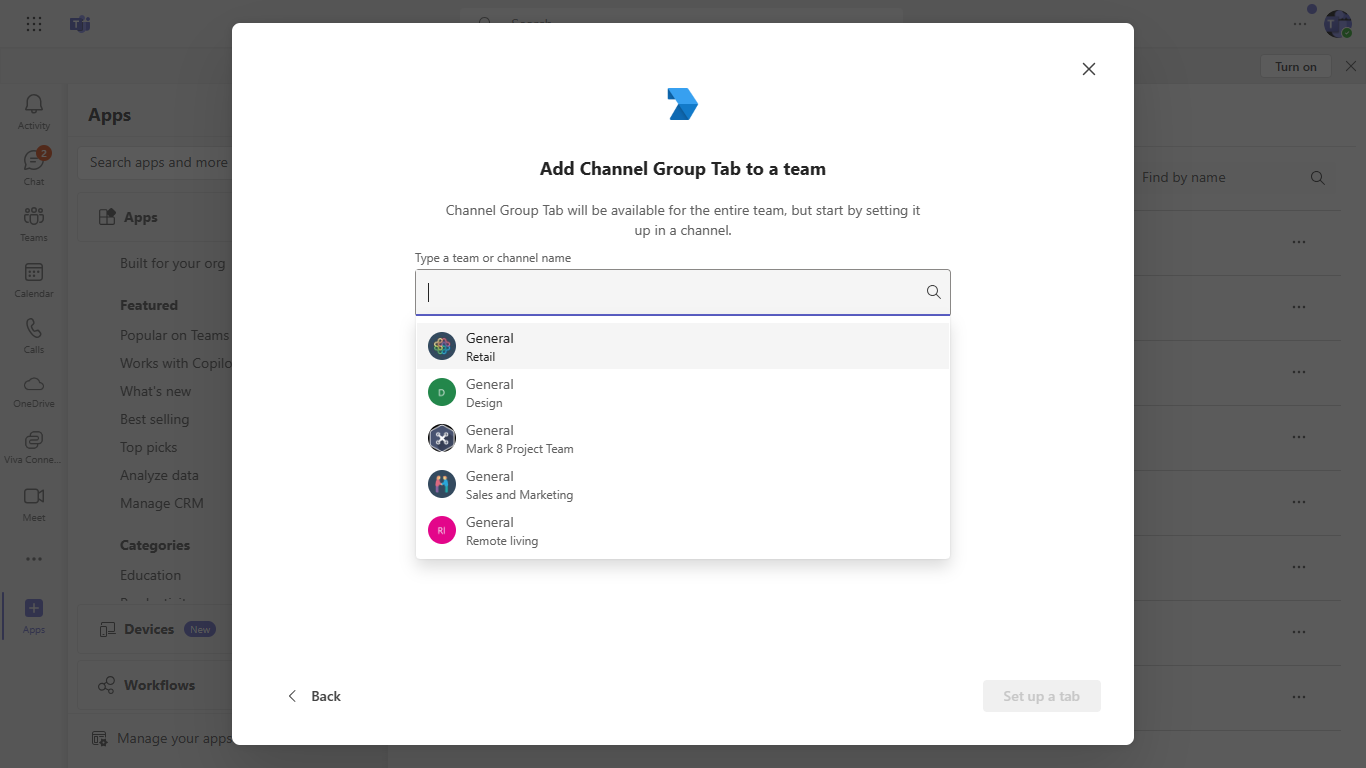
Step 2: Setup Tab
Step 3: Gray Tab Configuration
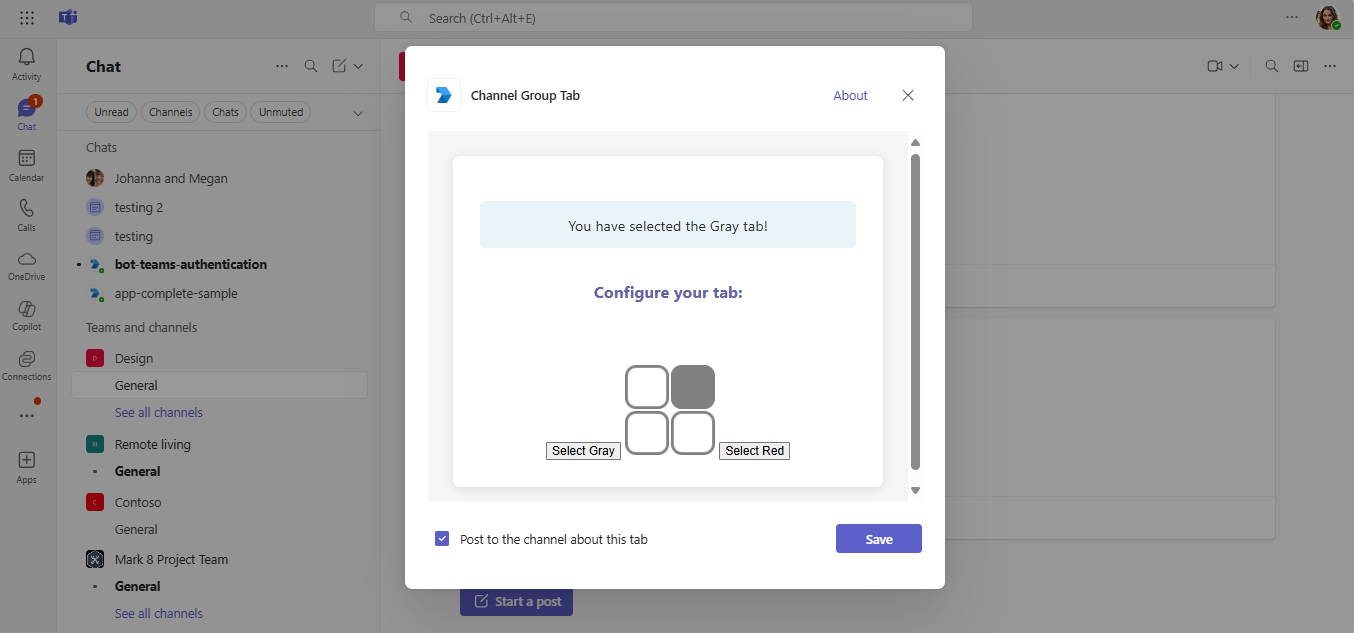
Step 4: Gray Tab Result
Step 5: Red Tab Configuration
Step 6: Red Tab Result
Development Tips
- Auto-restart during development: Use Flask's debug mode for automatic reloading
- Domain changes: When tunnel domain changes, run
sync_domains.pyand recreate the app package - Testing: Test both configuration page (
/tab) and content pages (/gray,/red) - Debugging: Check browser developer tools and Flask console for errors
Further Reading
- Microsoft Teams Tabs Documentation
- Create a Custom Channel and Group Tab
- Teams JavaScript SDK
- Flask Documentation
- Dev Tunnels Documentation
License
This project is licensed under the MIT License - see the LICENSE file for details.