Apply sensitivity labels to Microsoft Teams, Microsoft 365 groups, and SharePoint sites
- 15 minutes
Sensitivity labels for containers (Teams, SharePoint sites, Microsoft 365 Groups) protect the workspace itself, not just the files inside it. A label on a SharePoint site can enforce who's allowed external sharing. A label on a team can control guest access and privacy. These are different decisions from labeling a document, and they happen in different places.
The challenge is knowing where to apply a label and who should be responsible for applying it. Microsoft 365 offers several surfaces for applying container labels:
- Outlook on the web
- SharePoint admin center
- SharePoint document library settings
- Teams admin center
- Teams desktop or web client
Each surface serves a different audience and scope. The following table maps common scenarios to the surface that fits best:
| Scenario | Best surface |
|---|---|
| Group owner classifies their own group | Outlook on the web |
| Admin standardizes labels across many sites | SharePoint admin center |
| Specific library needs a consistent file classification | SharePoint library settings |
| Admin reclassifies an existing team | Teams admin center |
| End user creates a new team with a label | Teams desktop or web client |
| Automated provisioning or scripted label assignment | Microsoft Entra ID |
Apply sensitivity labels to groups in Outlook on the web
Microsoft 365 Groups connect Teams, SharePoint, and shared mailboxes into a single membership boundary. Labeling a group from Outlook on the web is the most direct way for group owners to set or change sensitivity. This approach works well when the group owner is the person closest to understanding the sensitivity of the content the group handles.
- Navigate to Outlook on the web.
- From the left navigation pane, go to Groups.
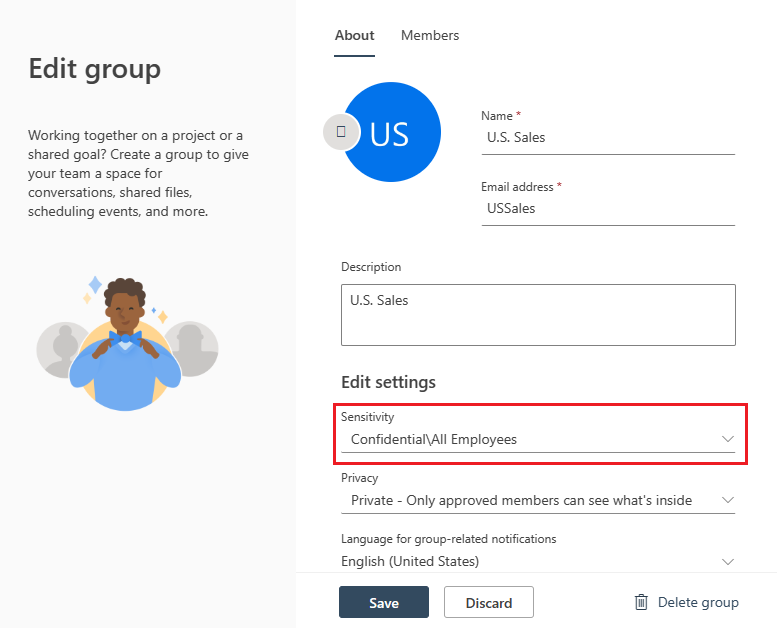
- To edit the sensitivity of an existing group:
- Select the group, then select ... > Settings.
- In the flyout, select Edit group.
- Under Sensitivity, select the desired label, then select Save.
- To assign a label to a new group:
- Select New group.
- In the dialogue, select Edit to the right of Default settings.
- Under Edit settings, select the desired sensitivity label.

Apply sensitivity labels to SharePoint sites
Site-level labels control privacy, external sharing, and Conditional Access settings for the entire site. This is where administrators standardize protection across the organization. Applying labels from the SharePoint admin center makes sense when you need to label or relabel sites at scale, or when site owners shouldn't be making the classification decision themselves.
To apply a label to an existing SharePoint site:
- Navigate to the Microsoft 365 admin center, then select … Show all > SharePoint.
- In the SharePoint admin center, navigate to Sites > Active Sites.
- Select the site you want to modify.
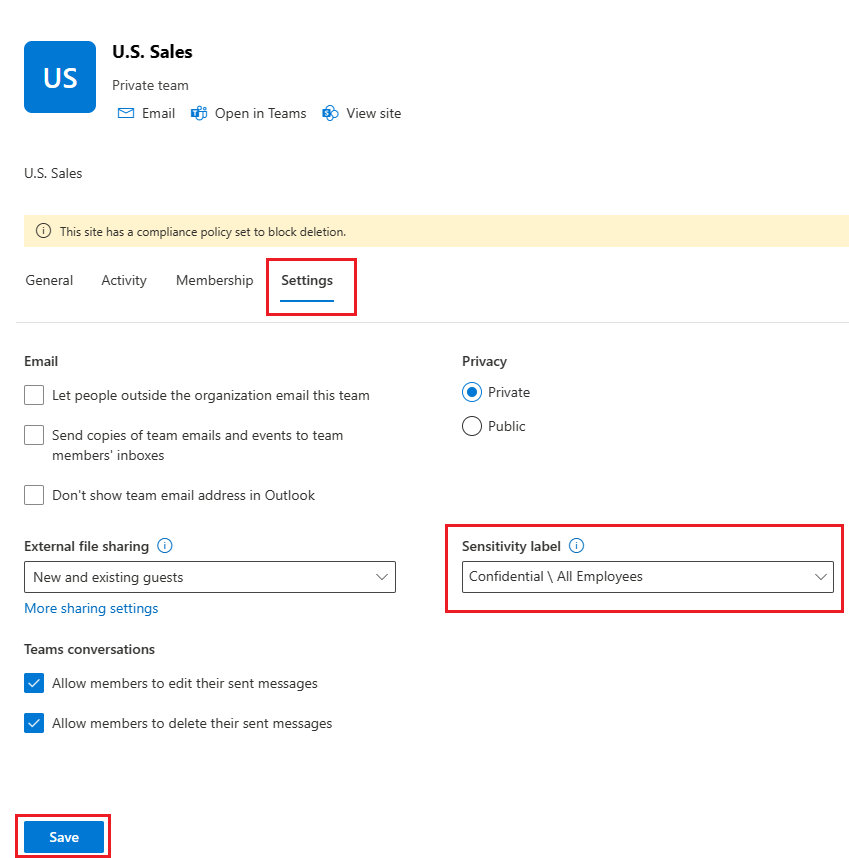
- On the site's properties page, select Settings.
- Under the Settings tab, select the desired sensitivity label, then select Save.

You can also apply a label when creating a new site:
- In the SharePoint admin center, navigate to Sites > Active Sites > + Create.
- Select the site type and template.
- Enter your site settings (name, description, address, owner).
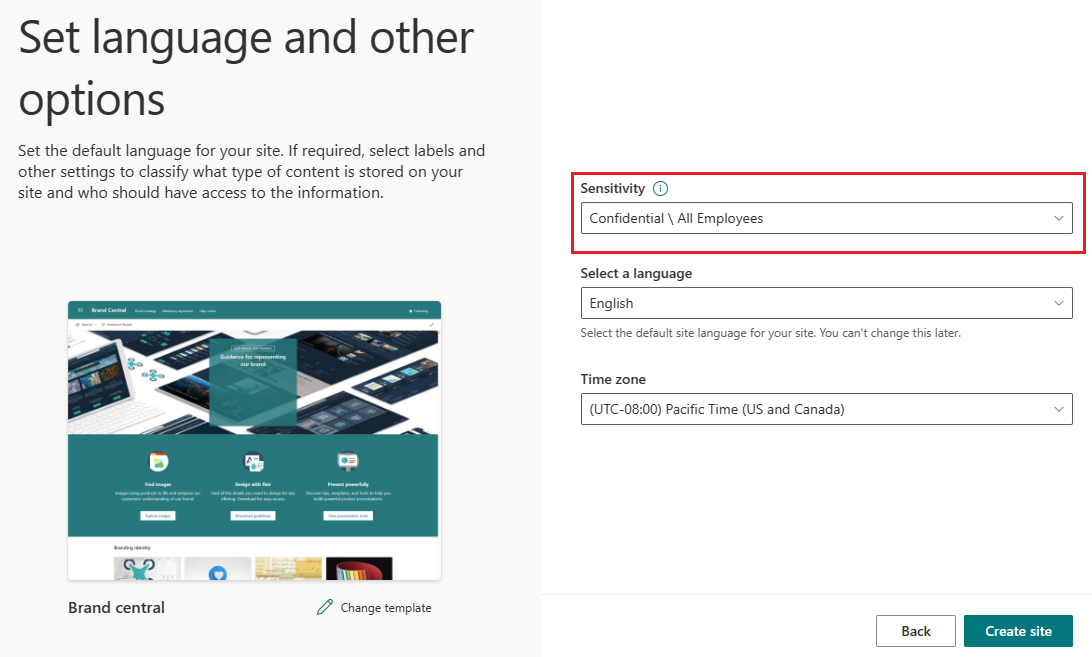
- On the Set language and other options page, under Sensitivity, select the desired label, then select Create site.

Apply default sensitivity labels to SharePoint document libraries
Site labels and library default labels serve different purposes. A site label controls who can access and share from the site, but it doesn't classify or encrypt the files inside it. A library default label fills that gap by classifying the files themselves. When someone uploads or creates a new file in the library, the library automatically applies its default label, unless the file already has a higher-priority label.
A library default label is useful when a specific library holds content that consistently needs the same classification. For example, a library storing client contracts might default to Confidential, ensuring new documents are labeled even if the user forgets.
Navigate to the SharePoint site that contains the document library.
Select Documents from the left navigation pane.
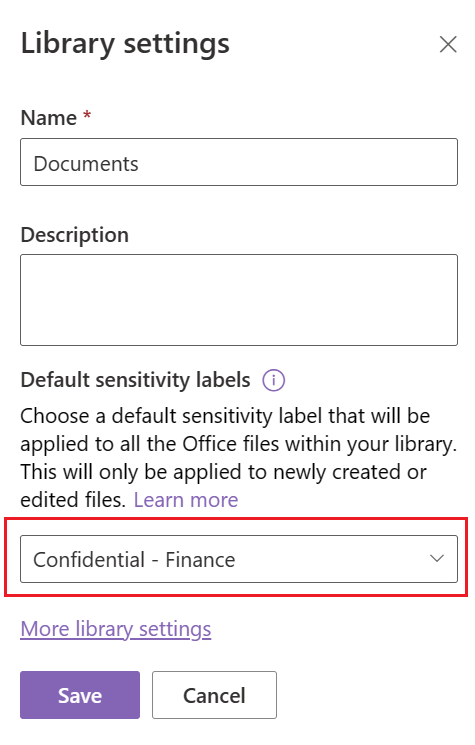
Select the gear icon to open the Settings menu, then select Library settings.
On the Library settings flyout page, under Default sensitivity labels, select the desired label.

Keep in mind that library default labels only apply to newly created or edited files. Existing files at rest aren't relabeled automatically.
Apply sensitivity labels to Teams from the admin center
The Teams admin center gives IT administrators a central view of all teams in the organization. Apply labels from this surface when you need to reclassify an existing team or enforce labels that team owners haven't applied. It's an administrative action, and team owners and members won't typically use this path.
Navigate to the Microsoft Teams admin center, then select Teams > Manage teams from the left navigation pane.
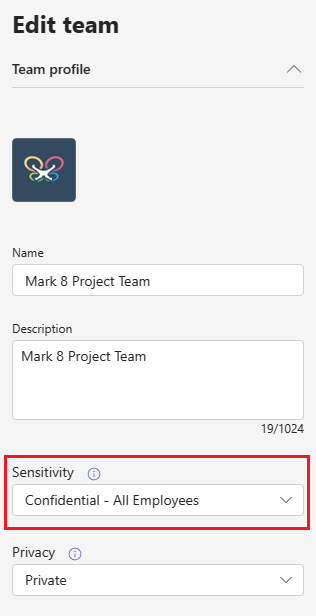
On the Manage teams page, select the check box to the left of the team you want to modify, then select Edit.
On the Edit team flyout page, under Sensitivity, select the desired label.

Apply sensitivity labels when creating teams from the desktop or web client
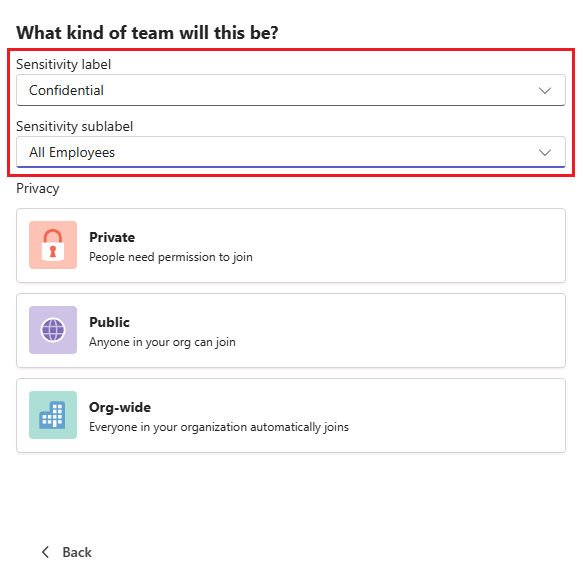
When sensitivity labels are configured with a Groups & sites scope and your organization has Microsoft Entra ID P1 (or higher) licensing, users see a sensitivity label picker when they create a new team. This is the path most end users follow, and it's where label policies are most visible. If your label policy requires a label, users can't skip this step.
In the Teams desktop or web client, select Teams from the left navigation pane.
Select + in the top right, then select Create team.
Enter a Team name, then select the bar under Description to open label and privacy options.
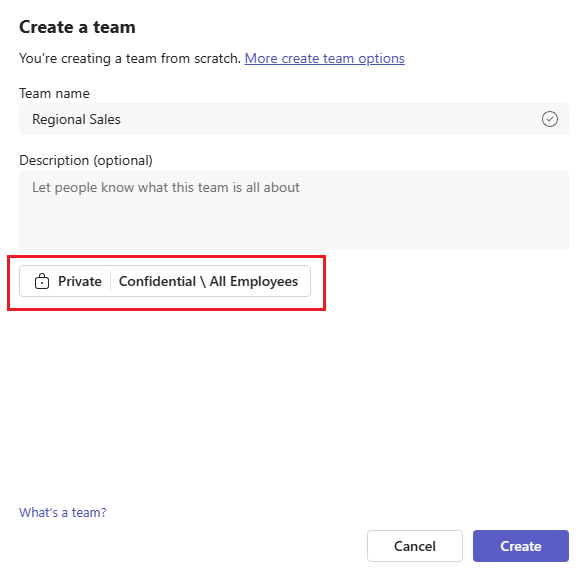
Select the desired sensitivity label and sublabel if applicable.


Tip
The sensitivity label applies to the team, its SharePoint site, and any private channel SharePoint sites.
In practice, most organizations use a combination of these surfaces. Administrators handle bulk site labeling and enforce policies from admin centers, while team and group owners apply labels from the apps they use every day. Organizations that manage group creation centrally can also apply labels through Microsoft Entra ID, which is useful for scripted provisioning workflows.
Check your knowledge
Feedback
Was this page helpful?
No
Need help with this topic?
Want to try using Ask Learn to clarify or guide you through this topic?