Get started with Windows App to connect to devices and apps
Article
Important
Windows App is currently in PREVIEW.
This information relates to a prerelease product that may be substantially modified before it's released. Microsoft makes no warranties, expressed or implied, with respect to the information provided here.
Tip
Select what you want to connect to using the buttons at the top of this article.
Windows App securely connects you to Windows devices and apps on a device of your choice from:
Azure Virtual Desktop
Windows 365
Microsoft Dev Box
Remote Desktop Services
Remote PC
Windows App is available on Windows, macOS, iOS and iPadOS, and web browsers. To learn more about Windows App, see What is Windows App?
The following table shows what you can connect to and from:
Connect to/from
Windows
macOS
iOS/iPadOS
Web browser
Azure Virtual Desktop
Windows 365
Microsoft Dev Box
Remote Desktop Services
Remote PC
Important
You can connect to Remote Desktop Services and a remote PC with Windows App on macOS or iOS/iPadOS, but Microsoft doesn't currently support these connections.
This article shows you how to get started with Windows App on each platform. Make sure you select what you want to connect to using the buttons at the top of this article before continuing.
Windows App replaces the Windows 365 app in the Microsoft Store. If you already have the Windows 365 app installed, make sure you've updated to the latest version, then change the Preview toggle to on. The app and restarts and is renamed and branded Windows App. Once you enable the preview, if you toggle back to the Windows 365 experience, the icon and name in Start menu, Windows taskbar, and your list of installed apps is still called Windows App.
Select Sign in and sign in with your user account. If you're signed in to your local Windows device with a work or school account on a managed device, you're signed in automatically.
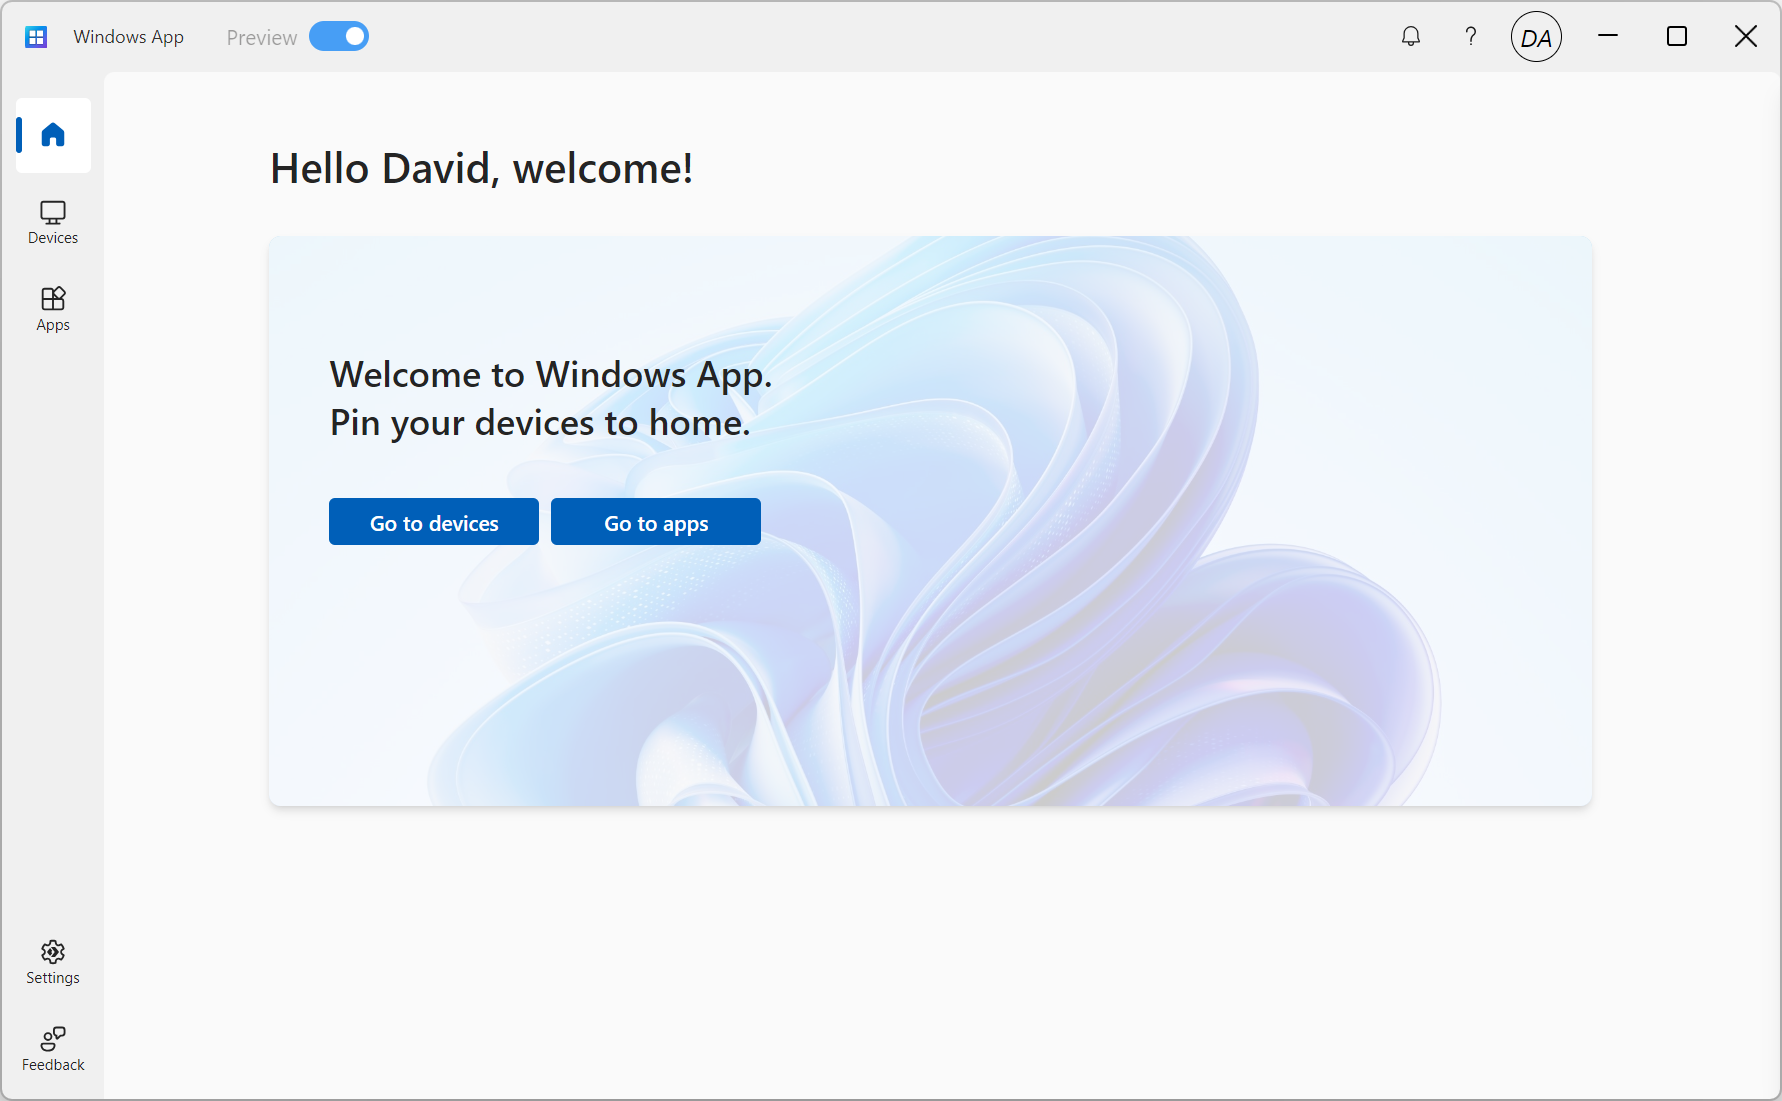
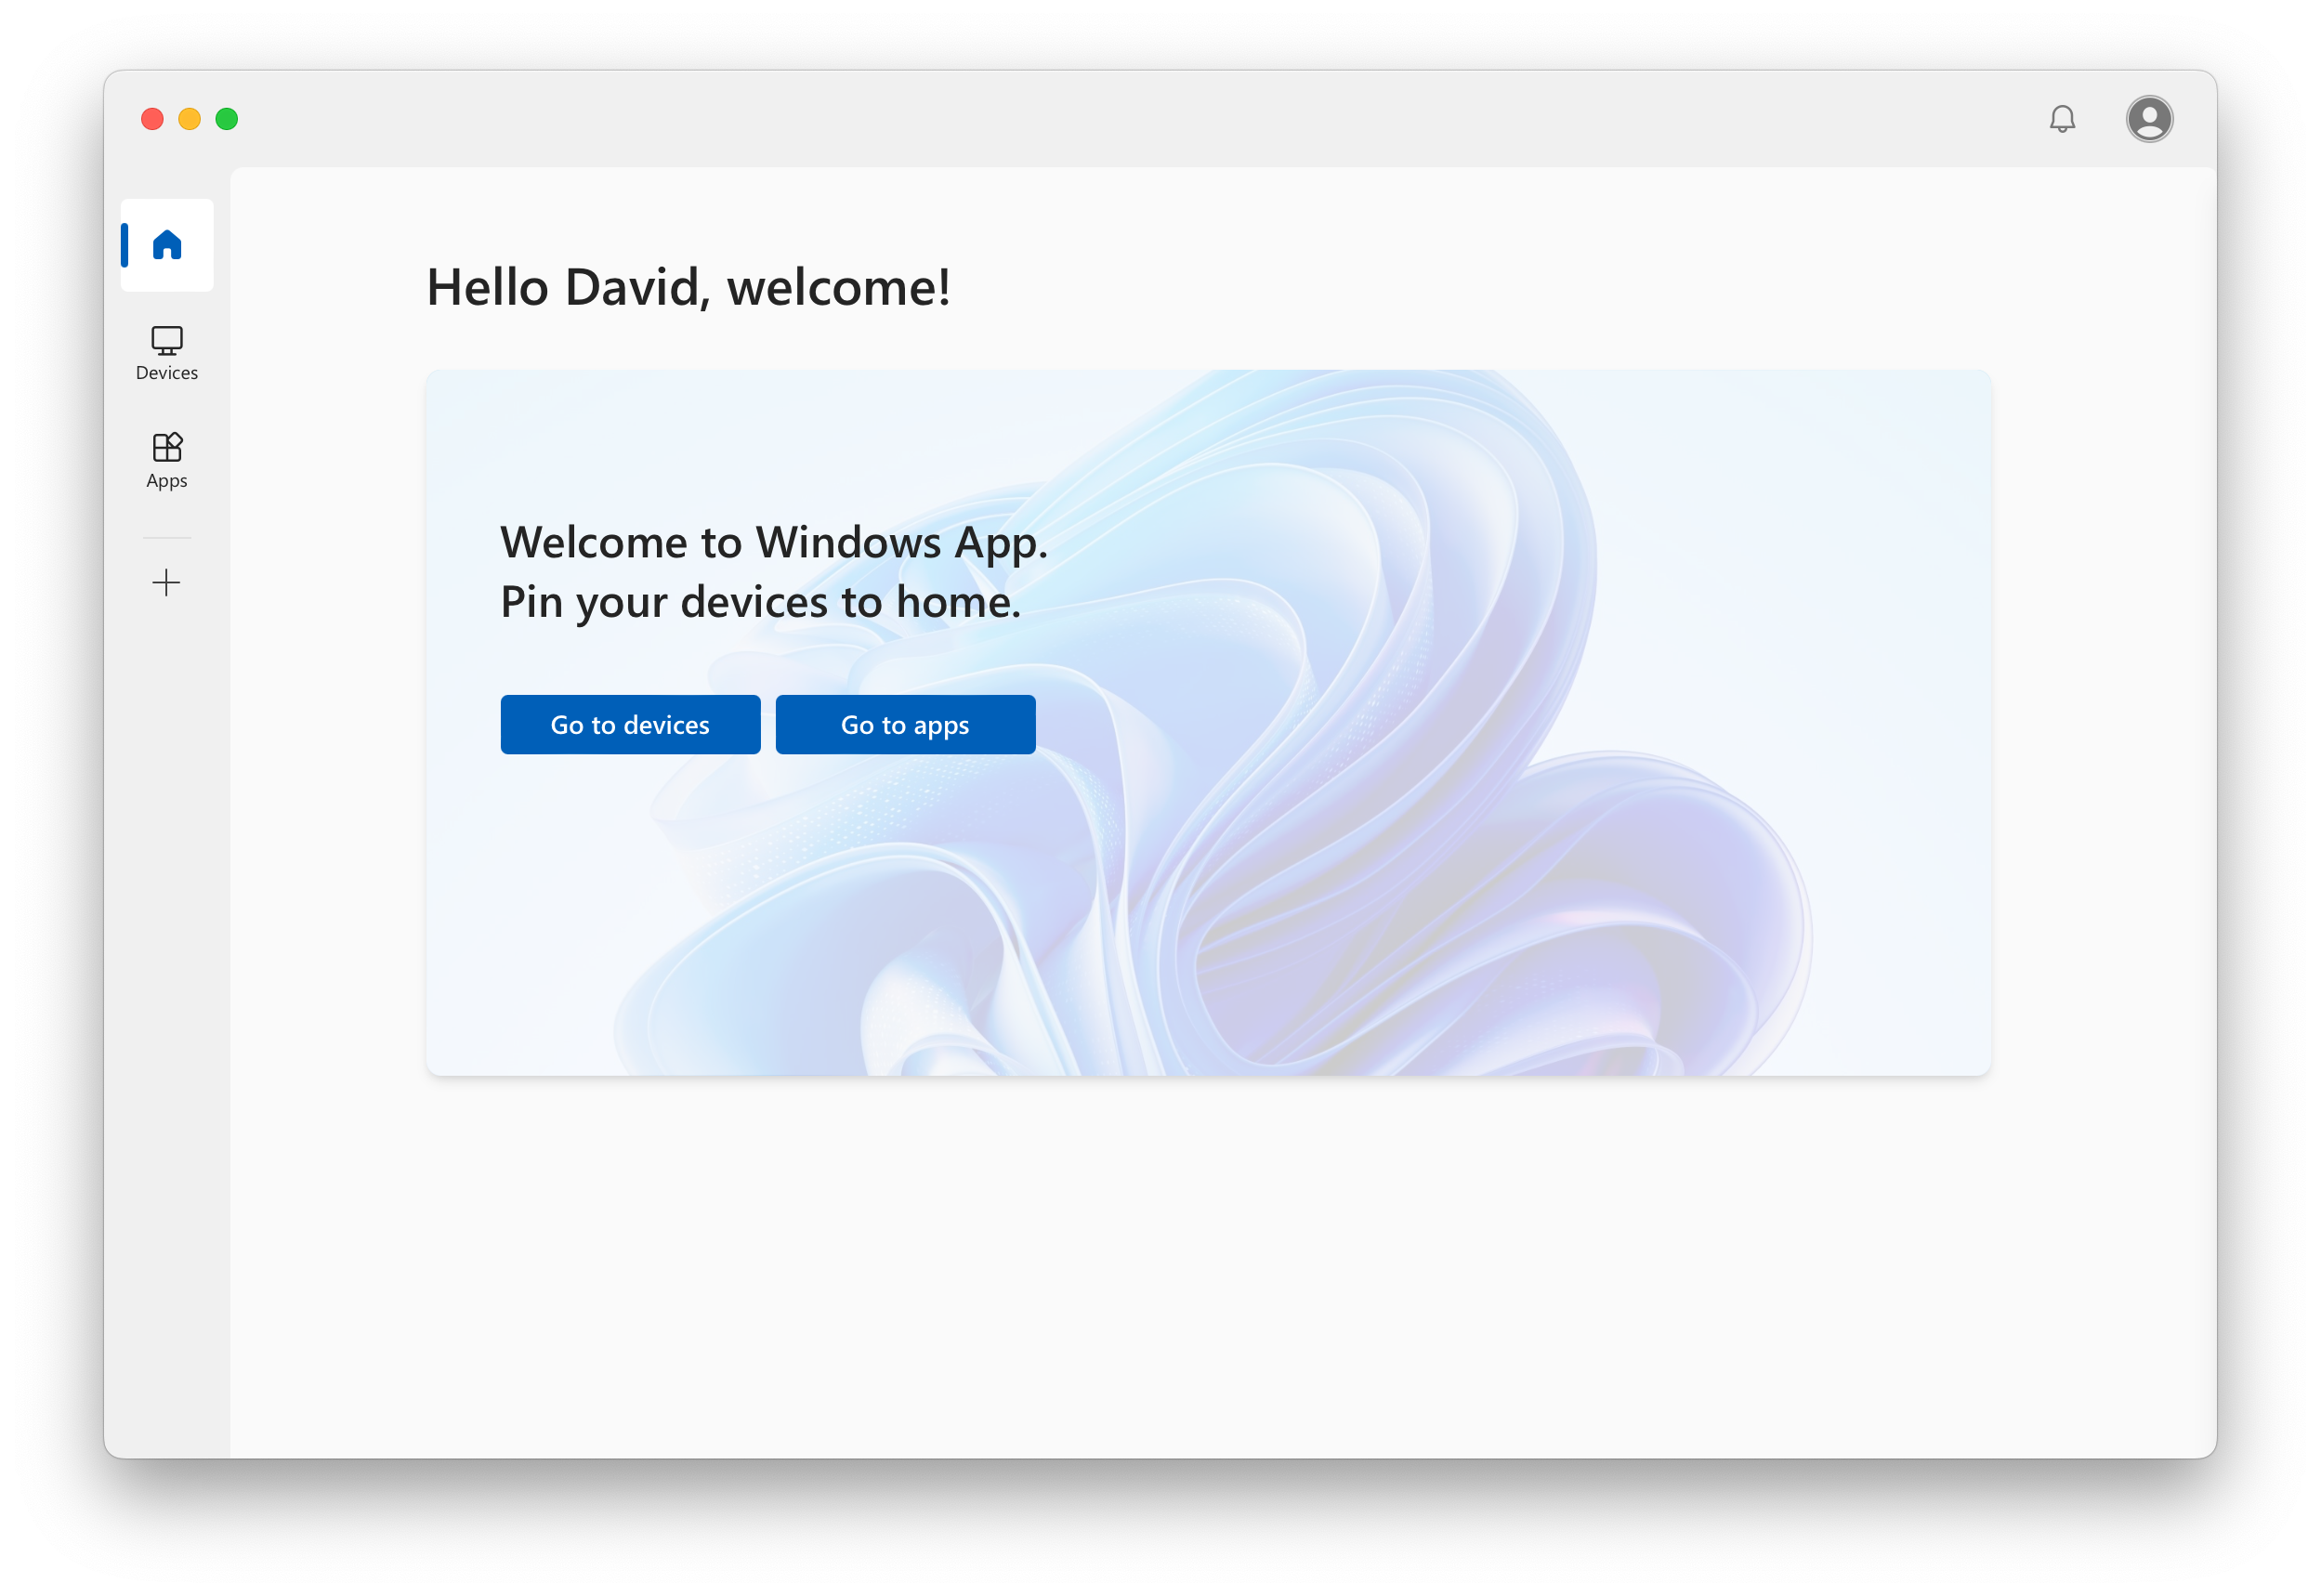
If it's your first time using Windows App, navigate through the tour to learn more about Windows App, then select Done, or select Skip.
From the Home tab, select Go to devices or Go to apps (depending on which you have access to).
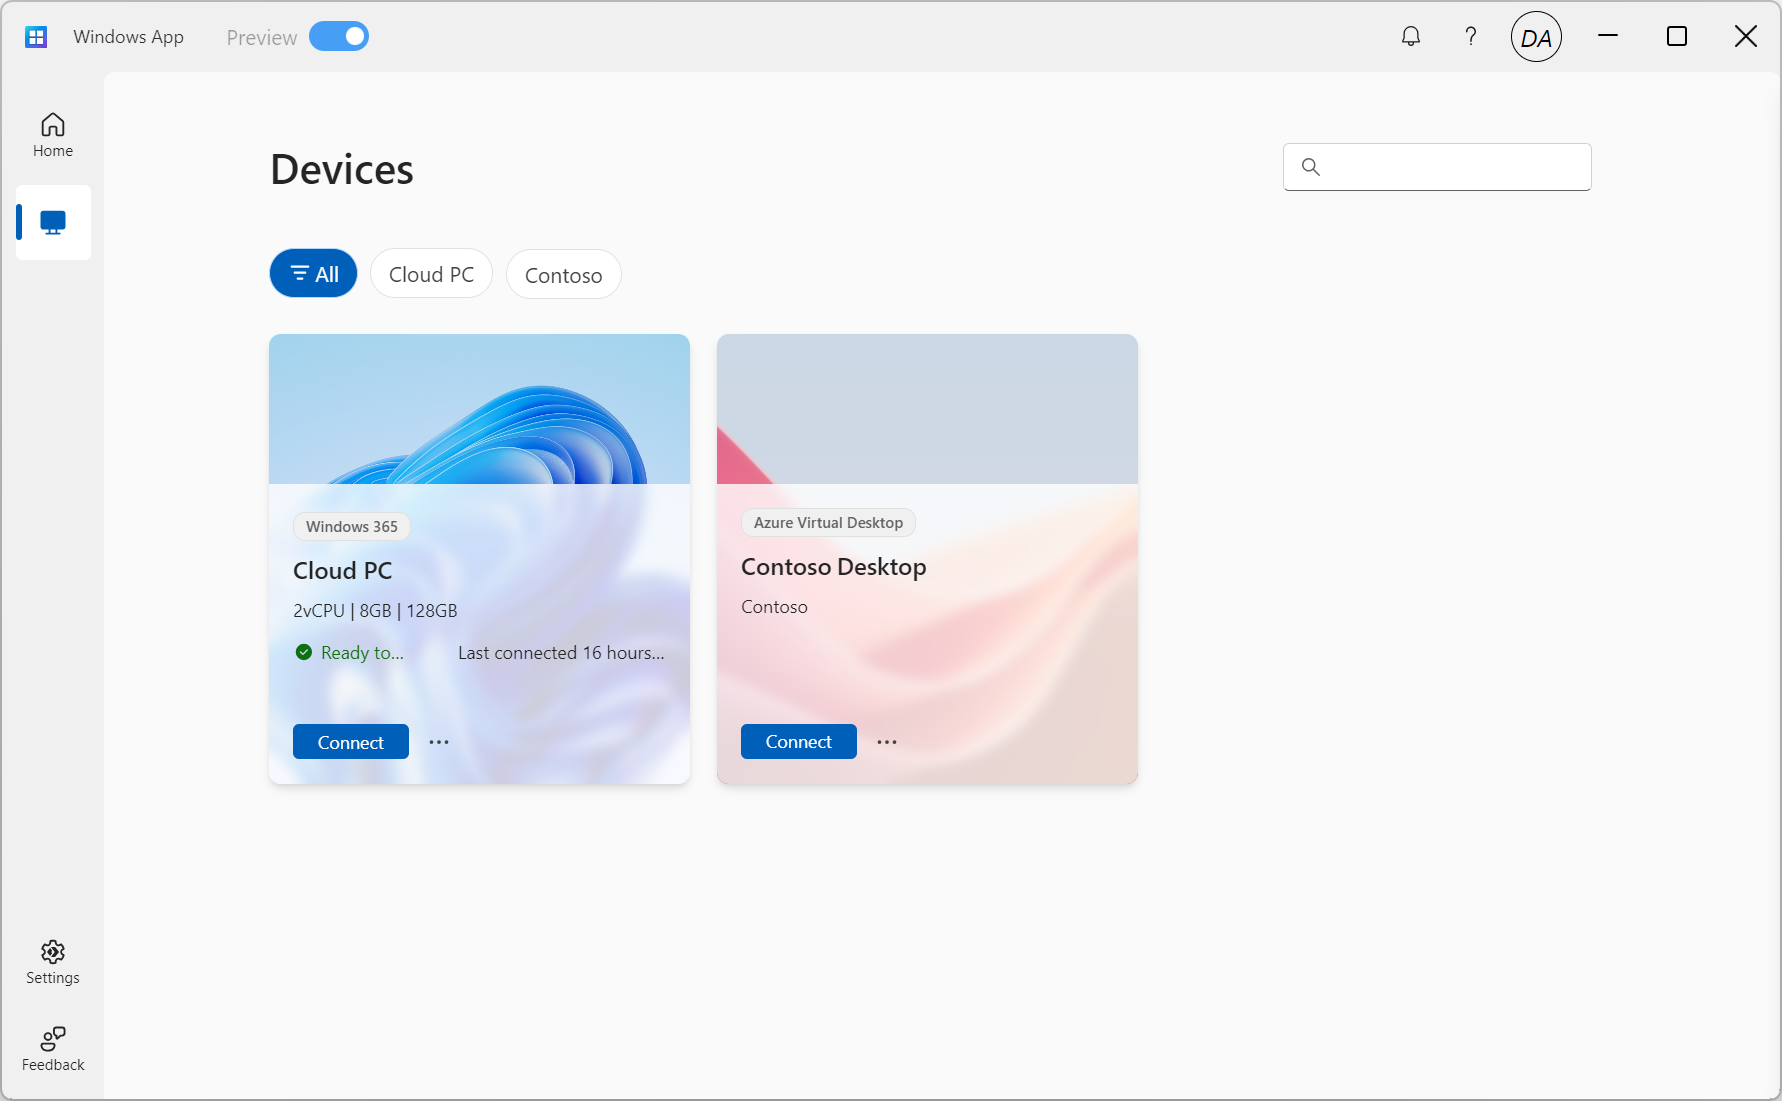
You'll see your devices and apps from Azure Virtual Desktop, along with any other remote resources you have access to. If you don't see any devices or apps, contact your administrator. Find the device or app you want to connect to. You can use the filters to help you find what you want to connect to.
Select Connect. Once the connection to your device or app is complete, you're ready to start using it. You might be prompted to enter the password for your user account again, depending on how your administrator configures Azure Virtual Desktop.
You can provide feedback about Windows App using Feedback Hub, which is installed on Windows by default, whether you want to make a suggestion or report a problem.
To easily provide feedback:
Open Windows App.
Select the Feedback tab. Feedback Hub automatically opens and shows all feedback provided for Windows App on Windows. You need to be signed in to Feedback Hub to provide feedback.
Select Give new feedback, then complete the form.
Once you've completed the form, select Submit. Feedback you post is public.
To connect to your devices and apps from Azure Virtual Desktop on macOS, follow these steps:
Download and install Windows App for macOS by going to Windows App in TestFlight, or by downloading the preview from App Center and following the steps. When Windows App is installed, open it.
Note
During the preview, if you choose to use TestFlight from Apple, keep in mind there is a capacity limit. Participation is on a first-come, first-served basis. If you're accepted into the preview from TestFlight, we might not be able to accommodate your availability for its full duration. As spaces are limited, we rotate participants to reach a wider testing audience. We rotate a subset of participants on the 2nd and 4th Monday at 7 PM PST each month, so if there's not capacity now, please check back.
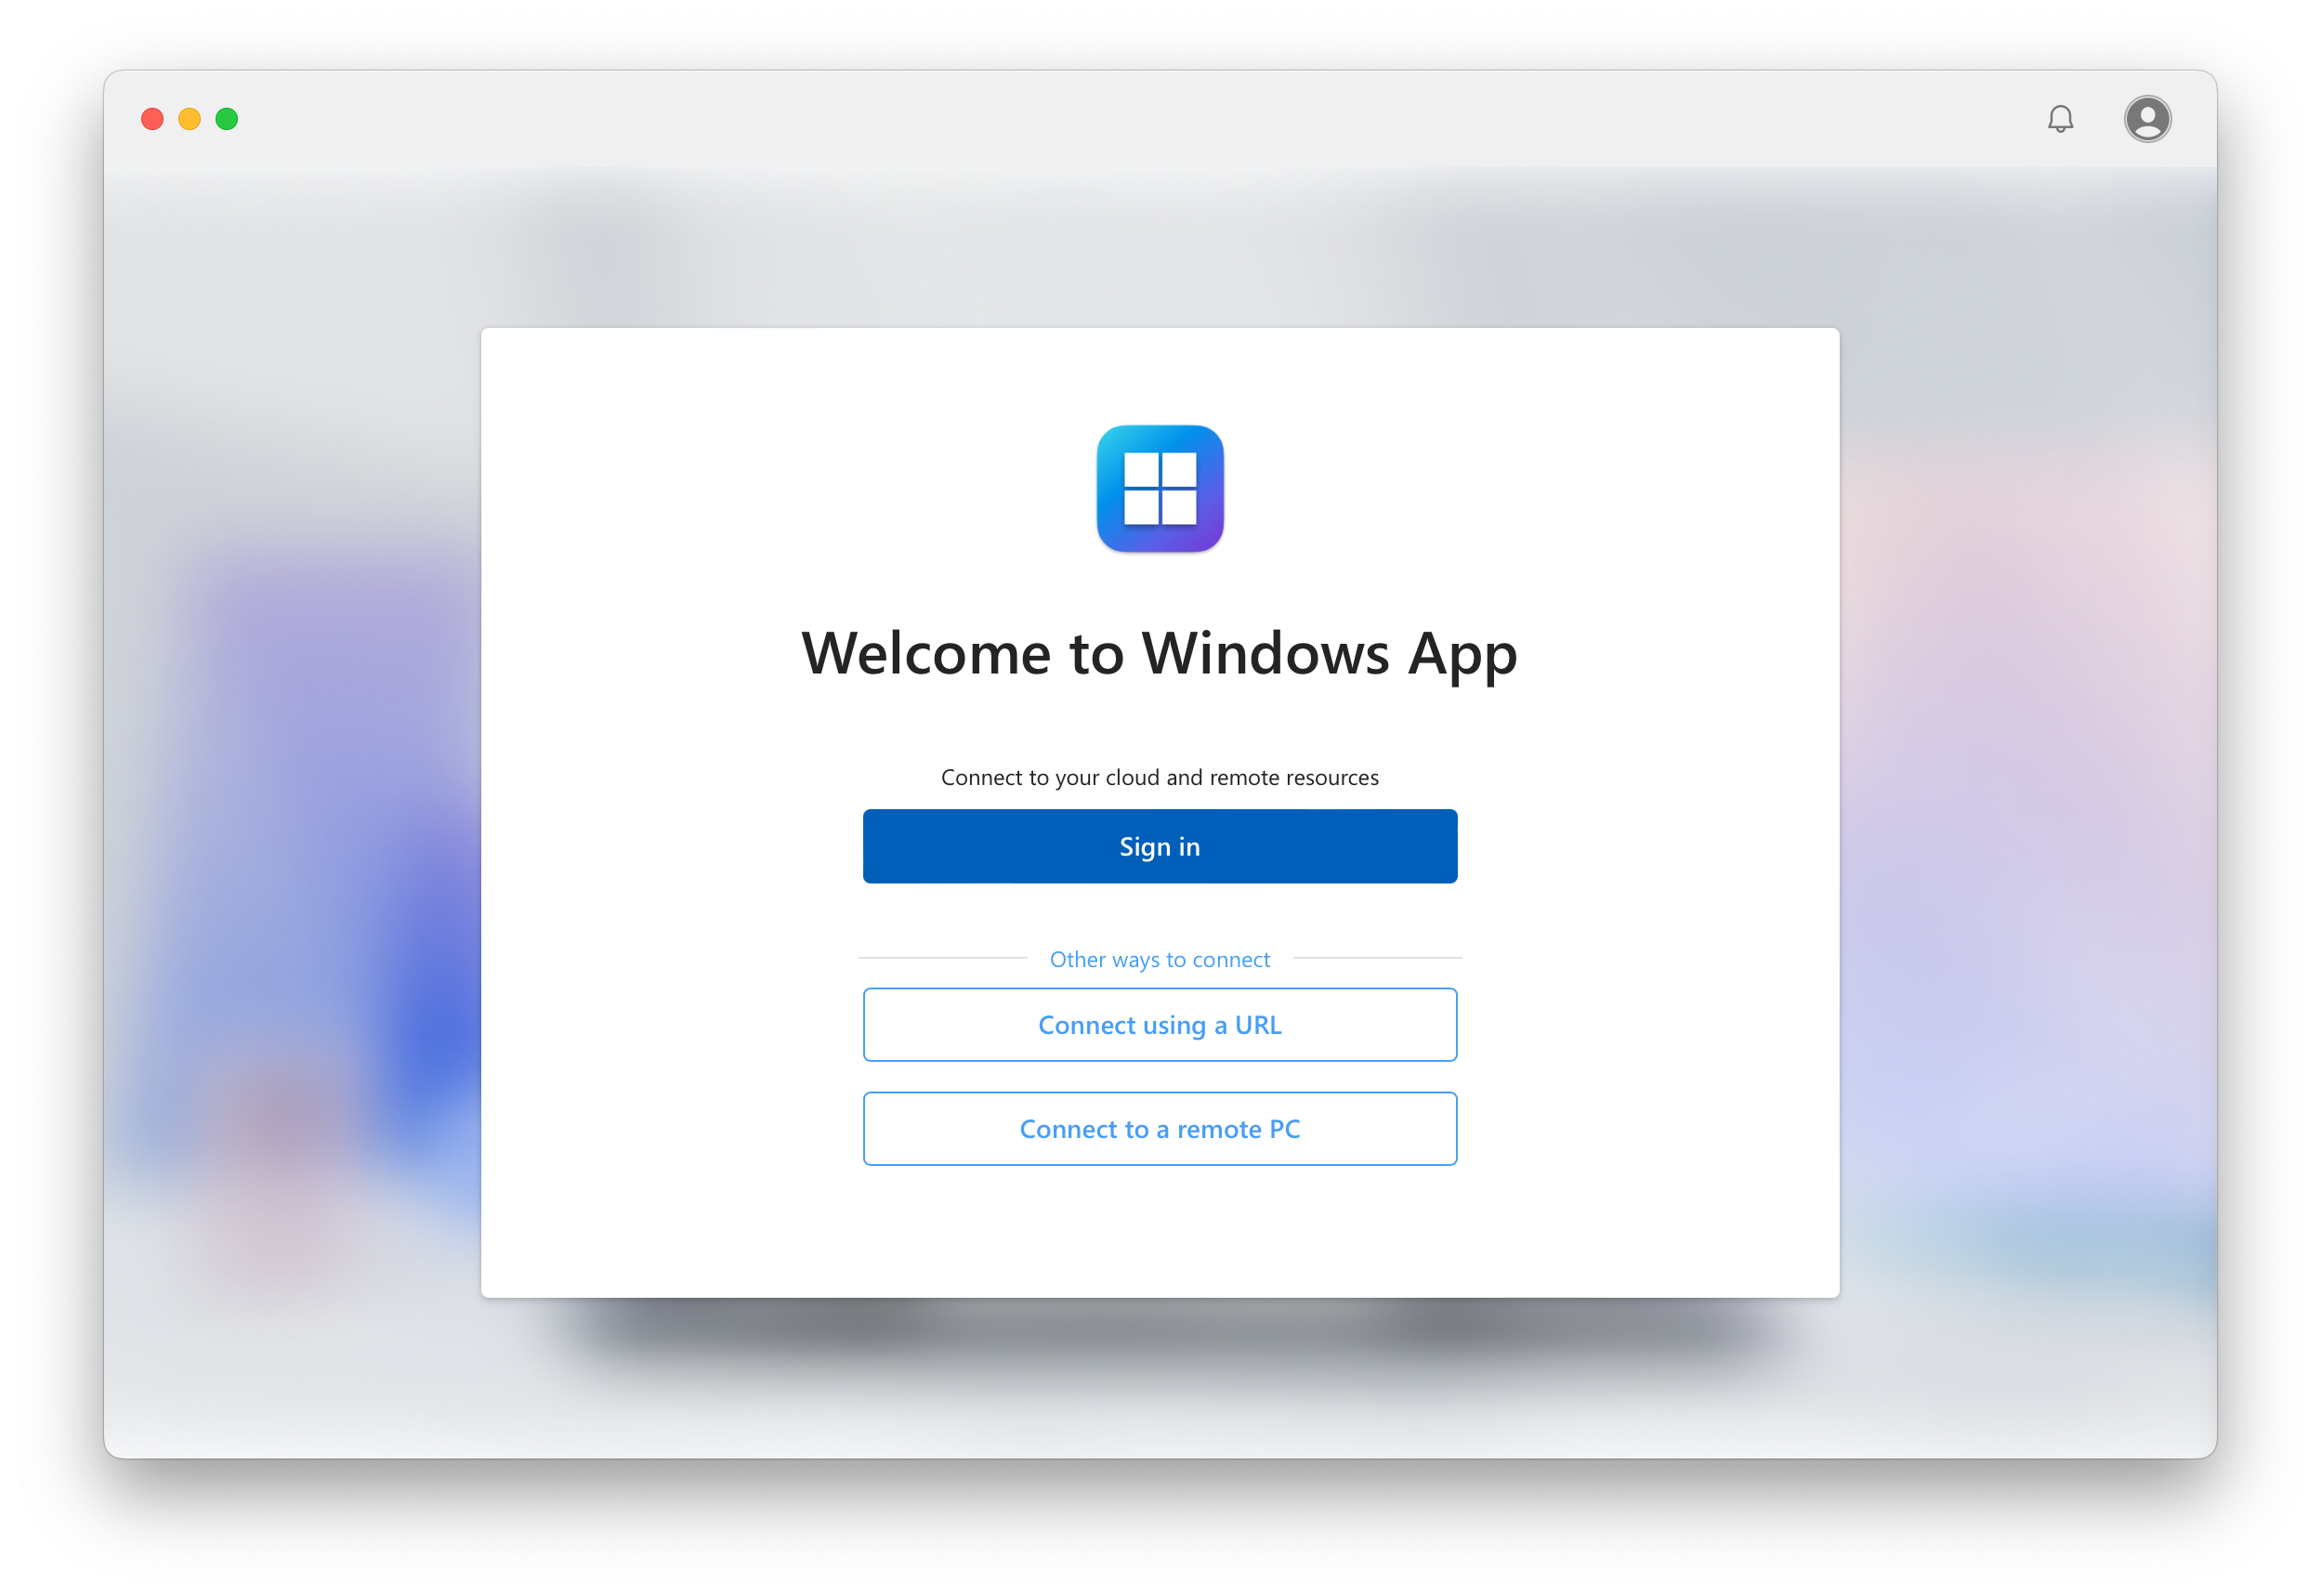
Select Sign in and sign in with your user account.
If it's your first time using Windows App, navigate through the tour to learn more about Windows App, then select Done, or select Skip.
From the Home tab, select Go to devices or Go to apps (depending on which you have access to).
You'll see your devices and apps from Azure Virtual Desktop, along with any other remote resources you have access to. If you don't see any devices or apps, contact your administrator. Find the device or app you want to connect to. You can use the filters to help you find what you want to connect to.
Select Connect. Once the connection to your device or app is complete, you're ready to start using it. You might be prompted to enter the password for your user account again, depending on how your administrator configures Azure Virtual Desktop.
You can provide feedback about Windows App using TestFlight, whether you want to make a suggestion or report a problem.
To easily provide feedback:
Open the TestFlight app on your device.
Select Windows App in the apps list.
Select Send Beta Feedback, then complete the form.
Once you've completed the form, select Submit. Feedback you post isn't anonymous.
To connect to your devices and apps from Azure Virtual Desktop on iOS and iPadOS, follow these steps:
Download and install Windows App for iOS and iPadOS by going to Windows App in TestFlight and following the steps. When Windows App is installed, open it.
Note
During the preview, we're using TestFlight from Apple, which has a capacity limit. Participation is on a first-come, first-served basis. If you're accepted into the preview from TestFlight, we might not be able to accommodate your availability for its full duration. As spaces are limited, we rotate participants to reach a wider testing audience. We rotate a subset of participants on the 2nd and 4th Tuesday at 4 PM PST each month, so if there's not capacity now, please check back.
From the Home tab, tap the plus (+) icon to add a new connection.
Tap Account, then sign in with your user account.
Tap Devices or Apps (depending on which you have access to). If you don't see any devices or apps, contact your administrator.
You'll see your devices and apps from Azure Virtual Desktop, along with any other remote resources you have access to. Find the device or app you want to connect to. You can use the search box to help you find what you want to connect to.
Tap the device or app to connect. Once the connection to your device or app is complete, you're ready to start using it. You might be prompted to enter the password for your user account again, depending on how your administrator configures Azure Virtual Desktop.
If it's your first time using Windows App, navigate through the tour to learn more about Windows App, then select Done, or select Skip.
From the Home tab, select Go to devices or Go to apps (depending on which you have access to).
You'll see your devices and apps from Azure Virtual Desktop, along with any other remote resources you have access to. If you don't see any devices or apps, contact your administrator. Find the device or app you want to connect to. You can use the filters to help you find what you want to connect to.
Select Connect. A new tab or browser window opens for that device or app.
A prompt for In Session Settings is displayed asking you confirm which local devices or features to use in the remote session. Make your selection, then select Connect. If you don't want to see this prompt each time you connect, check the box for Don't show again. You might be prompted to enter the password for your user account again, depending on how your administrator configures Azure Virtual Desktop.
Once the connection to your device or app is complete, you're ready to start using it.
Windows App replaces the Windows 365 app in the Microsoft Store. If you already have the Windows 365 app installed, make sure you've updated to the latest version, then change the Preview toggle to on. The app and restarts and is renamed and branded Windows App. Once you enable the preview, if you toggle back to the Windows 365 experience, the icon and name in Start menu, Windows taskbar, and your list of installed apps is still called Windows App.
Select Sign in and sign in with your user account. If you're signed in to your local Windows device with a work or school account on a managed device, you're signed in automatically.
If it's your first time using Windows App, navigate through the tour to learn more about Windows App, then select Done, or select Skip.
From the Home tab, select Go to devices to see your Cloud PCs from Windows 365, along with any other remote resources you have access to. If you don't see any Cloud PCs, contact your administrator.
Find the Cloud PC you want to connect to, then select Connect. You can use the filters to help you find what you want to connect to.
Once the connection to your Cloud PC is complete, you're ready to start using it.
Tip
You can pin your favorite Cloud PCs to the Home tab or the Windows taskbar for quick access. To learn more, see Device and app actions in Windows App.
Provide feedback
You can provide feedback about Windows App using Feedback Hub, which is installed on Windows by default, whether you want to make a suggestion or report a problem.
To easily provide feedback:
Open Windows App.
Select the Feedback tab. Feedback Hub automatically opens and shows all feedback provided for Windows App on Windows. You need to be signed in to Feedback Hub to provide feedback.
Select Give new feedback, then complete the form.
Once you've completed the form, select Submit. Feedback you post is public.
To connect to your Cloud PC from Windows 365 on macOS, follow these steps:
Download and install Windows App for macOS by going to Windows App in TestFlight and following the steps. When Windows App is installed, open it.
Note
During the preview, if you choose to use TestFlight from Apple, keep in mind there is a capacity limit. Participation is on a first-come, first-served basis. If you're accepted into the preview from TestFlight, we might not be able to accommodate your availability for its full duration. As spaces are limited, we rotate participants to reach a wider testing audience. We rotate a subset of participants on the 2nd and 4th Monday at 7 PM PST each month, so if there's not capacity now, please check back.
Select Sign in and sign in with your user account.
If it's your first time using Windows App, navigate through the tour to learn more about Windows App, then select Done, or select Skip.
From the Home tab, select Go to devices to see your Cloud PCs from Windows 365, along with any other remote resources you have access to. If you don't see any Cloud PCs, contact your administrator.
Find the Cloud PC you want to connect to, then select Connect. You can use the filters to help you find what you want to connect to.
Once the connection to your Cloud PC is complete, you're ready to start using it.
You can provide feedback about Windows App using TestFlight, whether you want to make a suggestion or report a problem.
To easily provide feedback:
Open the TestFlight app on your device.
Select Windows App in the apps list.
Select Send Beta Feedback, then complete the form.
Once you've completed the form, select Submit. Feedback you post isn't anonymous.
To connect to your Cloud PC from Windows 365 on iOS or iPadOS, follow these steps:
Download and install Windows App for iOS and iPadOS by going to Windows App in TestFlight and following the steps. When Windows App is installed, open it.
Note
During the preview, we're using TestFlight from Apple, which has a capacity limit. Participation is on a first-come, first-served basis. If you're accepted into the preview from TestFlight, we might not be able to accommodate your availability for its full duration. As spaces are limited, we rotate participants to reach a wider testing audience. We rotate a subset of participants on the 2nd and 4th Tuesday at 4 PM PST each month, so if there's not capacity now, please check back.
From the Home tab, tap the plus (+) icon to add a new connection.
Tap Account, then sign in with your user account.
Tap Devices to see your Cloud PCs from Windows 365, along with any other remote resources you have access to. If you don't see any Cloud PCs, contact your administrator.
Find the Cloud PC you want to connect to, then tap it to connect. You can use the search box to help you find what you want to connect to.
Once the connection to your Cloud PC is complete, you're ready to start using it.
If it's your first time using Windows App, navigate through the tour to learn more about Windows App, then select Done, or select Skip.
From the Home tab, select Go to devices.
You'll see your Cloud PCs from Windows 365, along with any other remote resources you have access to. If you don't see any Cloud PCs, contact your administrator. Find the Cloud PC you want to connect to. You can use the filters to help you find what you want to connect to.
Select Connect. A new tab or browser window opens for that device or app.
A prompt for In Session Settings is displayed asking you confirm which local devices or features to use with your Cloud PC. Make your selection, then select Connect. If you don't want to see this prompt each time you connect, check the box for Don't show again.
Once the connection to your Cloud PC is complete, you're ready to start using it.
Windows App replaces the Windows 365 app in the Microsoft Store. If you already have the Windows 365 app installed, make sure you've updated to the latest version, then change the Preview toggle to on. The app and restarts and is renamed and branded Windows App. Once you enable the preview, if you toggle back to the Windows 365 experience, the icon and name in Start menu, Windows taskbar, and your list of installed apps is still called Windows App.
Select Sign in and sign in with your user account. If you're signed in to your local Windows device with a work or school account on a managed device, you're signed in automatically.
If it's your first time using Windows App, navigate through the tour to learn more about Windows App, then select Done, or select Skip.
From the Home tab, select Go to devices to see your dev boxes from Microsoft Dev Box, along with any other remote resources you have access to. If you don't see any dev boxes, contact your administrator.
Find the dev box you want to connect to, then select Connect. You can use the filters to help you find what you want to connect to.
Once the connection to your dev box is complete, you're ready to start using it.
Tip
You can pin your favorite dev boxes to the Home tab or the Windows taskbar for quick access. To learn more, see Device and app actions in Windows App.
Provide feedback
You can provide feedback about Windows App using Feedback Hub, which is installed on Windows by default, whether you want to make a suggestion or report a problem.
To easily provide feedback:
Open Windows App.
Select the Feedback tab. Feedback Hub automatically opens and shows all feedback provided for Windows App on Windows. You need to be signed in to Feedback Hub to provide feedback.
Select Give new feedback, then complete the form.
Once you've completed the form, select Submit. Feedback you post is public.
To connect to your dev box from Microsoft Dev Box on macOS, follow these steps:
Download and install Windows App for macOS by going to Windows App in TestFlight and following the steps. When Windows App is installed, open it.
Note
During the preview, if you choose to use TestFlight from Apple, keep in mind there is a capacity limit. Participation is on a first-come, first-served basis. If you're accepted into the preview from TestFlight, we might not be able to accommodate your availability for its full duration. As spaces are limited, we rotate participants to reach a wider testing audience. We rotate a subset of participants on the 2nd and 4th Monday at 7 PM PST each month, so if there's not capacity now, please check back.
Select Sign in and sign in with your user account.
If it's your first time using Windows App, navigate through the tour to learn more about Windows App, then select Done, or select Skip.
From the Home tab, select Go to devices to see your dev boxes from Microsoft Dev Box, along with any other remote resources you have access to. If you don't see any dev boxes, contact your administrator.
Find the dev box you want to connect to, then select Connect. You can use the filters to help you find what you want to connect to.
Once the connection to your dev box is complete, you're ready to start using it.
You can provide feedback about Windows App using TestFlight, whether you want to make a suggestion or report a problem.
To easily provide feedback:
Open the TestFlight app on your device.
Select Windows App in the apps list.
Select Send Beta Feedback, then complete the form.
Once you've completed the form, select Submit. Feedback you post isn't anonymous.
To connect to your dev box from Microsoft Dev Box on iOS or iPadOS, follow these steps:
Download and install Windows App for iOS and iPadOS by going to Windows App in TestFlight and following the steps. When Windows App is installed, open it.
Note
During the preview, we're using TestFlight from Apple, which has a capacity limit. Participation is on a first-come, first-served basis. If you're accepted into the preview from TestFlight, we might not be able to accommodate your availability for its full duration. As spaces are limited, we rotate participants to reach a wider testing audience. We rotate a subset of participants on the 2nd and 4th Tuesday at 4 PM PST each month, so if there's not capacity now, please check back.
From the Home tab, tap the plus (+) icon to add a new connection.
Tap Account, then sign in with your user account.
Tap Devices to see your dev boxes from Microsoft Dev Box, along with any other remote resources you have access to. If you don't see any dev boxes, contact your administrator.
Find the dev box you want to connect to, then tap it to connect. You can use the search box to help you find what you want to connect to.
Once the connection to your dev box is complete, you're ready to start using it.
If it's your first time using Windows App, navigate through the tour to learn more about Windows App, then select Done, or select Skip.
From the Home tab, select Go to devices.
You'll see your dev boxes from Microsoft Dev Box, along with any other remote resources you have access to. If you don't see any dev boxes, contact your administrator. Find the dev box you want to connect to. You can use the filters to help you find what you want to connect to.
Select Connect. A new tab or browser window opens for that dev box.
A prompt for In Session Settings is displayed asking you confirm which local devices or features to use with your dev box. Make your selection, then select Connect. If you don't want to see this prompt each time you connect, check the box for Don't show again.
Once the connection to your dev box is complete, you're ready to start using it.
To connect to your devices and apps from Remote Desktop Services on macOS, follow these steps:
Download and install Windows App for macOS by going to Windows App in TestFlight and following the steps. When Windows App is installed, open it.
Note
During the preview, if you choose to use TestFlight from Apple, keep in mind there is a capacity limit. Participation is on a first-come, first-served basis. If you're accepted into the preview from TestFlight, we might not be able to accommodate your availability for its full duration. As spaces are limited, we rotate participants to reach a wider testing audience. We rotate a subset of participants on the 2nd and 4th Monday at 7 PM PST each month, so if there's not capacity now, please check back.
Select Connect using a URL.
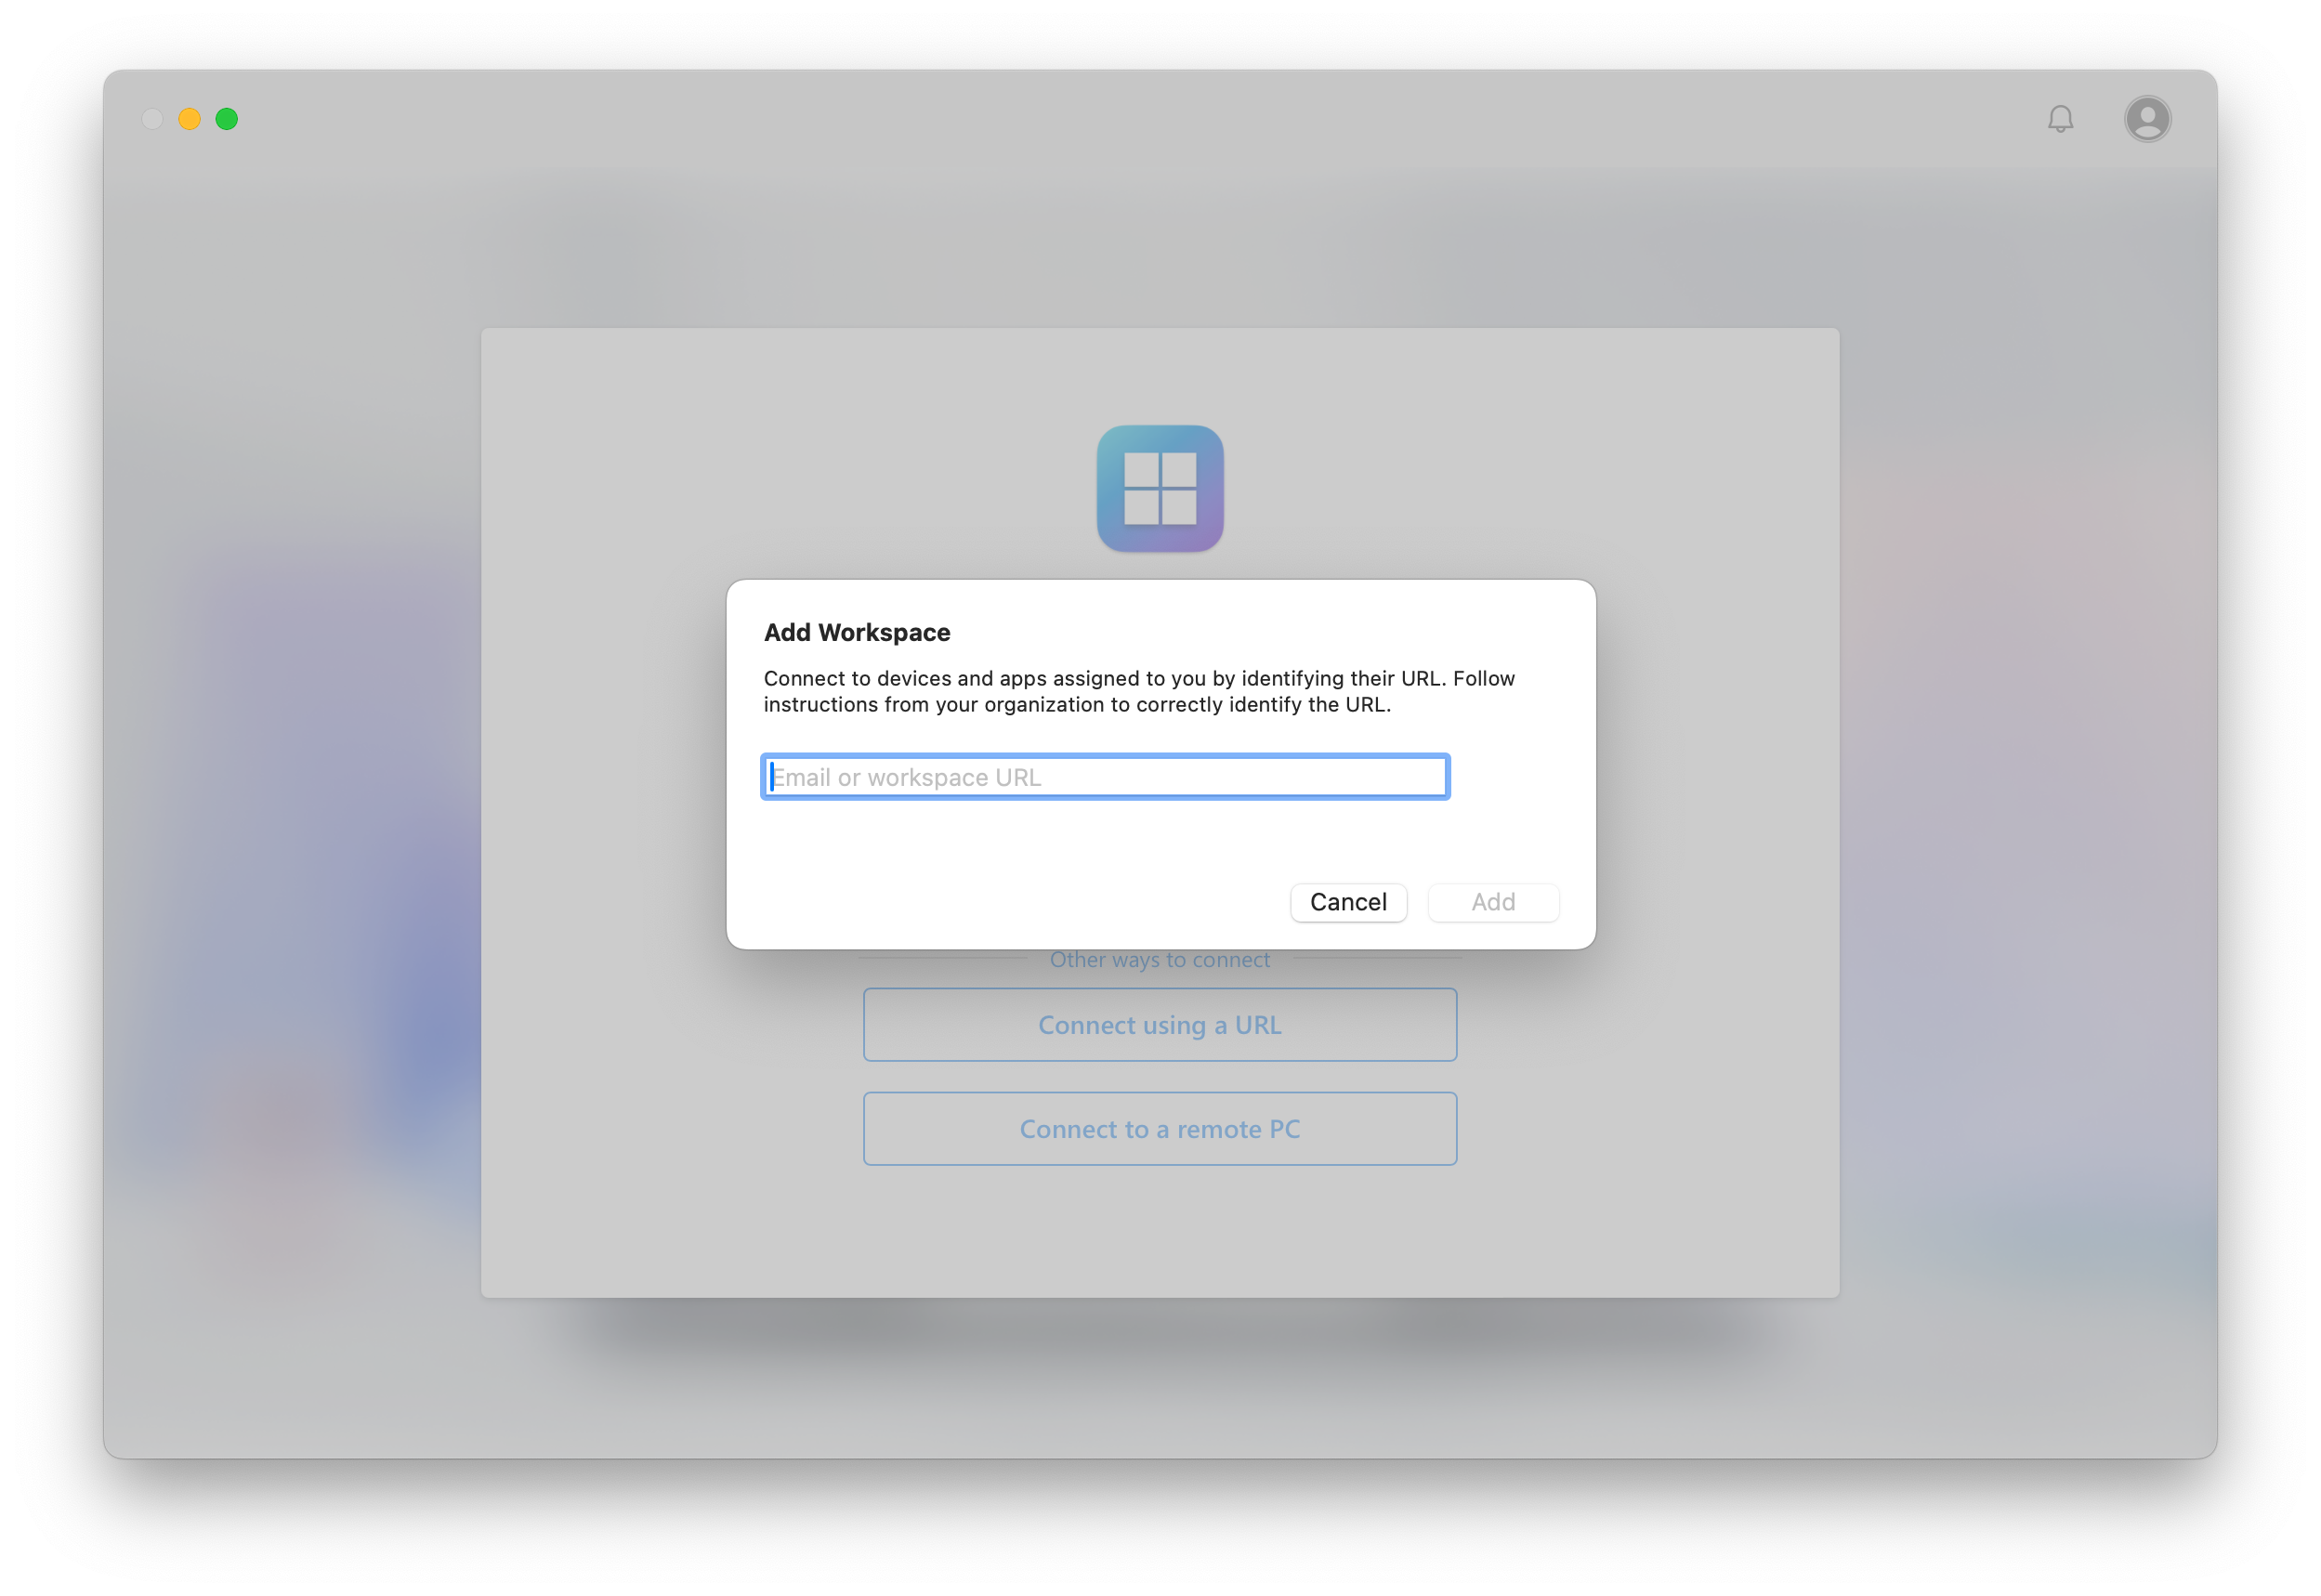
In the box that appears, enter your email address or the URL your administrator gave you to connect to Remote Desktop Services, then select Add.
Sign in with your user account.
If it's your first time using Windows App, navigate through the tour to learn more about Windows App, then select Done, or select Skip.
From the Home tab, select Go to devices or Go to apps (depending on which you have access to) to see your devices and apps from Remote Desktop Services, along with any other remote resources you have access to. If you don't see any devices or apps, contact your administrator.
Find the device or app you want to connect to, then select Connect. You can use the filters to help you find what you want to connect to. You might be prompted to enter the password for your user account again, depending on how your administrator configures Remote Desktop Services.
Once the connection to your device or app is complete, you're ready to start using it.
You can provide feedback about Windows App using TestFlight, whether you want to make a suggestion or report a problem.
To easily provide feedback:
Open the TestFlight app on your device.
Select Windows App in the apps list.
Select Send Beta Feedback, then complete the form.
Once you've completed the form, select Submit. Feedback you post isn't anonymous.
To connect to your devices and apps from Remote Desktop Services on iOS or iPadOS, follow these steps:
Download and install Windows App for iOS and iPadOS by going to Windows App in TestFlight and following the steps. When Windows App is installed, open it.
Note
During the preview, we're using TestFlight from Apple, which has a capacity limit. Participation is on a first-come, first-served basis. If you're accepted into the preview from TestFlight, we might not be able to accommodate your availability for its full duration. As spaces are limited, we rotate participants to reach a wider testing audience. We rotate a subset of participants on the 2nd and 4th Tuesday at 4 PM PST each month, so if there's not capacity now, please check back.
From the Home tab, tap the plus (+) icon to add a new connection.
Tap Workspace.
Enter your email address or the URL your administrator gave you to connect to Remote Desktop Services.
Tap Next, then sign in with your user account.
Tap Devices to see your devices and apps from Remote Desktop Services, along with any other remote resources you have access to. If you don't see any devices or apps, contact your administrator.
Find the device or app you want to connect to, then tap it to connect. You can use the search box to help you find what you want to connect to. You might be prompted to enter the password for your user account again, depending on how your administrator configures Remote Desktop Services.
Once the connection to your device or app is complete, you're ready to start using it.
To connect to a remote PC from Remote Desktop Services on macOS, follow these steps:
Download and install Windows App for macOS by going to Windows App in TestFlight and following the steps. When Windows App is installed, open it.
Note
During the preview, if you choose to use TestFlight from Apple, keep in mind there is a capacity limit. Participation is on a first-come, first-served basis. If you're accepted into the preview from TestFlight, we might not be able to accommodate your availability for its full duration. As spaces are limited, we rotate participants to reach a wider testing audience. We rotate a subset of participants on the 2nd and 4th Monday at 7 PM PST each month, so if there's not capacity now, please check back.
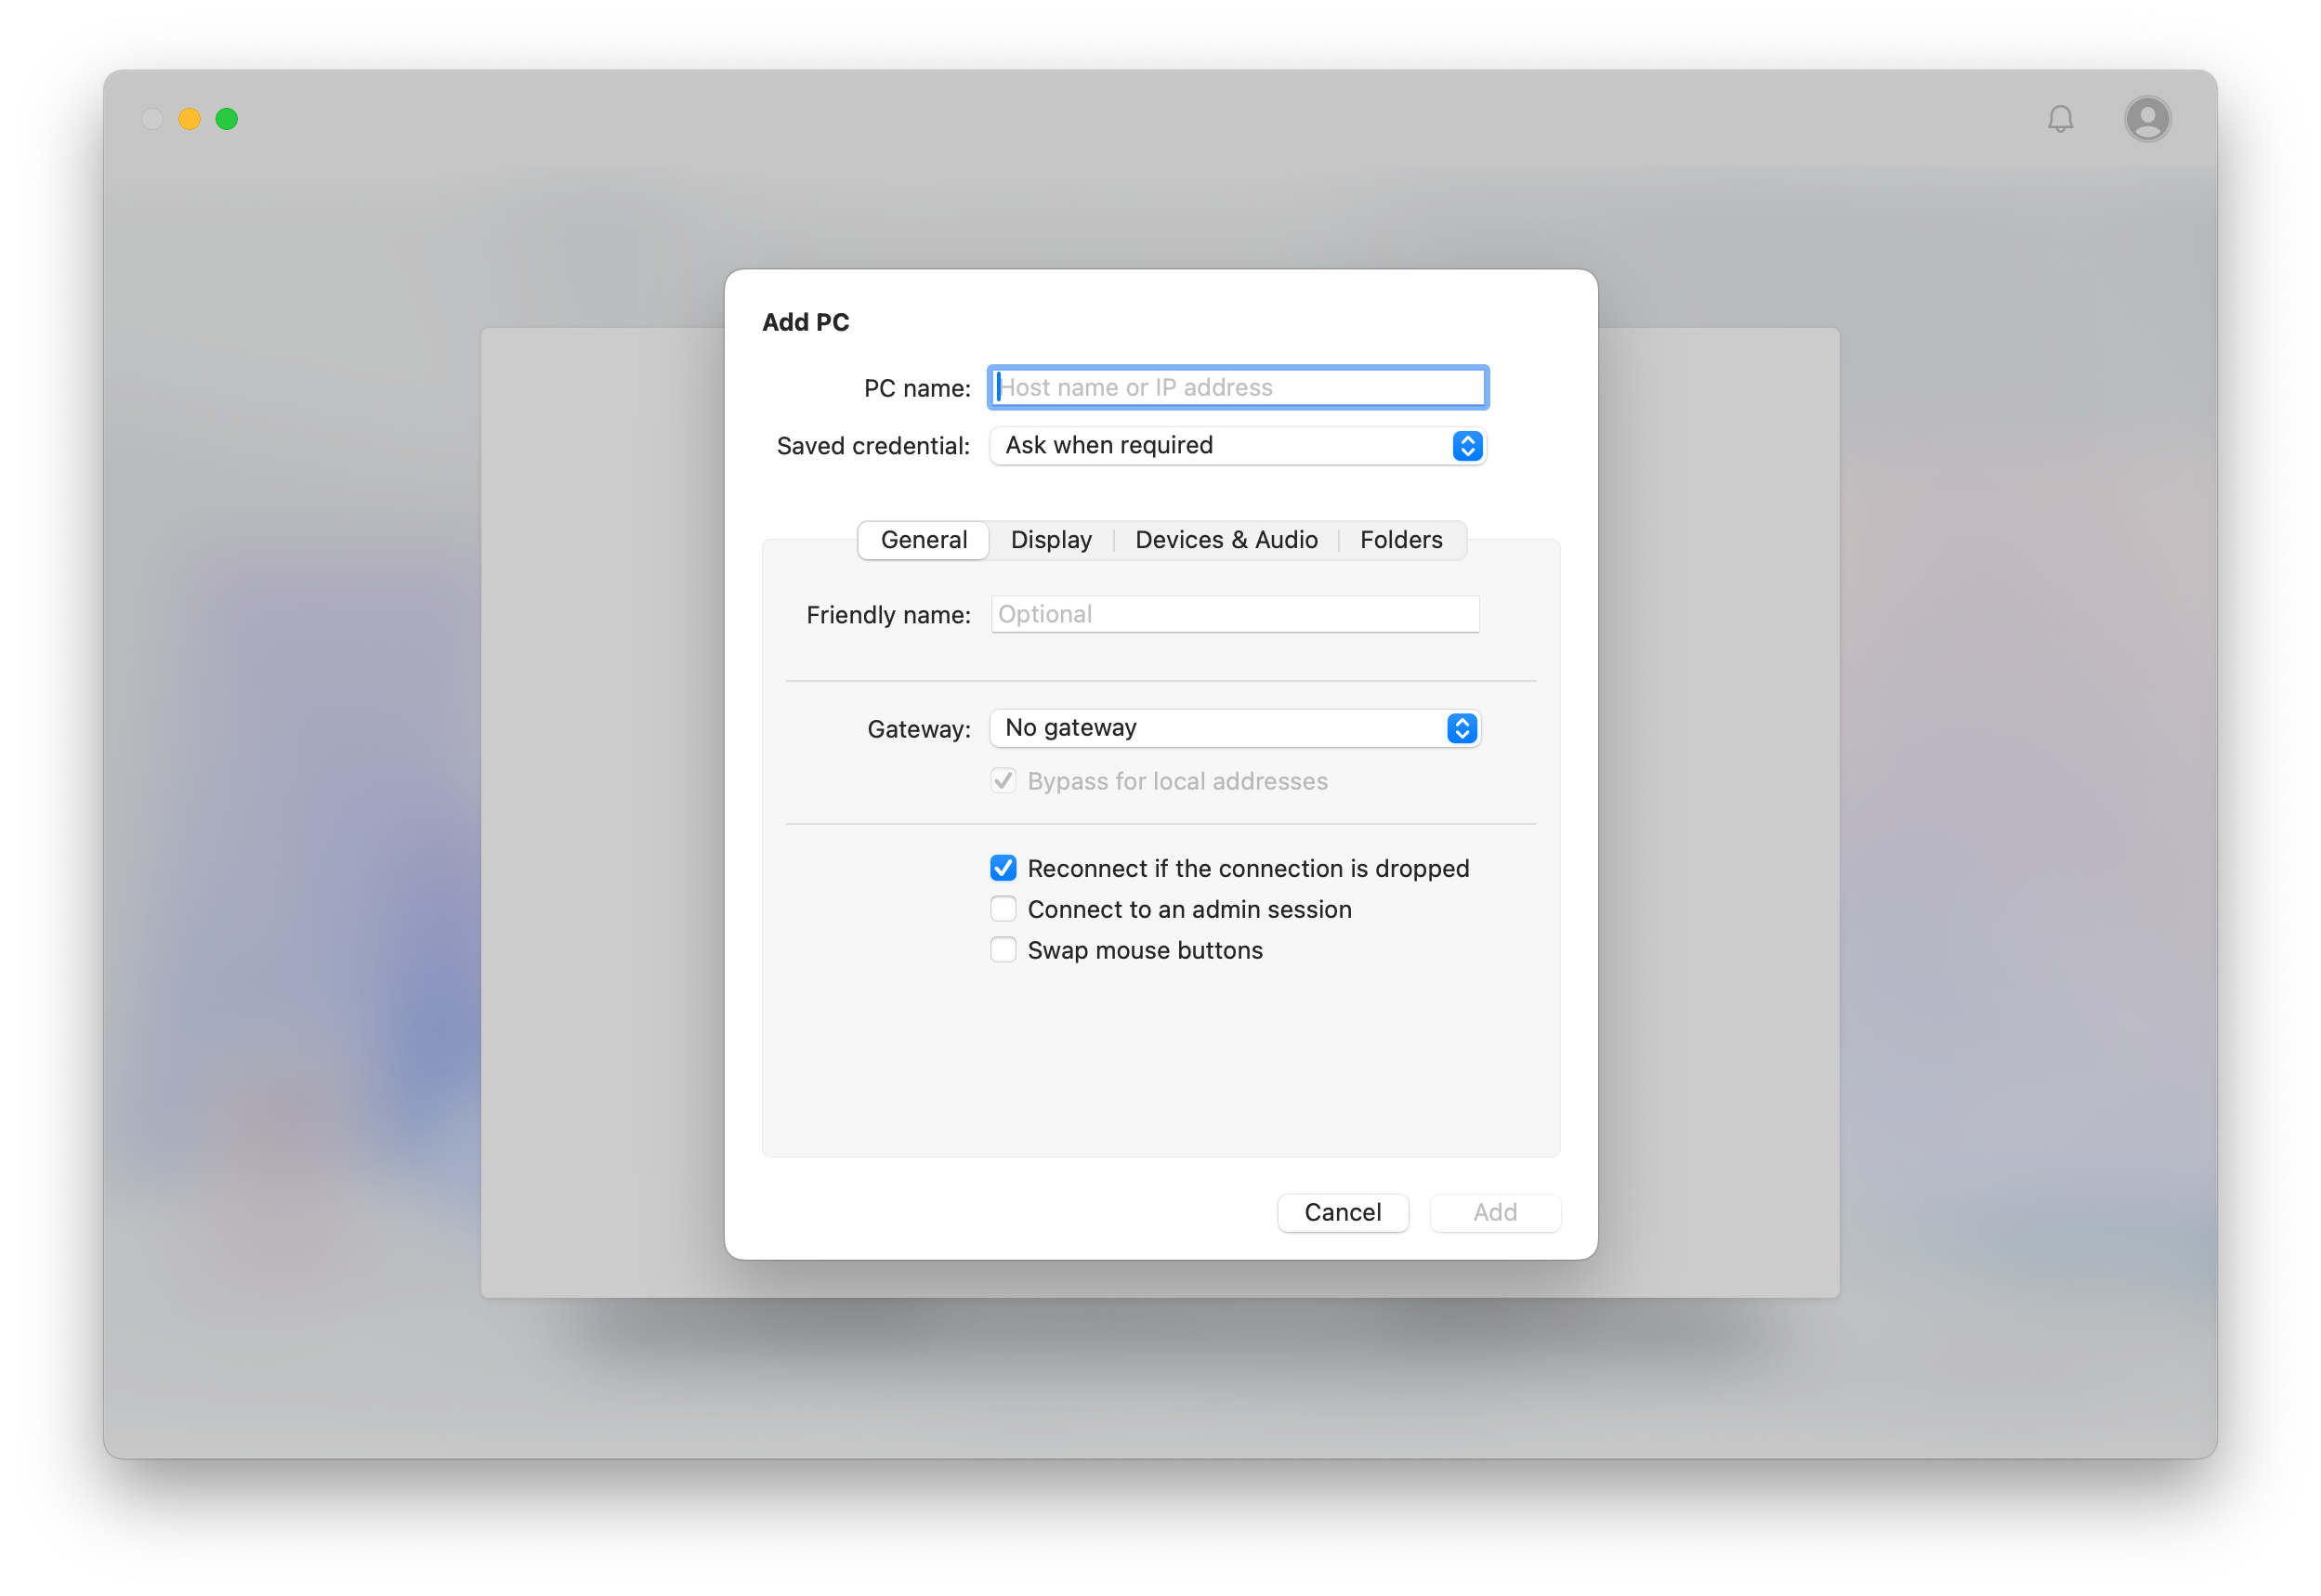
Select Connect to a remote PC. If you already added a remote PC or connected to another service, from the home tab select the plus (+) icon to add a new connection.
For PC Name and enter hostname or IP address of the remote PC you want to connect to.
Optional: you can make other changes, such as add a user account to connect with, provide a friendly name for the connection, configure display settings, and configure device and audio redirection. You can also configure these settings later. To learn more, see the links provided in Next steps.
Select Add.
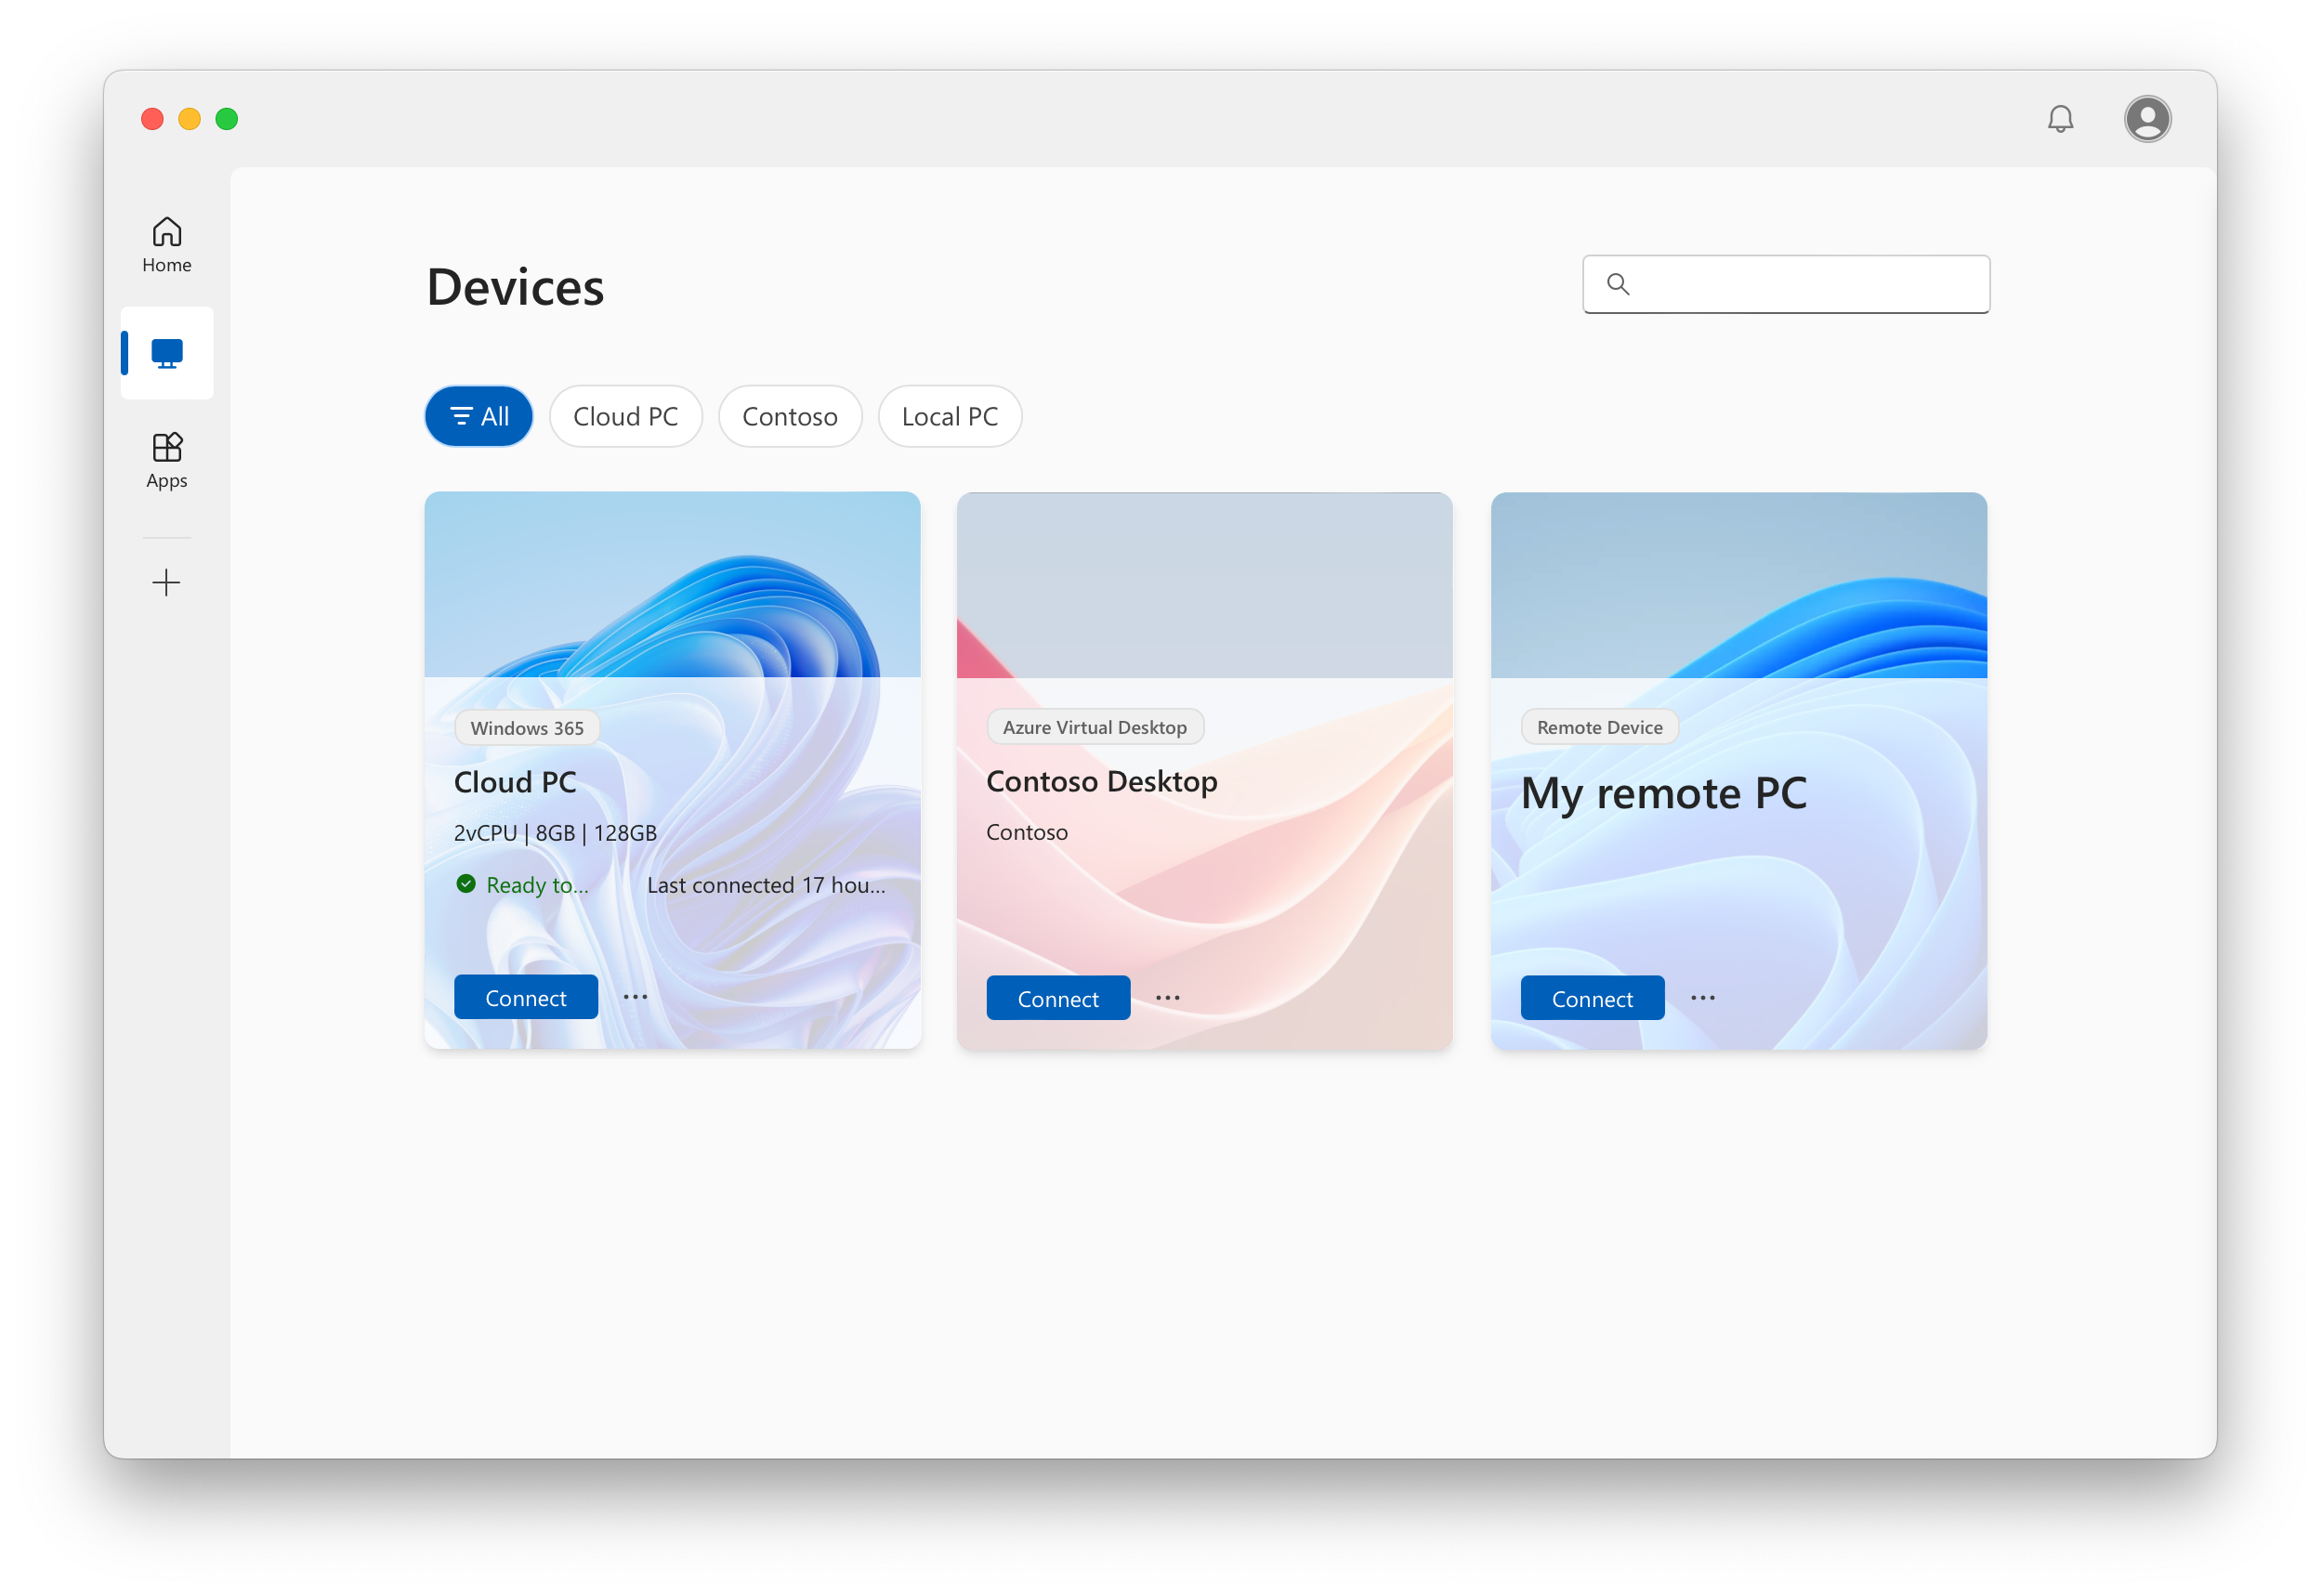
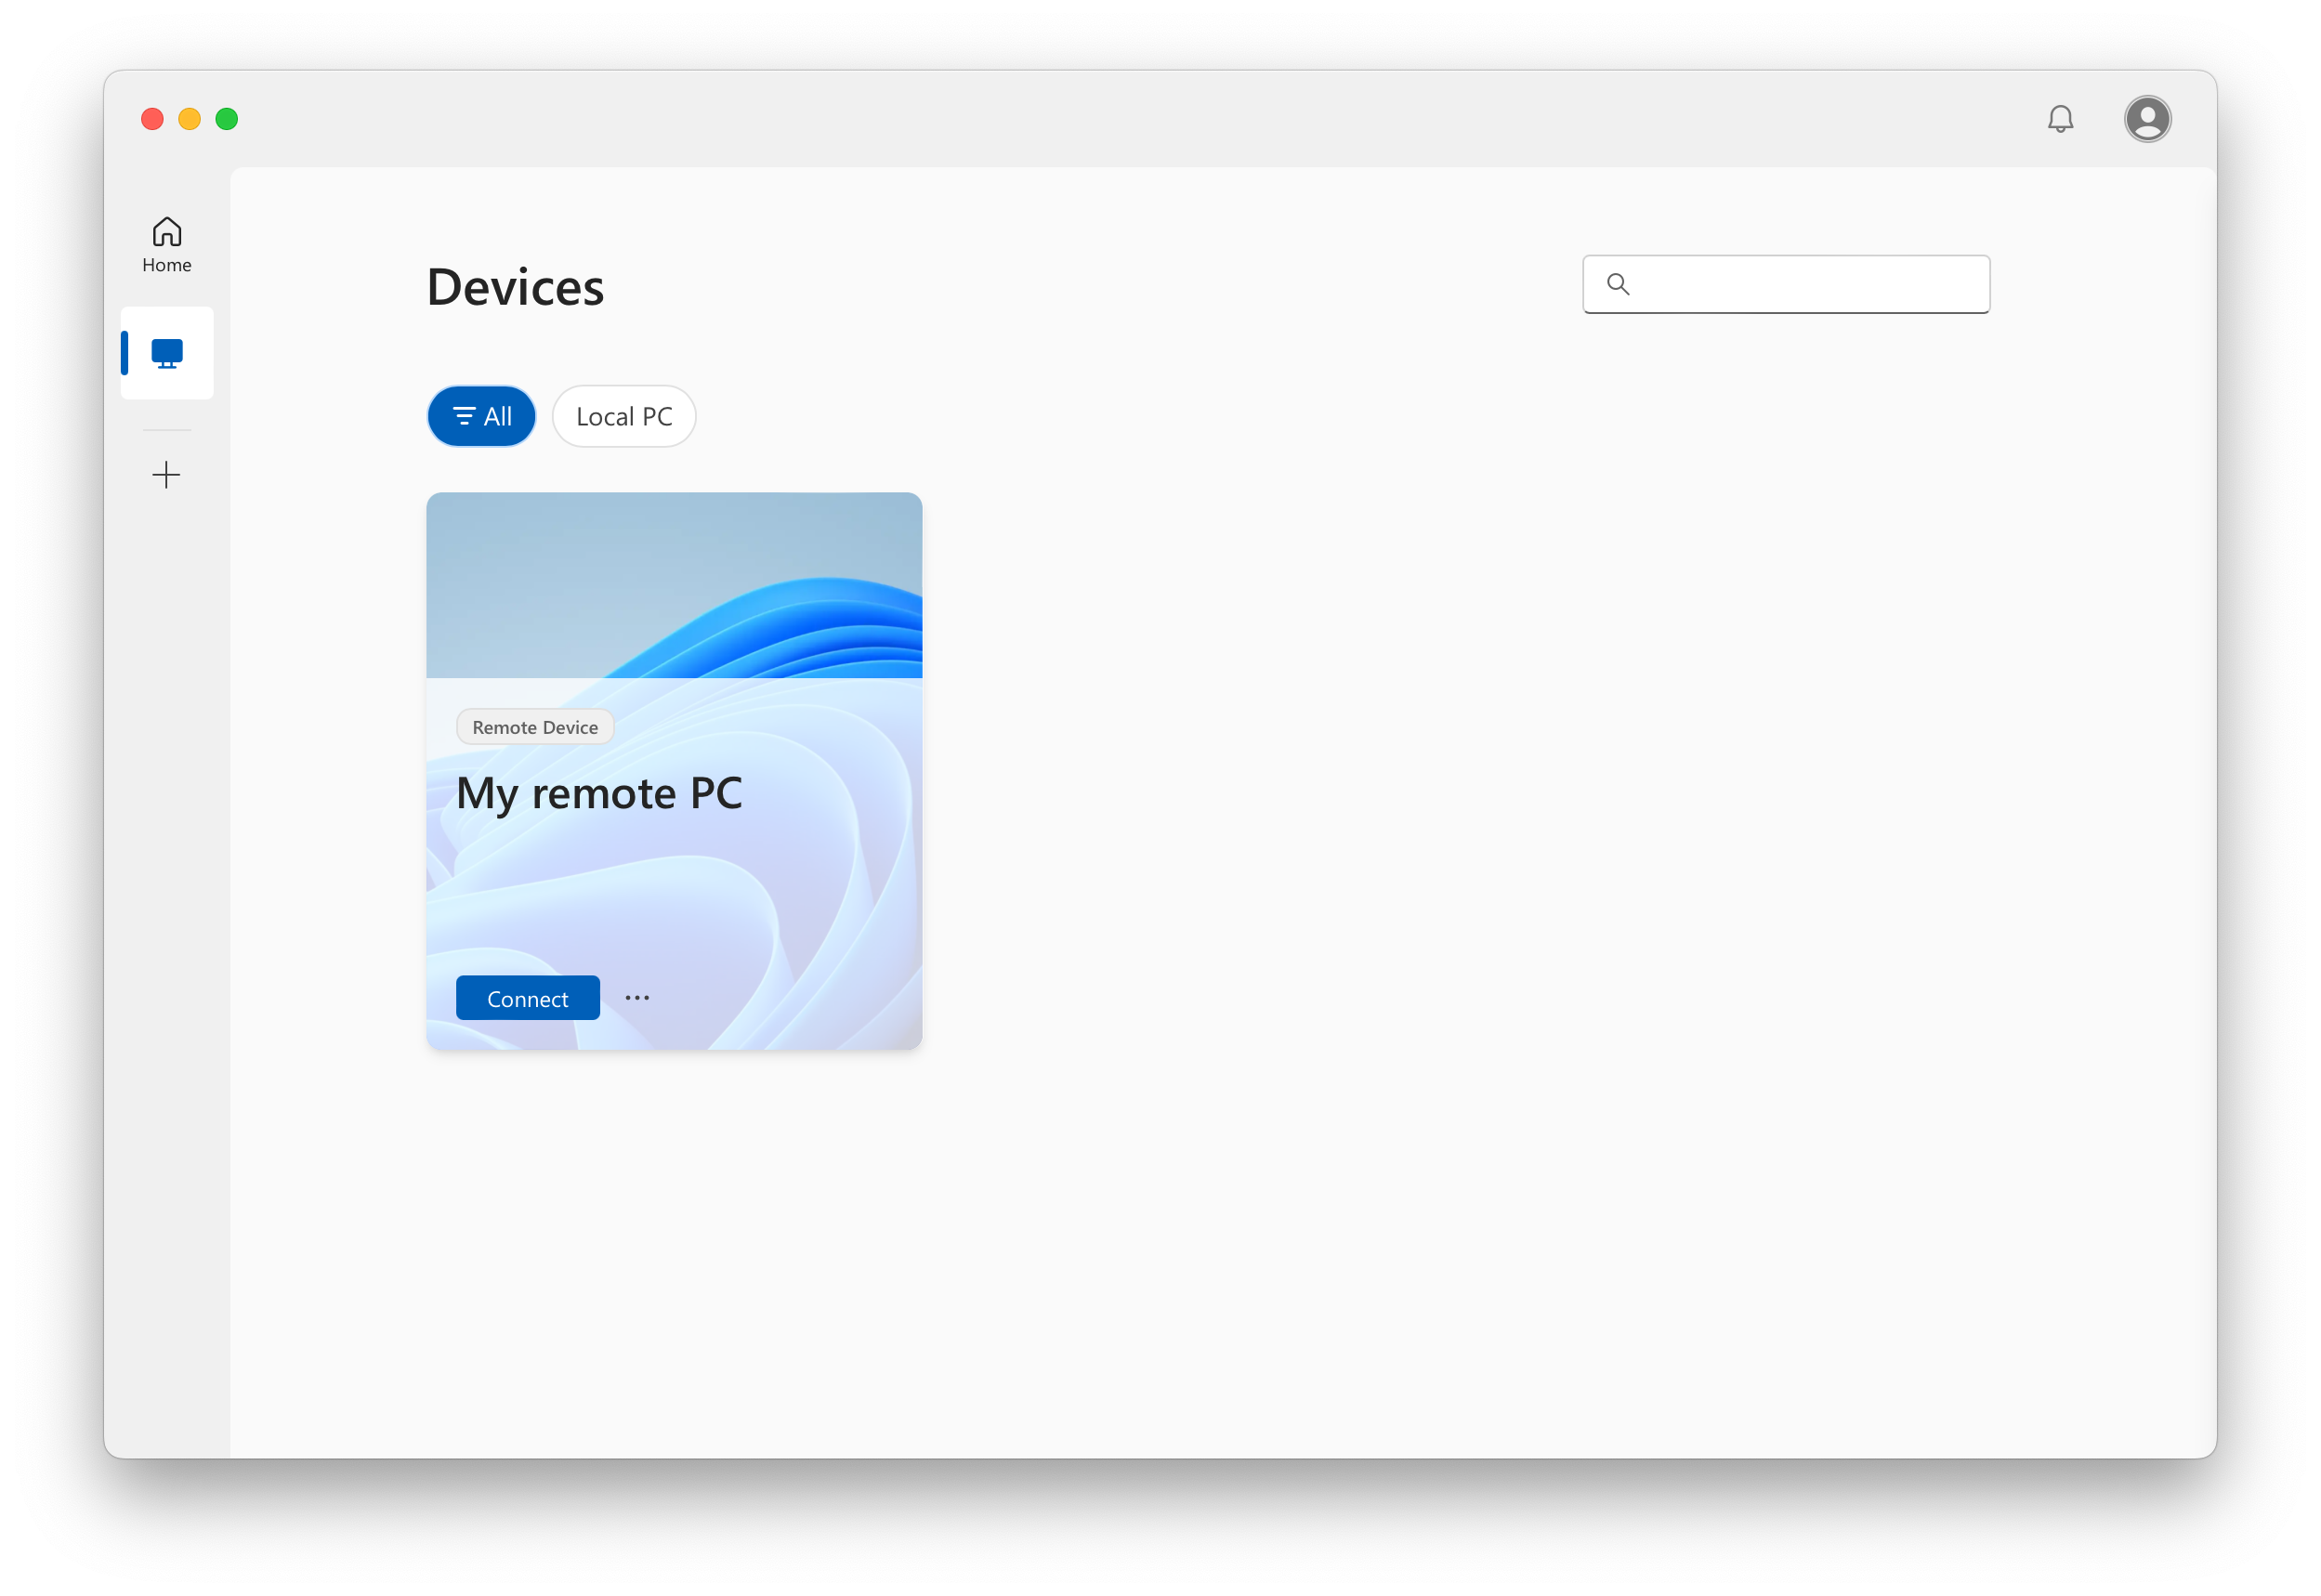
From the Devices tab, find the remote PC you want to connect to, then select Connect. If you also signed into Windows App and have other devices, you can use the filters to help you find what you want to connect to.
Once the connection to your remote PC is complete, you're ready to start using it.
You can provide feedback about Windows App using TestFlight, whether you want to make a suggestion or report a problem.
To easily provide feedback:
Open the TestFlight app on your device.
Select Windows App in the apps list.
Select Send Beta Feedback, then complete the form.
Once you've completed the form, select Submit. Feedback you post isn't anonymous.
To connect to a remote PC from Remote Desktop Services on iOS or iPadOS, follow these steps:
Download and install Windows App for iOS and iPadOS by going to Windows App in TestFlight and following the steps. When Windows App is installed, open it.
Note
During the preview, we're using TestFlight from Apple, which has a capacity limit. Participation is on a first-come, first-served basis. If you're accepted into the preview from TestFlight, we might not be able to accommodate your availability for its full duration. As spaces are limited, we rotate participants to reach a wider testing audience. We rotate a subset of participants on the 2nd and 4th Tuesday at 4 PM PST each month, so if there's not capacity now, please check back.
From the Home tab, tap the plus (+) icon to add a new connection.
Tap PC Connection.
Tap PC Name and enter hostname or IP address of the remote PC you want to connect to.
Optional: you can make other changes, such as add a user account to connect with, provide a friendly name for the connection, and configure device and audio redirection. You can also configure these settings later. To learn more, see the links provided in Next steps.
Tap Save.
On the Devices tab, tap the remote PC you want to connect to. If you didn't add a user account for this remote PC yet, you're prompted to enter a user account.
Once the connection to your remote PC is complete, you're ready to start using it.
Coming soon: Throughout 2024 we will be phasing out GitHub Issues as the feedback mechanism for content and replacing it with a new feedback system. For more information see: https://aka.ms/ContentUserFeedback.