Note
Access to this page requires authorization. You can try signing in or changing directories.
Access to this page requires authorization. You can try changing directories.
Fabric Activator in Microsoft Fabric enables you to take actions when it detects patterns or conditions in data streams. If you're new to Fabric Activator, see What is Fabric Activator. In this tutorial, you use the sample data included with Fabric Activator to complete the following tasks:
- Review a sample Activator item
- Explore the data
- Explore a rule
- Start the rule
- Create an object
- Create a rule
Prerequisites
Before you begin, you need a workspace with a Fabric capacity. To learn about Fabric workspaces, see the Workspaces article. If you don't have Fabric, you're prompted to start a trial.
Create a sample Activator
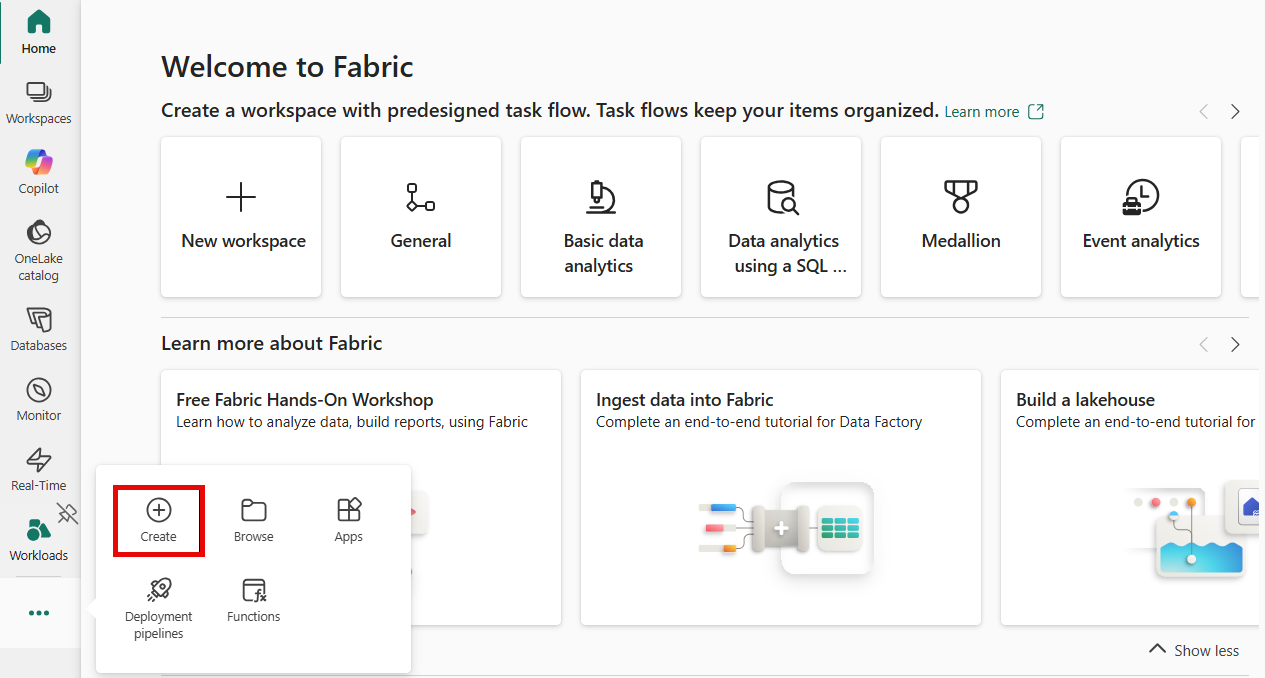
On the Fabric homepage, in the left navigation pane, select the ellipsis (...), and then select Create.
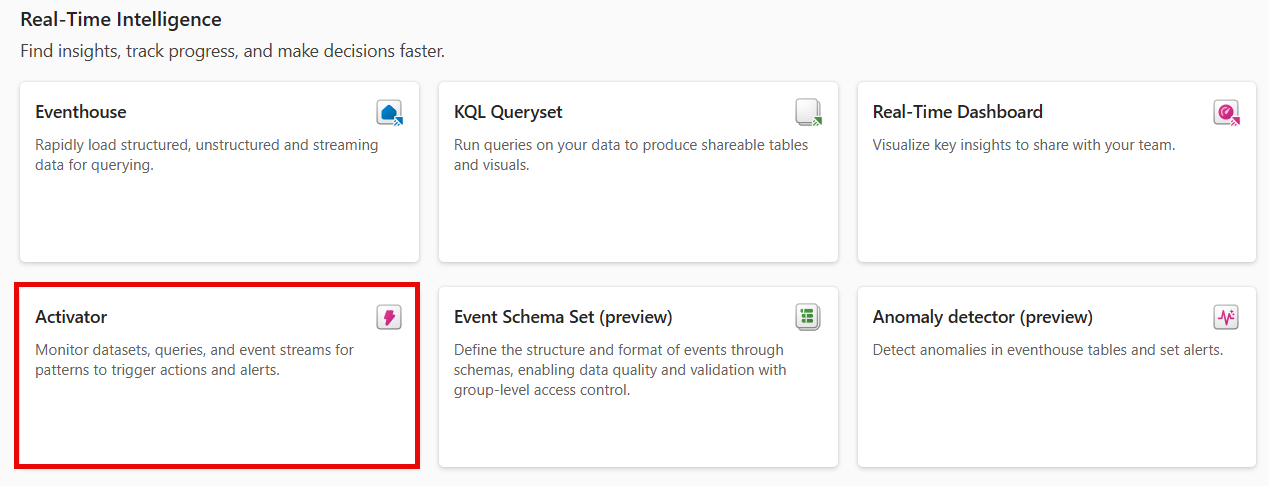
On the Create page, under Real-Time Intelligence, select Activator.
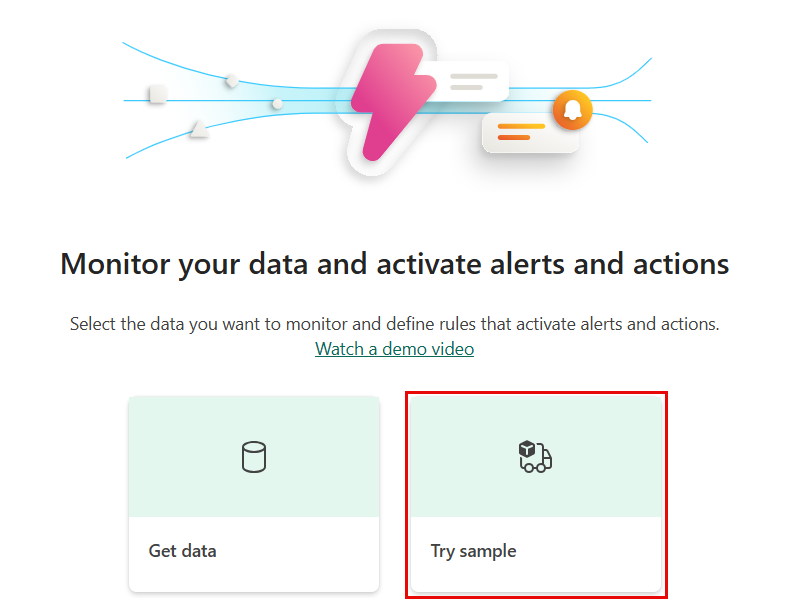
On the Activator page, select Try sample.
Explore the data
In this step, you explore the eventstream data that the sample is built on.
The new Activator item has an Explorer section. Scroll down and select the Package delivery events stream.
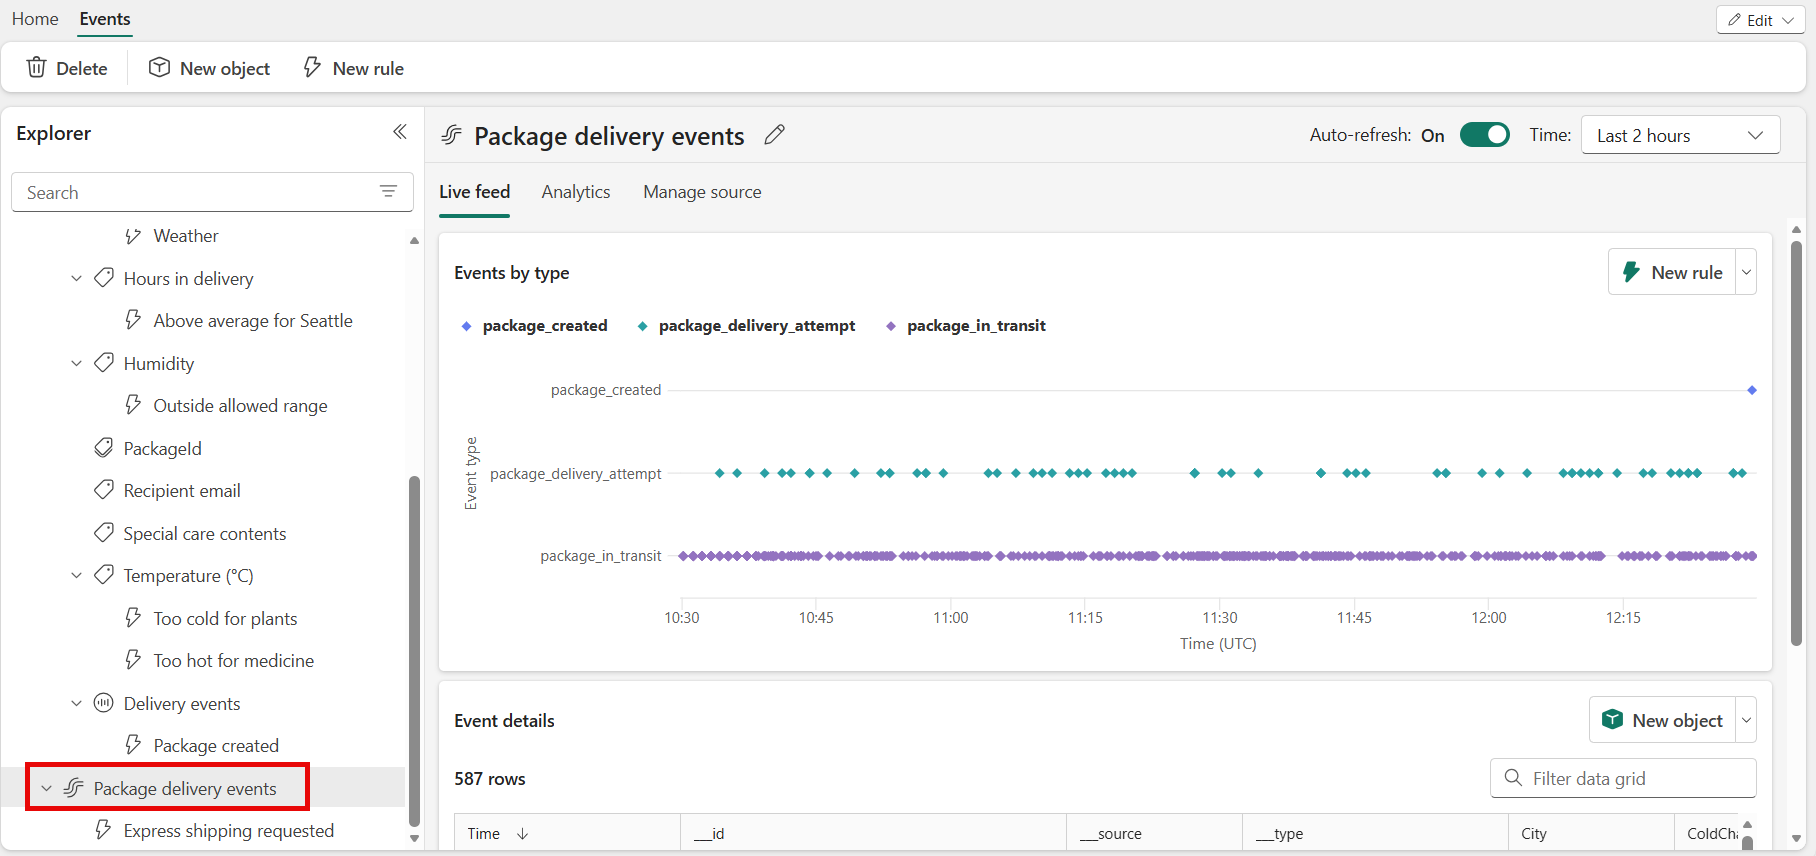
These events show the real-time status of packages that are in the process of being delivered.
Look at the incoming events and hover over the event data in the live table. Each data point contains information about the event. You might have to scroll to see it all.
Explore a rule
Use a rule to specify the event values you want to monitor, the conditions you want to detect, and the actions you want Fabric Activator to take.
The Explorer pane displays objects, like eventstreams, for this activator. Delivery events is one of the objects created from the Package delivery events eventstream.
In the Explorer pane, select the object called Delivery events. You can create rules about objects that use data from the Package delivery events eventstream. For example, a rule that checks packages for temperature.
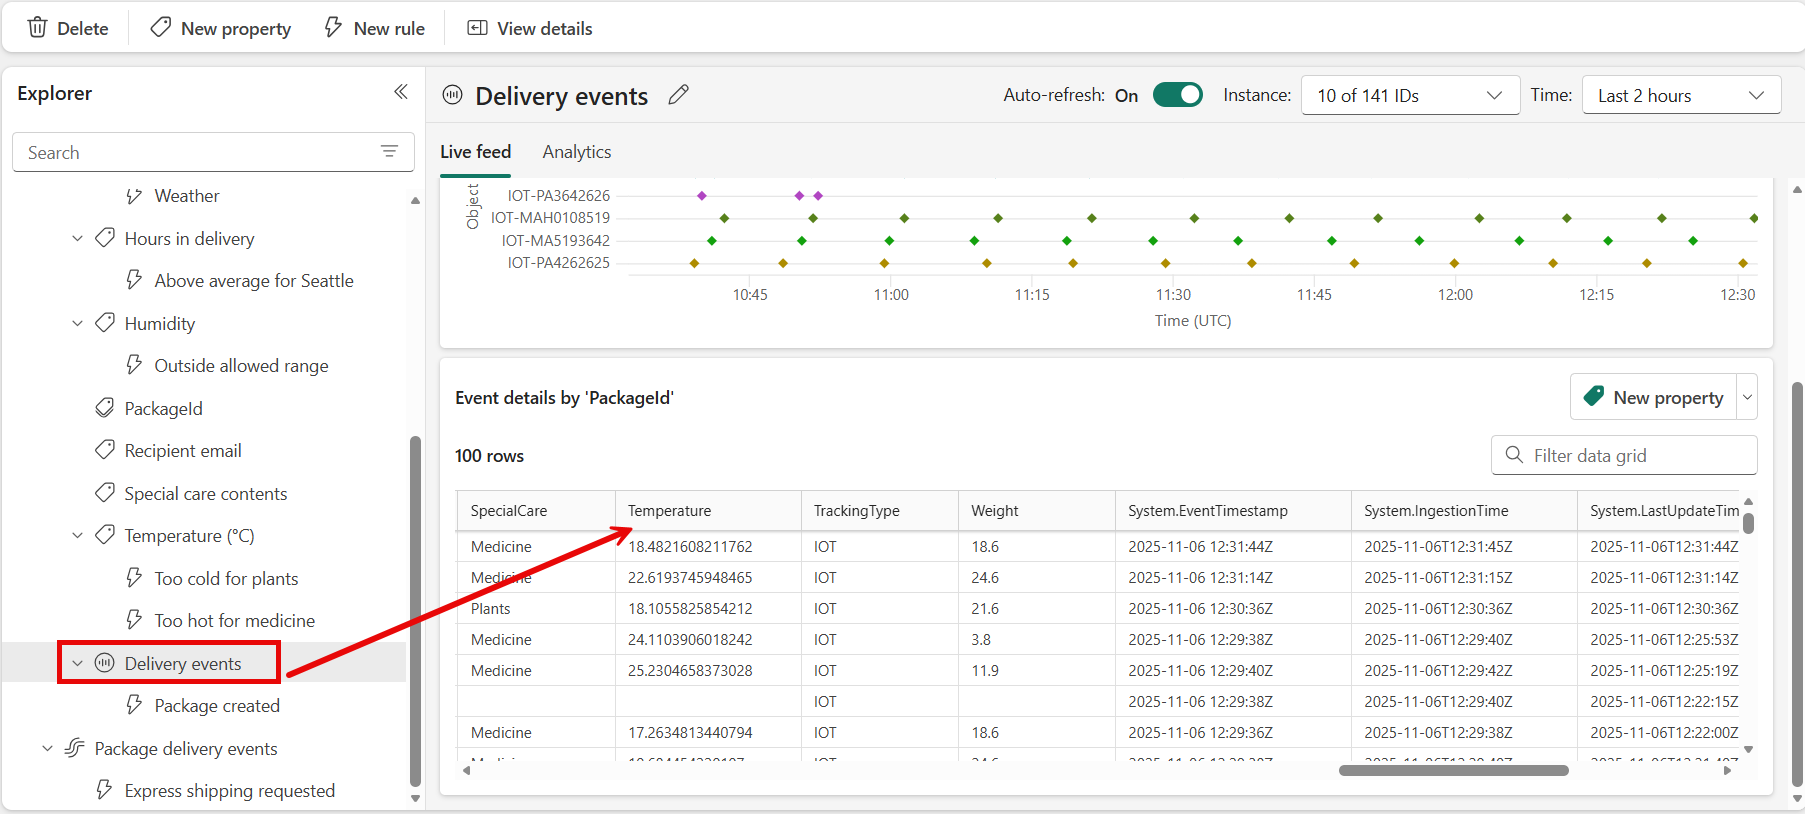
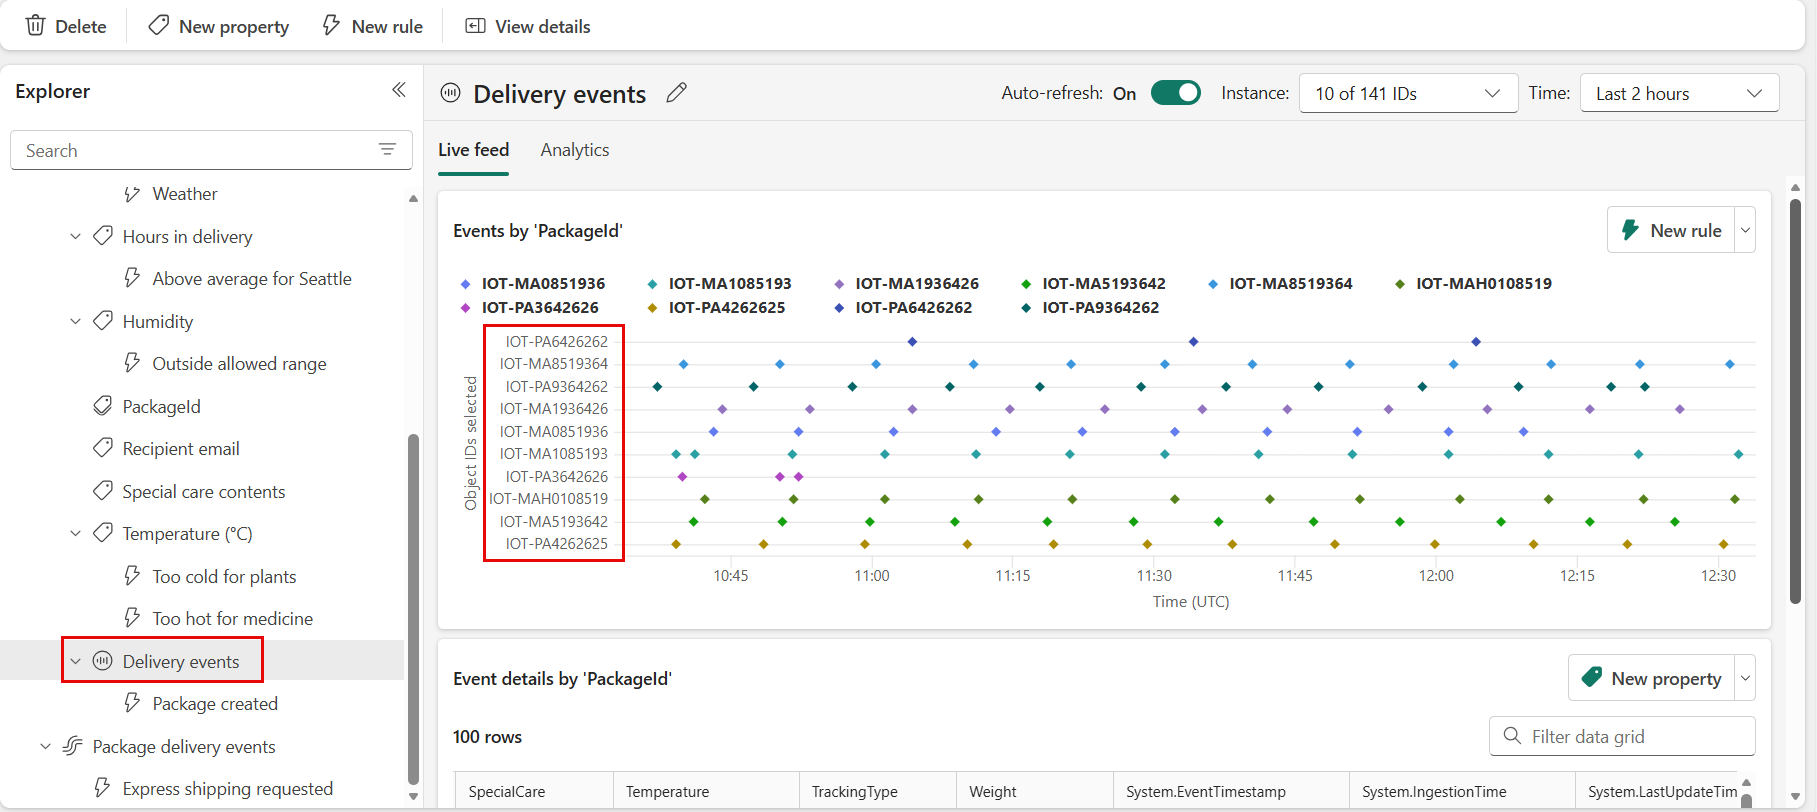
Notice that the Events by object ID section is organized by Package ID. Package ID is the column ID that uniquely identifies each package. Use this unique ID to assign package events to package objects.
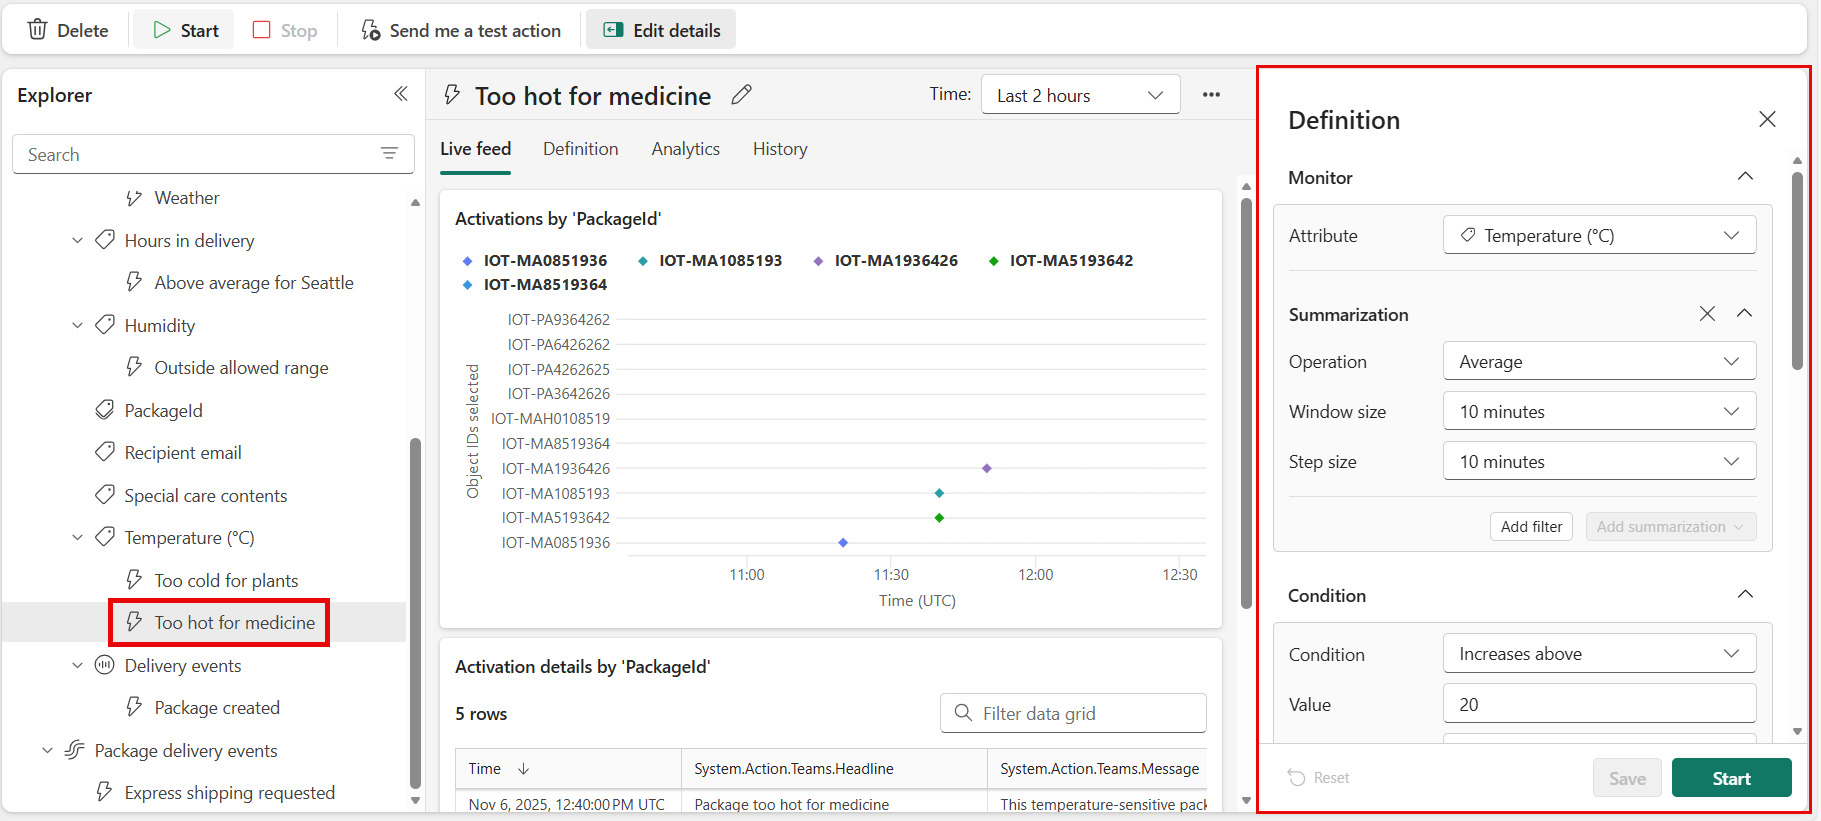
Select the Temperature rule called Too hot for medicine. In the rightmost pane, view the Definition pane to see how the rule works.
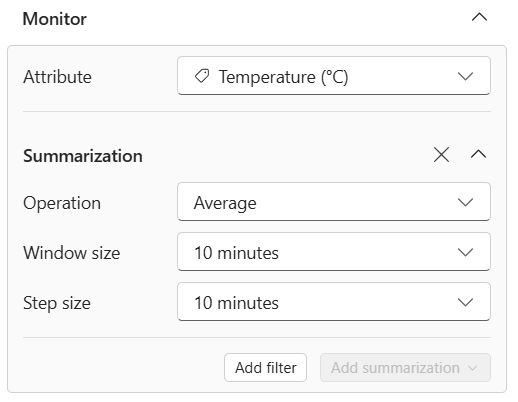
In the Monitor section, select Temperature. The temperature values come from the Temperature column in the Delivery events table. You can see the Temperature column in an earlier screenshot.
In the Condition section, you see the rule condition to monitor temperatures that are higher than 20 degrees Celsius.
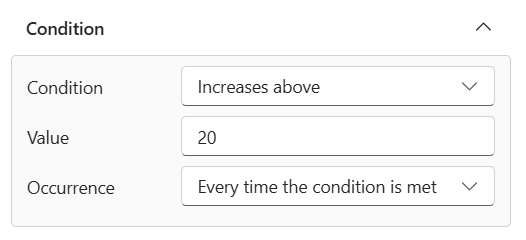
Scroll further down to Property filter. The rule applies only to packages containing medicine. In the Delivery events table, the rule looks at the column named Special care contents. In the Special care contents column, some of the packages have a value of Medicine.

Scroll down to Action. Choose one of the following actions to take when the condition is met:
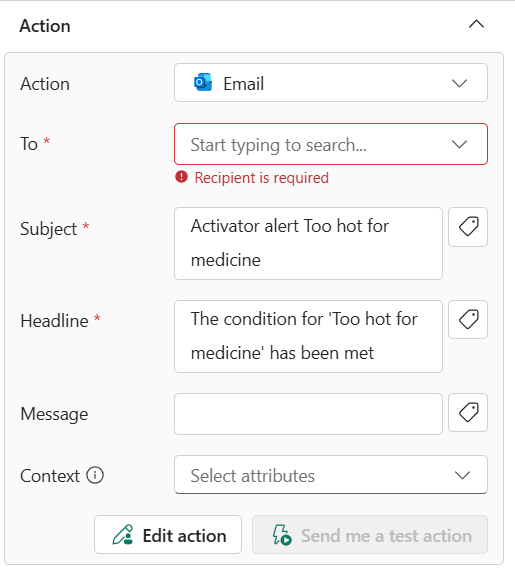
Send email notification: Sends an email to yourself or to others in your organization.
- For Select action, select Send email.
- For To, enter the email addresses of the recipients, or use the dropdown list to select a property whose value is an email address. Your email address is populated here by default.
- For Subject, enter the subject of the email notification.
- For Headline, enter the headline of the email notification.
- For Notes, enter notes for the email notification.
Note
When you enter the subject, headline, or notes, you can refer to properties in the data by typing
@or by selecting the button next to the text boxes. For example,@PackageId. - For Context, select the values from the dropdown list that you want to include in the email notification.
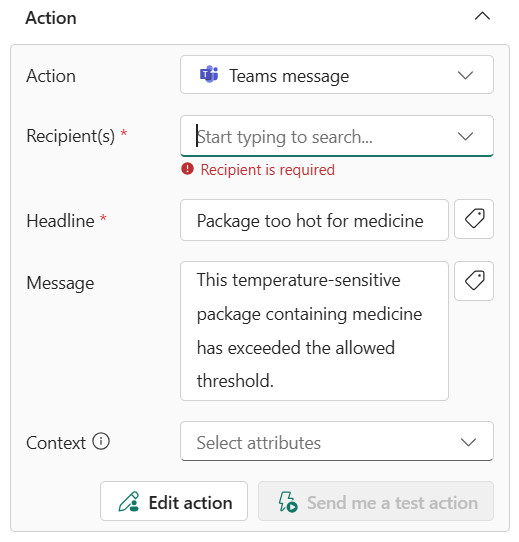
Send Microsoft Teams notification: Sends a Microsoft Teams notification to individuals, a group chat, or a channel. You can customize the title and message content.
- For Select action, select Teams > Message to individuals, Group chat message, or Channel post.
- Follow one of these steps depending on your selection:
- If you selected Message to individuals, enter the email addresses of the recipients, or use the dropdown list to select a property whose value is an email address. When the condition is met, Fabric Activator sends a Teams message to the specified individuals.
- If you selected Group chat message, select a group chat from the dropdown list. When the condition is met, Fabric Activator posts a message to the group chat.
- If you selected Channel post, select a team and channel from the dropdown lists. When the condition is met, Fabric Activator posts a message to the selected channel.
- For Headline, enter the headline of the Teams notification.
- For Notes, enter notes for the Teams notification.
Note
When you enter the subject, headline, or notes, you can refer to properties in the data by typing
@or by selecting the button next to the text boxes. For example,@PackageId. - For Context, select the values from the dropdown list that you want to include in the Teams notification.
Run Fabric activities: To configure the alert to launch a Fabric pipeline, Dataflow, Spark job, notebook, Function, Copy job (preview), or Publish business event (preview) when the condition is met, follow these steps:
For Select action, select Run Pipeline, Run Dataflow, Run Spark job, Run Notebook, Run Function, Run Copy job (preview), or Publish business event (preview).
On Select Fabric item to run, select the Fabric item (pipeline, dataflow, notebook, Spark job, function, copy job, or publish business event (preview)) from the list.
Select Add parameter, and then specify the name of the parameter for the Fabric item and a value for it. You can add more than one parameter. You can pass parameters from the alert data by typing
@or by selecting the button next to the text box. For example,@PackageId. Copy jobs (preview) don't accept parameters, so this step doesn't apply to them.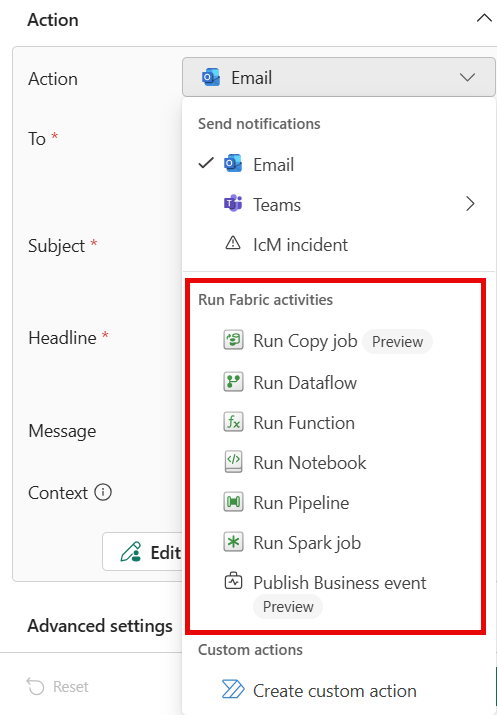
Custom actions: To configure the alert to call a custom action when the condition is met, follow these steps:
For Select action, select Create custom action.
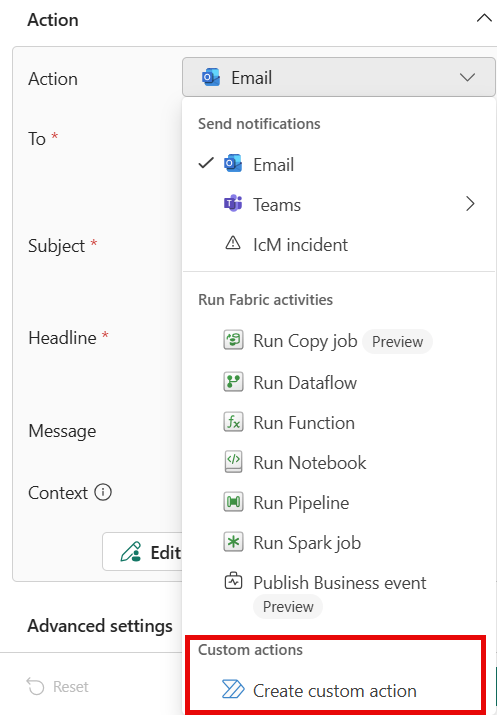
First, create the rule. Then complete the custom action setup by following the steps in Trigger custom actions (Power Automate flows).
After you create the custom action, in the Definition pane, select your custom action from the Select action dropdown list.
After you configure your selected action, select Create to save your Activator rule.

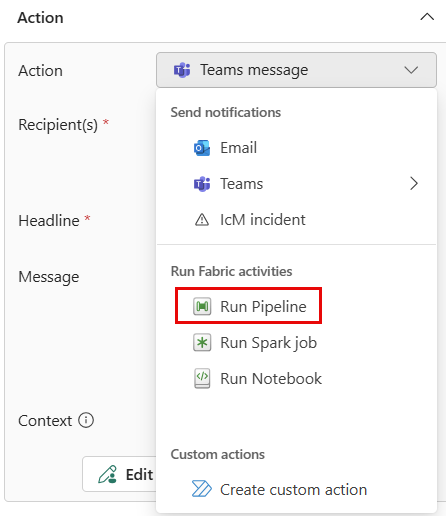
You created a Fabric Activator rule. The rule runs against the Package delivery events eventstream. The rule looks for packages that contain medicine and checks whether the temperature is greater than 20 degrees Celsius. When the temperature exceeds 20 degrees Celsius, the rule sends a Teams message.
This sample Activator item includes other rules. Explore them at your own pace to see how they work.
Start the rule
Now that you're familiar with the events and objects used to create a rule, start the rule.
Select Too hot for medicine.
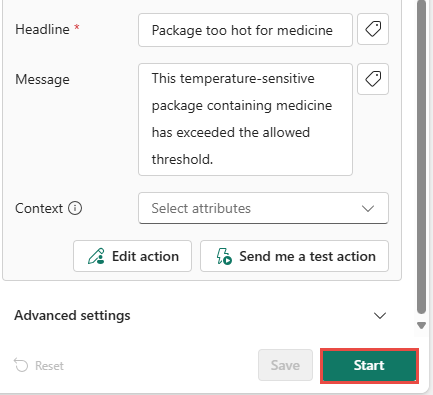
Optionally, send a test message by selecting Send me a test action. First, check that you're the Recipient.
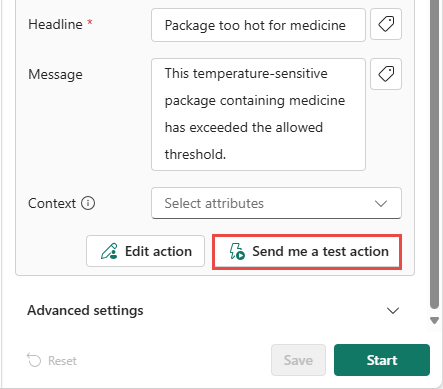
You receive a message similar to the following one:
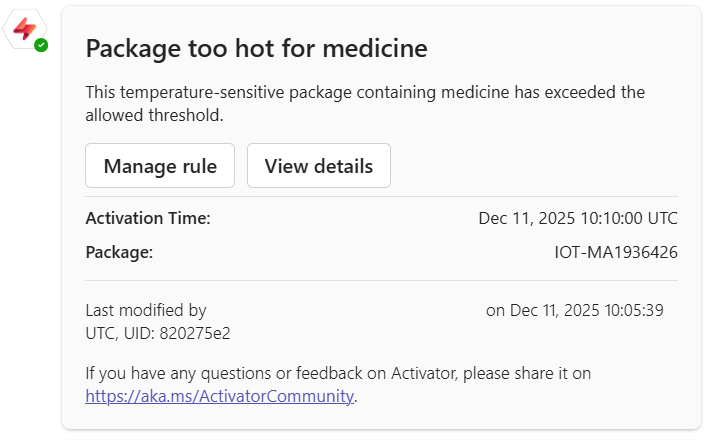
Select Start. This action activates the rule. You receive a Teams message whenever a medicine package is too hot. The rule triggers several times every hour.
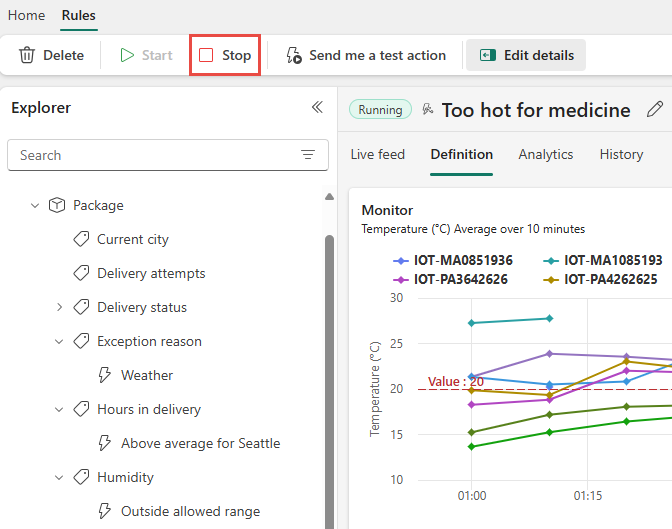
Later, you can turn off the rule by using the Stop button on the ribbon.
Create an object
Now create an object of your own. In this section, you delete the Package object and recreate it with the properties you'll use in the next section to build a rule.
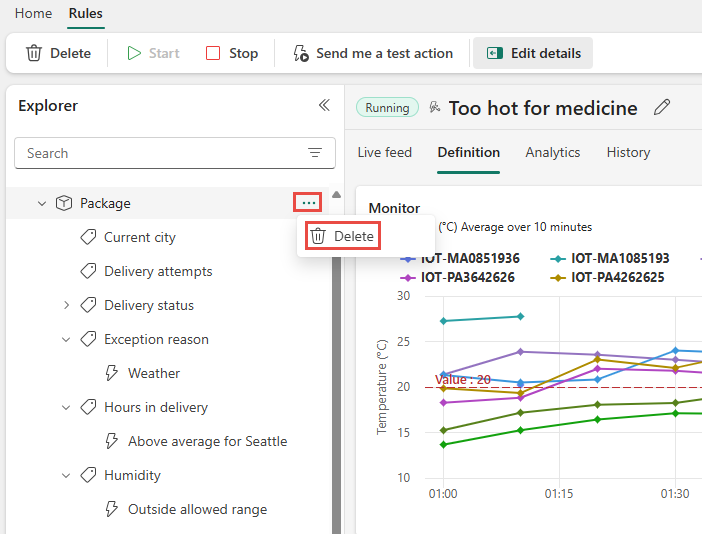
In the Explorer pane, right-click Package, and select Delete. On the Delete item window, select Delete.
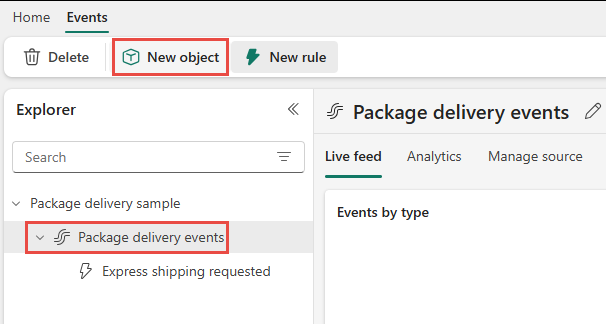
Select the Package delivery events stream, and then select New object on the ribbon.
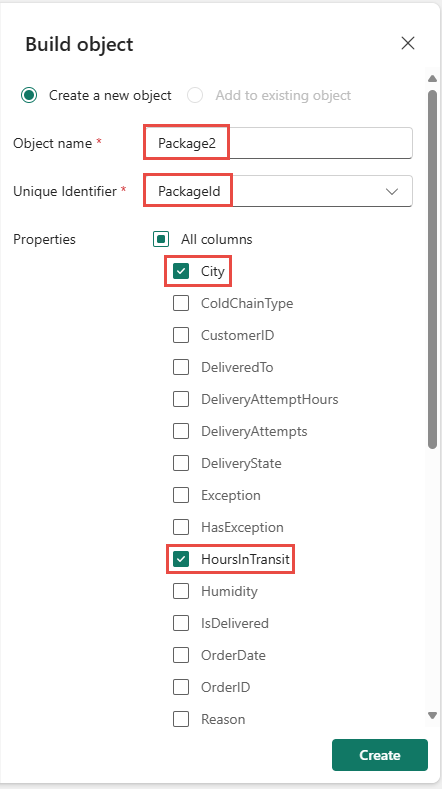
In the Build object pane to the right, follow these steps:
Name your new object Package2.
Choose PackageId as the unique ID.
Select HoursInTransit and City as properties of the object.
Select Create.
Create a rule
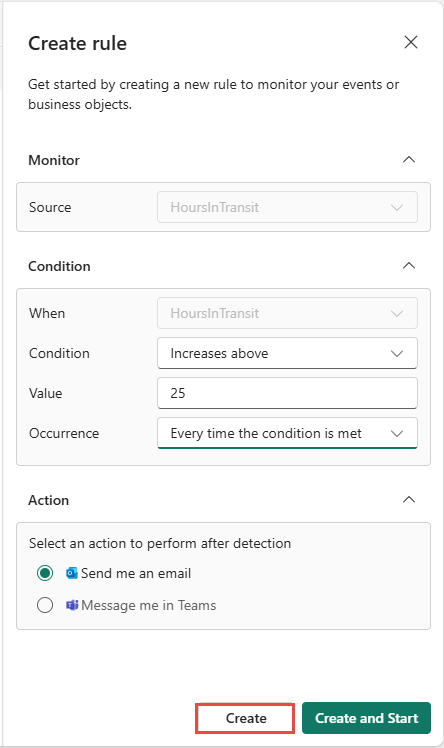
Create a rule that alerts you when average transit time exceeds 25 hours.
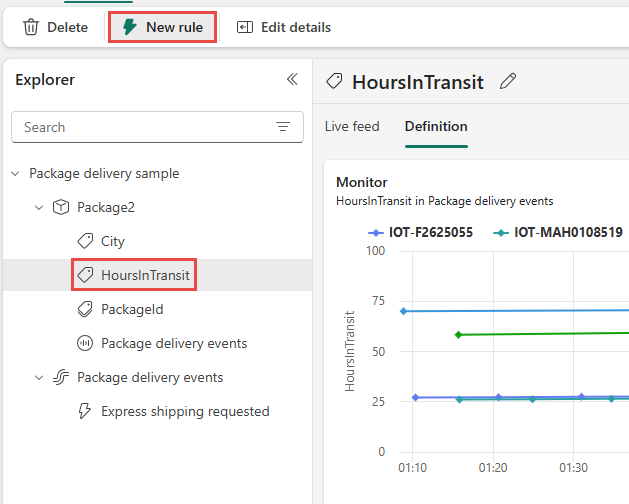
Select your new HoursInTransit property. From the ribbon, select New rule.
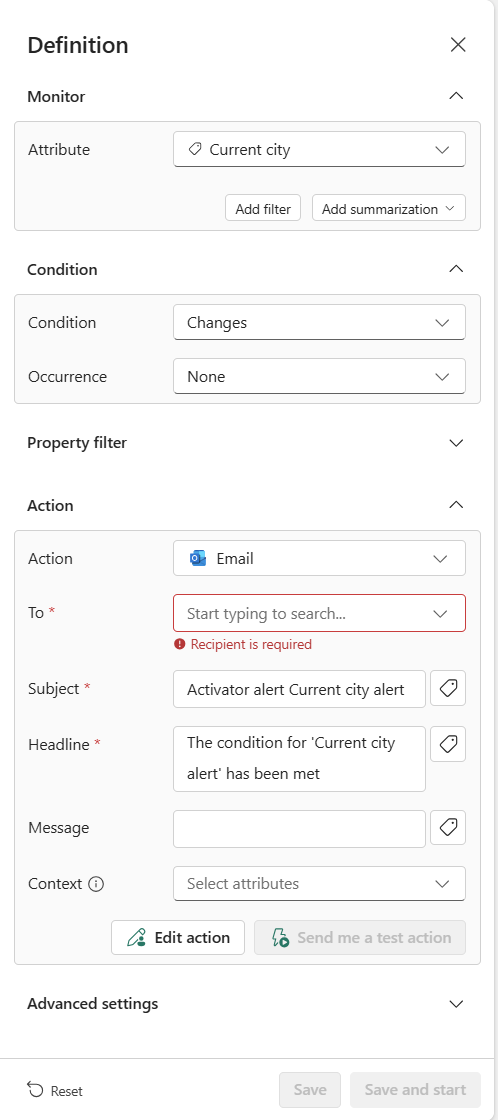
In the Definition pane, follow these steps:
For Monitor, choose the attribute to monitor and optionally add filters.
For Condition, set the condition to trigger when HoursInTransit is greater than 25.
For Action, select one of the options to send a message in Teams or email.
Select Save.
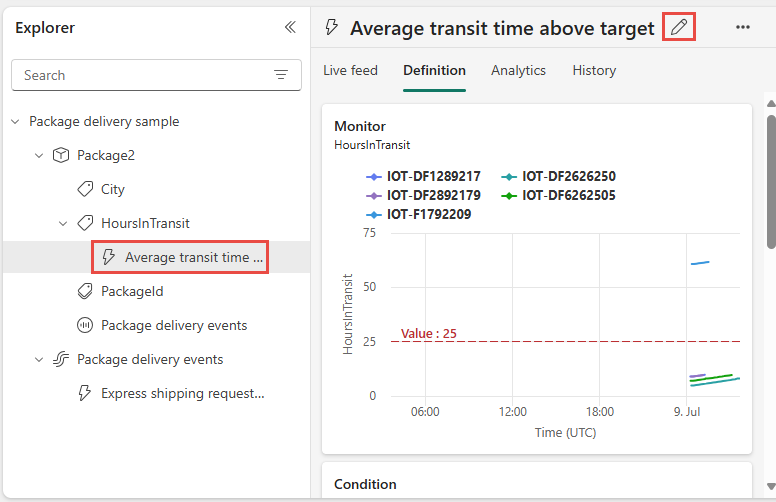
You see the rule under HoursInTransit in the Explorer pane. Select the rule. In the middle pane, select the pencil icon at the top, and update the name to Average transit time above target.
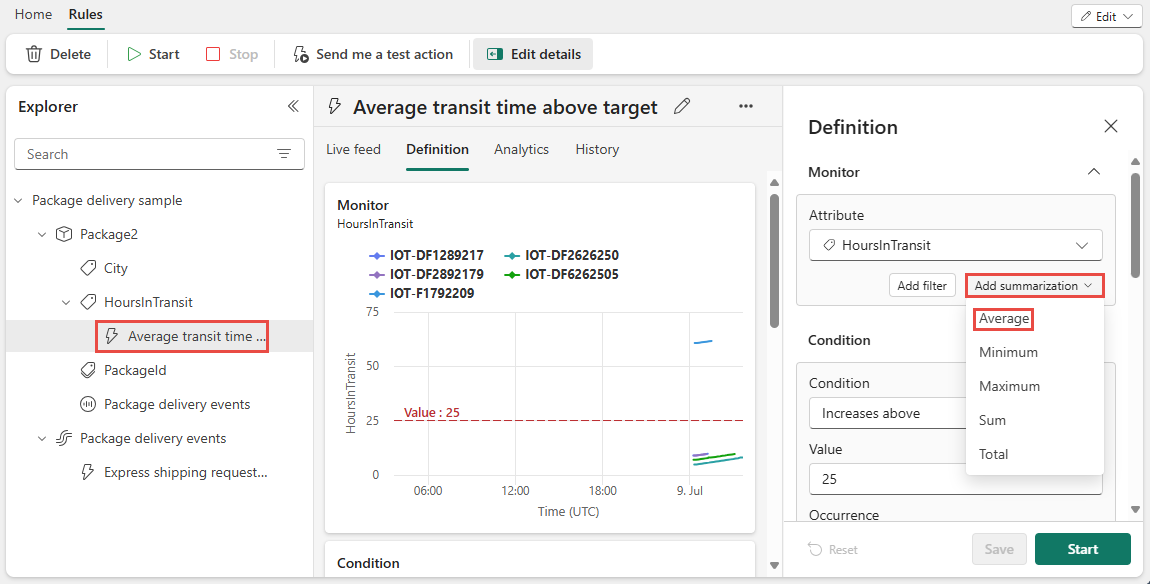
In the Definition pane to the right, select HoursInTransit. Then select Add summarization > Average.
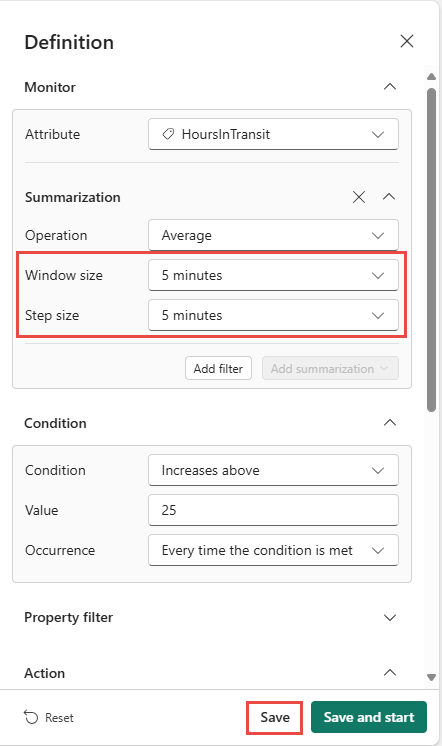
Set an aggregation Window size of five minutes and a Step size of five minutes, and then select Save.
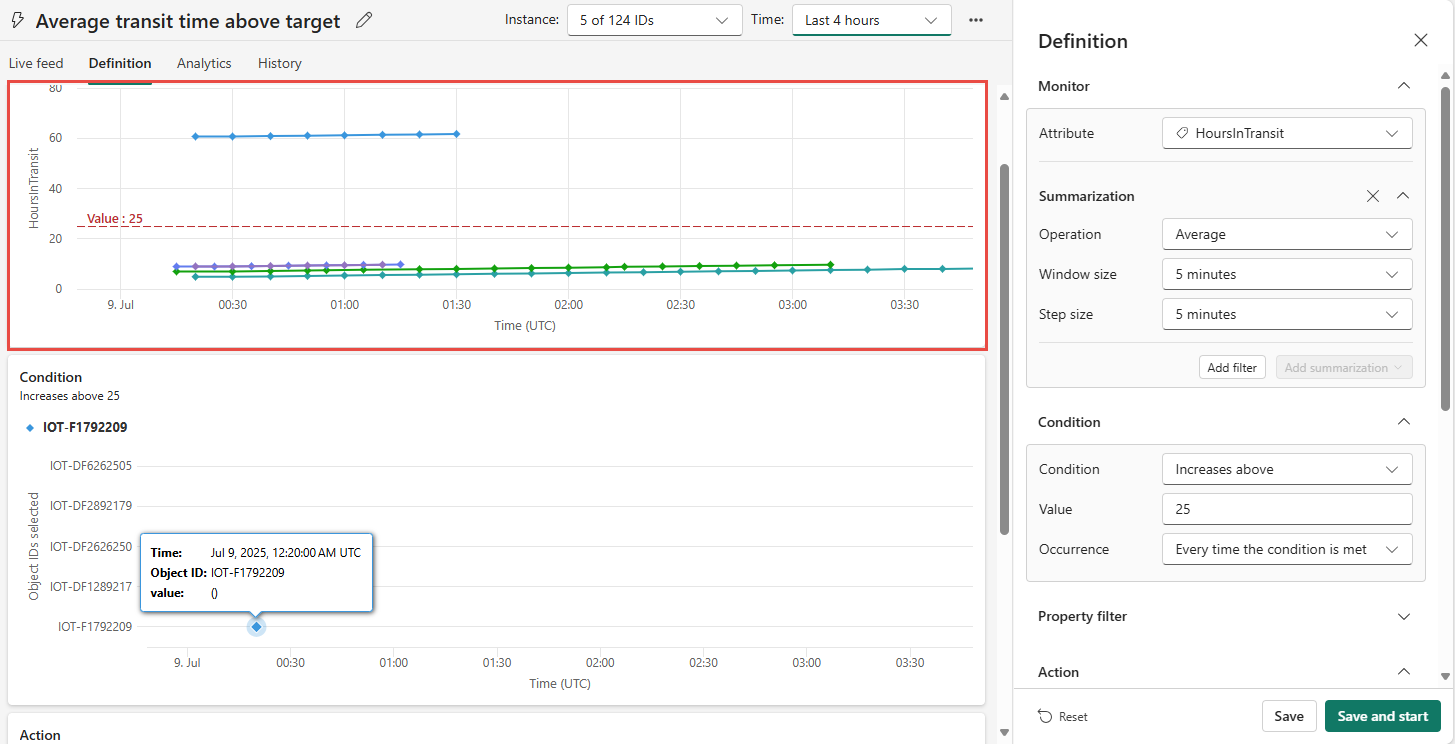
The Monitor chart updates to reflect the summarization, and your rule Monitor chart looks like this.
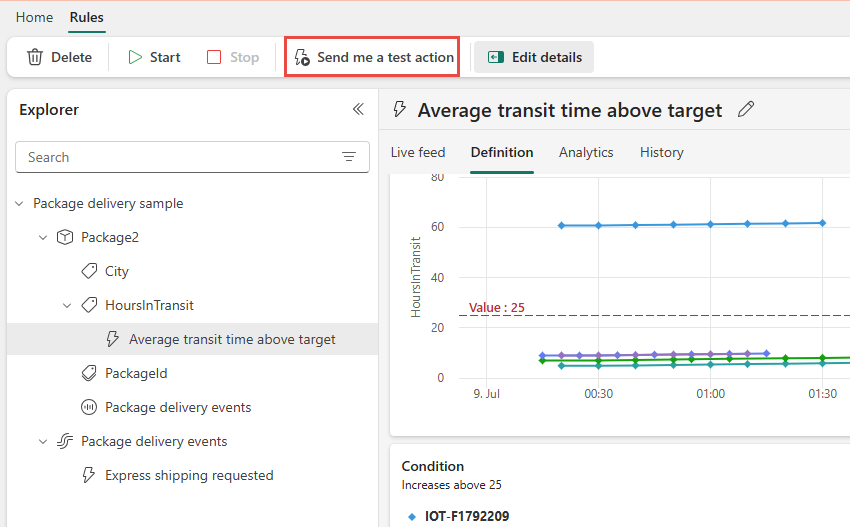
Test your rule by selecting the Send me a test action button. Make sure you get an alert. If you use email, it might take a minute or two to arrive.
Start your rule by selecting Save and start in the Definition pane or by selecting Start on the ribbon.
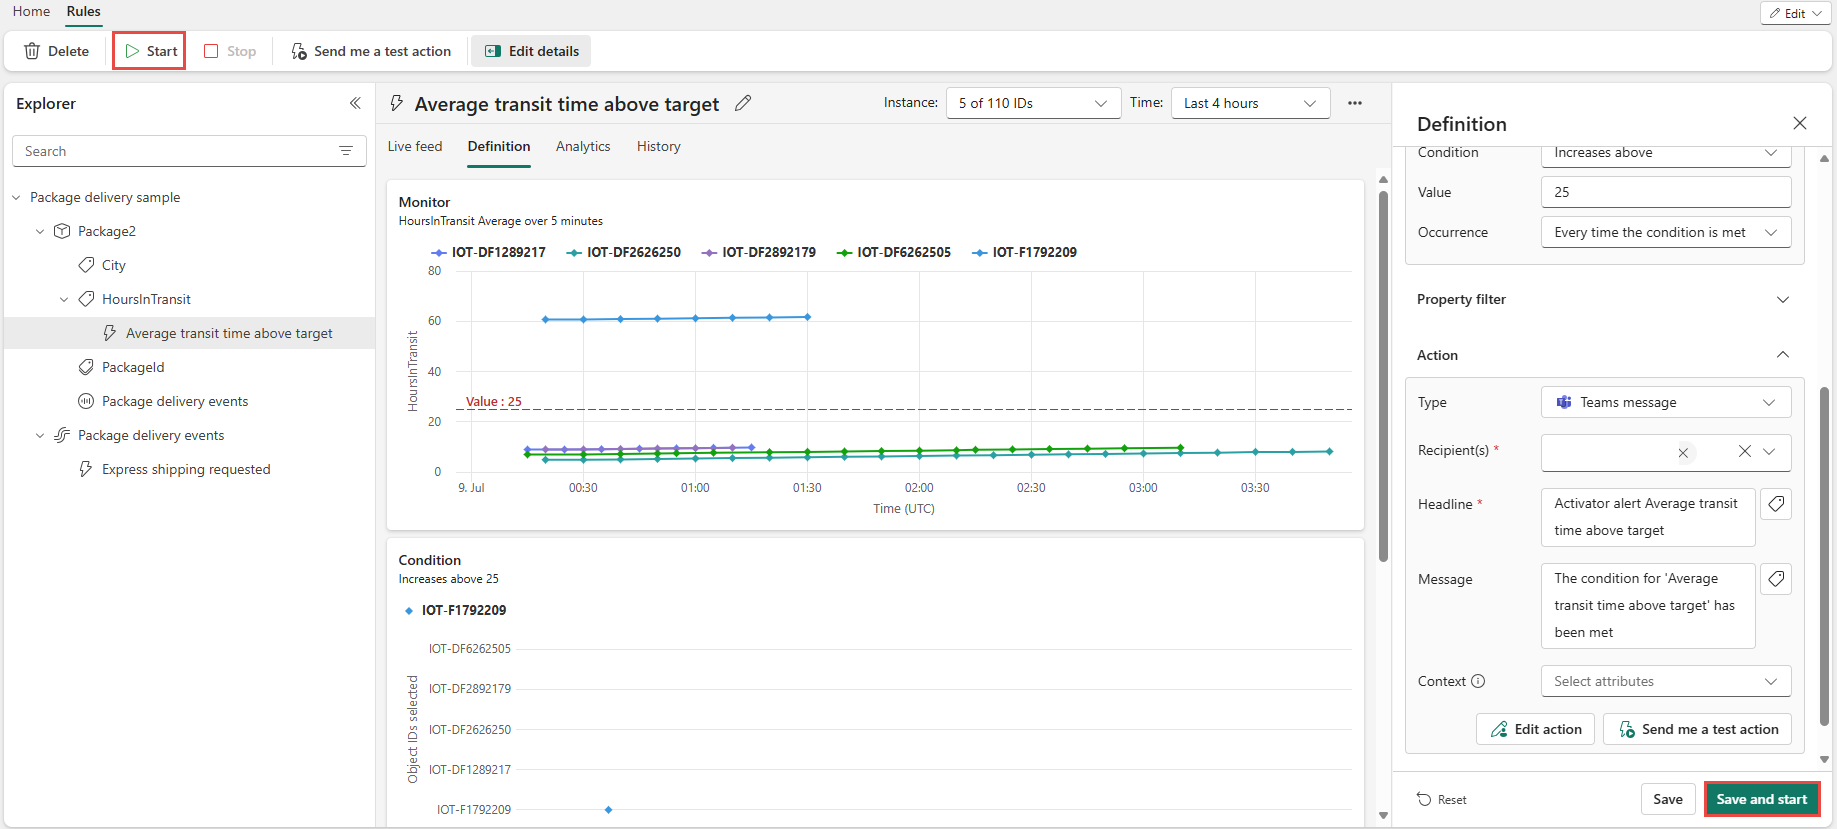
You created your first object and rule. As a next step, try setting up other rules on the Package2 object.
When you're ready to try using Fabric Activator on your own data, follow the steps in the Get data for Fabric Activator article.
Clean up resources
When you finish with the rules you created as part of the tutorial, stop them. If you don't stop the rules, you continue to receive the rule notifications. You might also incur charges for background processing. Select each rule in turn and select the Stop button from the ribbon.
Related content
To learn more about Microsoft Fabric, see: