Note
Access to this page requires authorization. You can try signing in or changing directories.
Access to this page requires authorization. You can try changing directories.
Important
Uploading CSV and Excel files is in Public Preview. Uploading PDF files is in Beta.
Upload CSV, Excel, and PDF files directly into a Genie Agent so users can query them in natural language alongside Unity Catalog tables. This is useful for quick data validation, lightweight analysis, and working with external datasets without manual import or transformation.
Note
Genie Agents were formerly known as Genie Spaces.
Overview
Uploading files to a Genie Agent allows you to explore data in a Genie Agent conversation. You can add files to agents that also include Unity Catalog tables, making it possible to analyze uploaded data alongside existing sources. Instead of manually importing and transforming datasets, you can drag and drop a file into the chat and begin querying it immediately. This is useful for quick data validation, lightweight analysis, and working with external datasets without additional setup.
Requirements
- Genie Agents must be enabled in your workspace. See Create and manage a Genie Agent.
- The Upload data using the UI workspace admin setting must be enabled. See Disable the upload data UI.
- A workspace admin must enable the preview from the Previews page. Use the Genie - Upload File toggle to manage access.
- To upload PDF files (Beta), a workspace admin must enable the Upload Local PDFs to Genie Agents toggle from the Previews page. The following additional requirements apply:
- Partner-Powered AI features must be enabled. See Partner-powered AI features.
- PDF uploads are not supported in compliance security profile workspaces.
- At least CAN RUN permissions on the Genie Agent. See Genie Agent ACLs.
File requirements
You can upload up to 25 files per conversation, regardless of file type.
CSV and Excel files
CSV and Excel uploads are not available in Agent mode.
- Each file must be smaller than 200 MB.
- Each file must contain fewer than 100 columns.
- Excel files can contain multiple sheets. Genie displays sample data from the first sheet by default, but all sheets that can be parsed are available. To query a specific sheet, reference it by name when asking Genie.
PDF files
Important
This feature is in Beta. Workspace admins can control access to this feature from the Previews page. See Manage Azure Databricks previews.
PDF uploads require Agent mode.
- Each PDF must be smaller than 20 MB.
- Each PDF must contain no more than 20 pages.
- Each PDF is limited to 4,000 characters.
- Uploaded PDFs apply only to the current conversation. New chat threads do not include context from previously uploaded PDFs.
- PDF uploads are only available through the UI. API-based file uploads are not supported.
Upload a file
Only the user who uploaded the file can access it.
Upload files in one of the following ways:
- Drag and drop the file into the chat window.
- Click
 to select a file from your file browser.

After the file is uploaded and processed, Genie displays the data in the response. You can ask questions about the uploaded file and any other data in the Genie Agent.
Note
Uploaded files are stored in a user- and agent-specific Unity Catalog managed volume. The volume is not listable and does not appear in the schema browser. Permissions on uploaded files do not need to be managed manually. Users are automatically granted USE CATALOG, USE SCHEMA, READ VOLUME, and WRITE VOLUME privileges on their uploaded files.
For more information about managed volumes, see What are Unity Catalog volumes?.
View available files
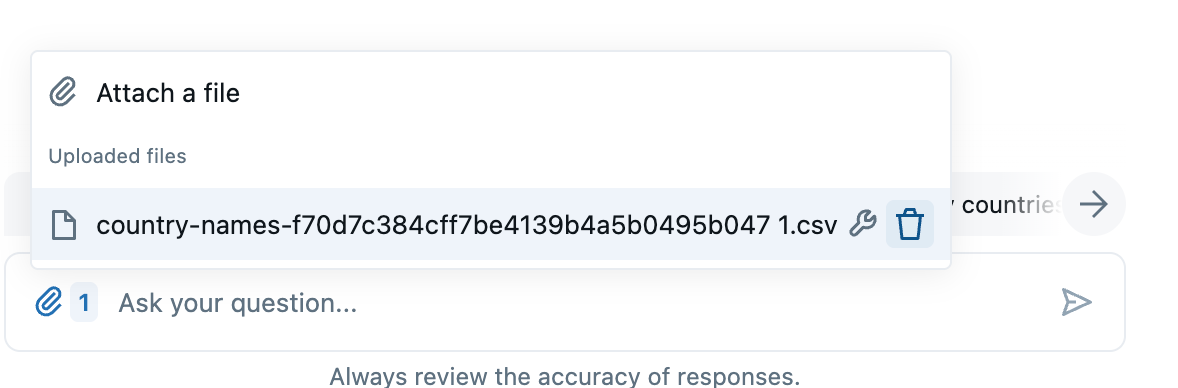
To view files that have been uploaded to the agent, click to open the file menu. If an uploaded Excel file has multiple sheets, they appear as separate files in the menu.
Adjust file format settings
To adjust the formatting settings applied to a file:
- Click to open the file menu.
- Click
 the wrench icon to the right of the file.
 - Adjust settings in the File Format Settings dialog.
- Click Apply changes to preview your changes.
- Click Save to keep your changes and close the dialog.
Remove a file
To remove a file and its associated conversation record, delete the conversation.
To remove only the file, click  the trash icon next to the file in the attached files menu.
Note
If the Genie Agent is deleted, the file is automatically removed from managed storage.
Disable file uploads
A workspace admin can prevent the ability to upload files to a Genie Agent. To do so, turn off Upload data using the UI. See Disable the upload data UI.
FAQ
Who can access uploaded files?
Only the user who uploaded the file can access it.
What data is sent to the LLM?
A subset of the data from uploaded files is sent to the external model and used to improve the response quality and properly parse the files.
Why can't I upload a file?
If you do not have at least CAN RUN permissions on the Genie Agent, the upload option is not available. Your workspace admin might also have turned off the Upload data using the UI workspace setting or disabled the Genie - Upload File preview for your workspace. See Disable the upload data UI.