Events
31 Mar, 23 - 2 Apr, 23
The biggest Fabric, Power BI, and SQL learning event. March 31 – April 2. Use code FABINSIDER to save $400.
Register todayThis browser is no longer supported.
Upgrade to Microsoft Edge to take advantage of the latest features, security updates, and technical support.
Previously, Azure Service Bus offered namespaces only on the standard tier. Namespaces are multitenant setups that are optimized for low throughput and developer environments. The premium tier offers dedicated resources per namespace for predictable latency and increased throughput at a fixed price. The premium tier is optimized for high throughput and production environments that require additional enterprise features.
This article describes how to migrate existing standard tier namespaces to the premium tier.
Warning
Migration is intended for Service Bus standard namespaces to be upgraded to the premium tier. The migration tool doesn't support downgrading. Please note that during migration a post migration name will be created that represents the pointer to the DNS namespace of the standard service bus namespace and the operation cannot be undone. This post migration name can be used to access the standard namespace, post migration. Any sort of testing should be done in a testing environment. Some of the points to note:
Some conditions are associated with the migration process. Familiarize yourself with the following steps to reduce the possibility of errors. These steps outline the migration process, and the step-by-step details are listed in the sections that follow.
Important
After the migration has been committed, access the old standard namespace and drain the queues and subscriptions. After the messages have been drained, they may be sent to the new premium namespace to be processed by the receiver applications. After the queues and subscriptions have been drained, we recommend that you delete the old standard namespace.
To migrate your Service Bus standard namespace to premium by using the Azure CLI or PowerShell tool, follow these steps.
Create a new Service Bus premium namespace. You can reference the Azure Resource Manager templates or use the Azure portal. Be sure to select premium for the serviceBusSku parameter.
Set the following environment variables to simplify the migration commands. You can get the Azure Resource Manager ID for your premium namespace by navigating to the namespace in the Azure portal and copying the portion of the URL that looks like the following sample: /subscriptions/00000000-0000-0000-0000-00000000000000/resourceGroups/contosoresourcegroup/providers/Microsoft.ServiceBus/namespaces/contosopremiumnamespace.
resourceGroup = <resource group for the standard namespace>
standardNamespace = <standard namespace to migrate>
premiumNamespaceArmId = <Azure Resource Manager ID of the premium namespace to migrate to>
postMigrationDnsName = <post migration DNS name entry to access the standard namespace>
Important
The Post-migration alias/name (postMigrationDnsName) will be used to access the old standard namespace post migration. Use this to drain the queues and the subscriptions, and then delete the namespace.
Pair the standard and premium namespaces and start the sync by using the following command:
az servicebus migration start --resource-group $resourceGroup --name $standardNamespace --target-namespace $premiumNamespaceArmId --post-migration-name $postMigrationDnsName
Check the status of the migration by using the following command:
az servicebus migration show --resource-group $resourceGroup --name $standardNamespace
The migration is considered complete when you see the following values:
This command also displays the migration configuration. Check to ensure the values are set correctly. Also check the premium namespace in the portal to ensure all the queues and topics have been created, and that they match what existed in the standard namespace.
Commit the migration by executing the following complete command:
az servicebus migration complete --resource-group $resourceGroup --name $standardNamespace
Migration by using the Azure portal has the same logical flow as migrating by using the commands. Follow these steps to migrate by using the Azure portal.
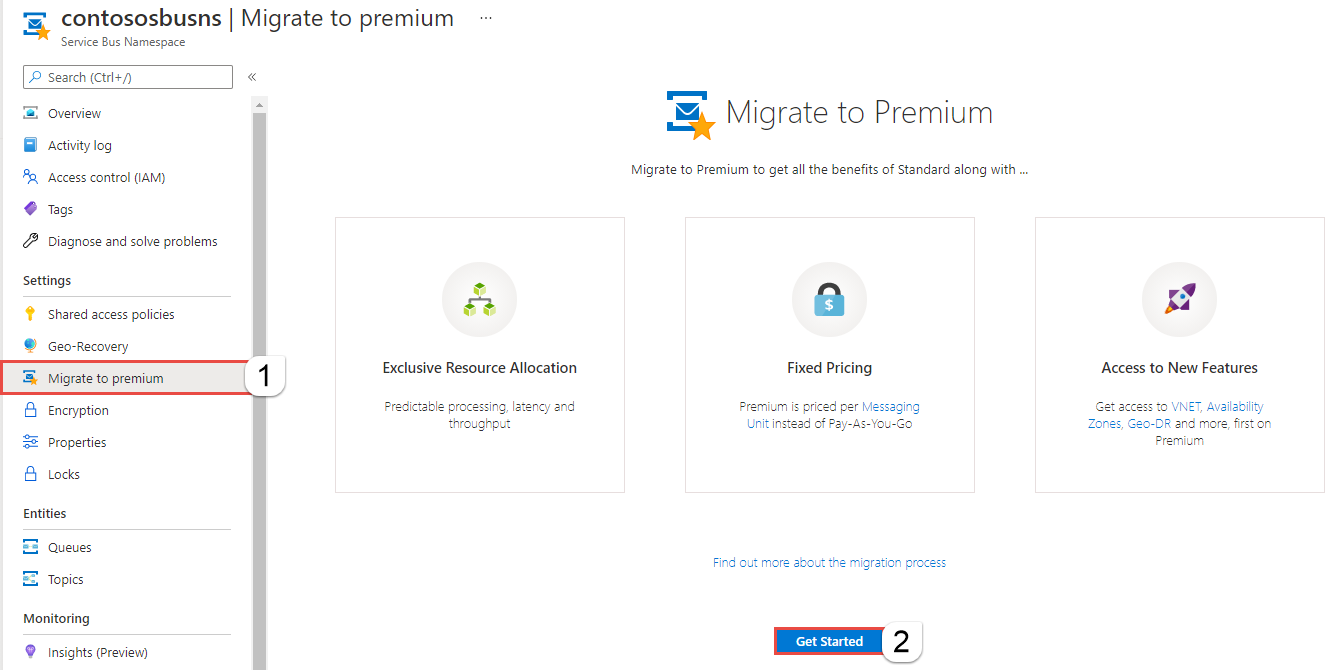
On the Navigation menu in the left pane, select Migrate to premium. Select the Get Started button to continue to the next page.
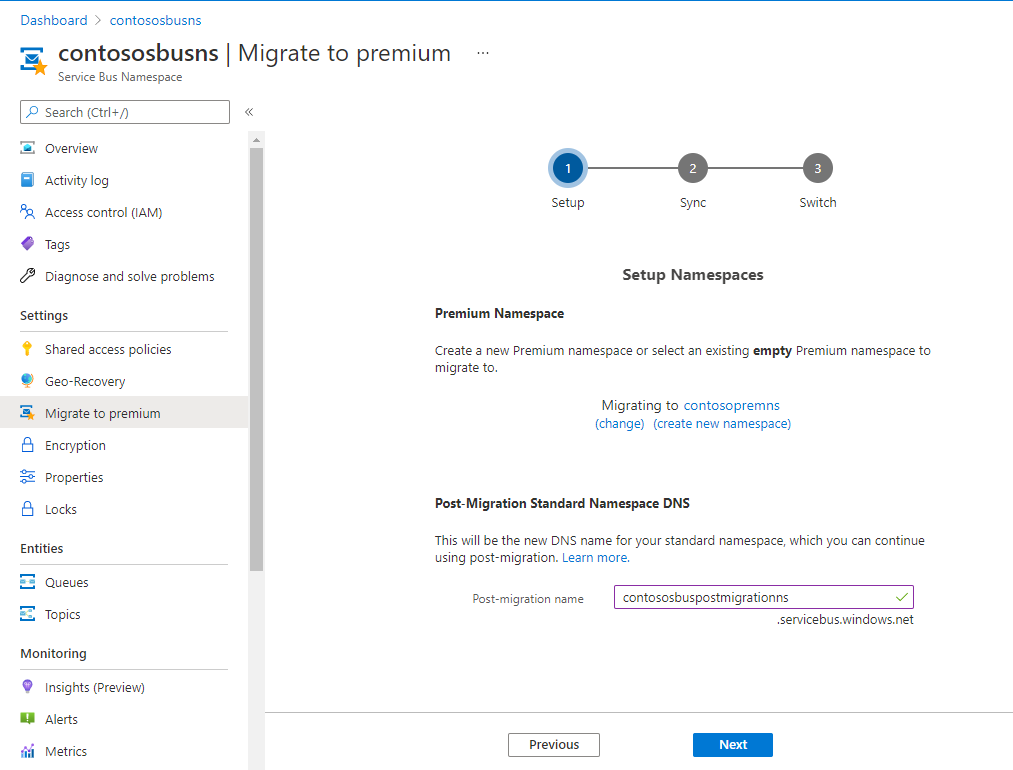
You see the following Setup Namespaces page.
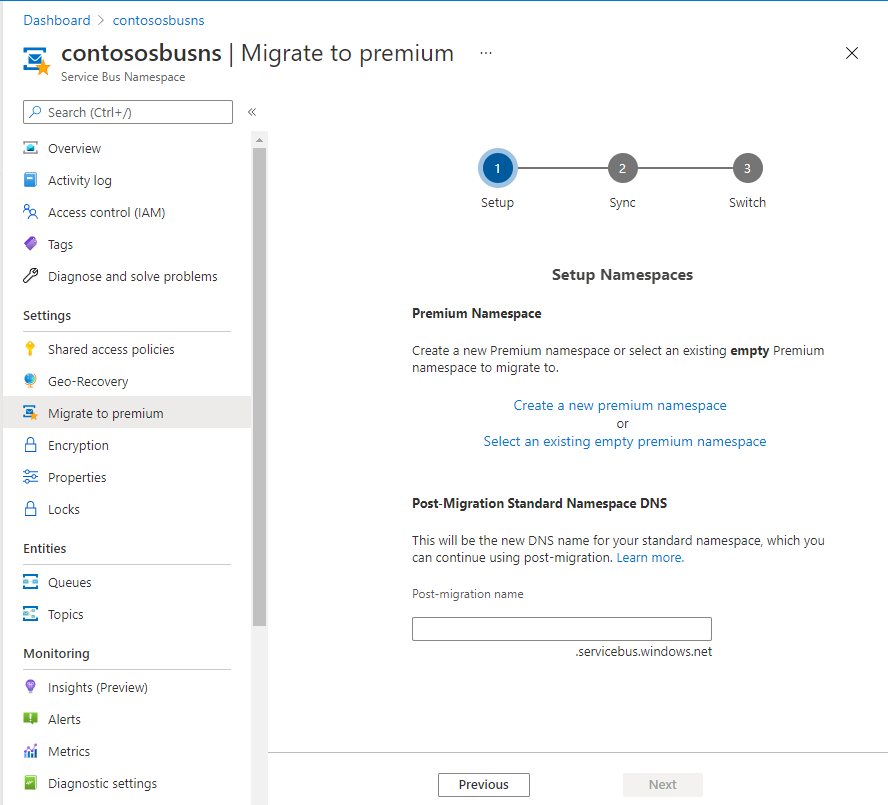
On the Setup Namespaces pages, follow one of these steps:
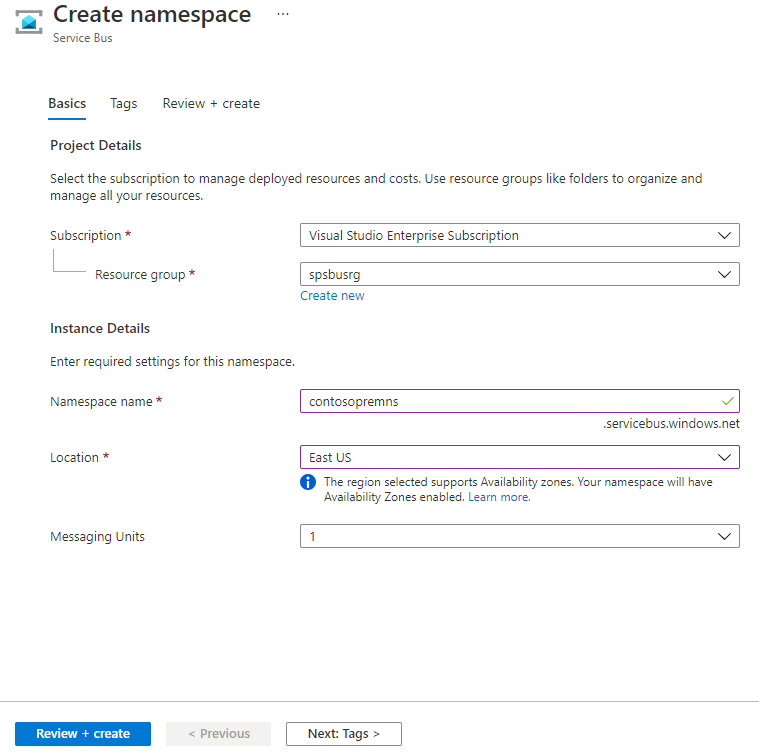
On the Create namespace page, enter a name for the namespace, and select Review + create.
On the Review + create page, select Create.
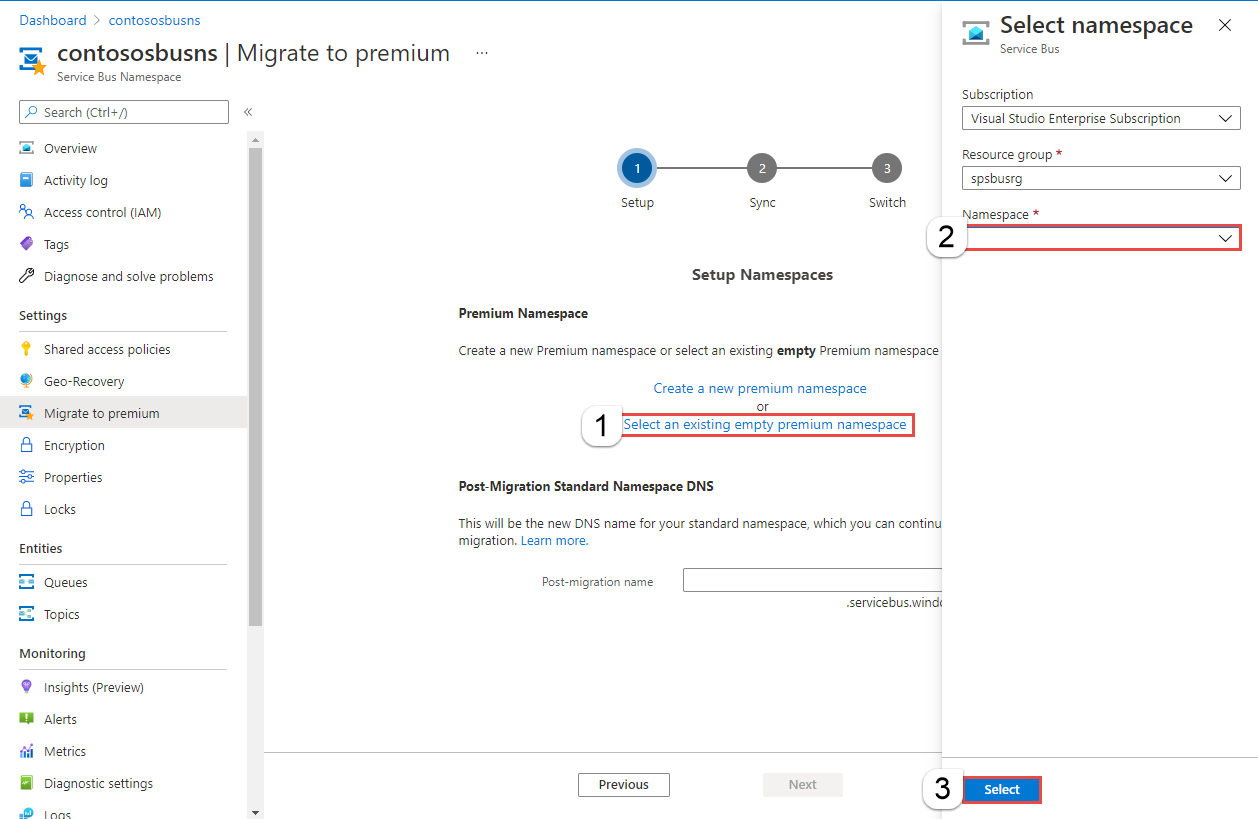
Select the Azure subscription and resource group that has the namespace.
Then, select the premium namespace.
Then click Select.
Enter a Post Migration name, and then select Next. You'll use this name to access the standard namespace after the migration is complete.
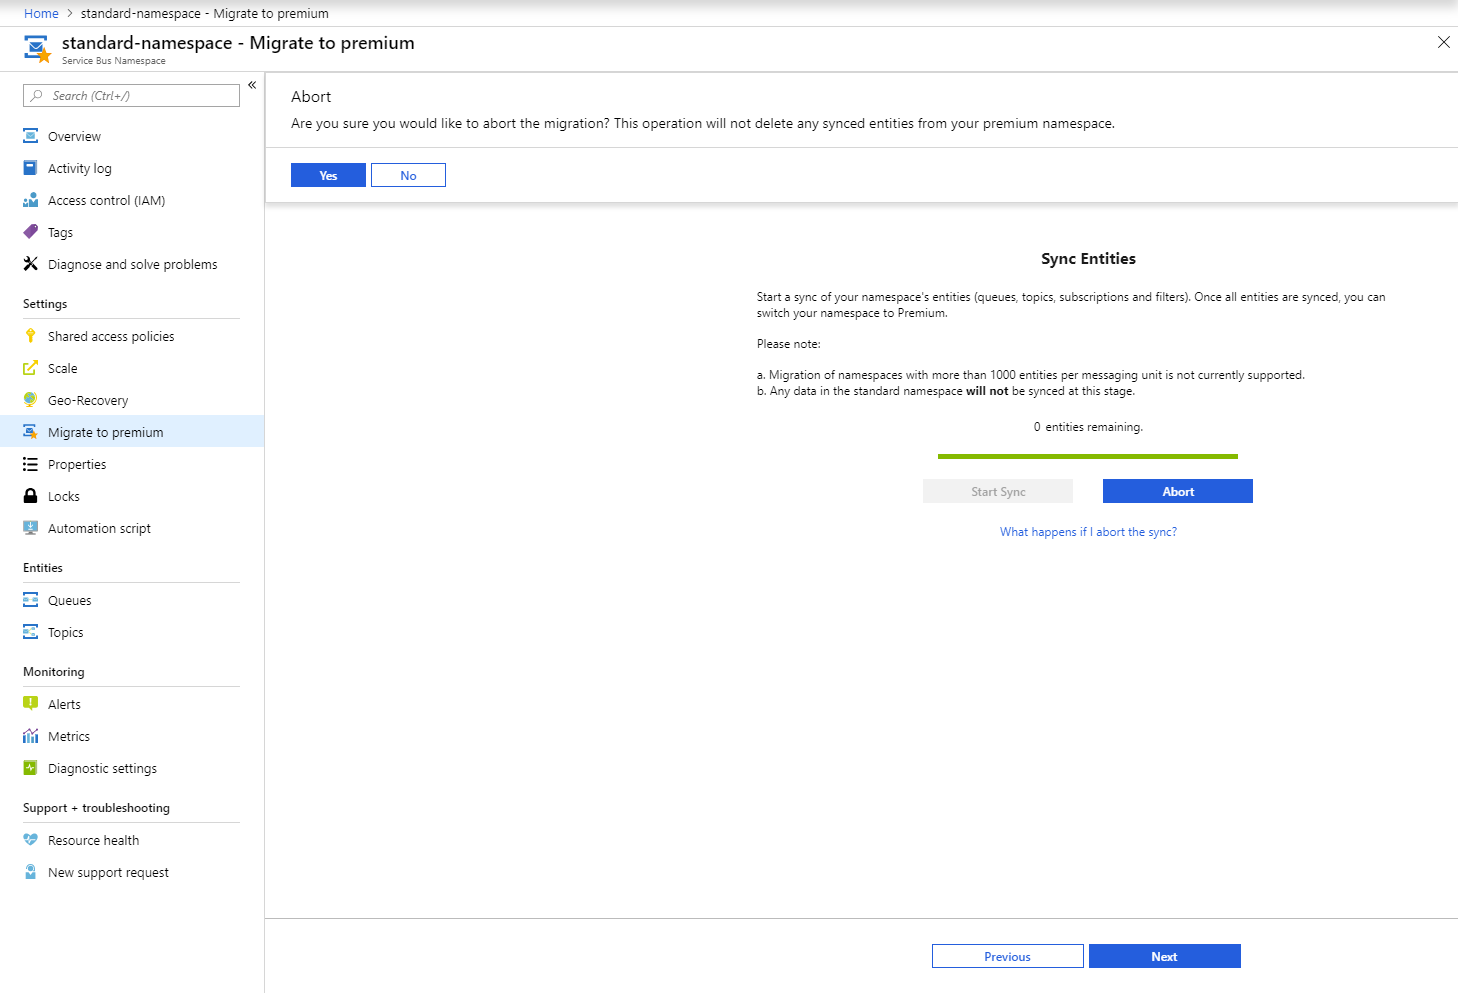
Select Start Sync to sync entities between the standard and premium namespaces.
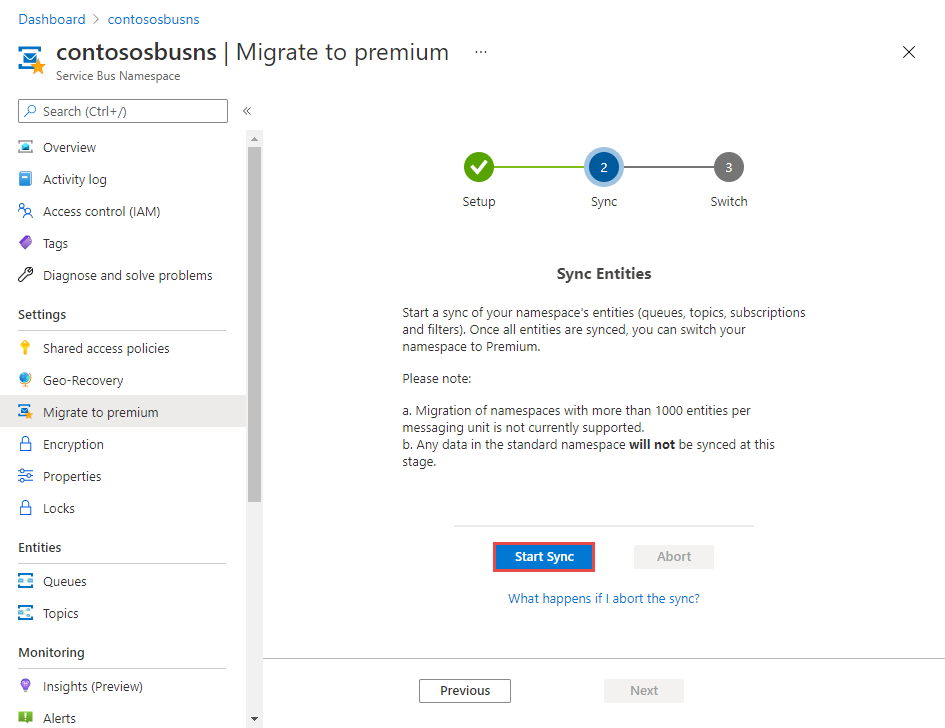
Select Yes in the dialog box to confirm and start the sync. Wait until the sync is complete. Then, select Next.
Important
If you need to abort the migration for any reason, please review the abort flow in the FAQ section of this document.
Select Complete Migration on the Switch page.
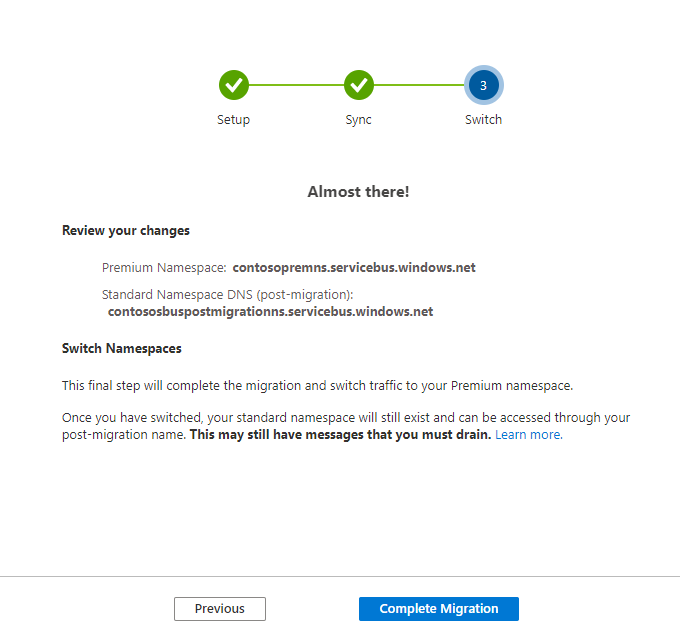
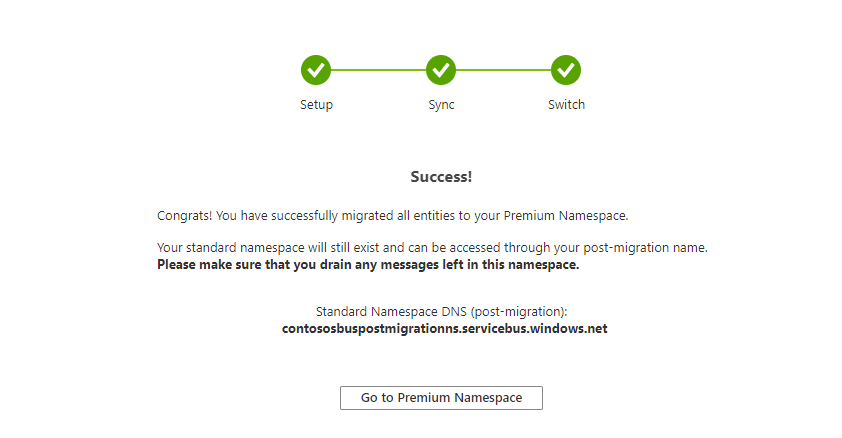
Select Yes to confirm the switch your standard namespace to premium. Once the switch is complete, the DNS name of your standard namespace will point to your premium namespace. This operation can't be undone. You see the Success page when the migration is complete.
Some of the features provided by Azure Service Bus Standard tier aren't supported by Azure Service Bus Premium tier. These are by design since the premium tier offers dedicated resources for predictable throughput and latency.
Here's an overview of features not supported by Premium and their mitigation.
Express entities that don't commit any message data to storage aren't supported in the Premium tier. Dedicated resources provided significant throughput improvement while ensuring that data is persisted, as is expected from any enterprise messaging system.
During migration, any of your express entities in your Standard namespace will be created on the Premium namespace as a non-express entity.
If you utilize Azure Resource Manager templates, please ensure that you remove the 'enableExpress' flag from the deployment configuration so that your automated workflows execute without errors.
The role-based access control (RBAC) settings on the namespace aren't migrated to the premium namespace. You'll need to add them manually after the migration.
After the migration is committed, the connection string that pointed to the standard namespace will point to the premium namespace.
The sender and receiver applications will disconnect from the standard namespace and reconnect to the premium namespace automatically.
If you are using the Azure Resource Manager ID for configuration rather a connection string (e.g. as a destination for an Event Grid Subscription), then you need to update the Azure Resource Manager ID to be that of the premium namespace.
The standard to premium migration ensures that the entity metadata such as topics, subscriptions, and filters are copied from the standard namespace to the premium namespace. The message data that was committed to the standard namespace isn't copied from the standard namespace to the premium namespace.
The standard namespace may have some messages that were sent and committed while the migration was underway. Manually drain these messages from the standard namespace and manually send them to the premium namespace. To manually drain the messages, use a console app or a script that drains the standard namespace entities by using the post-migration DNS name that you specified in the migration commands. Send these messages to the premium namespace so that they can be processed by the receivers.
After the messages have been drained, delete the standard namespace.
Important
After the messages from the standard namespace have been drained, delete the standard namespace. This is important because the connection string that initially referred to the standard namespace now refers to the premium namespace. You won't need the standard namespace anymore. Deleting the standard namespace that you migrated helps reduce later confusion.
The migration process is meant to reduce the expected downtime for the applications. Downtime is reduced by using the connection string that the sender and receiver applications use to point to the new premium namespace.
The downtime that is experienced by the application is limited to the time it takes to update the DNS entry to point to the premium namespace. Downtime is approximately 5 minutes.
No, there are no code or configuration changes needed to do the migration. The DNS name of your standard namespace will point to your premium namespace. The connection string that your sender and receiver applications use to access the standard Namespace is automatically mapped to act as an alias for the premium namespace.
The migration can be aborted either by using the Abort command or by using the Azure portal.
az servicebus migration abort --resource-group $resourceGroup --name $standardNamespace
Select Abort on the Sync entities page.
When it's complete, you see the following page:
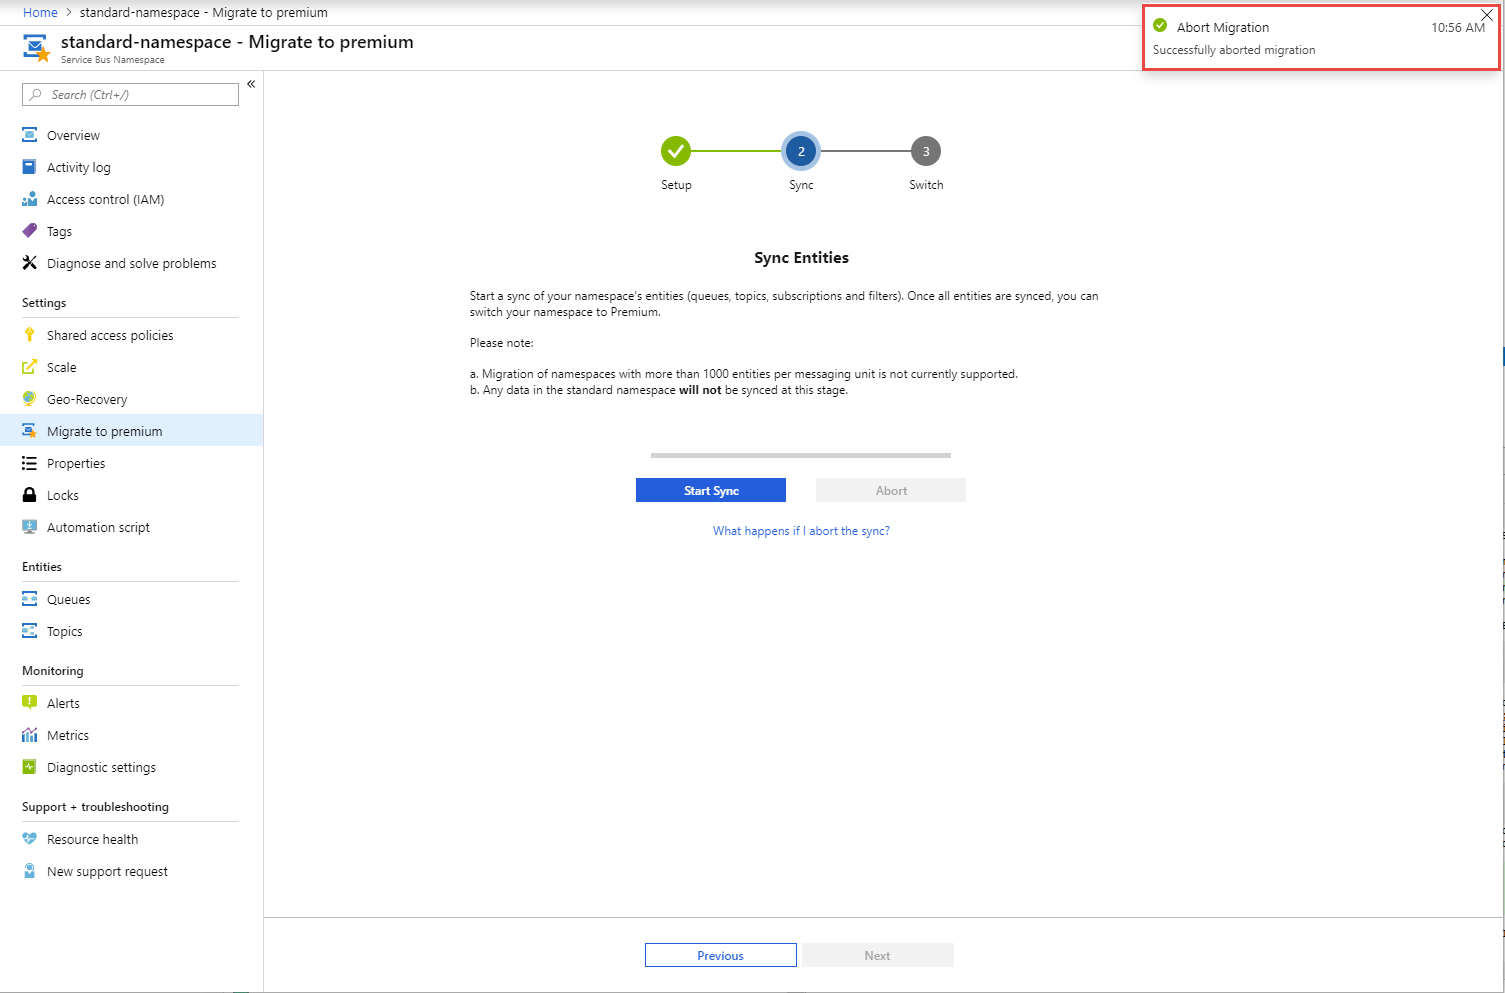
When the migration process is aborted, it aborts the process of copying the entities (topics, subscriptions, and filters) from the standard to the premium namespace and breaks the pairing.
The connection string isn't updated to point to the premium namespace. Your existing applications continue to work as they did before you started the migration.
However, it doesn't delete the entities on the premium namespace or delete the premium namespace. Delete the entities manually if you decided not to move forward with the migration.
Important
If you decide to abort the migration, delete the premium Namespace that you had provisioned for the migration so that you are not charged for the resources.
There may be messages that are sent by the sender applications and committed to the storage on the standard Namespace while the migration is taking place and just before the migration is committed.
During migration, the actual message data/payload isn't copied from the standard to the premium namespace. The messages have to be manually drained and then sent to the premium namespace.
However, if you can migrate during a planned maintenance/housekeeping window, and you don't want to manually drain and send the messages, follow these steps:
Stop the sender applications. The receiver applications will process the messages that are currently in the standard namespace and will drain the queue.
After the queues and subscriptions in the standard namespace are empty, follow the procedure that is described earlier to execute the migration from the standard to the premium namespace.
After the migration is complete, you can restart the sender applications.
The senders and receivers will now automatically connect with the premium namespace.
Note
You do not have to stop the receiver applications for the migration.
After the migration is complete, the receiver applications will disconnect from the standard namespace and automatically connect to the premium namespace.
Events
31 Mar, 23 - 2 Apr, 23
The biggest Fabric, Power BI, and SQL learning event. March 31 – April 2. Use code FABINSIDER to save $400.
Register todayTraining
Learning path
Migrate servers and workloads in on-premises and hybrid environments - Training
Migrate servers and workloads in on-premises and hybrid environments
Certification
Microsoft Certified: Azure for SAP Workloads Specialty - Certifications
Demonstrate planning, migration, and operation of an SAP solution on Microsoft Azure while you leverage Azure resources.
Documentation
Azure Service Bus premium messaging tier - Azure Service Bus
This article describes standard and premium tiers of Azure Service Bus. Compares these tiers and provides technical differences.
Microsoft Azure Service Bus quotas and limits - Azure Service Bus
This article lists basic quotas and throttling thresholds in Azure Service Bus messaging. For example, maximum number of namespaces per subscription.
Azure Service Bus - Automatically update messaging units - Azure Service Bus
This article shows you how you can use automatically update messaging units of a Service Bus namespace.