Note
Access to this page requires authorization. You can try signing in or changing directories.
Access to this page requires authorization. You can try changing directories.
Use Teams webinars v2 to create online presentations. One or multiple presenters can share content, videos, and audio. Participants can view the content and optionally engage with the presenters. Audiences engage through reactions, posting in the chat, or answering poll questions. Attendees can’t share their own audio, video, or content.
Webinars are useful for conference keynotes or meetings where a few presenters are talking to a large audience. Webinars can support up to 1,000 attendees. Webinars are the only Teams event types that support registrations, which means that only people who are registered for the event can attend.
Note
To use Microsoft Teams as an online event provider, you must have a Microsoft 365 license that allows you access to the Teams service. If you don't have the correct license, you won't see the Teams webinar, Teams meeting, or Teams live event options as a part of the Streaming provider list.
Create a Teams webinar v2
- Create a new event in Customer Insights - Journeys.
- Set the toggle Do you want to stream this event toggle to Yes and select Teams webinar v2 from the dropdown.
- Define the meeting options by selecting Open settings.
- Save the event record. By selecting Save, the Teams meeting is created, and you become the owner of the Teams meeting. By changing the meeting type and saving again, the original meeting is canceled and a new URL is generated.
Important
To use Teams webinars v2 in Customer Insights - Journeys, your tenant administrator must first complete the authentication setup. Without authentication, correct permissions, and application access policies, Customer Insights - Journeys can't create registrations for Teams webinars. For more information, see Teams authentication in Customer Insights - Journeys.
Webinar settings
The default webinar settings are configured to provide the best possible experience for attendees and presenters. However, you can easily tweak these settings from your Customer Insights - Journeys event. To change the default settings, select Open settings. This reveals the webinar settings, which you can adjust on a per-event basis directly in the Teams meeting options interface.
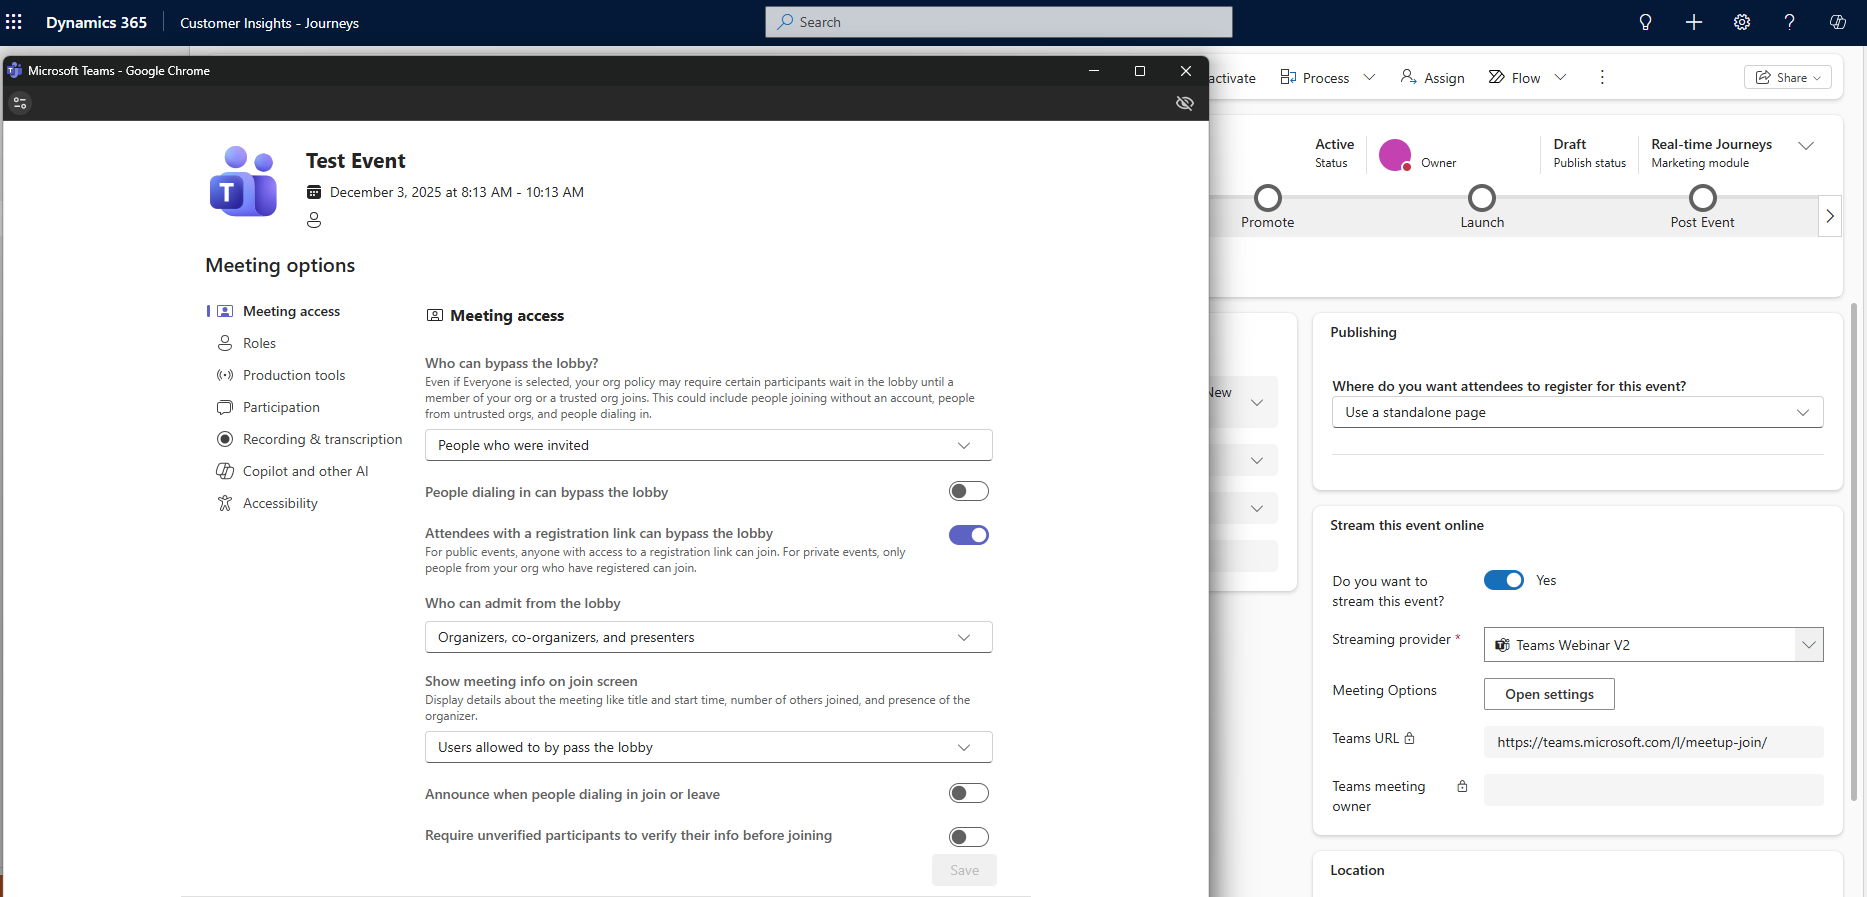
For more information, see Manage meeting settings in Microsoft Teams.
Adding co-organizers to webinar
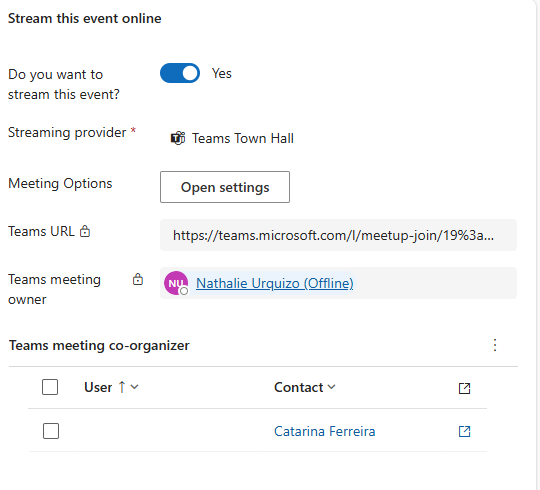
In Microsoft Teams, a co-organizer is a designated person assigned by the primary organizer to help manage a town hall, with permissions to manage the lobby, to start/stop recording, and manage attendee roles. They can be added to assist with setup and execution, allowing them to join early and control production tools.
To add a co-organizer to your event, first add them to the Team Members table on Additional information tab in your event. To be able to add the team member successfully, they need to be part of your organization and have access to both - Customer Insights Journeys and your Teams instance. Once the team member is added, you can navigate to the General tab and add a co-organizer through the lookup.
Webinar roles
| Role name | What do they do? | How to create them? |
|---|---|---|
| Event owner | The user who owns the event record in Customer Insights - Journeys. | Set the event owner using the Assign button on the event ribbon. |
| Teams meeting owner | The user who created and saved the record after choosing the webinar option in Customer Insights - Journeys. Changing the owner of the event record in Customer Insights - Journeys doesn’t change the owner of the webinar in Teams. Any change to the event record in Customer Insights - Journeys only reflects in Teams when done by the owner or when they select Sync to Teams. | Sign in as this user in Customer Insights - Journeys and create a new event with a webinar or meeting stream. |
| Presenter | In a Teams webinar, a presenter is a person who presents audio, video, or a screen to the live event, or moderates the Q&A. Presenters can only share audio, video, or a screen (desktop or window) in webinars produced in Teams. | If you want to invite another person to present to the webinar, add them to the event or session as a speaker. To add a speaker, create a speaker engagement at the event (or session) level. The speaker is added as a “presenter” for the webinar. Ensure that the speaker's email ID is filled in. |
Invite a guest to present in a webinar
- Ensure that the guest user is added to your Teams instance. You only have to do this once. For more information, see Guest to present.
- As a best practice, Teams recommends that you create a channel for producers and presenters so they can chat and share information before the event. Guests who don't have Microsoft 365 credentials won't see the calendar in Teams. To make it easy for guests to join the event, producers can post the event link to the channel. Presenters can then open Teams, go to the channel, and select the link to join the webinar.
- Add a guest as a presenter in your webinar by adding them as a speaker in your event or session in Customer Insights - Journeys using the steps detailed in the previous above.
Create a registration experience for Teams webinar v2
Teams webinars scheduled through Customer Insights – Journeys rely on event registrations for each event. These registrations are regularly synced with the corresponding Teams webinar, ensuring that the list of registrants is automatically updated whenever a new registration is received in Customer Insights - Journeys.
To create a seamless webinar registration experience, follow one of the available options described in the official guide: Create an event registration experience.
Accessing a Teams webinar attendee link
The Teams attendee URL is created when you save a Customer Insights - Journeys event that's being streamed with Teams. You can navigate to the Teams webinar using the attendee URL.
Note
To invite a registrant to join the event, don't share the attendee URL directly. Instead, use the email invitation method described below.
Calendar integration
Once a meeting is created or updated and the producers and presenters are added (by adding team members and speakers), the meeting shows up in their Outlook calendar and in their Teams calendar. The calendar item is a read-only version of the event. Changes made to the event from the Teams meeting owner's calendar won’t update the event in Customer Insights - Journeys. Speakers and team members can join the meeting from their calendars.
Note
Presenters that are guest users won't see the event on their calendar. To share the event link with guest users, send them the attendee link from the event in Customer Insights - Journeys.
Important
The calendar integration feature for producers and presenters isn't affected by the Calendar content field in the Additional information tab in the event planning work area. The Calendar content field only affects .ics files sent through the email designer. For more information, see Generate iCalendar files for events and sessions.
For on-premises mailboxes, you can't create a calendar item for the Teams webinar event organizer or for the speakers. This is a known limitation of Exchange REST APIs for on-premises mailboxes. In this case, you should share the event details (such as the Teams meeting URL) through a standard email to the event speakers.
Inviting registrants to attend the Teams event through email
After creating the event, going live with it, and gathering registrations, you should send the registrants an email to provide the attendee URL. In the Customer Insights - Journeys email designer, you can find a Join in Teams option in the Link to menu for the element.
The Join in Teams button generates a unique attendee URL for each registrant. When the registrant selects the button, the Customer Insights - Journeys app creates a relevant check-in record for them, giving insights about the Teams event attendance in Customer Insights - Journeys. You can either set up the button to link to a specific event or selected session or, if you're using trigger-based journeys and one email template for multiple events, you can change the setting Select event/event registration from Event to Other source and pick an attribute relevant to your trigger.
Note
The Teams webinar owner is set to the user who creates the meeting in Customer Insights - Journeys. You can't change the owner once the event has been created. This is different from the owner of the event record in Customer Insights - Journeys.
View webinar engagement data
After you run a Teams webinar-based Customer Insights - Journeys event, you can view the attendee engagement data (check-in and check-out times) in the Customer Insights - Journeys app. To generate the engagement data, send an email invite to webinar registrants before the event that contains the webinar Join in Teams link. See Inviting registrants to attend the Teams event through email for details about creating an invite email in the Customer Insights - Journeys email designer.
10 minutes after the webinar ends (based on the end date configured in the Customer Insights - Journeys app), the Customer Insights - Journeys app automatically populates the engagement data for attendees with the updated check-in and checkout times, and the total attendance duration in minutes.
Important
Organizations that manage their Teams user policies need to make sure that the admin enables the OnlineMeetingArtifact.Read.All API permissions in the Teams authentication app before synchronizing the engagement data. For more information, see Teams authentication in Customer Insights - Journeys.