Note
Access to this page requires authorization. You can try signing in or changing directories.
Access to this page requires authorization. You can try changing directories.
The Fabric Data Engineering VS Code extension brings Microsoft Fabric development into Visual Studio Code. With the extension you can author and run Fabric notebooks, create Spark job definitions, explore lakehouses, and manage Spark environments—all from your VS Code environment.
This article walks you through installing the extension, signing in, and selecting a workspace so you're ready to start developing.
What you can do with the extension
The extension supports the following Fabric items and tasks:
- Workspaces – Manage one or more Fabric workspaces directly in VS Code. For more information, see Manage Fabric workspace with VS Code under VFS mode.
- Notebooks – Create, edit, and run Fabric notebooks locally and execute them on remote Spark compute. For more information, see Create and manage Fabric notebooks in VS Code and Develop Fabric notebooks in VS Code with VFS mode.
- Spark job definitions – Create and manage Spark job definitions with full CRUD support. For more information, see Create and manage Spark job definitions in VS Code.
- Environments – Explore and inspect Spark environments, including hardware profiles, libraries, and Spark configuration. For more information, see Explore and inspect Spark environments with VS Code and Manage Spark environments in VS Code under VFS mode.
- Lakehouses – Browse lakehouse tables and files, preview data, and copy paths for use in your code. For more information, see Explore Fabric lakehouses in VS Code.
Prerequisites
- Install Visual Studio Code.
- Install the Jupyter extension for VS Code from the Visual Studio Code Marketplace.
- Have a Fabric workspace. If you don't have one, see Create a workspace.
Install the extension
To install the Fabric Data Engineering VS Code extension:
Open the Extensions view in VS Code (Ctrl+Shift+X on Windows/Linux, Cmd+Shift+X on macOS), search for Fabric Data Engineering VS Code, and select Install. You can also install the extension from the Visual Studio Code Marketplace.
After the installation completes, you might need to restart VS Code. The extension icon appears in the activity bar.
Access the command palette
You can access many of the extension's features through the VS Code command palette. To open the command palette:
- On Windows/Linux: Press Ctrl+Shift+P
- On macOS: Press Cmd+Shift+P
Once the command palette opens, enter "Fabric Data Engineering" (in full or in part) to filter the available commands.
Sign in to your account
From the VS Code command palette, enter the
Fabric Data Engineering: Sign Incommand.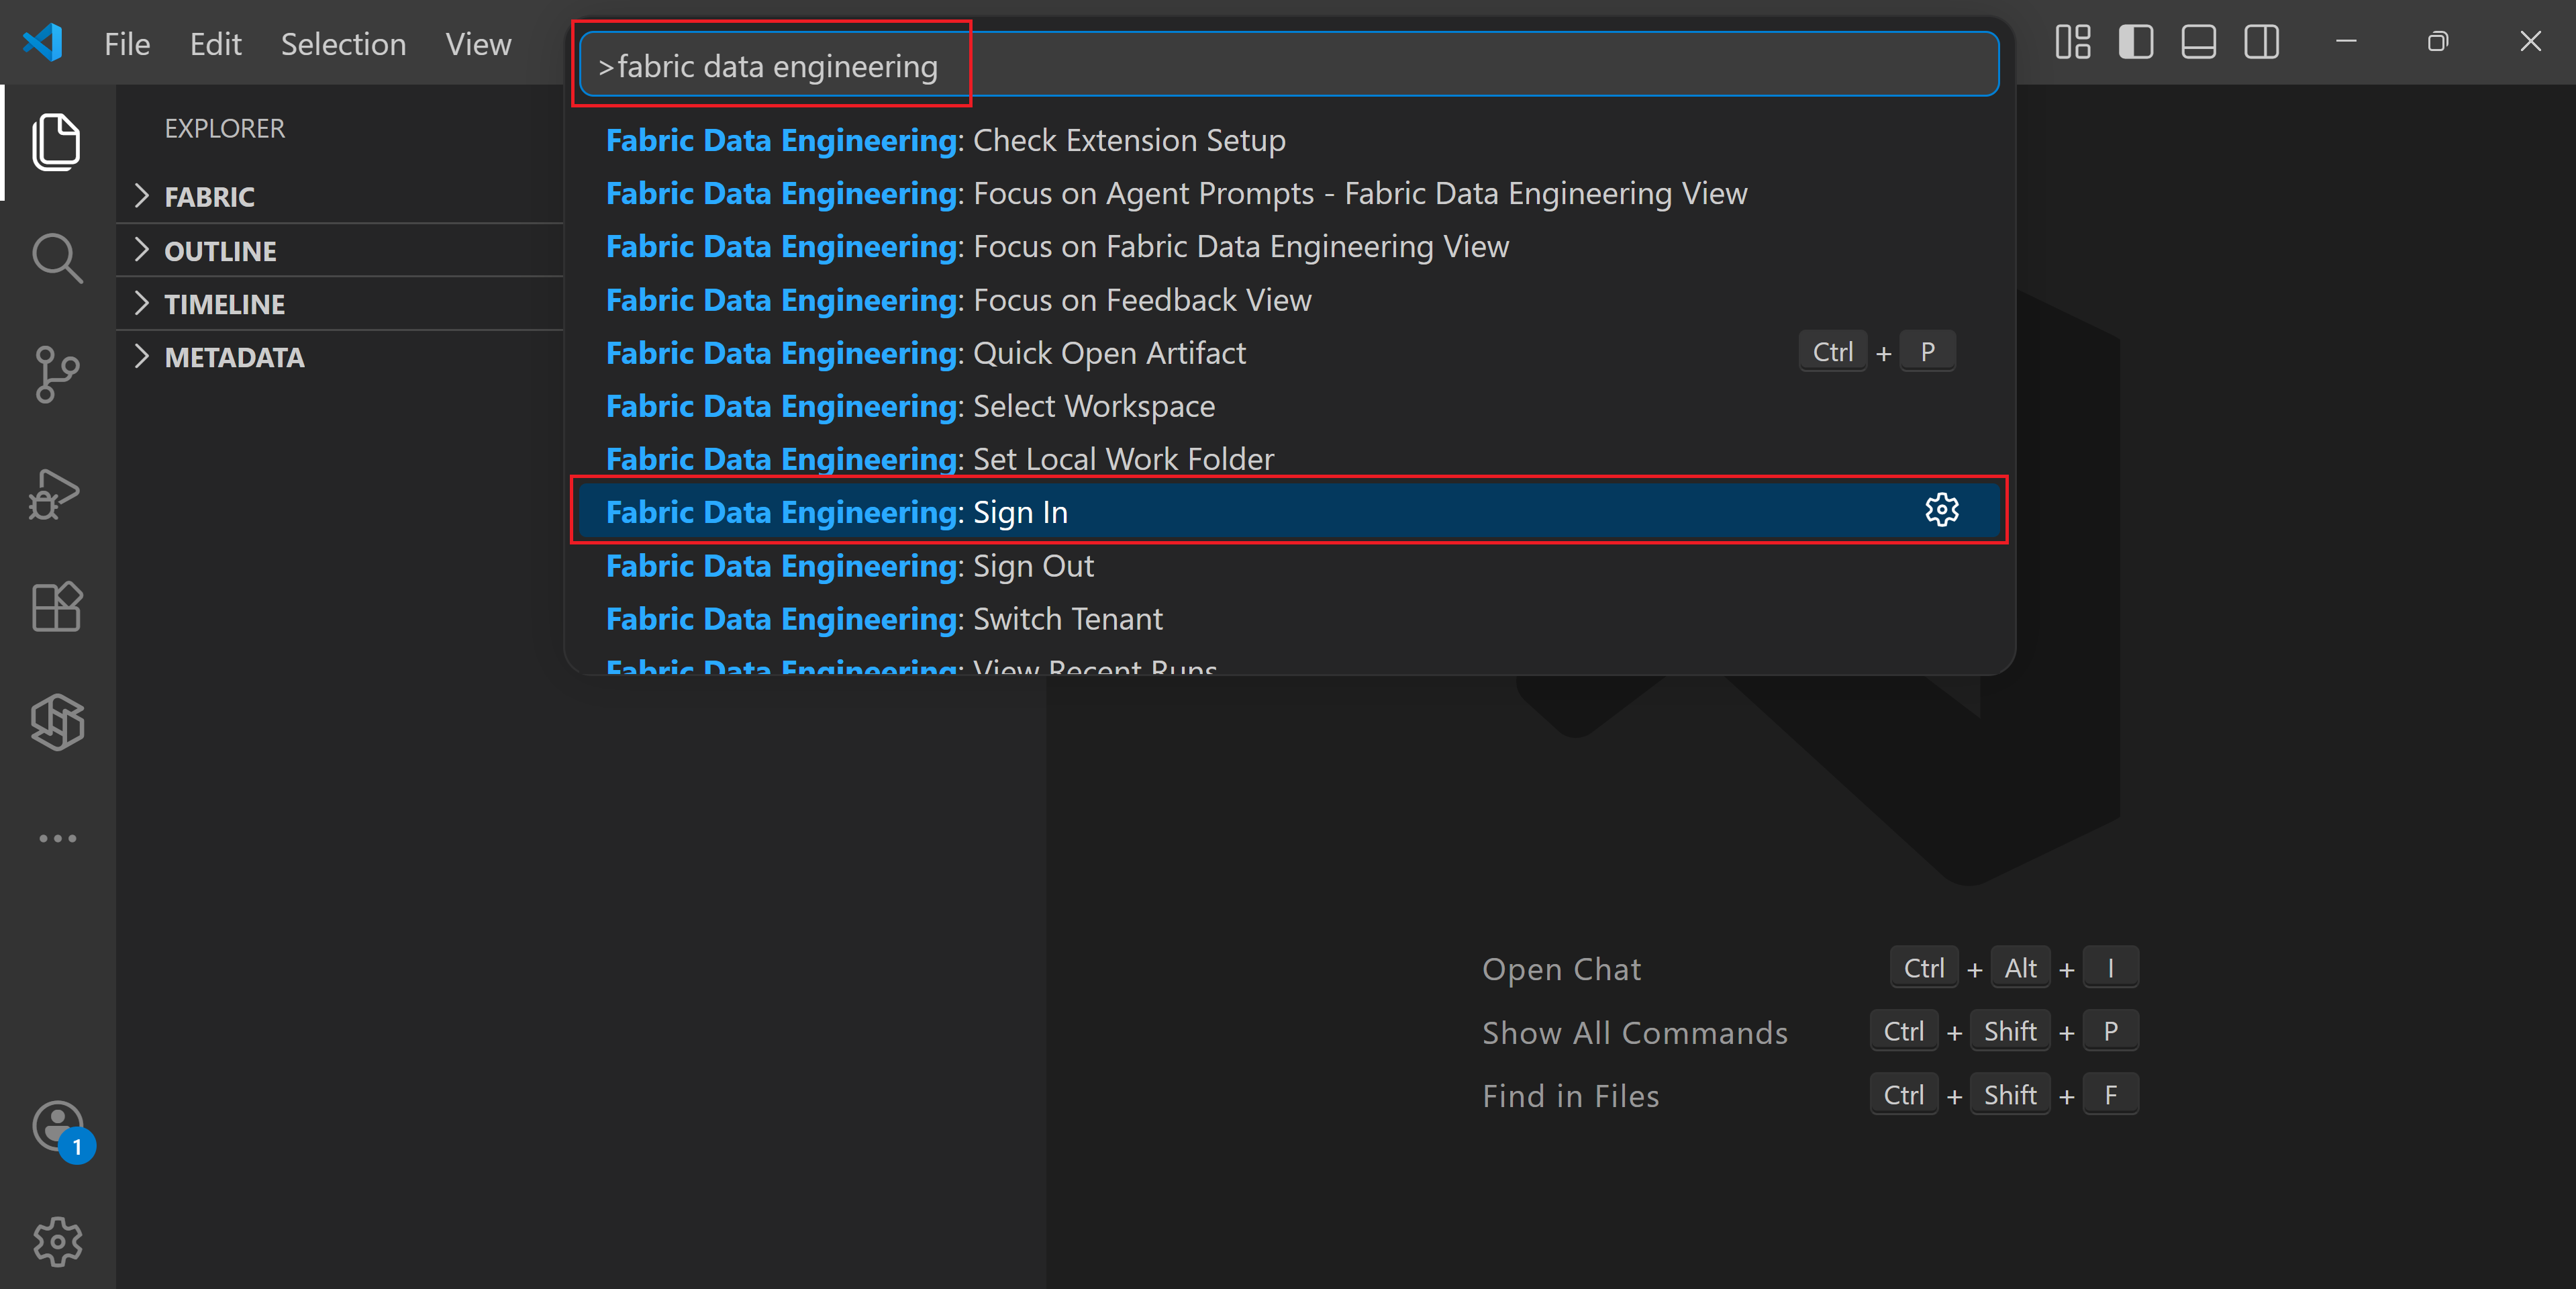
A browser window opens. Select the account you want to use for your Fabric workspaces and complete the authentication.
After you authenticate, the VS Code status bar at the bottom displays your account name.
Note
If your account has access to multiple tenants, one is selected automatically. You can see which tenant you're signed in to and switch tenants by selecting the account name in the status bar.

To sign out later, enter the command Fabric Data Engineering: Sign Out from the command palette.
Choose a workspace
After you sign in, connect to a Fabric workspace so you can start working with its items. The extension supports two authoring modes, and each has a different way to connect to a workspace.
Local mode
In local mode, you download notebooks and other items to a local working directory, edit them locally, and sync changes back to your Fabric workspace.
Select the Fabric Data Engineering icon in the activity bar to open the extension's side bar.
Select Select Workspace, or select the Switch Workspace icon (the arrows icon). A list of all workspaces you have access to appears; select the one you want.
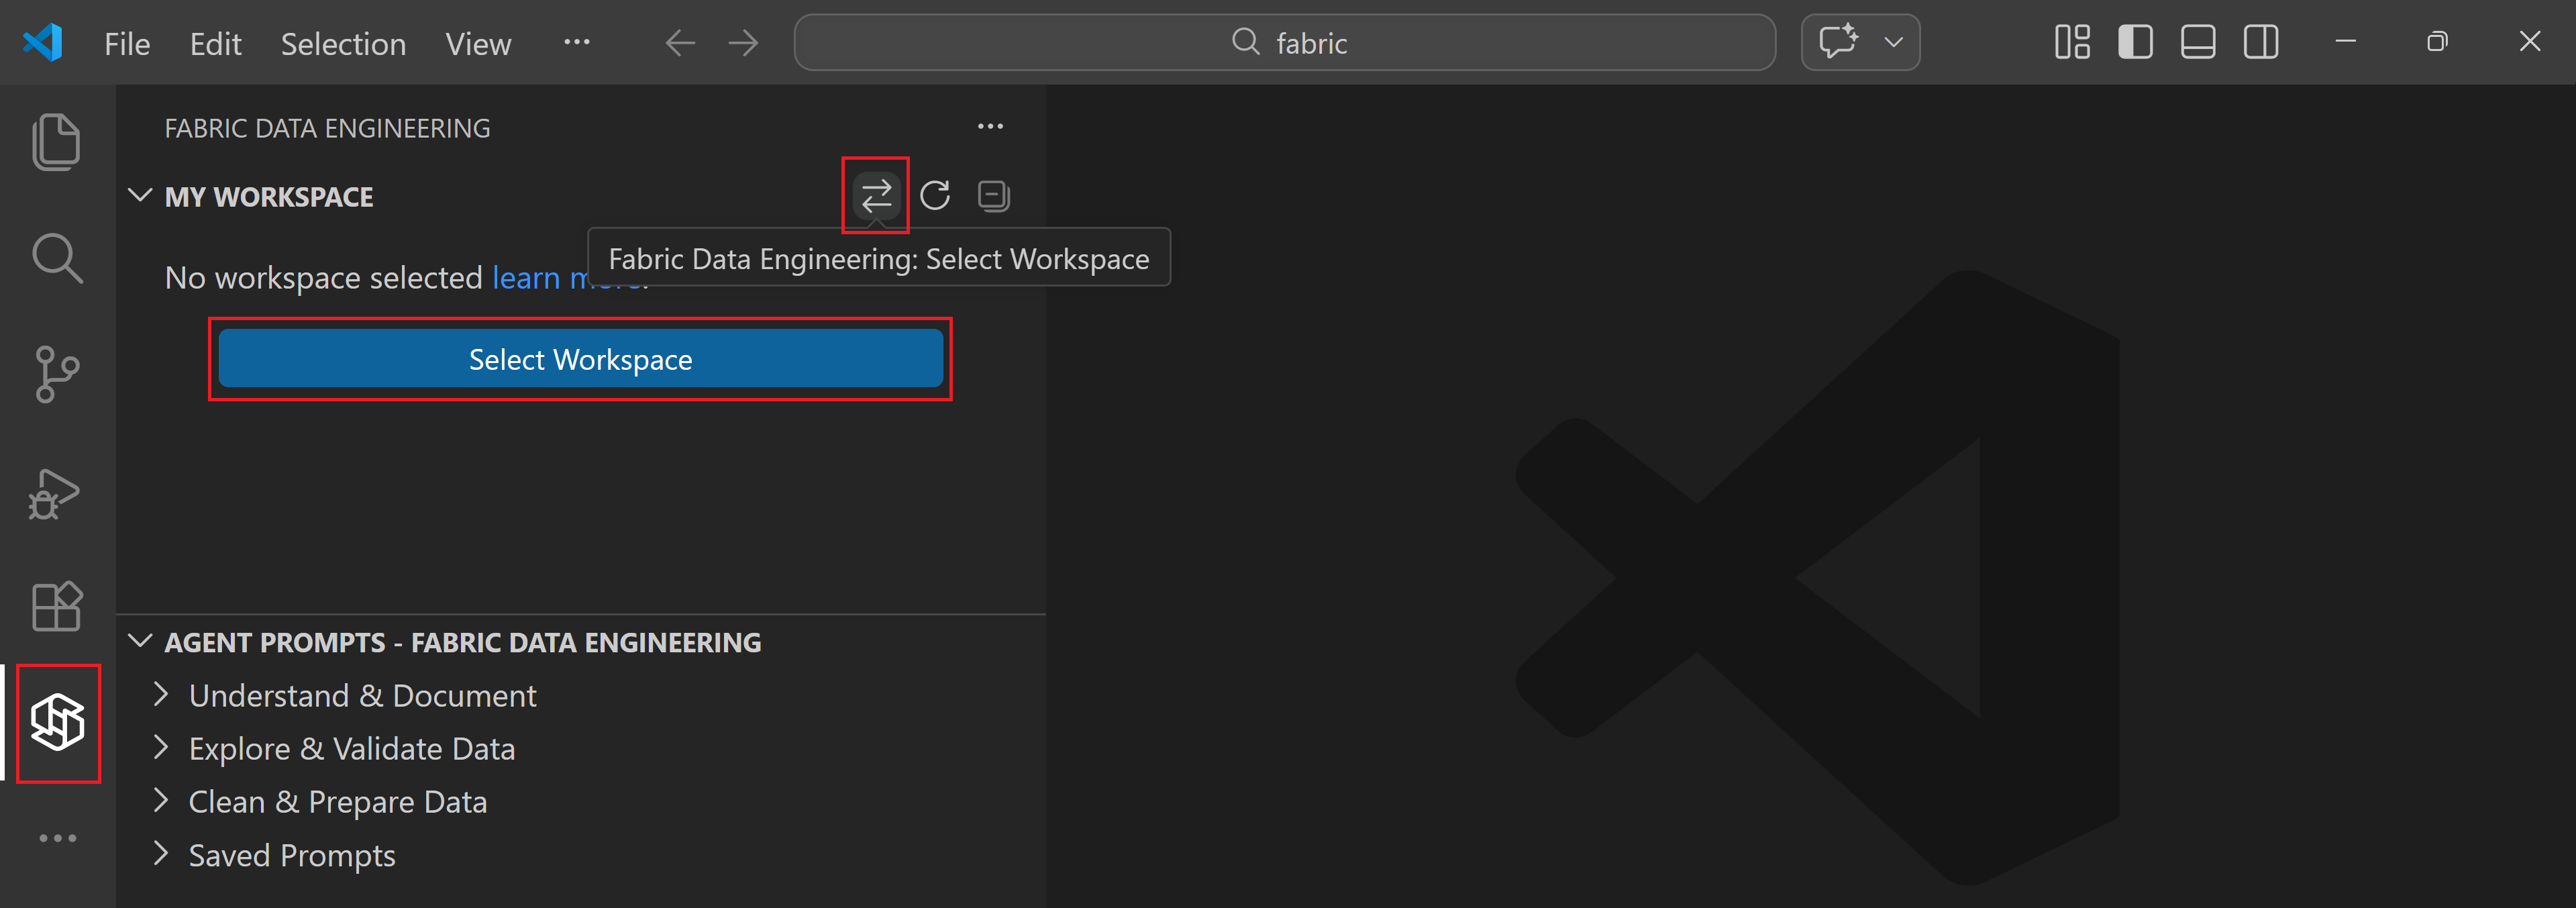
To switch to a different workspace later, select the Switch Workspace icon at any time.

After you select a workspace, you can browse its items in the side bar. When you want to edit an item such as a notebook, you download it to a local folder on your machine. To choose where downloaded items are stored, run Fabric Data Engineering: Set Local Work Folder from the command palette.
VFS mode
In VFS (Virtual File System) mode, you open and edit workspace items directly as remote files, without downloading them. VFS mode also lets you add multiple Fabric workspaces to a single VS Code window and work across them side by side.
To enter VFS mode, select the Open a Remote Window button in VS Code, then select Open Fabric Data Engineering Workspaces. For the full setup steps, see Manage Fabric workspace with VS Code under VFS mode.
Related content
- Create and manage Fabric notebooks in VS Code
- Develop Fabric notebooks in VS Code with VFS mode
- Explore and inspect Spark environments with VS Code
- Manage Spark environments in VS Code under VFS mode
- Create and manage Spark job definitions in VS Code
- Explore Fabric lakehouses in VS Code
- Access and manage notebook resources in VS Code
- Develop notebooks with the Fabric Notebook custom agent
- Use Docker containers with the VS Code extension