Translate a document in Microsoft Syntex
Translation in Microsoft Syntex lets you create a translated copy of a file manually on demand or automatically by using rules. You can set a rule to create a translated copy automatically when a document is created, or when data in a column is modified.
When a file is translated, the file name of the translated copy is appended to show the ISO code for the language.

To create a translated version of a document, follow these steps:
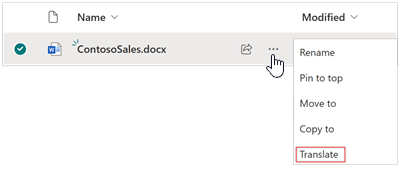
From a SharePoint document library (or from your My files folder in OneDrive), select the file or files you want to translate. Then use either of the following methods to start the translation process.
From the ribbon, select More options (...), and then select Translate.

Or, next to the file name in the list of documents, select Show more actions for this item (...), and then select Translate.

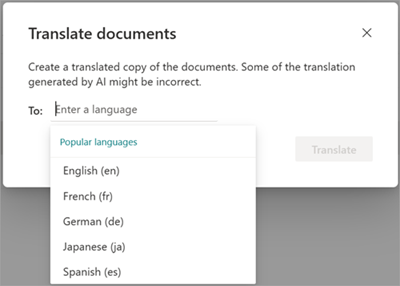
On the Translate documents screen, enter a language or use the drop-down menu to choose a language you want to translate the file, and then select Translate.

You receive a confirmation message saying that the request to translate the file has been submitted.

It can take several minutes for the translated file to be created. When the process is completed, the translated file will appear in the document library.
If you try to submit a duplicate translation request before the file has finished processing, you'll receive a message telling you to wait a few minutes before trying again.

You can create a rule to automatically translate a document when a new file is added or when data in a column changes. For step-by-step instruction, see Create a rule to translate a document.
To create a translated version of a video transcript or closed captioning, see How to translate transcripts in Stream for SharePoint.