Create tables in Microsoft Teams
In Teams, data is defined by tables. To create a table, you must be a member of a team.
Types of tables
Whereas Dataverse has two types of tables (a standard table with ownership defined and an activity table), you can only create standard tables in Dataverse for Teams.
You define the type of table by selecting More settings when you create a table.
There are four different types of table ownership. When you create a table, the only options are user, team owned, or organization-owned, but you should be aware that other tables have different ownership types. More information: Types of tables in Dataverse
Create a table
Watch this video for a quick overview about how to create a table in Dataverse for Teams:
Sign in to Teams, and then select the link for Power Apps.

Select the Build tab, and then select See all.

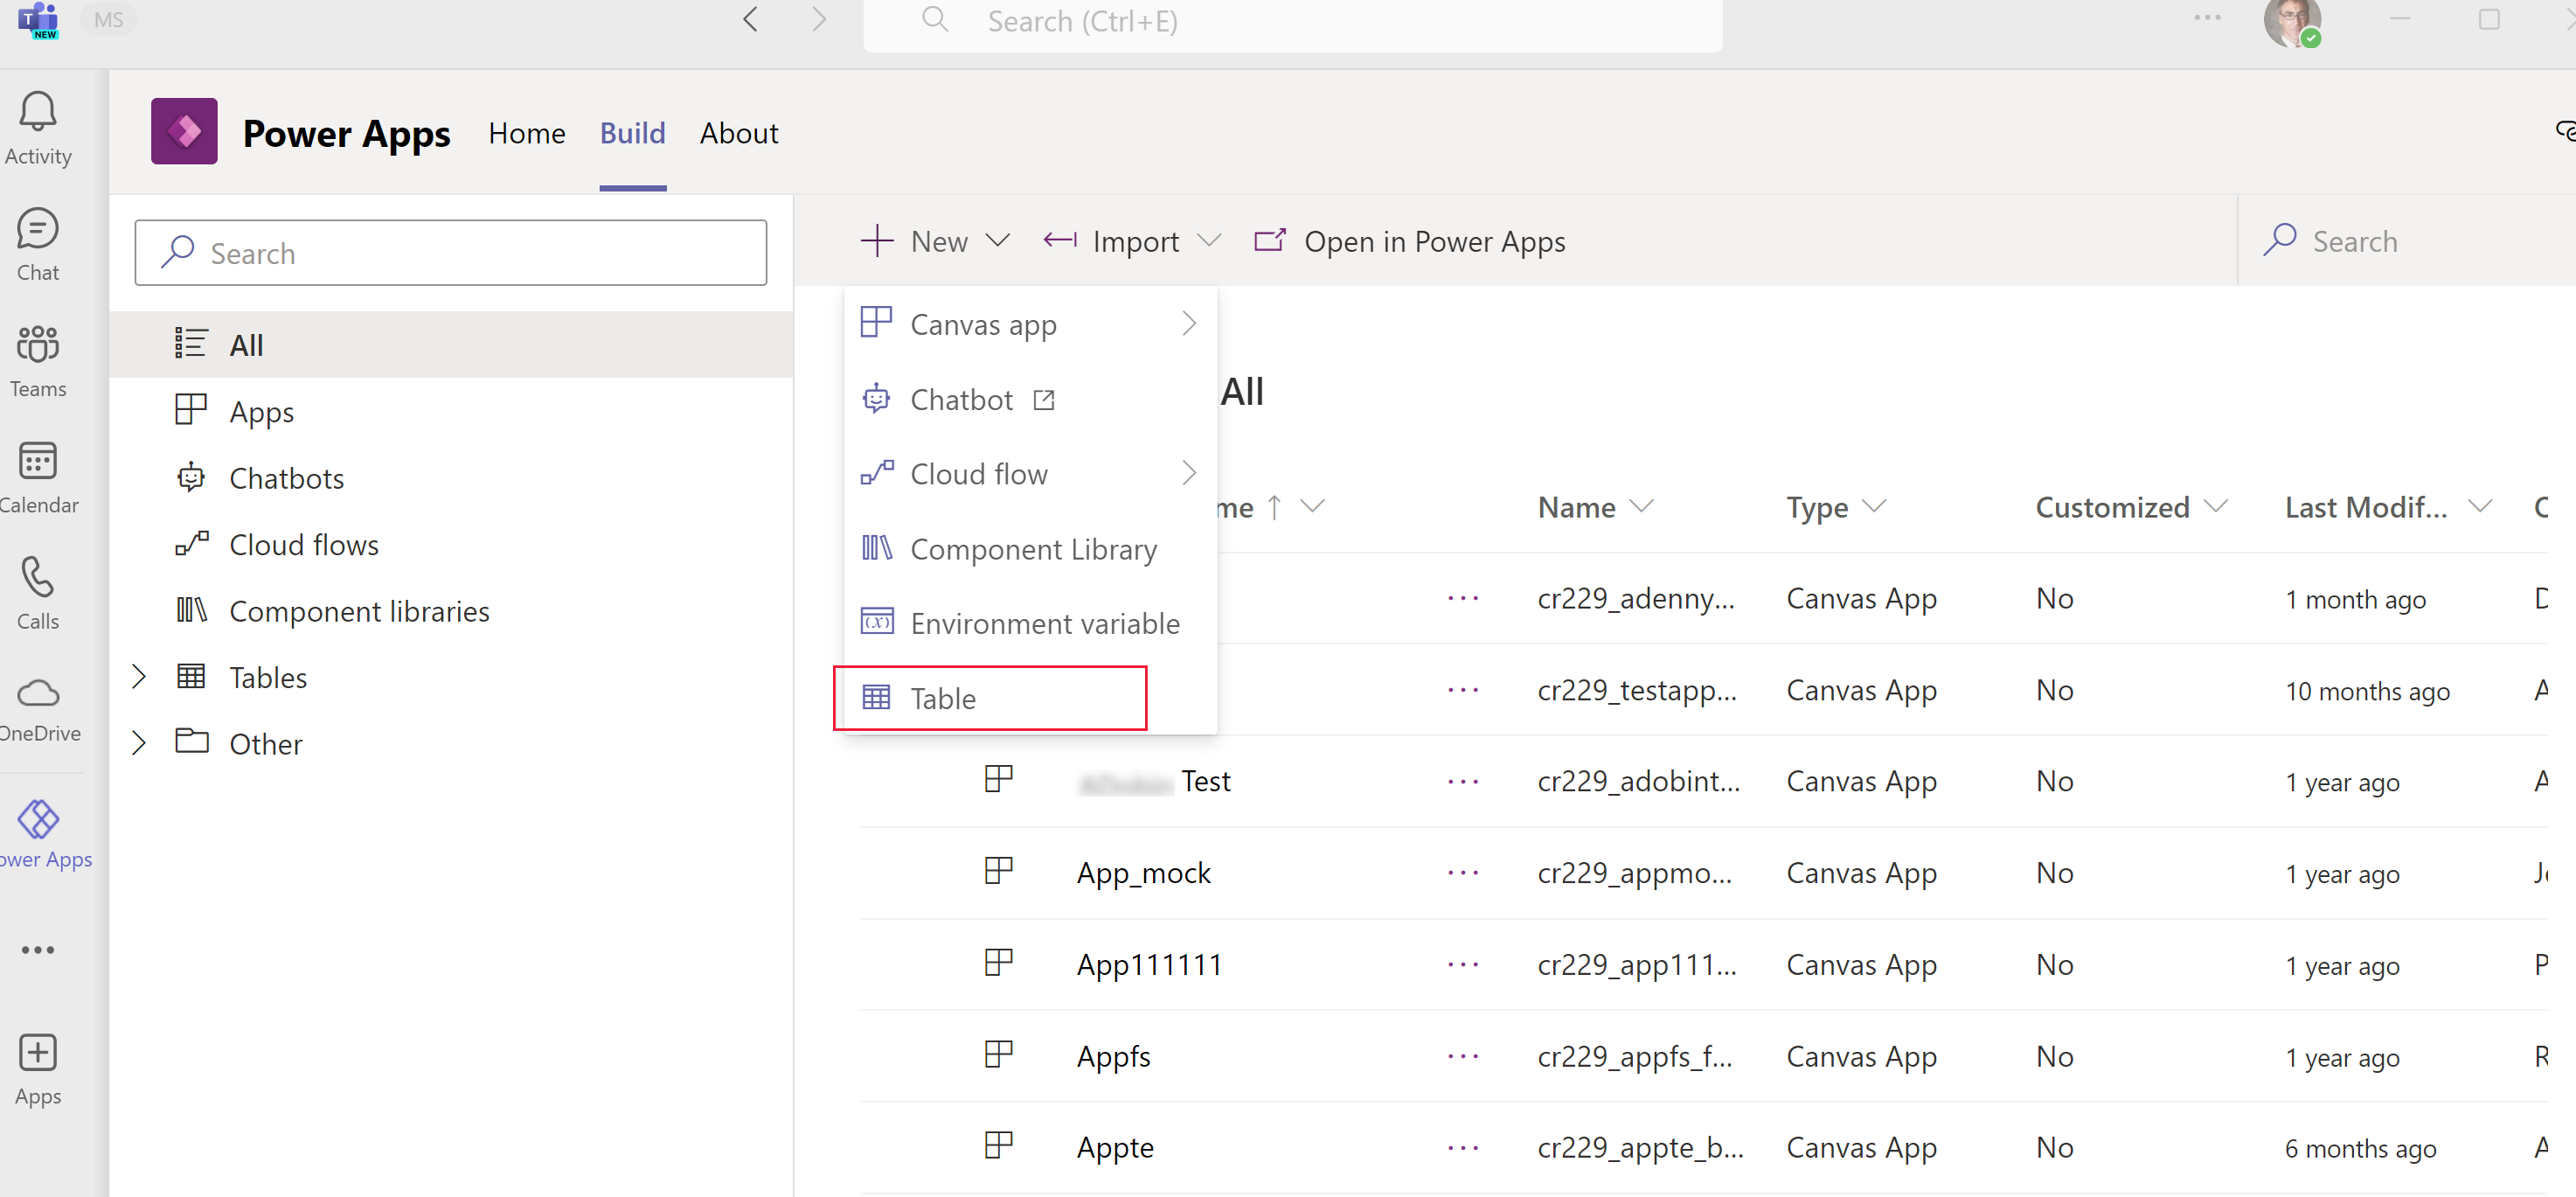
Select New on the command bar, and then select Table.

In the New table pane, enter the following information. Required columns are designated with an asterisk (*) next to the column label.
Display name: The name of the table to be displayed. For example, Product.
Plural display name: The name used to reflect multiples of what the table contains. For example, Products.
Name: A unique internal name for the table. Unlike the display name, after it's saved this value can't be changed.
Note
Each Dataverse for Teams environment is assigned a prefix when it's created, such as cr628. The name for every table and column you create will be prefixed with this value. This value can't be changed.
Display name (Primary name column): Every table contains a primary name column, which is used by lookup fields when establishing relationships with other tables. Typically the primary name column stores the name or primary description of the data stored in the entity.
Name (Primary name column): This column is pre-populated based on the primary name column name you enter. It includes the prefix. You cannot change this after the table is saved.
More settings: This area provides additional settings that are available. More information: Create a custom table.

Select Done.