Release a Build
Important
Visual Studio App Center is scheduled for retirement on March 31, 2025. While you can continue to use Visual Studio App Center until it is fully retired, there are several recommended alternatives that you may consider migrating to.
Upload your application binary package to App Center to distribute it. App Center supports package distribution for Android, iOS, macOS, Windows, and custom operating system apps. You can distribute releases to individual testers or groups of testers. For iOS and Android applications, you can also release to the stores like Google Play, the App Store, and Intune. See Publish to consumer and enterprise stores.
On this page you can learn how to generate the binary for release, and how to upload and release it to groups using the portal, the command-line interface (CLI), and the application programming interface (API).
You can also use Azure DevOps or Jenkins:
- Azure DevOps uses the App Center Distribute Task (version 3+)
- Jenkins Plugin (version 0.11.0+).
Generating an application binary package
First you must package your application into a binary file for release. You can create this file manually, or use App Center Build. You can configure Build to distribute automatically in the build configuration of a branch.
The following sections explain how to create the files for all app types App Center supports for distribution.
Note
If you are going to upload archive (.zip, .ipa and others) then your app’s total uncompressed size must be less than 4GB.
Android
For Android, you must produce a signed app bundle or APK file. For full details of this process, see the official Google documentation on preparing an app for release.
- Ensure you've updated the manifest and have a correctly configured Gradle build.
- In Android Studio, choose Build > Generate Signed Bundle / APK and follow the steps in the wizard to build the app bundle or APK.
Android Studio places built app bundles in project-name/module-name/build/outputs/bundle/ and APKs in project-name/module-name/build/outputs/apk/.
Note
When you distribute Android Application Bundle (AAB), App Center generates a universal APK, signs it with a generated signing key, and distributes it to a device.
iOS
For iOS, you must produce an IPA package for your application. For full details of this process, see the official Apple documentation.
- Register UDIDs for all hardware devices in your provisioning profile.
- In Xcode, go to Product > Archive to archive your app.
- Export the archive using the proper provisioning profile.
macOS
For macOS, you must produce an app package. App Center supports releasing app packages of type .app.zip, .pkg or .dmg. For full details of this process, see the official Apple macOS documentation.
- Register a single device or register multiple devices in your Apple developer account.
- In Xcode, go to Product > Archive to archive your app.
- Export the archive using the proper provisioning profile.
Windows
App Center supports releasing Windows app packages of type .appx, .appxbundle, .appxupload, .msi, .msix, .msixbundle, .msixupload, or .zip. For full details on how to package your app in AppX or MSIX formats, see the official Microsoft UWP documentation.
Custom operating system
Archive your build for apps with a custom operating system in .zip format.
Distributing the package
Note
All install.appcenter.ms URLs that contain files for downloading are publicly accessible.
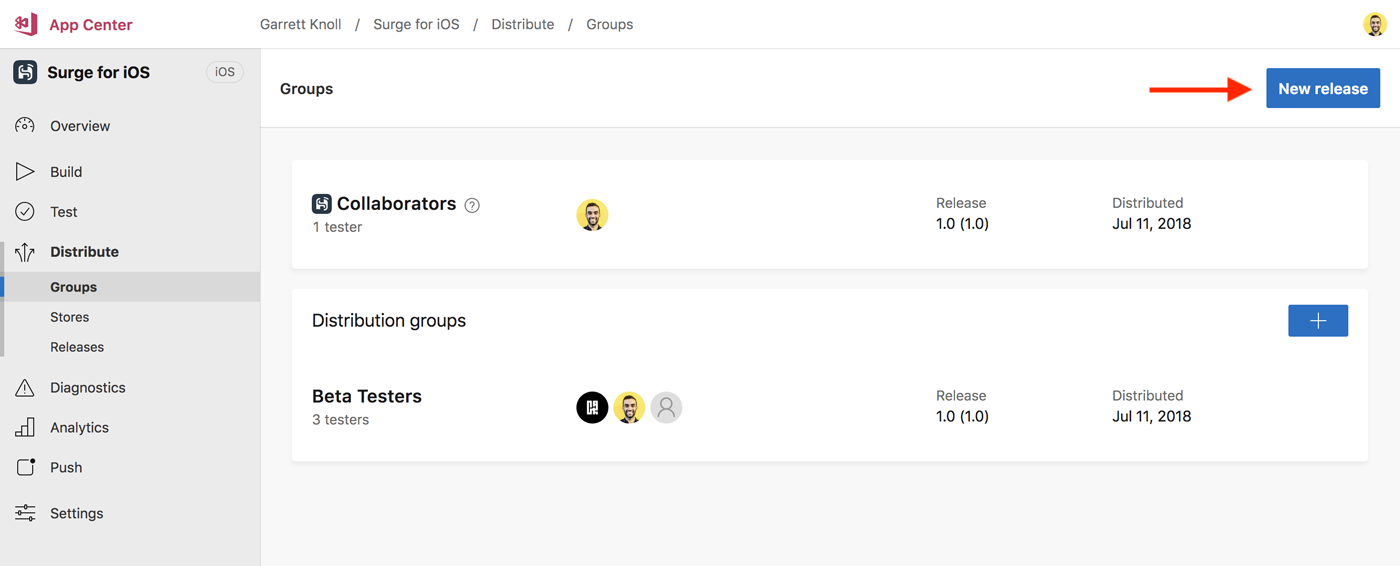
To distribute a package with App Center, go to App Center, go to your app, then go to Distribute > Groups and select New release. Follow the steps in the wizard.
In the first step, choose the Release area to browse for the file you want to upload, or drag and drop the file onto the area. Depending on the operating system of your app and the file extension, App Center may ask you to enter a version and build number for your release. Enter the information and choose Next.
You can include release notes as a part of your release, both in plain text or Markdown format. Choose Next.
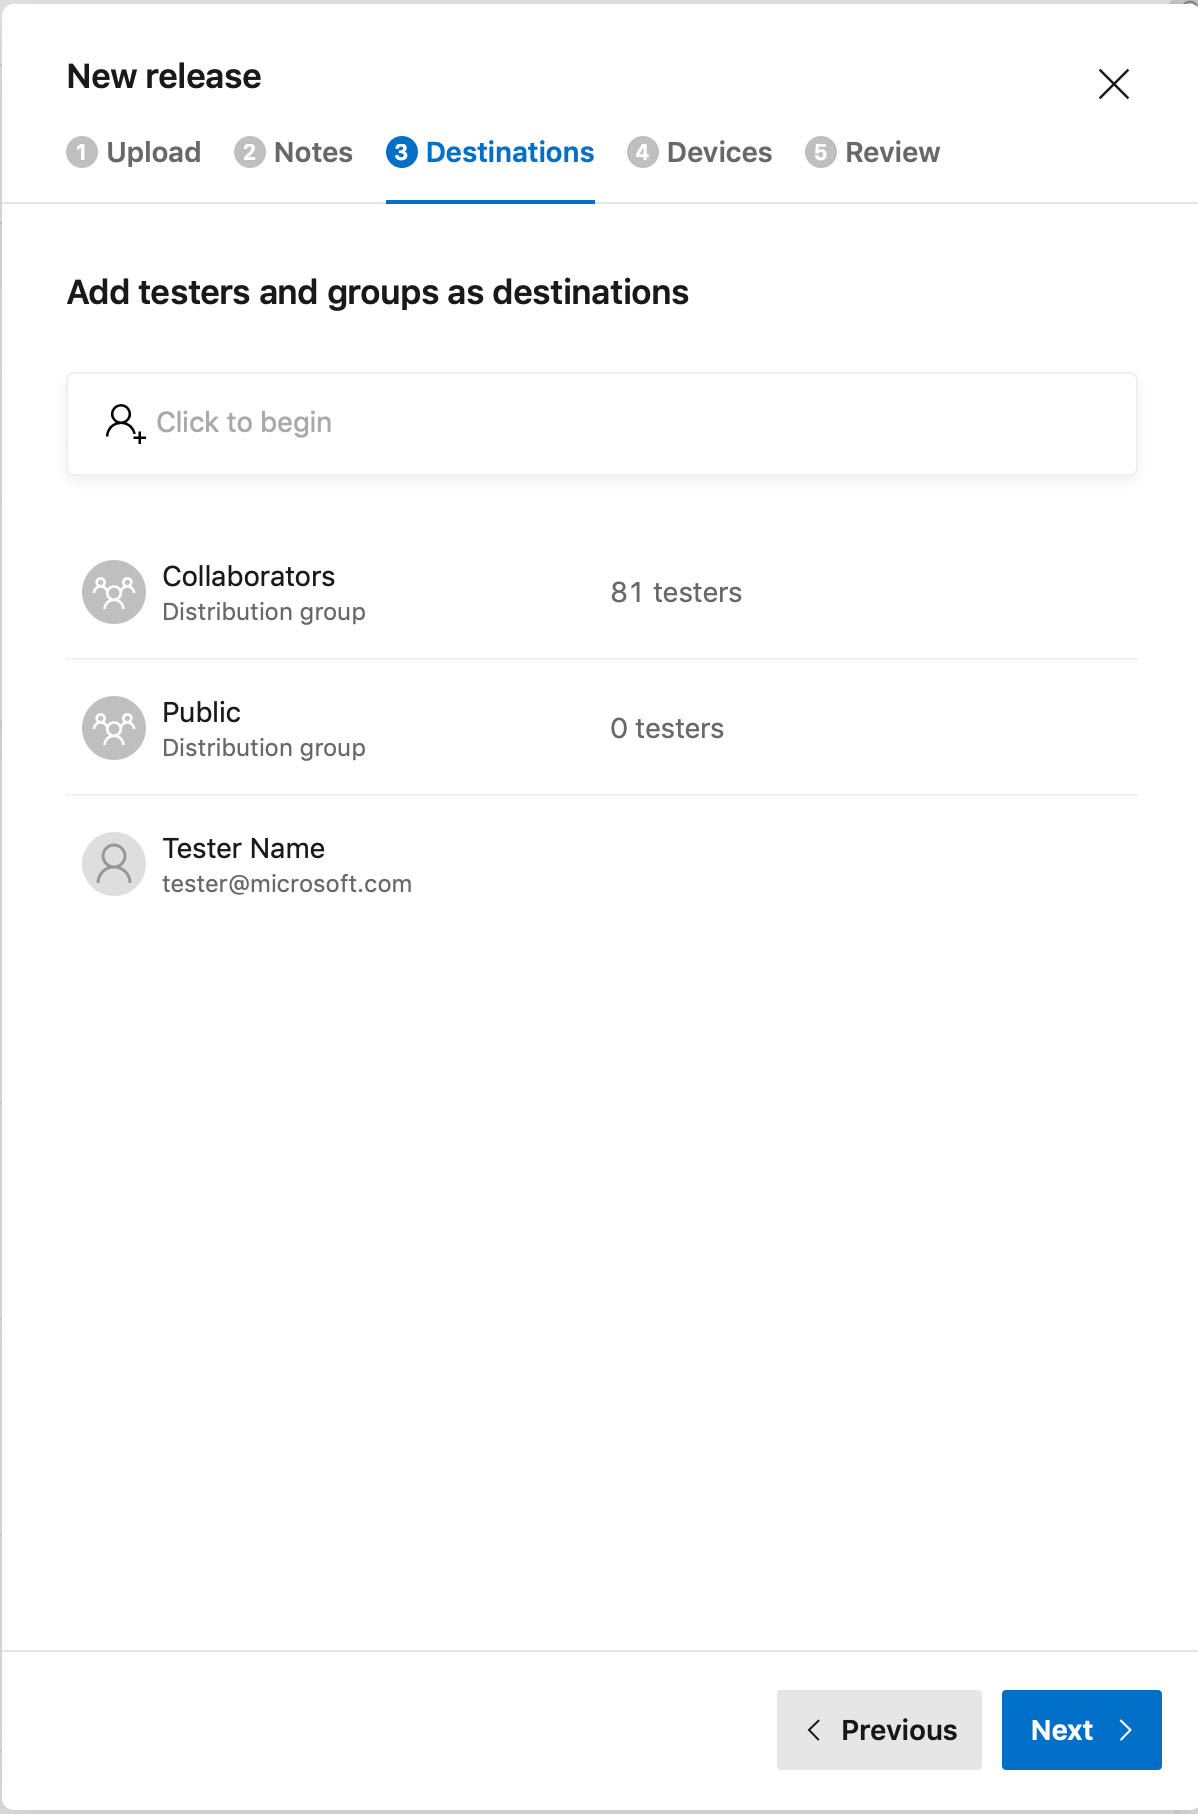
You can target your release at multiple distribution groups or testers. App Center makes this release available to those testers and the users who are part of the selected groups. Choose Next.
When releasing an iOS app, you can automatically provision your testers' devices. Choose Next.
Review the release. If your app uses the Distribute SDK, then you can configure App Center to make the release mandatory. When App Center distributes a release, it sends an email notification of the new version to all testers set in the destinations. You can choose not to notify testers in the review tab. Finally, choose Distribute to release the file to your testers.
Distributing using the App Center command-line interface
Warning
You need App Center CLI 2.7 or newer to use this feature.
Distribute your release using the appcenter distribute release command in the App Center CLI. The following example command distributes a file called ~/releases/my_app-23.ipa to the group Beta testers of the app My-App owned by David.
appcenter distribute release --app David/My-App --file ~/releases/my_app-23.ipa --group "Beta testers"
Distributing using the API
You can call the App Center API to distribute a release. The approach below is intended to describe a minimal working approach, many of the tasks can be further customized or automated.
A sample implementation can be seen here: https://github.com/microsoft/appcenter-Xamarin.UITest-Demo/blob/main/ac-distribute.sh
Prerequisites
- The App package to upload and distribute.
- Obtain an API token. An API Token is used for authentication for all App Center API calls.
- The Distribution Group Name (optional, if missing or invalid the upload will still complete)
- Identify the
{owner_name}and{app_name}for the app that you wish to distribute a release for. These identifiers are used in the URL for the API calls. For an app owned by a user, the URL in App Center might look like: https://appcenter.ms/users/Example-User/apps/Example-App. Here, the{owner_name}isExample-Userand the{app_name}isExample-App. For an app owned by an org, the URL might be https://appcenter.ms/orgs/Example-Org/apps/Example-App and the{owner_name}would beExample-Org.
Upload New Release
Upload a new release using these sequential API calls:
Create a new release upload: The endpoint to call is POST /v0.1/apps/{owner_name}/{app_name}/uploads/releases
    OWNER_NAME="Example-Org"
    APP_NAME="Example-App"
    API_TOKEN="Example-Token"

    curl -X POST "https://api.appcenter.ms/v0.1/apps/$OWNER_NAME/$APP_NAME/uploads/releases" -H  "accept: application/json" -H  "X-API-Token: $API_TOKEN" -H  "Content-Type: application/json" -H "Content-Length: 0"
The response will look something like this, with
{VARIABLE_NAME}replacing data unique to each use:{ "id": "{ID}", "package_asset_id": "{PACKAGE_ASSET_ID}", "upload_domain": "https://file.appcenter.ms", "token": "{TOKEN}", "url_encoded_token": "{URL_ENCODED_TOKEN}" }Copy the parameters from the response in the previous step, as most of them are used in the next step, including the
package_asset_id,upload_domain&url_encoded_token.Determine the size of your app package in bytes. It's recommended to use a command such as
wc -c ExampleApp.ipato get an accurate byte count.Set the
MIME Typefor thecontent_typebased on your app:- Android .apk uses the vendor type
application/vnd.android.package-archive - Android .aab uses the vendor type
application/x-authorware-bin - iOS uses the general type
application/octet-stream
The final command should look something like this:
FILE_NAME="ExampleApp.apk"
FILE_SIZE_BYTES=$(wc -c $RELEASE_FILE_LOCATION | awk '{print $1}')
APP_TYPE='application/vnd.android.package-archive' # iOS uses `application/octet-stream` instead.

METADATA_URL="https://file.appcenter.ms/upload/set_metadata/$PACKAGE_ASSET_ID?file_name=$FILE_NAME&file_size=$FILE_SIZE_BYTES&token=$URL_ENCODED_TOKEN&content_type=$APP_TYPE"

 curl -s -d POST -H "Content-Type: application/json" -H "Accept: application/json" -H "X-API-Token: $API_TOKEN" "$METADATA_URL"
The output returned should look something like this:
{ "error":false, "id":"{PACKAGE_ASSET_ID}", "chunk_size":4194304, "resume_restart":false, "chunk_list":[1,2,3,4,5], "blob_partitions":1, "status_code":"Success" }- Android .apk uses the vendor type
Using the
chunk_sizevalue which cannot be customized, you can split your app upload into sequential chunks for upload to Distribute. For example, you can use thesplitutility like so:split -b $CHUNK_SIZE $RELEASE_FILE_LOCATION temp/splitThis command generates sequential files in the
tempdirectory namedsplitaa,splitab, and so on. Each file is split within thechunk_sizelimit.Next you need to upload each chunk of the split app package with the respective block:
BLOCK_NUMBER=0

for i in temp/*
do
    BLOCK_NUMBER=$(($BLOCK_NUMBER + 1))
    CONTENT_LENGTH=$(wc -c "$i" | awk '{print $1}')

    UPLOAD_CHUNK_URL="https://file.appcenter.ms/upload/upload_chunk/$PACKAGE_ASSET_ID?token=$URL_ENCODED_TOKEN&block_number=$BLOCK_NUMBER"

    curl -X POST $UPLOAD_CHUNK_URL --data-binary "@$i" -H "Content-Length: $CONTENT_LENGTH" -H "Content-Type: $CONTENT_TYPE"
done
After the upload is done, update the upload resource's status to
uploadFinished.FINISHED_URL="https://file.appcenter.ms/upload/finished/$PACKAGE_ASSET_ID?token=$URL_ENCODED_TOKEN" curl -d POST -H "Content-Type: application/json" -H "Accept: application/json" -H "X-API-Token: $API_TOKEN" "$FINISHED_URL" COMMIT_URL="https://api.appcenter.ms/v0.1/apps/$OWNER_NAME/$APP_NAME/uploads/releases/$ID" curl -H "Content-Type: application/json" -H "Accept: application/json" -H "X-API-Token: $API_TOKEN" \ --data '{"upload_status": "uploadFinished","id": "$ID"}' \ -X PATCH \ $COMMIT_URLOnce uploaded, there is a short delay before the upload is marked as finished. Poll for this status to get the
$RELEASE_IDfor the next step:RELEASE_STATUS_URL="https://api.appcenter.ms/v0.1/apps/$OWNER_NAME/$APP_NAME/uploads/releases/$UPLOAD_ID" POLL_RESULT=$(curl -s -H "Content-Type: application/json" -H "Accept: application/json" -H "X-API-Token: $API_TOKEN" $RELEASE_STATUS_URL) RELEASE_ID=$(echo $POLL_RESULT | jq -r '.release_distinct_id') if [[ $RELEASE_ID == null ]]; then echo "Failed to find release from appcenter" exit 1 fiFinally, release the build. The endpoint to call is PATCH /v0.1/apps/{owner_name}/{app_name}/releases/{release_id}
DISTRIBUTE_URL="https://api.appcenter.ms/v0.1/apps/$OWNER_NAME/$APP_NAME/releases/$RELEASE_ID"

curl -H "Content-Type: application/json" -H "Accept: application/json" -H "X-API-Token: $API_TOKEN" \
--data '{"destinations": [{ "name": "'"$DISTRIBUTION_GROUP"'"}] }' \
-X PATCH \
$DISTRIBUTE_URL
Distribute Release
Distribute the uploaded release to testers, groups, or stores to see the release in the App Center portal. The three endpoints are:
- POST /v0.1/apps/{owner_name}/{app_name}/releases/{release_id}/testers
- POST /v0.1/apps/{owner_name}/{app_name}/releases/{release_id}/groups
- POST /v0.1/apps/{owner_name}/{app_name}/releases/{release_id}/stores
An example for groups:
curl -X POST -H "Content-Type: application/json" -H "Accept: application/json" -H "X-API-Token: $API_TOKEN" -d "{ \"id\": "$DISTRIBUTION_GROUP_ID", \"mandatory_update\": false, \"notify_testers\": false}"
You can find the distribution group ID on that group's settings page.
The request to distribute to multiple destinations is referenced here for more complex scenarios: PATCH /v0.1/apps/{owner_name}/{app_name}/releases/{release_id}
Re-Release a build
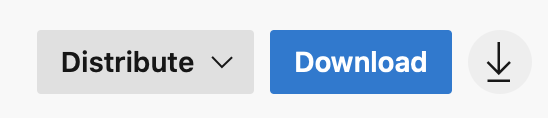
To release a build to another distribution group, from any place in App Center go to Distribute > Releases and then select the release you want to distribute again. The release details page opens. Select the Distribute button in the upper right-hand corner of the screen and select the destination to start the re-release process. Follow the steps in the wizard and finally select Distribute to send the release to groups/testers or the store.
Mandatory Updates
Make a release mandatory to force all users to run the same version of your app. When you do this, App Center will install the selected update on all tester devices.
You can only make a release mandatory if your app uses the App Center Distribute SDK. Make a release mandatory by selecting the Mandatory update checkbox in the review stage of distributing a release, or you can use the API.
You can view mandatory releases in App Center by opening [Your App] > Distribute > Groups > Releases. Mandatory releases are indicated by a red dot.
Link to Releases
Once you've released successfully, your testers can access the release through email, logging in to App Center, or through a direct link.
You can find links to specific releases on the release page for private destinations.
Note
Android Application Bundles (AAB) are available for download on the release page by clicking the download button. If you need an installable APK file format, please use the install portal (https://install.appcenter.ms) on your device. You can find the link underneath the generated QR code next to the download button.
You can find links to specific releases to public destinations on the releases tab in public groups.

Feedback
Coming soon: Throughout 2024 we will be phasing out GitHub Issues as the feedback mechanism for content and replacing it with a new feedback system. For more information see: https://aka.ms/ContentUserFeedback.
Submit and view feedback for