Note
Access to this page requires authorization. You can try signing in or changing directories.
Access to this page requires authorization. You can try changing directories.
In addition to native Active Directory support, Azure NetApp Files supports native integration with directory services including FreeIPA, Red Hat Identity Management (IdM), OpenLDAP, Red Hat Directory Server, and Oracle Unified Directory (OUD) for lightweight directory access protocol (LDAP) directory servers. With native LDAP directory server support, you can achieve secure and scalable identity-based access control for NFS volumes in Linux environments.
Azure NetApp Files' LDAP integration simplifies file share access management by leveraging trusted directory services. It supports NFSv3 and NFSv4.1 protocols and uses DNS SRV record-based discovery for high availability and load balancing across LDAP servers. From a business perspective, this feature enhances:
- Compliance: Centralized identity management supports auditability and policy enforcement
- Efficiency: Reduces administrative overhead by unifying identity controls across Linux and NTFS systems
- Security: Supports LDAP over TLS, symmetric/asymmetric name mapping, and extended group memberships
- Seamless integration: Works with existing LDAP infrastructure
- Scalability: Supports large user and group directories
- Flexibility: Compatible with multiple LDAP implementations
Supported directory services
- FreeIPA: Ideal for secure, centralized identity management in Linux environments
- Red Hat IdM: Centralized identity and access management in Linux environments
- OpenLDAP: Lightweight and flexible directory service for custom deployments
- Red Hat Directory Server: Enterprise-grade LDAP service with advanced scalability and security features
- Oracle Unified Directory: Enterprise-grade LDAP directory service ideal for Oracle application ecosystems, with multi-master replication and comprehensive compliance features
Important
To configure LDAP with Active Directory, see Configure AD DS LDAP with extended groups for NFS volume access.
Architecture
The following diagram outlines how Azure NetApp Files uses LDAP bind/search operations to authenticate users and enforce access control based on directory information.
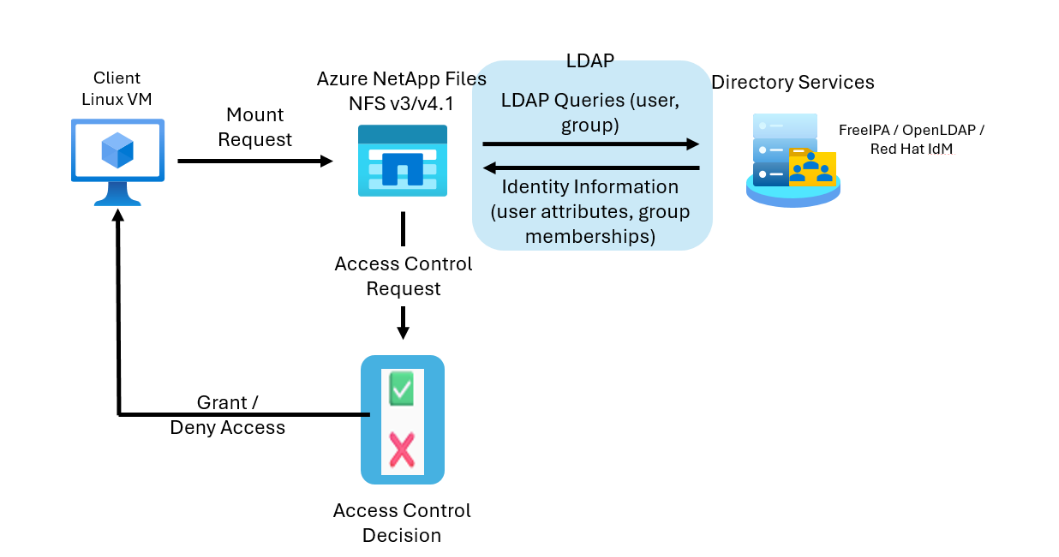
The architecture involves the following components:
- Client Linux VM: initiates an NFS mount request to Azure NetApp Files
- Azure NetApp Files volume: receives the mount request and performs LDAP queries
- LDAP directory server: responds to bind/search requests with user and group information
- Access control decision: enforces access decisions based on LDAP responses
Data flow
- Mount Request: The Linux VM sends an NFSv3 or NFSv4.1 mount request to Azure NetApp Files.
- LDAP Bind/Search: Azure NetApp Files sends a bind/search request to the LDAP server (FreeIPA, Red Hat IdM, OpenLDAP, or RHDS) using the UID/GID.
- LDAP Response: The directory server returns user and group attributes.
- Access Control Decision: Azure NetApp Files evaluates the response and grants or denies access.
- Client Access: The decision is communicated back to the client.
Considerations
- FreeIPA, Red Hat IdM, OpenLDAP, Red Hat Directory Server, and Oracle Unified Directory are supported with NFSv3 and NFSv4.1 volumes; they aren't currently supported with dual-protocol volumes.
- You must configure the LDAP server before creating the volume.
- You can only configure FreeIPA, Red Hat IdM, OpenLDAP, Red Hat Directory Server, or Oracle Unified Directory on new NFS volumes. You can't convert existing volumes to use these directory services.
- Kerberos isn't currently supported with FreeIPA, Red Hat IdM, OpenLDAP, Red Hat Directory Server, and Oracle Unified Directory.
- By default, the Time-to-Live (TTL) for both positive and negative user/group authentication entries in the NFS credential cache is set to 1 hour.
- You should contact Red Hat (IdM) Support for any IdM availability, connectivity, or directory/authentication issues observed directly on the IdM server. You should contact NetApp Support for issues relating to Azure NetApp Files integration, configuration, or access.
- You should contact Oracle Support for any LDAP connectivity or directory data issues observed directly with Oracle Unified Directory. You should contact NetApp Support for issues relating to Azure NetApp Files integration and operations.
Register the feature
Support for FreeIPA, Red Hat IdM, OpenLDAP, Red Hat Directory Server, and Oracle Unified Directory is currently in preview. Before connecting your NFS volumes to one of these directory servers, you must register the feature:
Register the feature:
Register-AzProviderFeature -ProviderNamespace Microsoft.NetApp -FeatureName ANFOpenLDAPCheck the status of the feature registration:
Note
The RegistrationState can remain in the
Registeringstate for up to 60 minutes before changing toRegistered. Wait until the status isRegisteredbefore continuing.Get-AzProviderFeature -ProviderNamespace Microsoft.NetApp -FeatureName ANFOpenLDAP
You can also use Azure CLI commands az feature register and az feature show to register the feature and display the registration status.
Create the LDAP server
You must first create the LDAP server before you can connect it to Azure NetApp Files. Follow the instructions for the relevant server:
- To configure FreeIPA, see the FreeIPA QuickStart Guide then follow Red Hat's guidance.
- To configure RedHat IDM, see Red Hat documentation.
- To configure OpenLDAP, see OpenLDAP documentation.
- To configure Red Hat Directory Server, follow the Red Hat documentation. For more information, see the Install Red Hat Directory Server.
- To configure Oracle Unified Directory, follow the Oracle Unified Directory documentation.
Configure the LDAP connection in Azure NetApp Files
Azure NetApp Files supports additional LDAP connection configuration options, including custom LDAP ports, customer-specified DNS servers, configurable LDAP scope settings, and certificate validation options. These settings improve compatibility with enterprise LDAP deployments and provide greater flexibility when integrating with existing directory infrastructures.
In the Azure portal, select LDAP connections within the NetApp account.
Select + Create to create a new LDAP connection.
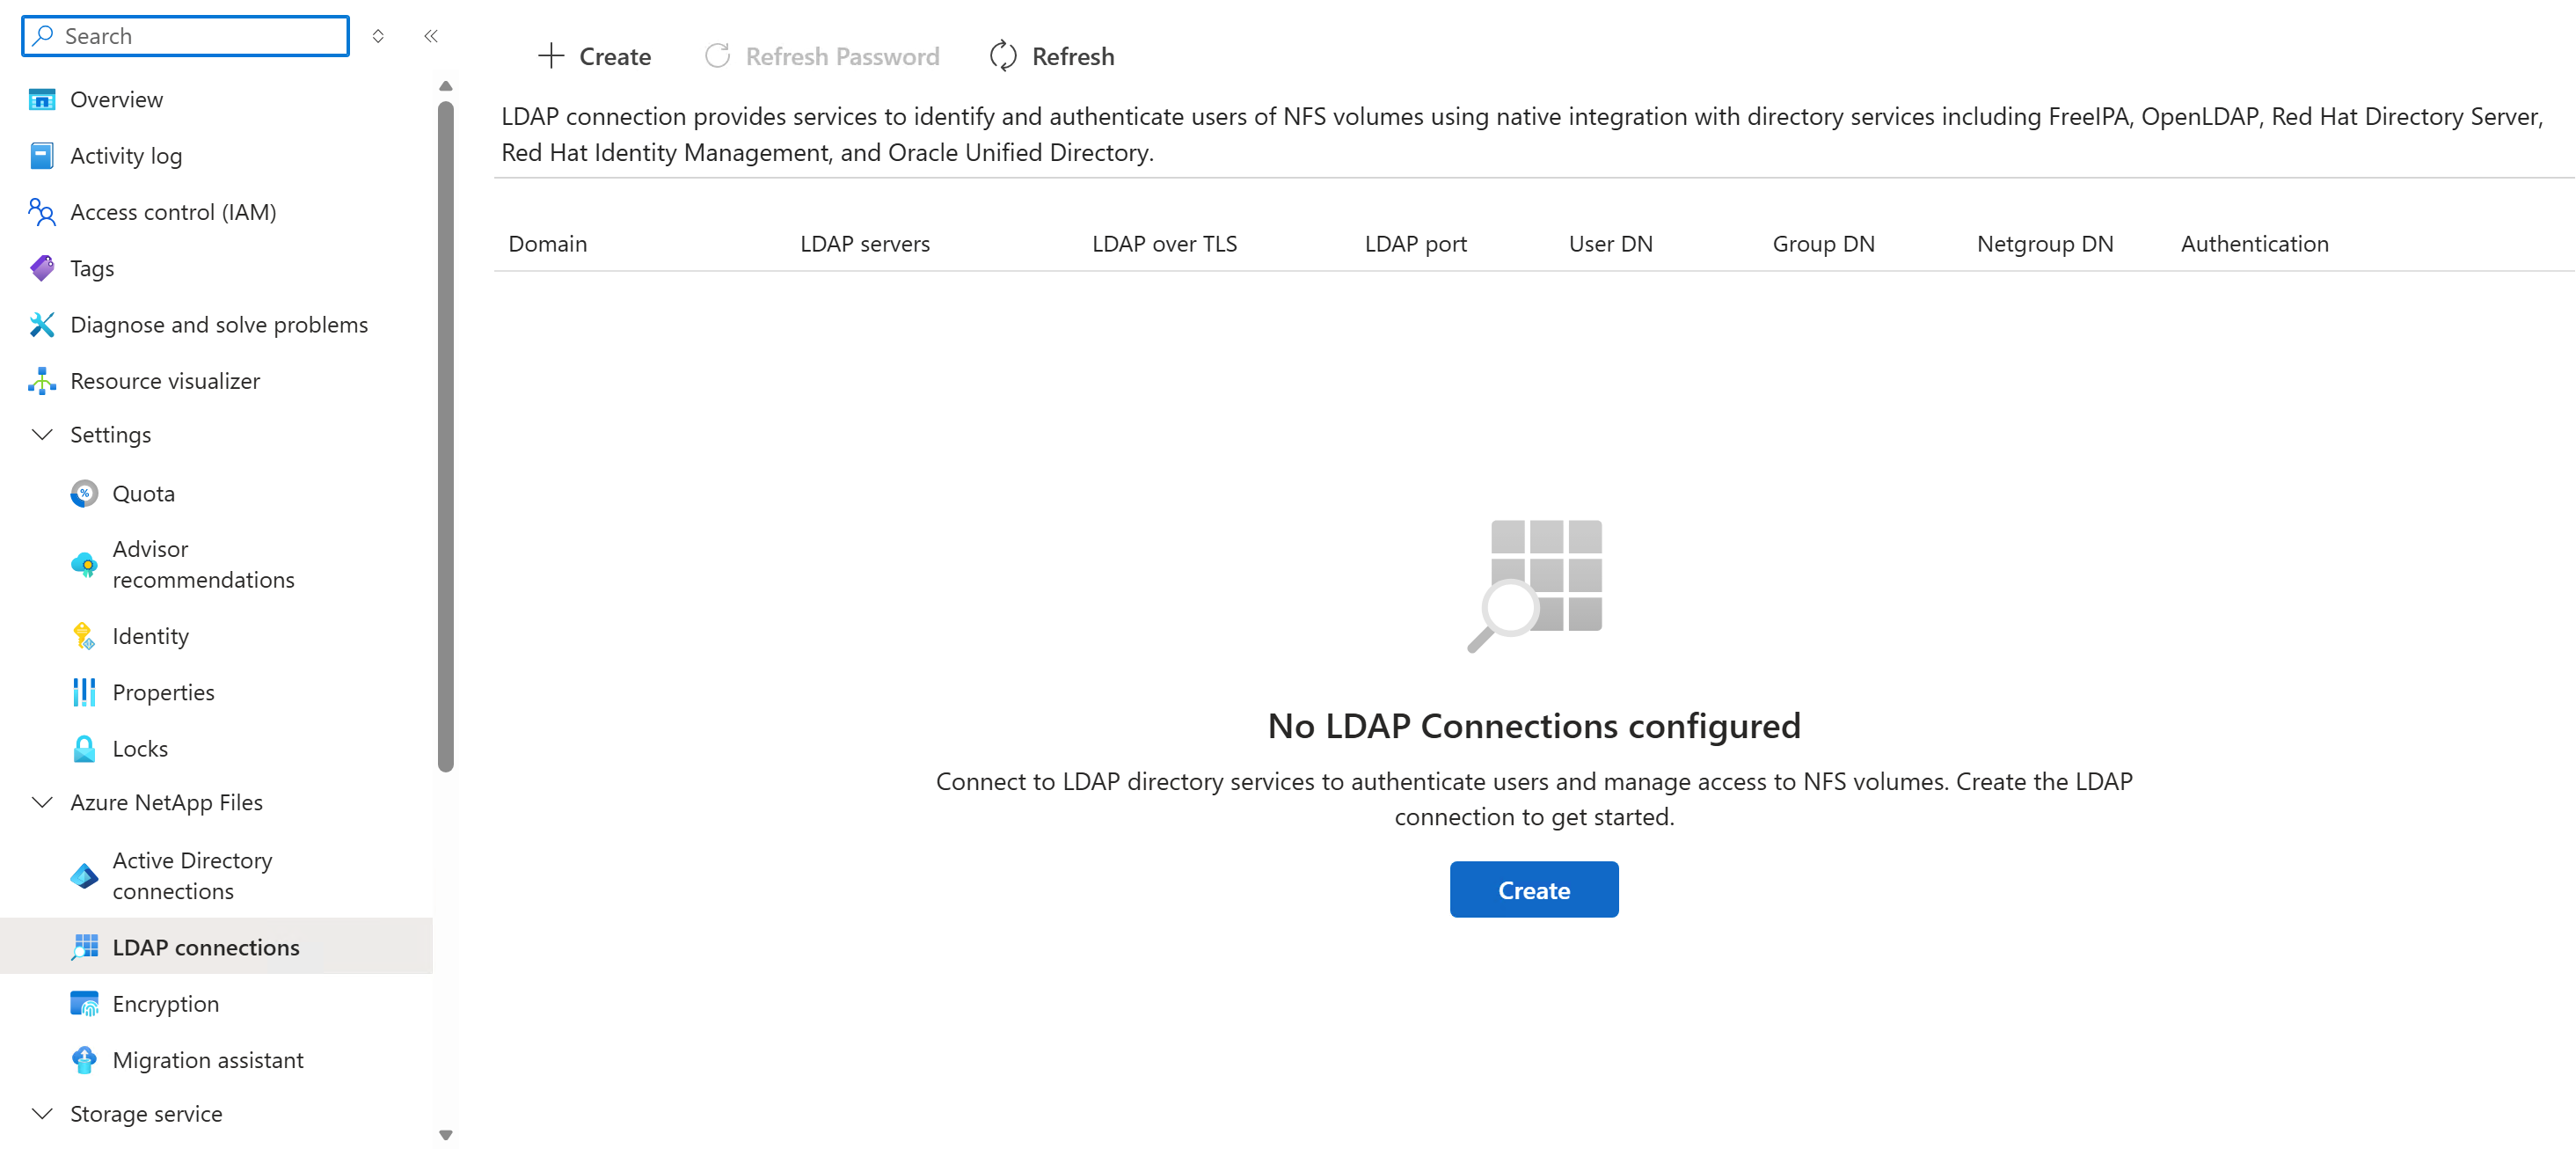
In the Configure LDAP connection window, provide the Connection details:
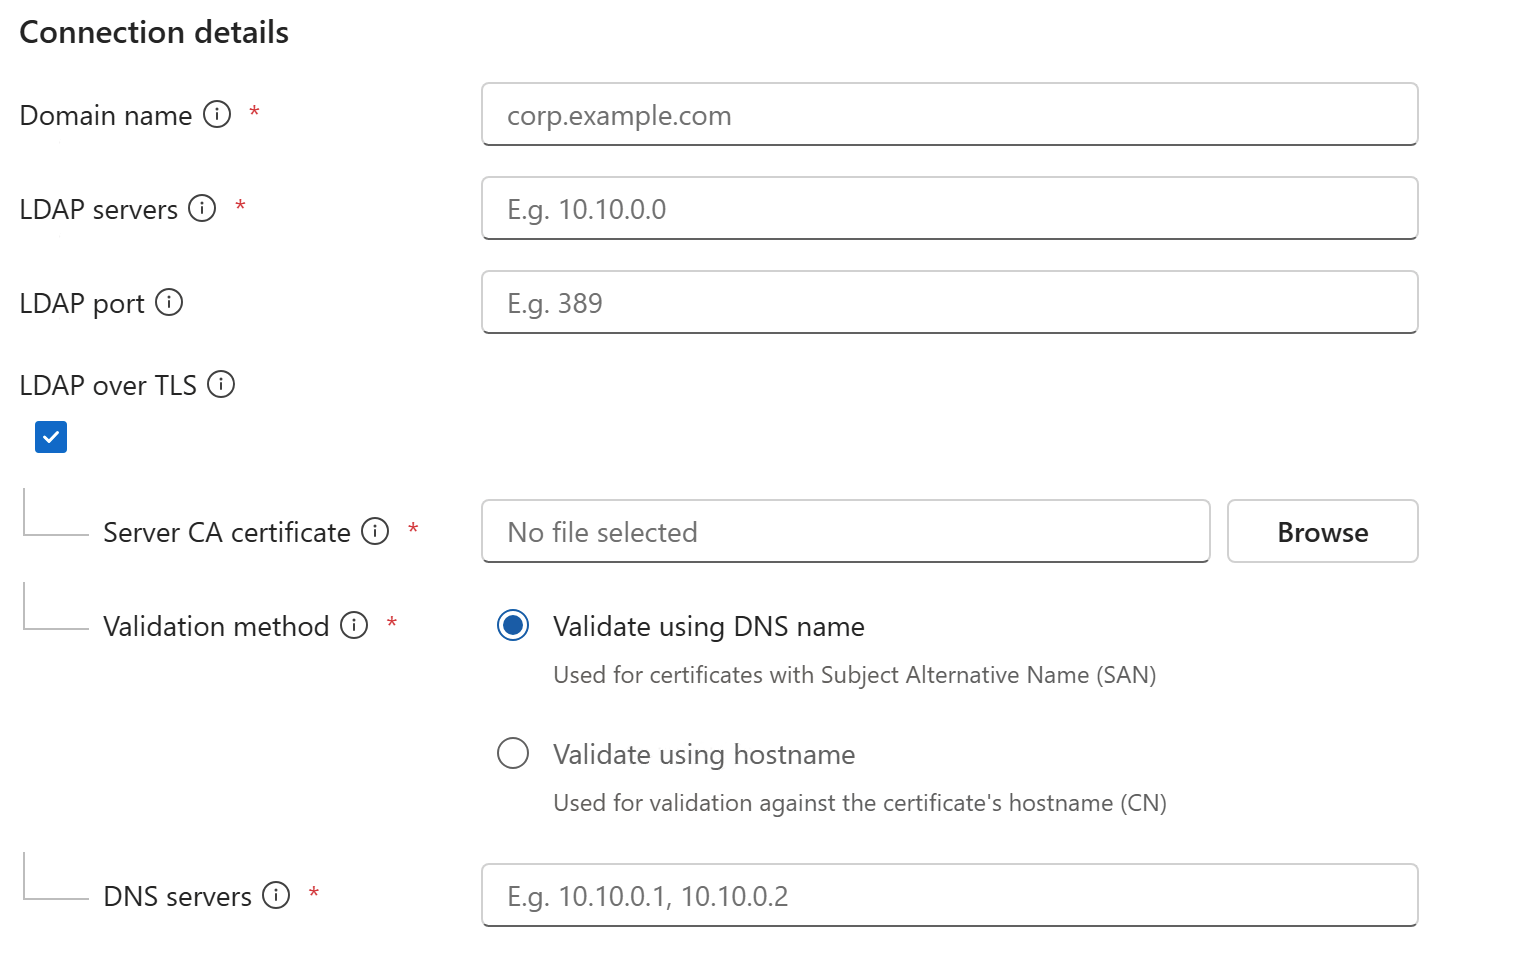
Domain name: The domain name serves as the base Distinguished Name (DN).
LDAP servers: The IP address of the LDAP server.
LDAP port: The port used to connect to the LDAP server. Azure NetApp Files supports both standard and custom LDAP port assignments, enabling integration with environments that use non-default LDAP configurations.
LDAP over TLS: Optionally, check the box to enable LDAP over TLS for secure communication.
Note
To enable LDAP over TLS on multiple servers, you should generate and install the common certificate on each server and then upload the server CA certificate in the Azure portal.
- Server CA certificate: The certification authority certificate. This option is required if you use LDAP over TLS.
- Validation method:
Validate using DNS Name
DNS Servers: The DNS server used by Azure NetApp Files to resolve LDAP server hostnames during connection establishment and certificate validation.Validate using hostname
Certificate CN host: The common name server of the host, for example server.contoso.com.
Configure the LDAP scope:
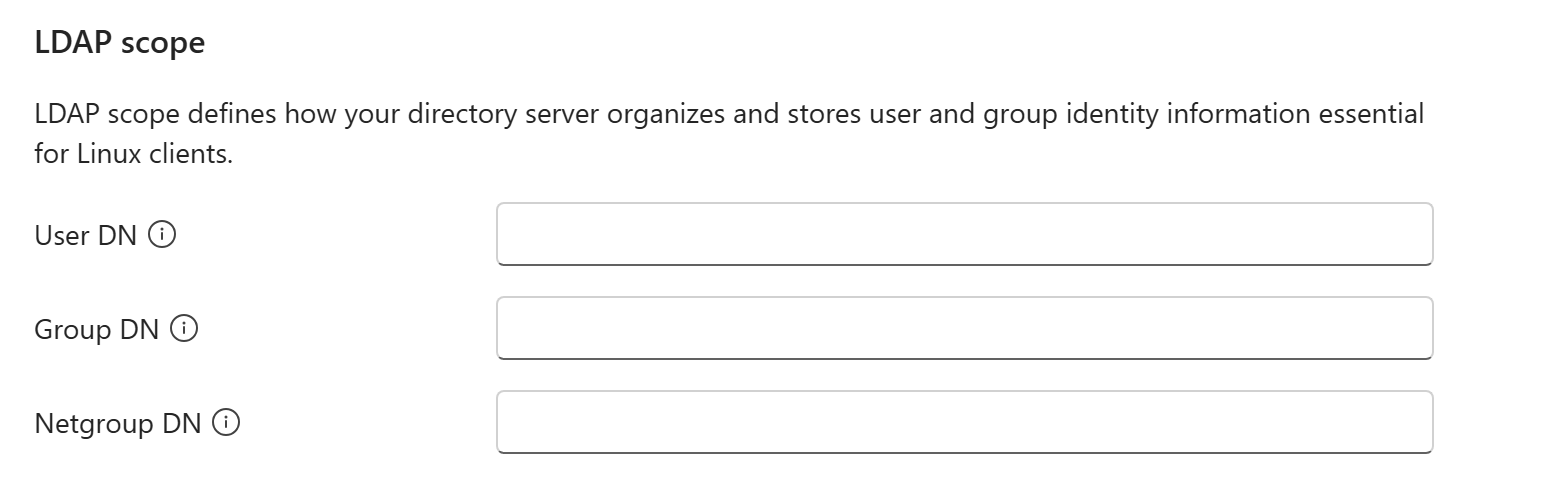
- User DN: Defines the base path in the LDAP directory where user entries are located.
- Group DN: Specifies the location of group entries used for access control and permissions.
- Netgroup DN: Defines the network-based groupings, often for NFS or system-level access control. Allowing customers to configure these DNs ensures that ANF can accurately query and integrate with their specific LDAP directory structures, thereby enhancing flexibility.
Select the Authentication type:
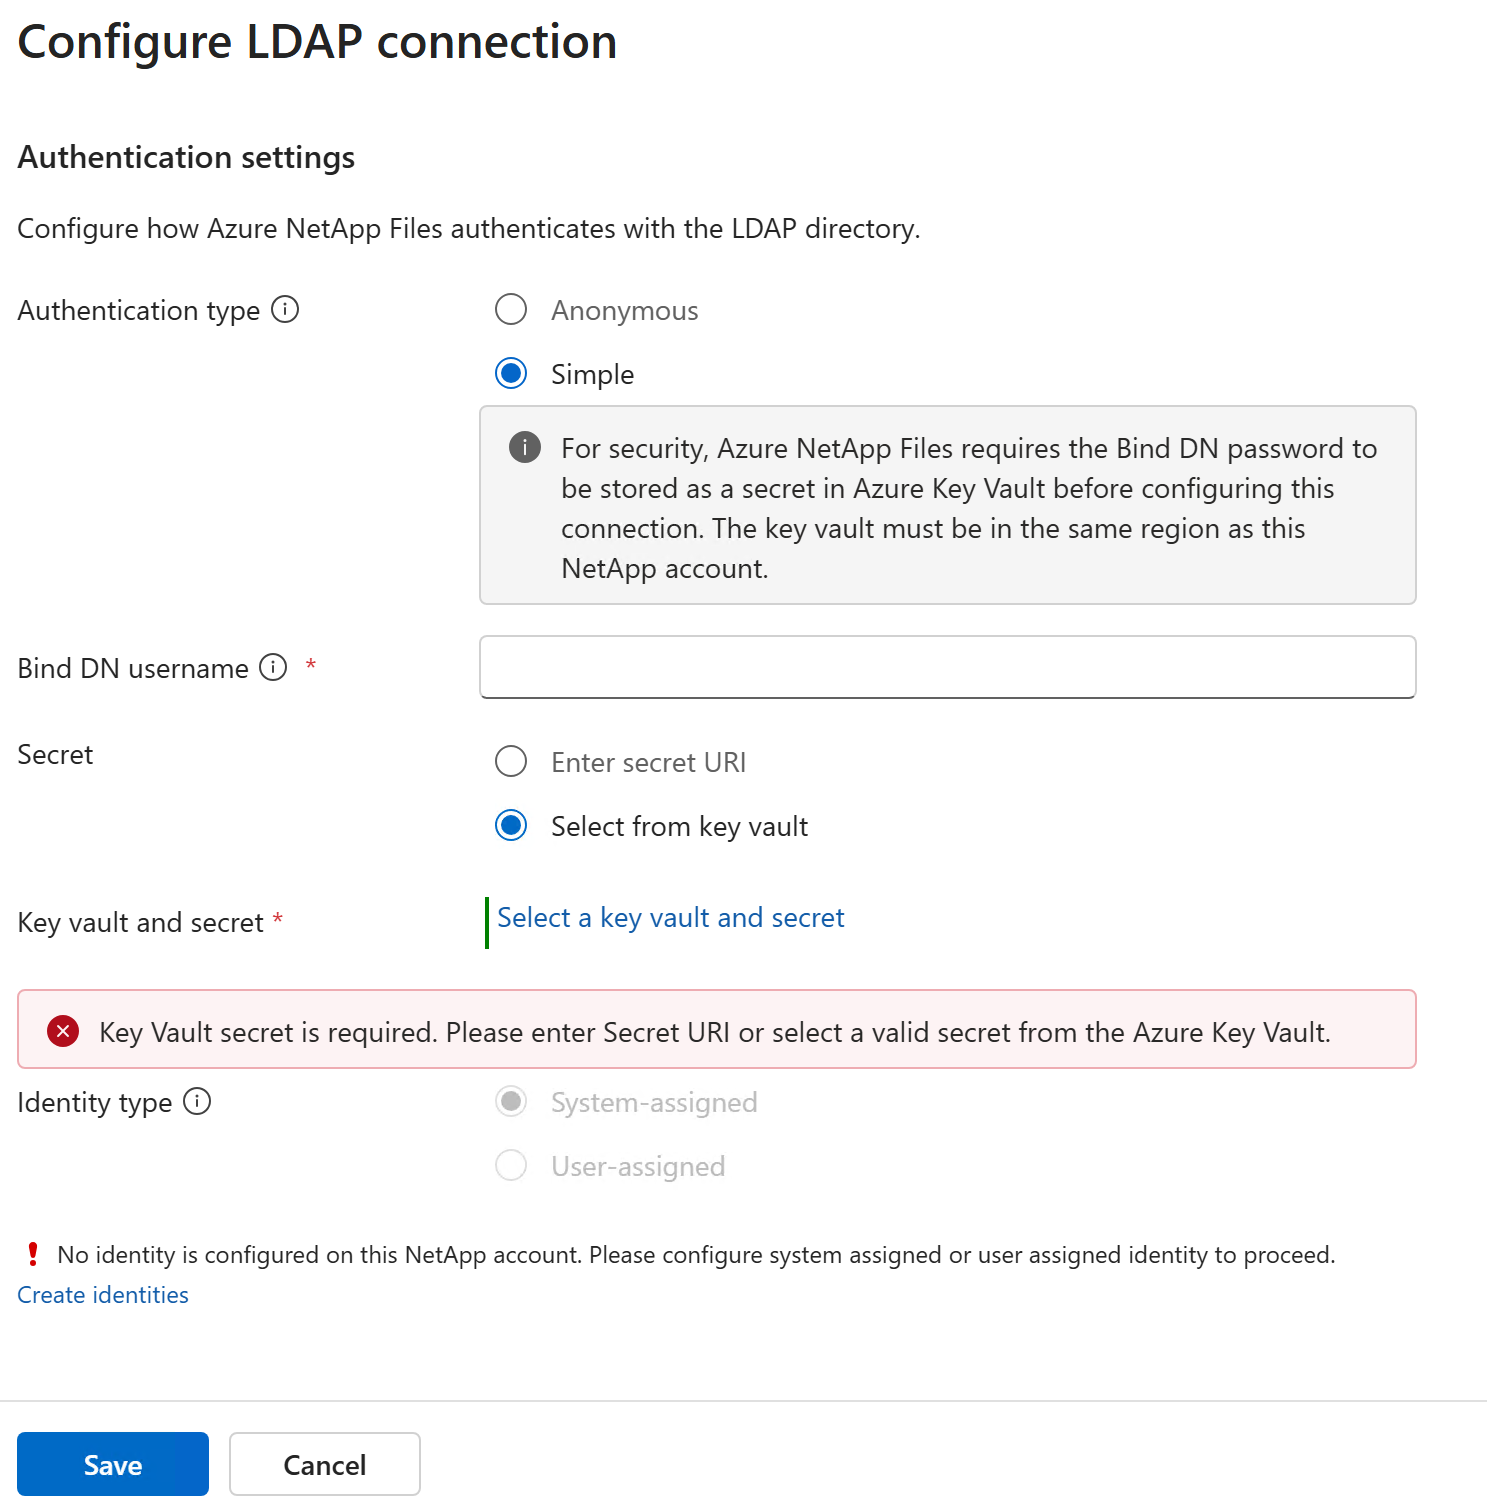
Anonymous: Connects without providing a distinguished name or password. Access is governed by the LDAP server's anonymous access policies.
Simple: Authenticates using the specified Bind DN and a password retrieved from a secret stored in Azure Key Vault.
In the Bind DN username, enter the distinguished name of the account used to authenticate with the LDAP server.
Example:uid=binduser,cn=users,cn=accounts,dc=contoso,dc=comSelect the secret that contains the bind password for LDAP authentication.
- Enter Secret URI: Manually enter the secret identifier.
- Select from Key Vault: Select the secret from the Azure Key Vault.
The portal displays the Key Vault and Secret. You can select Change selection to select another secret.
Select the identity type used to access the Key Vault secret. To configure a managed identity, select Add New Identity in the edit window and select one of the following options:
- System-assigned: Enable the system-assigned managed identity.
- User-assigned: Select or add an existing user-assigned managed identity.
Note
The identity must be granted at least the Key Vault Secrets User role on the target Key Vault.
Select Save.
After you configure the LDAP connection, you can create an NFS volume.
Validate the LDAP connection
- To validate the connection, navigate to the volume overview for the volume using the LDAP connection.
- Select LDAP connection then LDAP Group ID List.
- In the Username field, enter the username provided when you configured the LDAP server. Select Get Group IDs. Ensure the group IDs match the client and server.
For more information, see Troubleshoot user access on LDAP volumes in Azure NetApp Files.