✔️ Applies to: Classic SMB and NFS file shares created with the Microsoft.Storage resource provider
✔️ Applies to: File shares created with the Microsoft.FileShares resource provider
This article explains how to adjust the size, cost, and performance characteristics of Azure Files file shares by using the Azure portal, Azure PowerShell, and Azure CLI. The procedures differ for classic file shares, which use the Microsoft.Storage resource provider, versus file shares created with Microsoft.FileShares.
After creating your classic file share, you might need to adjust the provisioning (provisioned models) or access tier (pay-as-you-go model) of the share. The following sections show you how to adjust the relevant properties for your share.
Provisioned v2 billing model
After creating your provisioned v2 classic file share, you can change one or all three of the provisioned quantities of your file share. You can dynamically scale up or down the amount of storage, IOPS, and throughput you provision as your needs change. However, you can only decrease a provisioned quantity after 24 hours elapse since your last quantity increase. Storage, IOPS, and throughput changes take effect within a few minutes after a provisioning change.
Follow these instructions to update the provisioning for your file share.
Go to your storage account. From the service menu, under Data storage, select Classic file shares.
In the file share listing, select the file share for which you want to change the provisioning.
In the file share overview, select Change size and performance.
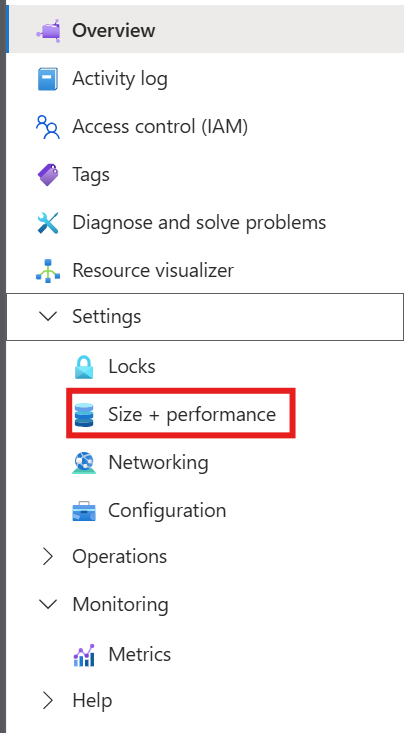
The Size and performance pop-out dialog has the following options:
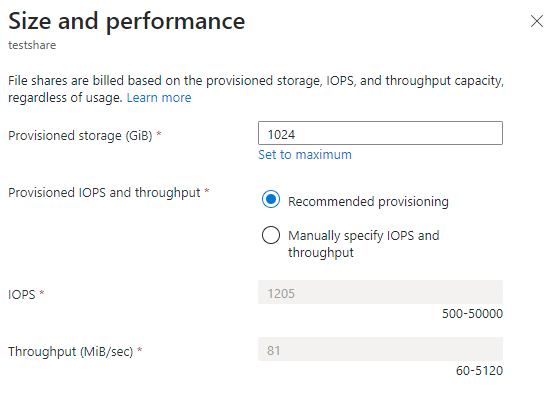
Provisioned storage (GiB): The amount of storage provisioned on the share.
Provisioned IOPS and throughput: A set of radio buttons that you use to select between Recommended provisioning and Manually specify IOPS and throughput. If your share is at the recommended IOPS and throughput level for the amount of storage provisioned, Recommended provisioning is selected; otherwise, Manually specify IOPS and throughput is selected. You can toggle between these two options depending on your desire to change share provisioning.
IOPS: If you select Manually specify IOPS and throughput, this textbox enables you to change the amount of IOPS provisioned on this file share.
Throughput (MiB/sec): If you select Manually specify IOPS and throughput, this textbox enables you to change the amount of throughput provisioned on this file share.
Select Save to apply the provisioning changes.
Use the Update-AzRmStorageShare cmdlet to modify a provisioned v2 file share. Replace the values for the variables $resourceGroupName, $storageAccountName, $shareName, $provisionedThroughputMibPerSec, $provisionedIops, and $provisionedStorageGib with the values you want for your file share.
# The path to the file share resource to be modified.
$resourceGroupName = "<my-resource-group>"
$storageAccountName = "<my-storage-account-name>"
$shareName = "<name-of-the-file-share>"
# The provisioning desired on the file share. Delete the parameters if no
# change is desired.
$provisionedStorageGib = 10240
$provisionedIops = 10000
$provisionedThroughputMibPerSec = 2048
# Update the file share provisioning.
Update-AzRmStorageShare `
        -ResourceGroupName $resourceGroupName `
        -AccountName $storageAccountName `
        -ShareName $shareName `
        -QuotaGiB $provisionedStorageGib `
        -ProvisionedIops $provisionedIops `
        -ProvisionedBandwidthMibps $provisionedThroughputMibPerSec
$f = Get-AzRmStorageShare -ResourceGroupName $resourceGroupName -AccountName $storageAccountName -ShareName $shareName
$f | fl
Use the az storage share-rm update command to modify a provisioned v2 file share. Replace the values for the variables resourceGroupName, storageAccountName, fileShareName, provisionedStorageGib, provisionedIops, and provisionedThroughputMibPerSec with the values you want for your file share.
# The path to the file share resource to be modified.
resourceGroupName="<resource-group>"
storageAccountName="<storage-account>"
fileShareName="<file-share>"

# The provisioning desired on the file share. Delete the parameters if no
# change is desired.
provisionedStorageGib=10240
provisionedIops=10000
provisionedThroughputMibPerSec=2048

# Update the file share provisioning.
az storage share-rm update \
        --resource-group $resourceGroupName \
        --name $shareName \
        --storage-account $storageAccountName \
        --quota $provisionedStorageGib \
        --provisioned-iops $provisionedIops \
        --provisioned-bandwidth-mibps $provisionedThroughputMibPerSec
Provisioned v1 billing model
After creating your provisioned v1 file share, you can change the provisioned storage size of the file share. When you change the provisioned storage size, you also change the amount of provisioned IOPS and provisioned throughput. You can only decrease the provisioned storage after 24 hours have elapsed since your last storage increase. Storage, IOPS, and throughput changes take effect within a few minutes after a provisioning change. For more information, see provisioned v1 provisioning detail.
Follow these instructions to update the provisioning for your file share.
Go to your storage account. From the service menu, under Data storage, select Classic file shares.
In the file share listing, select the file share for which you want to change the provisioning.
In the file share overview, select Change size and performance.
The Size and performance dialog has a single option, Provisioned storage (GiB). If you need more IOPS or throughput than the given amount of provisioned storage provides, you can increase your provisioned storage capacity to get extra IOPS and throughput.
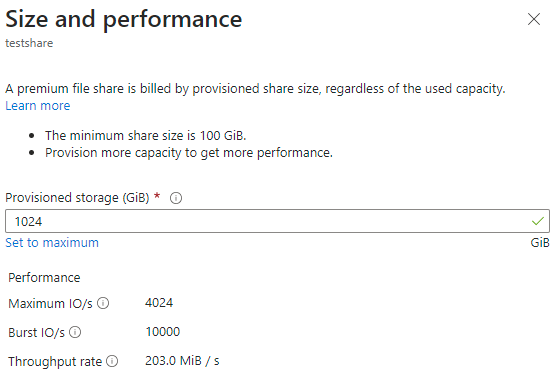
Select Save to apply the provisioning changes.
Note
You can use PowerShell and CLI to enable or disable paid bursting. Paid bursting is an advanced feature of the provisioned v1 billing model. See provisioned v1 paid bursting before enabling paid bursting.
You can modify a provisioned v1 file share with the Update-AzRmStorageShare cmdlet. Replace the values for the variables $resourceGroupName, $storageAccountName, and $fileShareName with the values for your file share. Set $provisionedStorageGib, $paidBurstingEnabled, $paidBurstingMaxIops, and $paidBurstingMaxThroughputMibPerSec to non-null ($null) values on the file share. Paid bursting is an advanced feature of the provisioned v1 model. See provisioned v1 paid bursting before enabling.
# The path to the file share resource to be modified.
$resourceGroupName = "<resource-group>"
$storageAccountName = "<storage-account>"
$fileShareName = "<file-share>"
# The provisioning desired on the file share. Set to $null to keep at the
# current level of provisioning.
$provisionedStorageGib = 10240
# Paid bursting settings.
$paidBurstingEnabled = $null # Set to $true or $false.
$paidBurstingMaxIops = $null # Set to an integer value.
$paidBurstingMaxThroughputMibPerSec = $null # Set to an integer value.
# Configure parameter object for splatting.
$params = @{
    ResourceGroupName = $resourceGroupName;
    StorageAccountName = $storageAccountName;
    Name = $fileShareName;
}
if ($null -ne $provisionedStorageGib) {
    $params += @{ QuotaGiB = $provisionedStorageGib }
}
if ($null -ne $paidBurstingEnabled) {
    $params += @{ PaidBurstingEnabled = $paidBurstingEnabled }
}
if ($null -ne $paidBurstingMaxIops) {
    $params += @{ PaidBurstingMaxIops = $paidBurstingMaxIops }
}
if ($null -ne $paidBurstingMaxThroughputMibPerSec) {
    $params += @{
        PaidBurstingMaxBandwidthMibps = $paidBurstingMaxThroughputMibPerSec
    }
}
# Update the file share provisioning.
Update-AzRmStorageShare @params
You can modify a provisioned v1 file share by using the az storage share-rm update command. Replace the values for the variables resourceGroupName, storageAccountName, fileShareName, and provisionedStorageGib with the values you want for your file share.
# The path to the file share resource to be modified.
resourceGroupName="<resource-group>"
storageAccountName="<storage-account>"
fileShareName="<file-share>"

# The provisioning desired on the file share.
provisionedStorageGib=10240

# Update the file share provisioning.
az storage share-rm update \
        --resource-group $resourceGroupName \
        --storage-account $storageAccountName \
        --name $fileShareName \
        --quota $provisionedStorageGib
To toggle paid bursting, use the --paid-bursting-enabled parameter. Paid bursting is an advanced feature of the provisioned v1 model. See provisioned v1 paid bursting before enabling. You can optionally use the --paid-bursting-max-iops and --paid-bursting-max-bandwidth-mibps flags to set a restriction on the upper amount of paid bursting allowed for cost control purposes. Replace the values for the variables resourceGroupName, storageAccountName, and fileShareName with the values you want for your file share.
resourceGroupName="<resource-group>"
storageAccountName="<storage-account>"
fileShareName="<file-share>"

az storage share-rm update \
        --resource-group $resourceGroupName \
        --storage-account $storageAccountName \
        --name $fileShareName \
        --paid-bursting-enabled true
Pay-as-you-go billing model
After you create your pay-as-you-go file share, you might want to change two properties:
Access tier: The access tier of the file share dictates the ratio of storage to IOPS and throughput costs (in the form of transactions). There are three access tiers: transaction optimized, hot, and cool. Changing the tier of the Azure file share results in transaction costs for the movement to the new access tier. For more information, see switching between access tiers.
Quota: Quota is a limit on the size of the file share. The quota property is used in the provisioned v2 and provisioned v1 models to mean "provisioned storage capacity". However, in the pay-as-you-go model, quota has no direct impact on billing. The two primary reasons you might want to modify this property are if you use quota to limit the growth of your file share to keep control of the used storage and transaction costs in the pay-as-you-go model, or if you have a storage account predating the introduction of the large file share feature, which enabled file shares to grow beyond 5 TiB. The maximum file share size for a pay-as-you-go file share is 100 TiB.
To update the access tier of your file share by using the Azure portal, follow these steps:
Go to your storage account. From the service menu, under Data storage, select Classic file shares.
In the file share listing, select the file share for which you want to change the access tier.
In the file share overview, select Change tier.
Select the desired Access tier from the provided drop-down list.
Select Apply to save the access tier change.
To update the quota of your file share by using the Azure portal, follow these steps:
Go to your storage account. From the service menu, under Data storage, select Classic file shares.
In the file share listing, select the file share for which you want to change the quota.
In the file share overview, select Edit quota.
In the Edit quota pop-out, enter the desired maximum size of the share or select Set to maximum. There's no cost implication of setting the share to the maximum size.
Select OK to save quota changes. The new quota is effective within a few minutes.
You can also use the Azure PowerShell Update-AzRmStorageShare cmdlet to change the access tier and quota settings for a pay-as-you-go file share. Replace the values for the variables $resourceGroupName, $storageAccountName, $fileShareName, $accessTier, and $quotaGib with the values you want for your file share.
# The path to the file share resource to be modified.
$resourceGroupName = "<resource-group>"
$storageAccountName = "<storage-account>"
$fileShareName = "<file-share>"
# The settings to be changed on the file share. Set to $null to skip setting.
$accessTier = "Cool"
$quotaGib = $null
# Construct a parameters hash table for cmdlet splatting.
$updateParams = @{
    ResourceGroupName = $resourceGroupName
    StorageAccountName = $storageAccountName
    Name = $fileShareName
}
if ($null -ne $accessTier) { $updateParams += @{ AccessTier = $accessTier } }
if ($null -ne $quotaGib) { $updateParams += @{ QuotaGiB = $quotaGib } }
# Update the file share
Update-AzRmStorageShare @updateParams
You can also use the Azure CLI az storage share-rm update command to change the access tier and quota settings for a pay-as-you-go file share. Replace the values for the variables resourceGroupName, storageAccountName, fileShareName, accessTier, and quotaGib with the values you want for your file share.
# The path to the file share resource to be modified.
resourceGroupName="<resource-group>"
storageAccountName="<storage-account>"
fileShareName="<file-share>"

# The settings to be changed on the file share. Set to the empty string to skip
# setting.
accessTier="Cool"
quotaGib=""

command="az storage share-rm update --resource-group $resourceGroupName"
command="$command --storage-account $storageAccountName --name $fileShareName"

if [ ! -z "${accessTier}" ]; then
    command="$command --access-tier $accessTier"
fi

if [ ! -z "${quotaGib}" ]; then
    command="$command --quota $quotaGib"
fi

# Update file share (command is in variable)
$command
Follow these instructions to change the size and performance of a file share (Microsoft.FileShares) by using the Azure portal. You can dynamically scale the amount of storage, IOPS, and throughput up or down as your needs change. However, you can only decrease a provisioned quantity after 24 hours have elapsed since your last quantity increase. Storage, IOPS, and throughput changes take effect within a few minutes after a provisioning change.
Select the file share you want to modify.
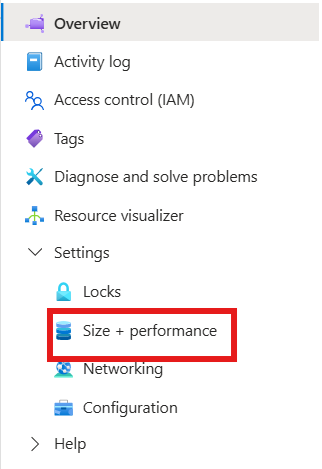
From the context menu, select Settings.
Choose Size + performance.
The Size and performance dialog has the following options:
Provisioned capacity (GiB): The amount of storage you provision on the share.
Provisioned IOPS and throughput: A set of radio buttons that you use to select between Recommended provisioning and Manually specify IOPS and throughput. If your share is at the recommended IOPS and throughput level for the amount of storage you provisioned, Recommended provisioning is selected; otherwise, Manually specify IOPS and throughput is selected. You can toggle between these two options to change share provisioning.
IOPS: If you select Manually specify IOPS and throughput, this textbox enables you to change the amount of IOPS provisioned on this file share.
Throughput (MiB/sec): If you select Manually specify IOPS and throughput, this textbox enables you to change the amount of throughput provisioned on the file share.
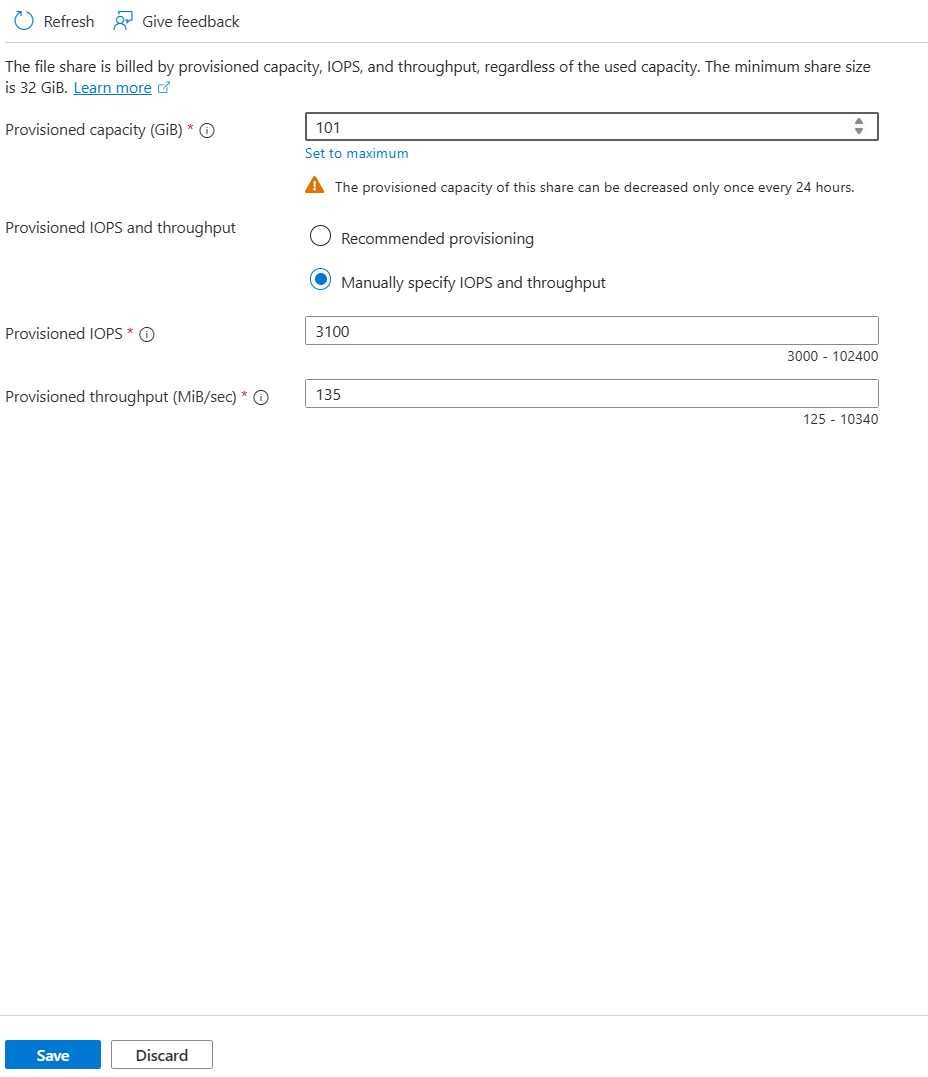
Select Save.
To change the size and performance of a file share (Microsoft.FileShares) by using Azure PowerShell, use the following commands. Replace the variables with your intended values.
# To learn more about the Az.FileShare module, see https://www.powershellgallery.com/packages/Az.FileShare/1.0.0
Install-Module -Name Az.FileShare -Repository PSGallery -RequiredVersion 1.0.0

$resourceGroup = "<resource-group>"
$shareName = "<file-share-name>"

# The following is an example to modify the file share setting. Edit the command to tailor it to your needs.
Update-AzFileShare `
    -ResourceName $shareName `
    -ResourceGroupName $resourceGroup `
    -RootSquash RootSquash `
    -EncryptionInTransitRequired Enabled `
    -ProvisionedIoPerSec 5001 `
    -ProvisionedStorageGiB 101 `
    -ProvisionedThroughputMiBPerSec 126 `
    -PublicNetworkAccess Disabled `
    -Tag @{tag1="value1"}
Get-AzFileShare -ResourceGroupName $resourceGroup -ResourceName $shareName
To change the size and performance of a file share (Microsoft.FileShares) by using Azure CLI, use the following commands.
# Install the fileshare extension
az extension add --name fileshare

# Specify your values
shareName="<your-file-share-name>"
resourceGroup="<your-resource-group-name>"

# Update the file share. Uncomment and set only the parameters you want to change.
az fileshare update --name $shareName --resource-group $resourceGroup
# --provisioned-storage-gib 2048 \
# --provisioned-iops 3000 \
# --provisioned-throughput-mib 125 \
# --root-squash RootSquash \
# --encryption-in-transit-required Enabled \
# --public-network-access Disabled \
# --allowed-subnets <subnet-resource-id> \
# --tags tag1=value1
To check file share information:
az fileshare show --name $shareName --resource-group $resourceGroup
Delete a classic file share
You might want to delete unused or outdated file shares. You can recover file shares in storage accounts with soft delete enabled within the retention period.
Follow these instructions to delete a classic file share by using the Azure portal.
Go to your storage account. From the service menu, under Data storage, select Classic file shares.
In the file share list, select the ... for the file share you want to delete.
Select Delete share from the context menu.
The Delete pop-out contains a survey about why you're deleting the file share. You can skip this step, but Microsoft appreciates any feedback you have on Azure Files, particularly if something isn't working properly for you.
Enter the file share name to confirm deletion and then select Delete.
You can also use the Azure PowerShell Remove-AzRmStorageShare cmdlet to delete a file share. Replace the values for the variables $resourceGroupName, $storageAccountName, and $fileShareName with the values for your file share.
# The path to the file share resource to be deleted.
$resourceGroupName = "<resource-group>"
$storageAccountName = "<storage-account>"
$fileShareName = "<file-share>"
# Remove the file share
Remove-AzRmStorageShare `
        -ResourceGroupName $resourceGroupName `
        -StorageAccountName $storageAccountName `
        -Name $fileShareName
You can also use the Azure CLI az storage share-rm delete command to delete a file share. Replace the values for the variables resourceGroupName, storageAccountName, and fileShareName with the values for your file share.
resourceGroupName="<resource-group>"
storageAccountName="<storage-account>"
fileShareName="<file-share>"

az storage share-rm delete \
    --resource-group $resourceGroupName \
    --storage-account $storageAccountName \
    --name $fileShareName
Delete a file share (Microsoft.FileShares)
Before deleting a file share that you created with the Microsoft.FileShares resource provider, make sure you delete or disconnect its associated private endpoint. File share deletion fails if the private endpoint is still present.
To delete a file share (Microsoft.FileShares) by using the Azure portal, follow these steps.
Go to your file share.
Select Delete from the context menu.
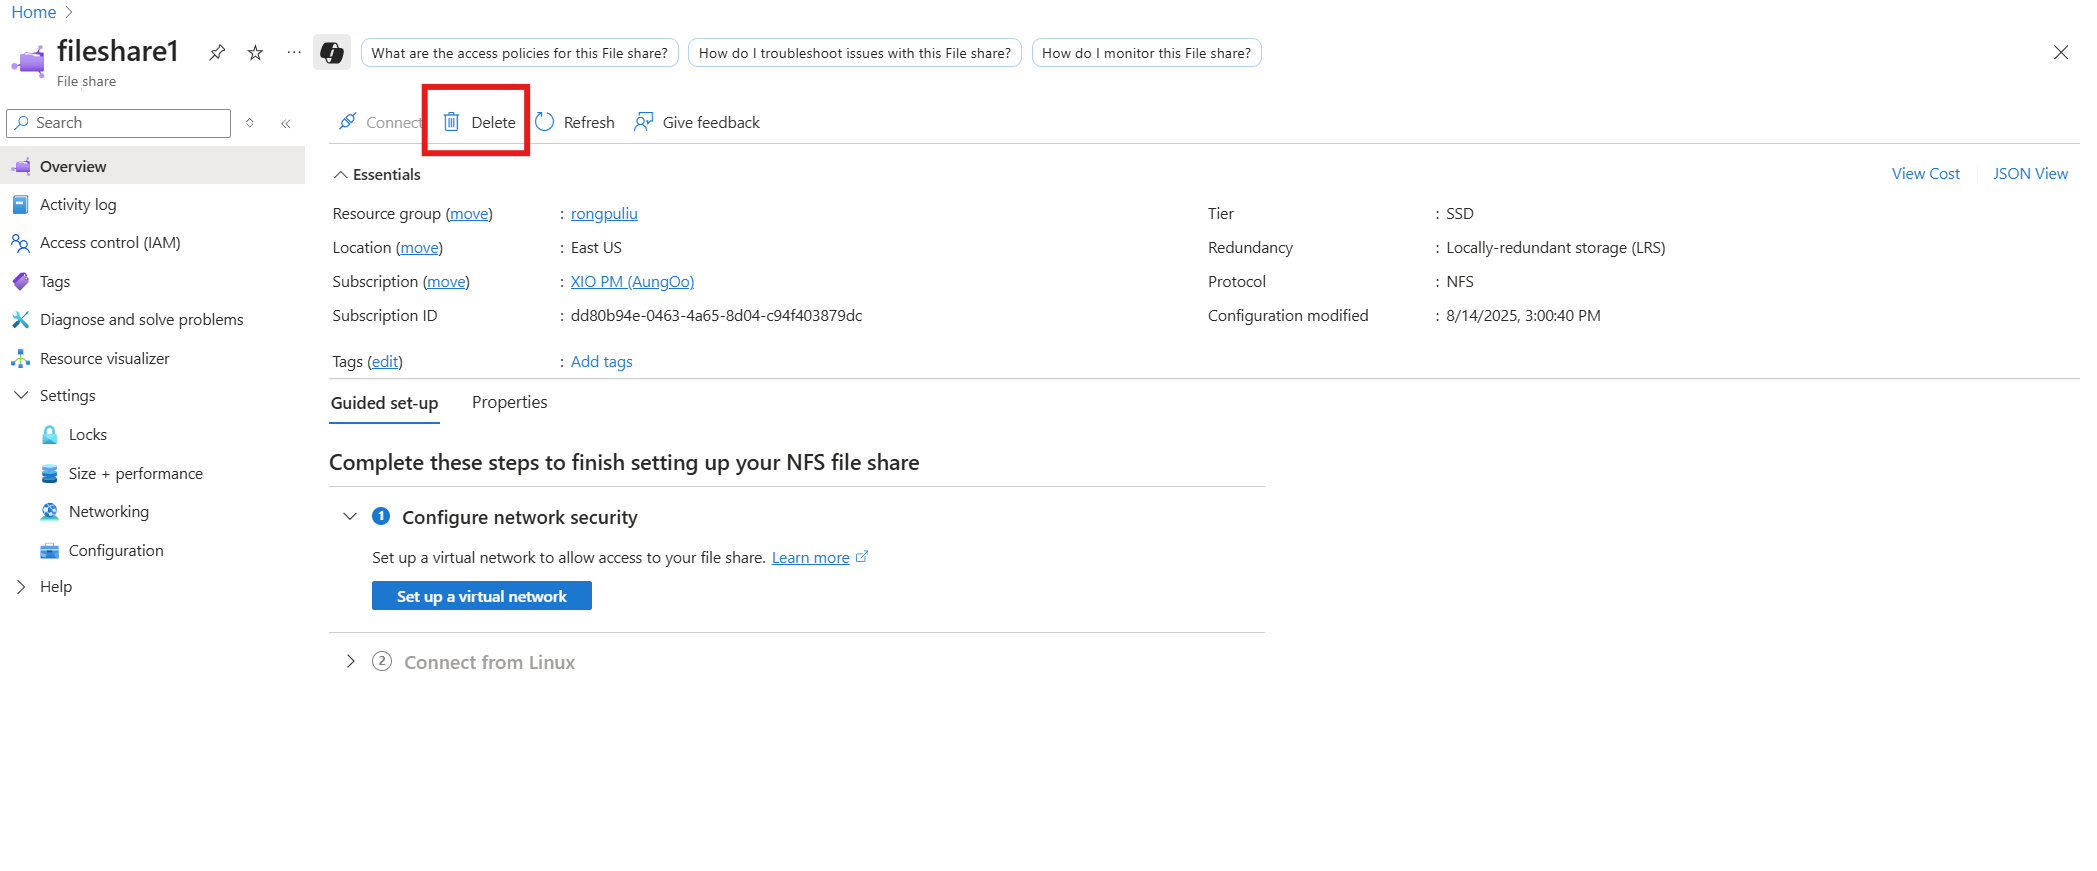
The Delete pop-out contains a survey about why you're deleting the file share. You can skip this survey, but the product team appreciates any feedback you provide, particularly if something isn't working properly for you. If your file share has dependent resources such as snapshots, the deletion process also deletes the snapshots, and the action is non-recoverable. If your file share has associated resources like private endpoints, the portal helps you remove them before you can delete the file share.
Enter the file share name to confirm deletion and then select Delete.
To delete a file share (Microsoft.FileShares) by using Azure PowerShell, run the following command. Make sure you replace the variables with your intended values.
# To learn more about the Az.FileShare module, see https://www.powershellgallery.com/packages/Az.FileShare/1.0.0
Install-Module -Name Az.FileShare -Repository PSGallery -RequiredVersion 1.0.0

$resourceGroup = "<resource-group>"
$shareName = "<file-share-name>"

Remove-AzFileShare -ResourceName $shareName -ResourceGroupName $resourceGroup
To delete a file share (Microsoft.FileShares) by using Azure CLI, run the following command.
# Install the fileshare extension
az extension add --name fileshare

# Delete the file share
az fileshare delete --name <file-share-name> --resource-group <your-resource-group-name> -y
Next steps