Note
Access to this page requires authorization. You can try signing in or changing directories.
Access to this page requires authorization. You can try changing directories.
APPLIES TO: Developer | Basic | Basic v2 | Standard | Standard v2 | Premium | Premium v2
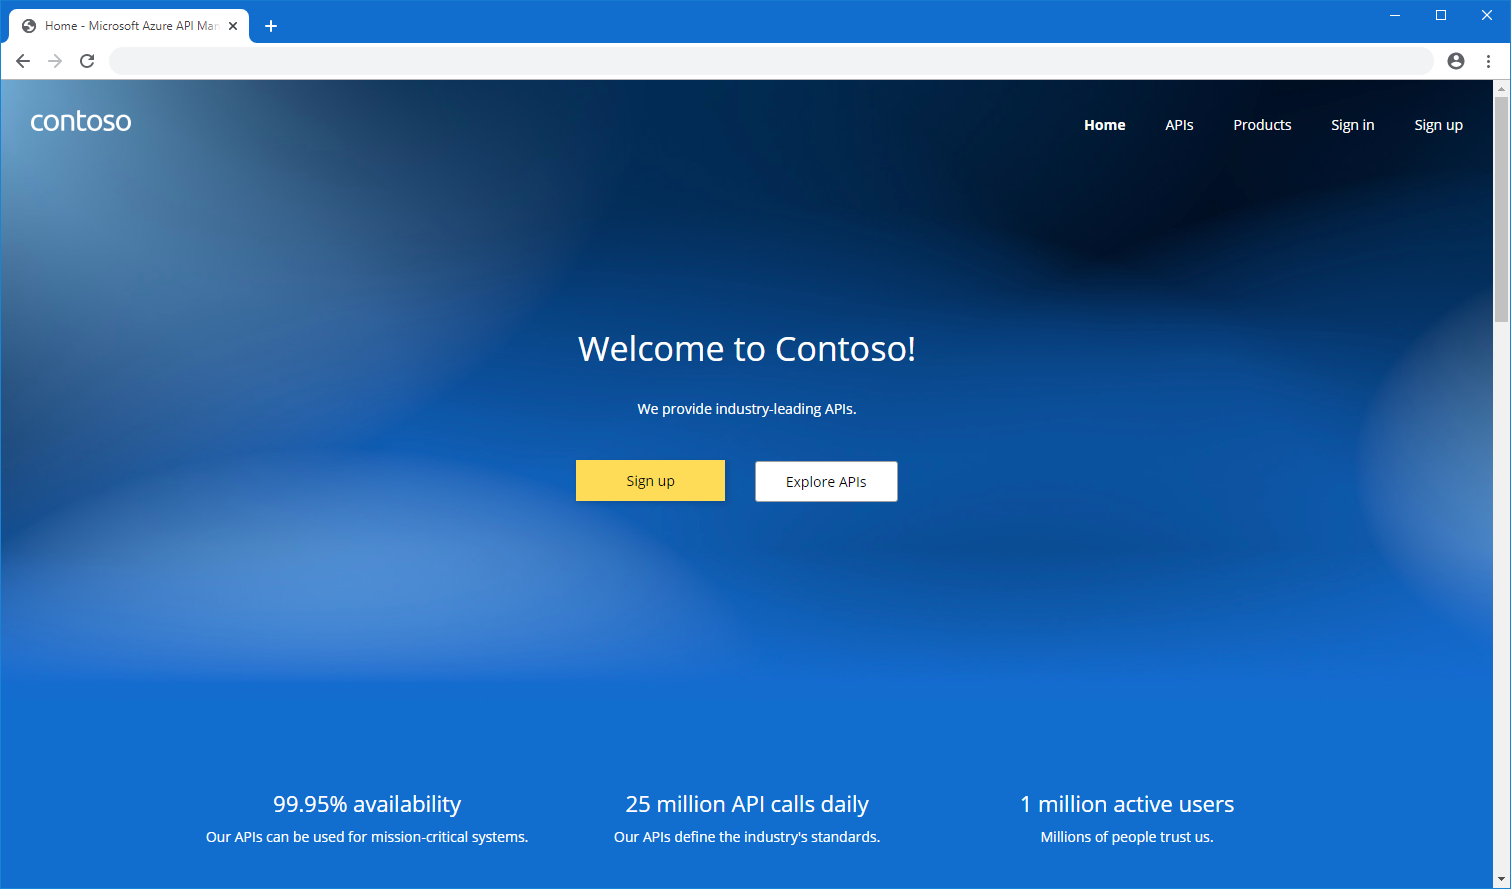
The developer portal is an automatically generated, fully customizable website with the documentation of your APIs. It is where API consumers can discover your APIs, learn how to use them, and request access.
In this tutorial, you learn how to:
- Access the managed version of the developer portal
- Navigate its administrative interface
- Customize the content
- Publish the changes
- View the published portal
For more information about developer portal features and options, see Azure API Management developer portal overview.
Prerequisites
- Complete the following quickstart: Create an Azure API Management instance.
- Import and publish an API.
Access the portal as an administrator
Follow these steps to access the managed version of the developer portal.
In the Azure portal, navigate to your API Management instance.
If you created your instance in a v2 service tier, first enable the developer portal.
- In the left menu, under Developer portal, select Portal settings.
- In the Portal settings window, select Enabled. Select Save.
It might take a few minutes to enable the developer portal.
In the left menu, under Developer portal, select Portal overview. Then select the Developer portal button in the top navigation bar. A new browser tab with an administrative version of the portal will open.
Note
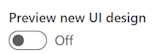
- We're enhancing the developer portal with Fluent UI Web Components in the React framework. We're also refreshing the placeholder content displayed when you first open the portal. You'll see the latest updates and appearance with a portal created after June 2025. Your portal's appearance may differ slightly from the screenshots in this article, but the functionality remains consistent.
- If you're using a version of the portal built on the previous components, you'll see a Preview new UI design setting at the bottom of the menu on the left. Enable this setting to try the latest experience. You'll switch to the new UI permanently if you reset your portal.
Understand the portal's administrative interface
As an administrator, you can customize the content of the portal using the visual editor.
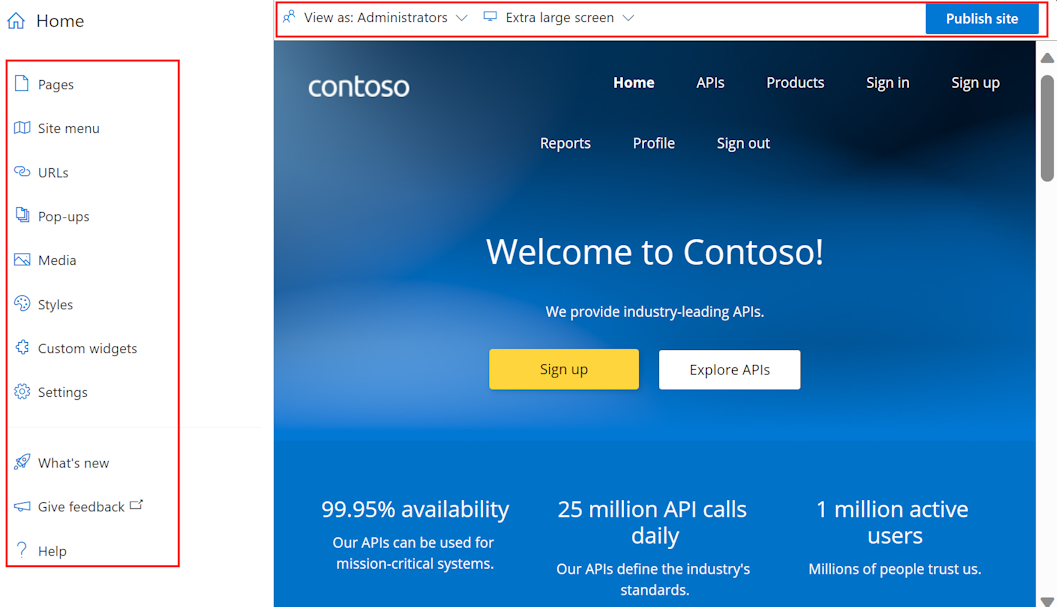
Use the menu options on the left to create or modify pages, media, layouts, menus, styles, or website settings.
On the top, switch between viewports (for screens of different sizes), or view the elements of the portal visible to users in different groups. For example, you might want to display certain pages only to groups that are associated with particular products, or to users that can access specific APIs.
Also, save or undo changes you make, or publish the website.
Tip
For even more flexibility in customizing the portal, you can use an open-source developer portal plugin for WordPress. Take advantage of site capabilities in WordPress to localize content, customize menus, apply custom stylesheets, and more.
Add an image to the media library
You'll want to use your own images and other media content in the developer portal to reflect your organization's branding. If an image that you want to use isn't already in the portal's media library, add it in the developer portal:
- In the left menu of the visual editor, select Media.
- Do one of the following:
- Select Upload file and select a local image file on your computer.
- Select Link file. Enter a Reference URL to the image file and other details. Then select Download.
- Select Close to exit the media library.
Tip
You can also add an image to the media library by dragging and dropping it directly in the visual editor window.
Replace the default logo on the home page
A placeholder logo is provided in the top left corner of the navigation bar. You can replace it with your own logo to match your organization's branding.
- In the developer portal, select the default logo in the top left of the navigation bar.
- Select Edit.
- In the Picture pop-up, under Main, select Source.
- In the Media pop-up, select one of the following:
- An image already uploaded in your media library
- Upload file to upload a new image file to your media library
- None if you don't want to use a logo
- The logo updates in real time.
- Select outside the pop-up windows to exit the media library.
- In the top bar, select Save.
Edit content on the home page
The default Home page and other pages are provided with placeholder text and other images. You can either remove entire sections containing this content or keep the structure and adjust the elements one by one. Replace the generated text and images with your own and make sure any links point to desired locations.
Edit the structure and content of the generated pages in several ways. For example:
Select existing text and heading elements to edit and format content.
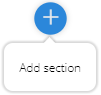
Add a section to a page by hovering over a blank area then click a blue icon with a plus sign. Choose from among several section layouts.
Add a widget (for example, text, image, custom widget, or APIs list) by hovering over a blank area, then click a gray icon with a plus sign.

Rearrange items in a page by drag-and-drop.
Edit the site's primary color
To change colors, gradients, typography, buttons, and other user interface elements in the developer portal, edit the site styles. For example, change the primary color used in the navigation bar, buttons, and other elements to match your organization's branding.
- In the developer portal, in the left menu of the visual editor, select Styles.
- Under the Colors section, select the color style item you want to edit. For example, select Primary.
- Select Edit color.
- Select the color from the color-picker, or enter the color hex code.
- In the top bar, elect Save.
The updated color is applied to the site in real time.
Tip
If you want, add and name another color item by selecting + Add color on the Styles page.
Change the background image on the home page
You can change the background on your portal's home page to an image or color that matches your organization's branding. If you haven't already uploaded a different image to the media library, you can upload it before changing the background image, or when you're changing it.
On the home page of the developer portal, click in the top right corner so that the top section is highlighted at the corners and a pop-up menu appears.
To the right of Edit article in the pop-up menu, select the up-down arrow (Switch to parent).
Select Edit section.
In the Section pop-up, under Background, select one of the icons:

- Clear background, to remove a background image
- Background image, to select an image from the media library, or to upload a new image
- Background color, to select a color from the color picker, or to clear a color
- Background gradient, to select a gradient from your site styles page, or to clear a gradient
Under Background sizing, make a selection appropriate for your background.
In the top bar, select Save.
Change the default layout
The developer portal uses layouts to define common content elements such as navigation bars and footers on groups of related pages. Each page is automatically matched with a layout based on a URL template.
By default, the developer portal comes with two layouts:
Home - used for the home page (URL template
/)Default - used for all other pages (URL template
/*).
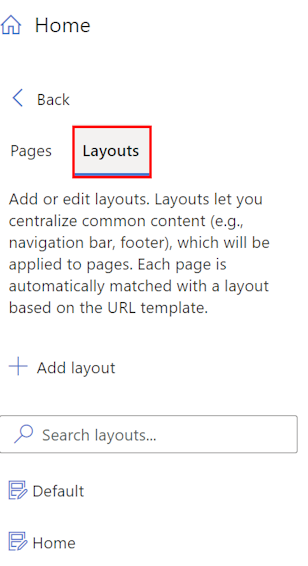
You can change the layout for any page in the developer portal and define new layouts to apply to pages that match other URL templates.
For example, to change the logo that's used in the navigation bar of the Default layout to match your organization's branding:
- In the left menu of the visual editor, select Pages.
- Select the Layouts tab, and select Default.
- Select the picture of the logo in the upper left corner and select Edit.
- Under Main, select Source.
- In the Media pop-up windows, select one of the following:
- An image already uploaded in your media library
- Upload file to upload a new image file to your media file that you can select
- None if you don't want to use a logo
- The logo updates in real time.
- Select outside the pop-up windows to exit the media library.
- In the top bar, select Save.
Edit navigation menus
You can edit the navigation menus at the top of the developer portal pages to change the order of menu items, add items, or remove items. You can also change the name of menu items and the URL or other content they point to.
For example, the Default and Home layouts for the developer portal display two menus to guest users of the developer portal:
- a main menu with links to Home, APIs, and Products
- an anonymous user menu with links to Sign in and Sign up pages.
However, you might want to customize them. For example, if you want to independently invite users to your site, you could disable the Sign up link in the anonymous user menu.

- In the left menu of the visual editor, select Site menu.
- On the left, expand Anonymous user menu.
- Select the settings (gear icon) next to Sign up, and select Delete.
- Select Save.
Edit site settings
Edit the site settings for the developer portal to change the site name, description, and other details.
- In the left menu of the visual editor, select Settings.
- In the Settings pop-up, enter the site metadata you want to change. Optionally, set up a favicon for the site from an image in your media library.
- In the top bar, Save.
Tip
If you want to change the site's domain name, you must first set up a custom domain in your API Management instance. Learn more about custom domain names in API Management.
Publish the portal
To make your portal and its latest changes available to visitors, you need to publish it.
To publish from the administrative interface of the developer portal:
Make sure you saved your changes by selecting the Save button.
In the menu at the top, select Publish site. This operation may take a few minutes.

Tip
Another option is to publish the site from the Azure portal. On the Portal overview page of your API Management instance in the Azure portal, select Publish.
Visit the published portal
To view your changes after you publish the portal, access it at the same URL as the administrative panel, for example https://contoso-api.developer.azure-api.net. View it in a separate browser session (using incognito or private browsing mode) as an external visitor.
Apply the CORS policy on APIs
To let the visitors of your portal test the APIs through the built-in interactive console, enable CORS (cross-origin resource sharing) on your APIs, if you haven't already done so. On the Portal overview page of your API Management instance in the Azure portal, select Enable CORS. Learn more.
Next steps
In this tutorial, you learned how to:
- Access the managed version of the developer portal
- Navigate its administrative interface
- Customize the content
- Publish the changes
- View the published portal
Advance to the next tutorial:
See related content about the developer portal:
- Azure API Management developer portal overview
- Configure authentication to the developer portal with usernames and passwords, Microsoft Entra ID, or Microsoft Entra External ID.
- Learn more about customizing and extending the functionality of the developer portal.