Add video clips to your projects
Important
Due to the Azure Media Services retirement announcement, Azure AI Video Indexer announces Azure AI Video Indexer features adjustments. See Changes related to Azure Media Service (AMS) retirement to understand what this means for your Azure AI Video Indexer account. See the Preparing for AMS retirement: VI update and migration guide.
The Azure AI Video Indexer website enables you to use your video's deep insights to: find the right media content, locate the parts that you’re interested in, and use the results to create an entirely new project.
Once created, the project can be rendered and downloaded from Azure AI Video Indexer and be used in your own editing applications or downstream workflows.
Some scenarios where you may find this feature useful are:
- Creating movie highlights for trailers.
- Using old clips of videos in news casts.
- Creating shorter content for social media.
This article shows how to create a project and add selected clips from the videos to the project.
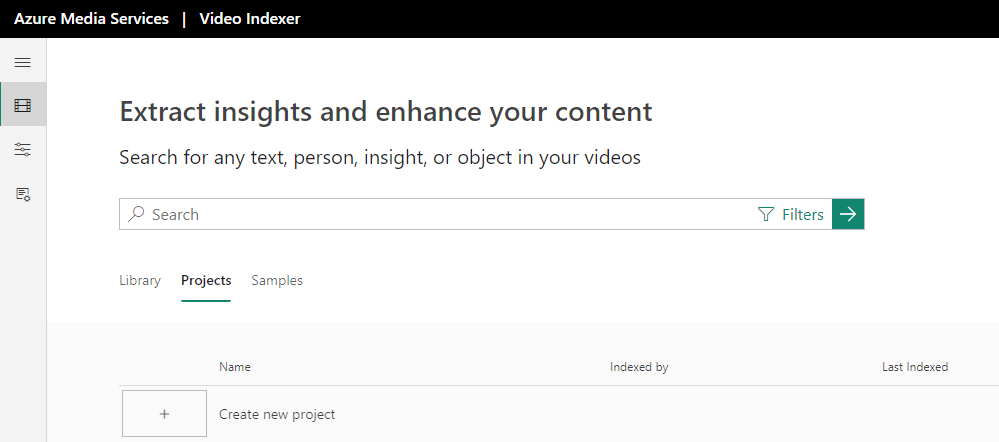
Create new project and manage videos
Browse to the Azure AI Video Indexer website and sign in.
Select the Projects tab. If you have created projects before, you will see all of your other projects here.
Click Create new project.
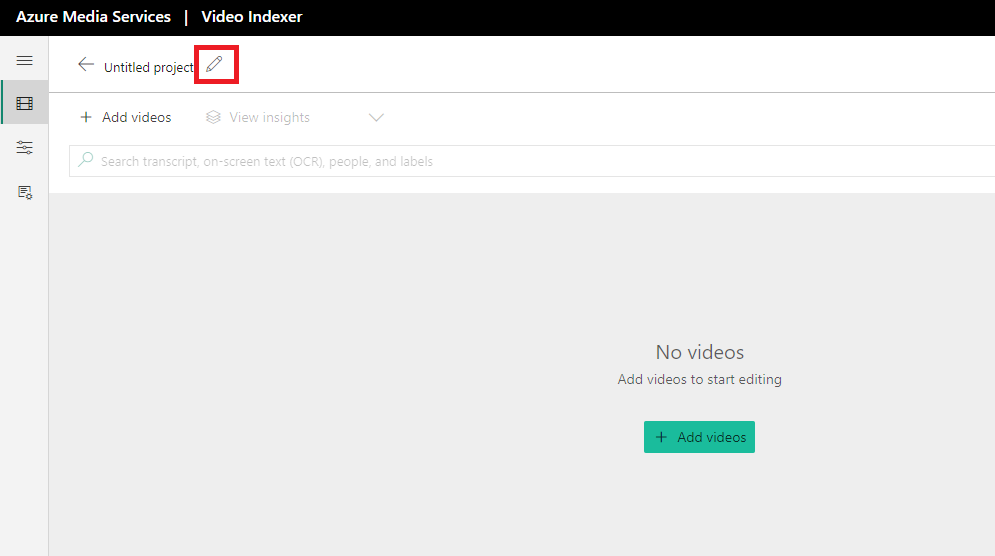
Give your project a name by clicking on the pencil icon. Replace the text that says "Untitled project" with your project name and click on the check.
Add videos to the project
Note
Currently, projects may only contain videos indexed in the same language.
Once you select a video in one language, you cannot add the videos in your account that are in a different language, the videos that have other languages will be grayed out/disabled.
Add videos that you want to work with in this project by selecting Add videos.
You will see all the videos in your account and a search box that says "Search for text, keywords, or visual content". You can search for videos that have a specified person, label, brand, keyword, or occurrence in the transcript and OCR.
For example, in the image below, we were looking for videos that mention "custom vision" in transcript only (use Filter if you want to filter your search results).
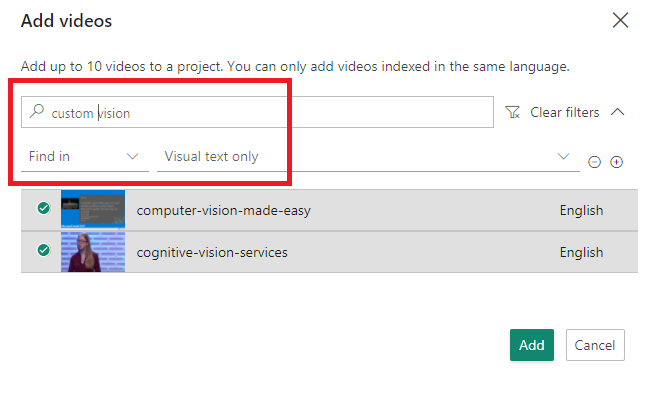
Click Add to add videos to the project.
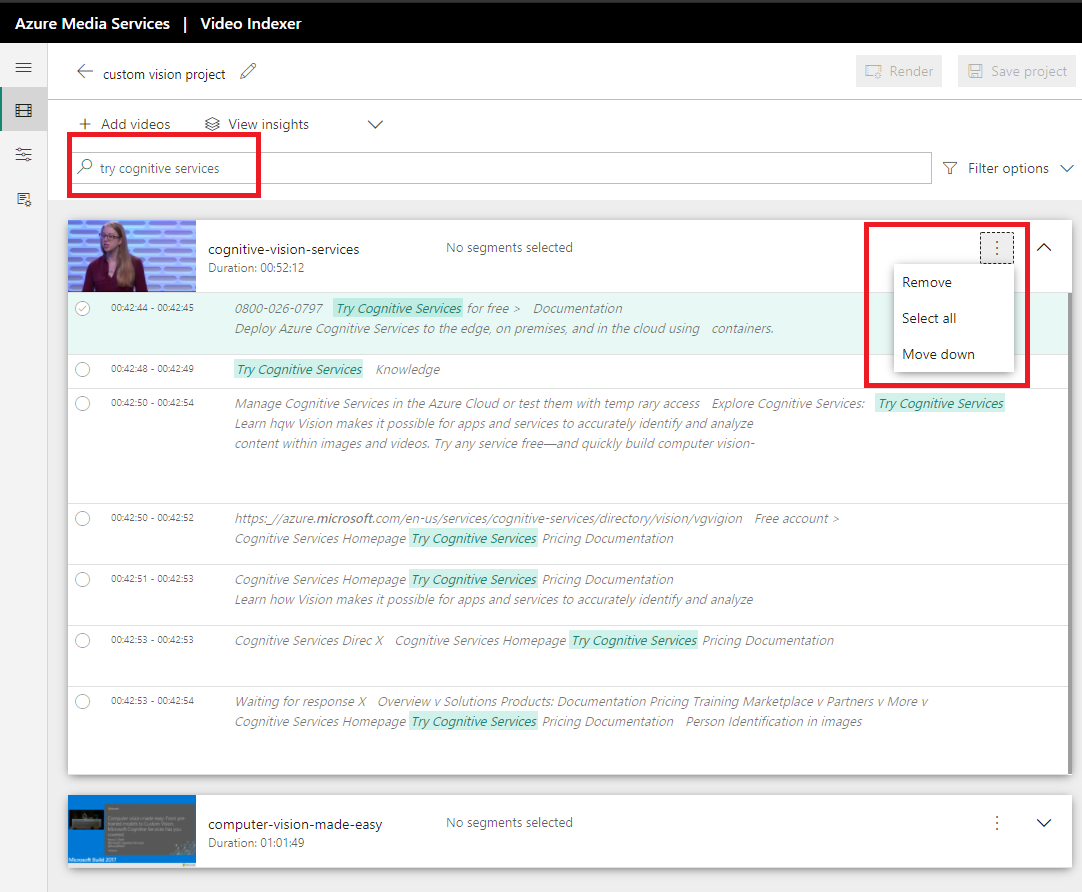
Now, you will see all of the videos you chose. These are the videos from which you are going to select clips for your project.
You can rearrange the order of the videos by dragging and dropping or by selecting the list menu button and selecting Move down or Move up. From the list menu, you will also be able to remove the video from this project.
You can add more videos to this project at any time by selecting Add videos. You can also add multiple occurrences of the same video to your project. You might want to do this if you want to show a clip from one video and then a clip from another and then another clip from the first video.
Select clips to use in your project
If you click on the downward arrow on the right side of each video, you will open up the insights in the video based on time stamps (clips of the video).
To create queries for specific clips, use the search box that says "Search in transcript, visual text, people, and labels".
Select View Insights to customize which insights you want to see and which you don't want to see.
Add filters to further specify details on what scenes you are looking for by selecting Filter options.
You can add multiple filters.
Once you are happy with your results, select the clips you want to add to this project by selecting the segment you want to add. You can unselect this clip by clicking on the segment again.
Add all segments of a video (or, all that were returned after your search) by clicking on the list menu option next to the video and selecting Select all.
As you are selecting and ordering your clips, you can preview the video in the player on the right side of the page.
Important
Remember to save your project when you make changes by selecting Save project at the top of the page.
Render and download the project
Note
For Azure AI Video Indexer paid accounts, rendering your project has encoding costs. Azure AI Video Indexer trial accounts are limited to 5 hours of rendering.
Once you are done, make sure that your project has been saved. You can now render this project. Click Render, a popup dialog comes up that tells you that Azure AI Video Indexer will render a file and then the download link will be sent to your email. Select Proceed.
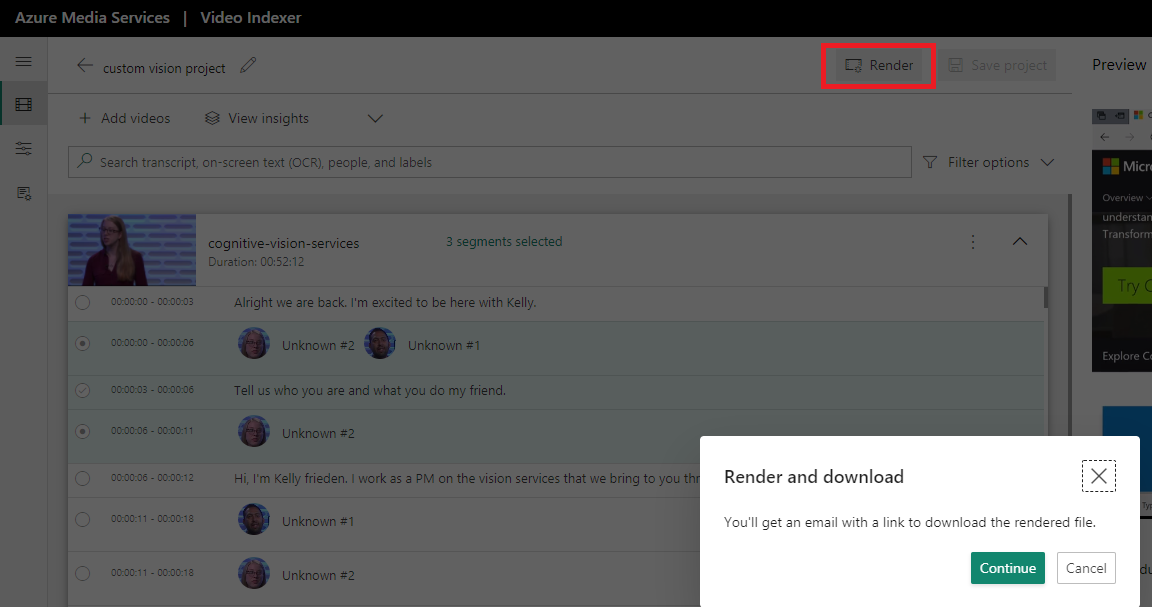
You will also see a notification that the project is being rendered on top of the page. Once it is done being rendered, you will see a new notification that the project has been successfully rendered. Click the notification to download the project. It will download the project in mp4 format.
You can access saved projects from the Projects tab.
If you select this project, you see all the insights and the timeline of this project. If you select Video editor, you can continue making edits to this project. Edits include adding or removing videos and clips or renaming the project.
Create a project from your video
You can create a new project directly from a video in your account.
Go to the Library tab of the Azure AI Video Indexer website.
Open the video that you want to use to create your project. On the insights and timeline page, select the Video editor button.
This takes you to the same page that you used to create a new project. Unlike the new project, you see the timestamped insights segments of the video, that you had started editing previously.
See also
Feedback
Coming soon: Throughout 2024 we will be phasing out GitHub Issues as the feedback mechanism for content and replacing it with a new feedback system. For more information see: https://aka.ms/ContentUserFeedback.
Submit and view feedback for