Deploy Azure Traffic Manager to balance Azure VMware Solution workloads
This article walks through the steps of how to integrate Azure Traffic Manager with Azure VMware Solution. The integration balances application workloads across multiple endpoints. This article also walks through the steps of how to configure Traffic Manager to direct traffic between three Azure Application Gateway spanning several Azure VMware Solution regions.
The gateways have Azure VMware Solution virtual machines (VMs) configured as backend pool members to load balance the incoming layer 7 requests. For more information, see Use Azure Application Gateway to protect your web apps on Azure VMware Solution
The diagram shows how Traffic Manager provides load balancing for the applications at the DNS level between regional endpoints. The gateways have backend pool members configured as IIS Servers and referenced as Azure VMware Solution external endpoints. Connection over the virtual network between the three private cloud regions uses an ExpressRoute gateway.

Before you begin, review the Prerequisites list, then go through the following procedures:
- Verify configuration of your application gateways and the NSX segment
- Create your Traffic Manager profile
- Add external endpoints into your Traffic Manager profile
Prerequisites
Three VMs configured as Microsoft IIS Servers running in different Azure VMware Solution regions:
- West US
- West Europe
- East US (on-premises)
An application gateway with external endpoints in the Azure VMware Solution regions previously mentioned.
Host with internet connectivity for verification.
Verify your application gateways configuration
The following steps verify the configuration of your application gateways.
In the Azure portal, select Application gateways to view a list of your current application gateways:
- AVS-GW-WUS
- AVS-GW-EUS (on-premises)
- AVS-GW-WEU
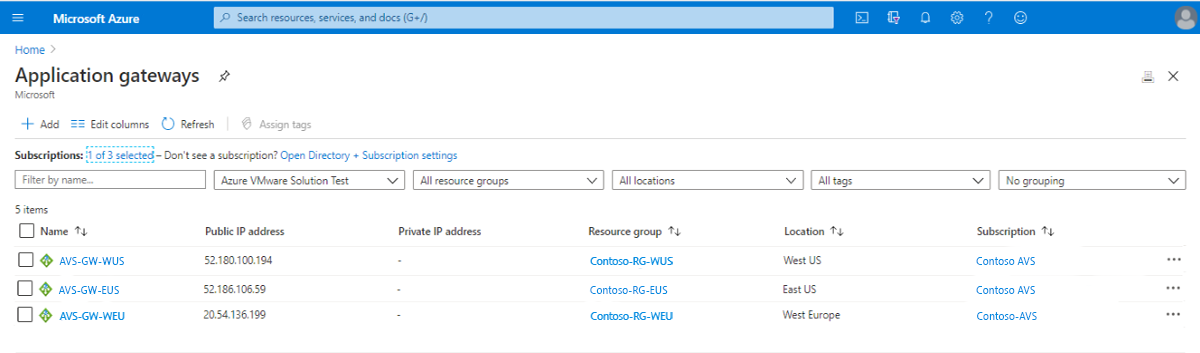
Select one of your previously deployed application gateways.
A window opens showing various information on the application gateway.

Select Backend pools to verify the configuration of one of the backend pools. You see one VM backend pool member configured as a web server with an IP address of 172.29.1.10.

Verify the configuration of the other application gateways and backend pool members.


Verify the NSX segment configuration
The following steps verify the configuration of the NSX segment in the Azure VMware Solution environment.
Select Segments to view your configured segments. You see Contoso-segment1 connected to Contoso-T01 gateway, a Tier-1 flexible router.
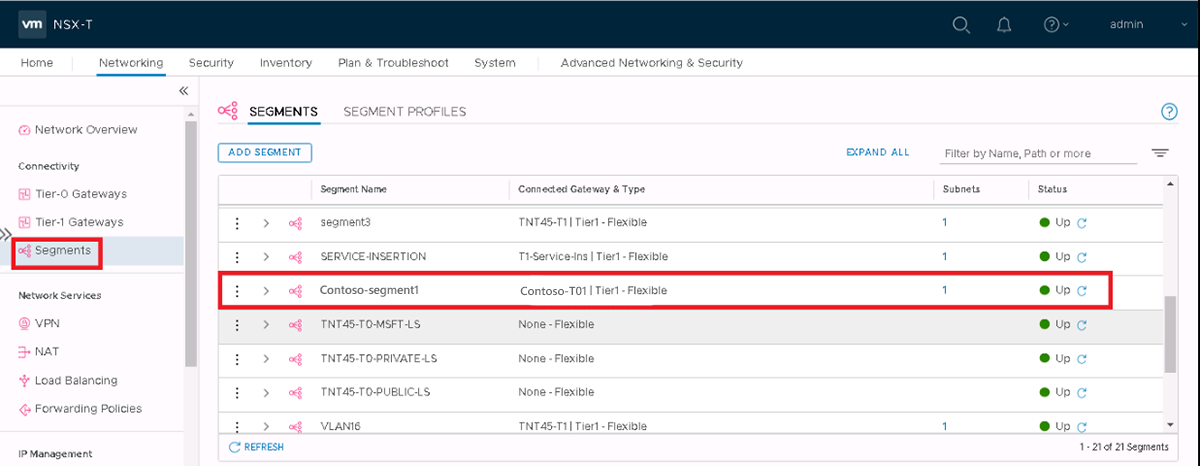
Select Tier-1 Gateways to see a list of Tier-1 gateways with the number of linked segments.
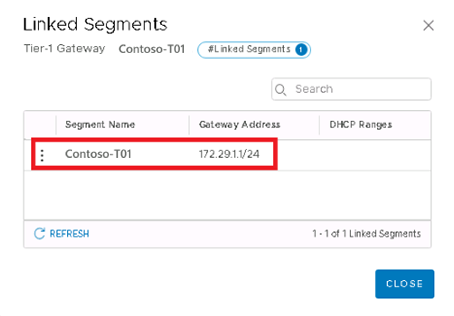
Select the segment linked to Contoso-T01. A window opens showing the logical interface configured on the Tier-01 router. It serves as a gateway to the backend pool member VM connected to the segment.
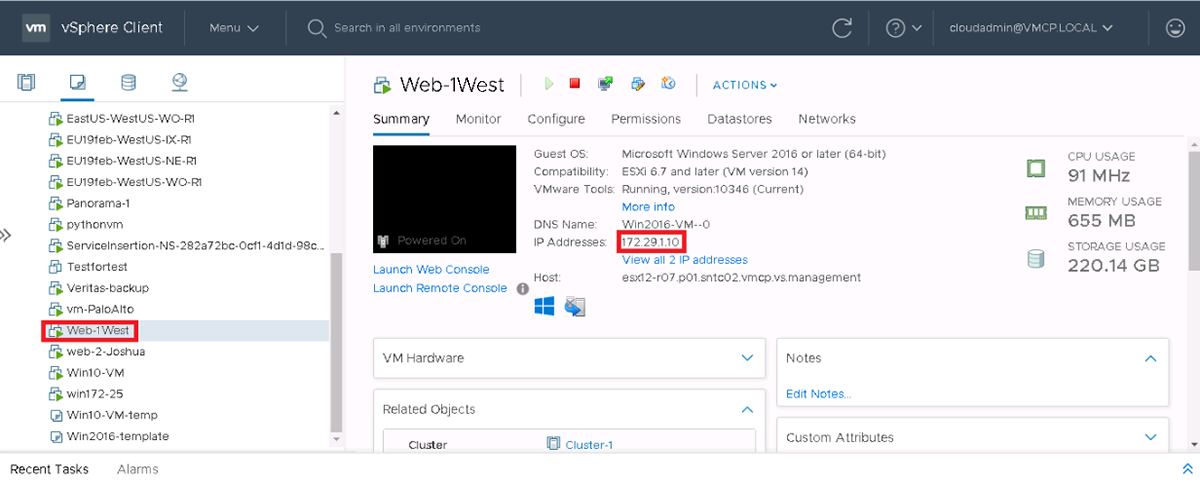
In the vSphere client, select the VM to view its details.
Note
Its IP address matches VM backend pool member configured as a web server from the preceding section: 172.29.1.10.
Select the VM, then select ACTIONS > Edit Settings to verify connection to the NSX segment.


Create your Traffic Manager profile
Sign in to the Azure portal. Under Azure Services > Networking, select Traffic Manager profiles.
Select + Add to create a new Traffic Manager profile.
Provide the following information and then select Create:
- Profile name
- Routing method (use weighted)
- Subscription
- Resource group
Add external endpoints into the Traffic Manager profile
Select the Traffic Manager profile from the search results pane, select Endpoints, and then + Add.
For each of the external endpoints in the different regions, enter the required details and then select Add:
- Type
- Name
- Fully Qualified domain name (FQDN) or IP
- Weight (assign a weight of 1 to each endpoint).
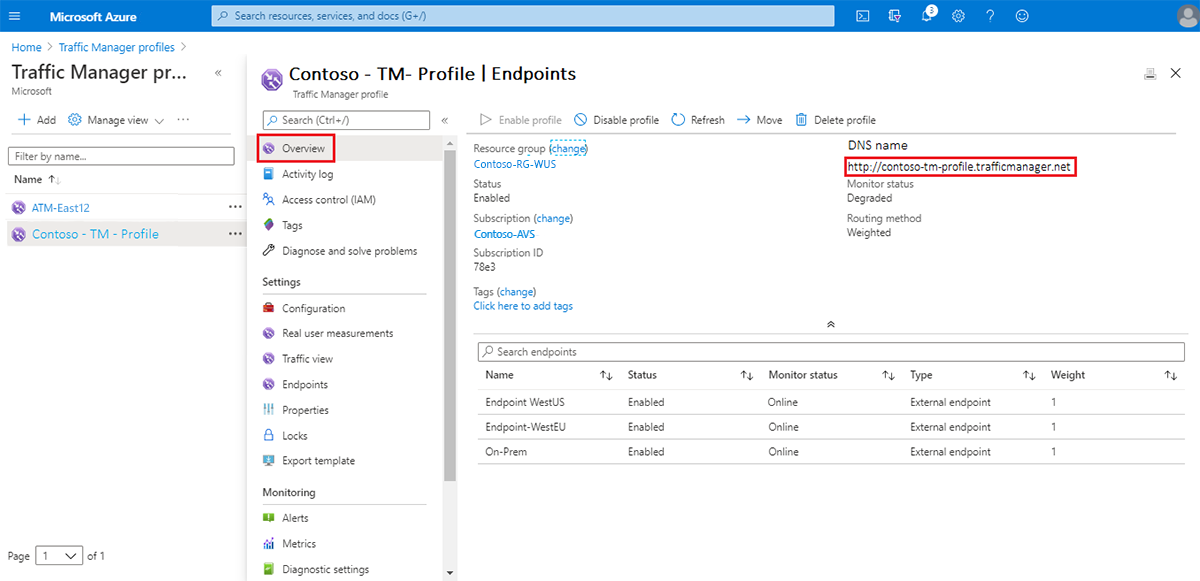
Once created, all three shows in the Traffic Manager profile. The monitor status of all three must be Online.
Select Overview and copy the URL under DNS Name.
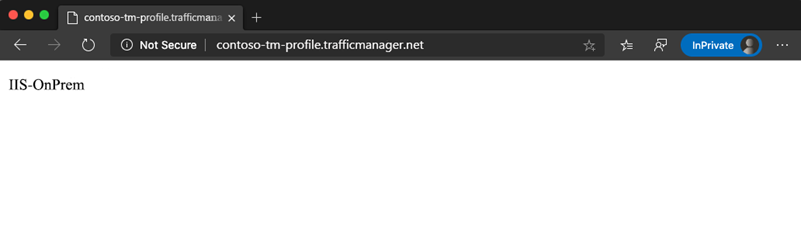
Paste the DNS name URL in a browser. The screenshot shows traffic directing to the West Europe region.

Refresh your browser. The screenshot shows traffic directing to another set of backend pool members in the West US region.

Refresh your browser again. The screenshot shows traffic directing to the final set of backend pool members on-premises.

Next steps
Now that you covered integrating Azure Traffic Manager with Azure VMware Solution, learn more about: