Note
Access to this page requires authorization. You can try signing in or changing directories.
Access to this page requires authorization. You can try changing directories.
In this tutorial, you will learn how to set up a self-hosted integration runtime with multiple on-premises machines and enable remote access from intranet with TLS/SSL certificate (Advanced) to secure communication between integration runtime nodes.
Prerequisites
- An introduction to SSL/TLS Strong Encryption.
- Certificate could be a general TLS certificate for a Web Server. Requirements:
- The certificate must be a publicly trusted X509 v3 certificate. We recommend that you use certificates that are issued by a public partner certification authority (CA).
- Each integration runtime node must trust this certificate.
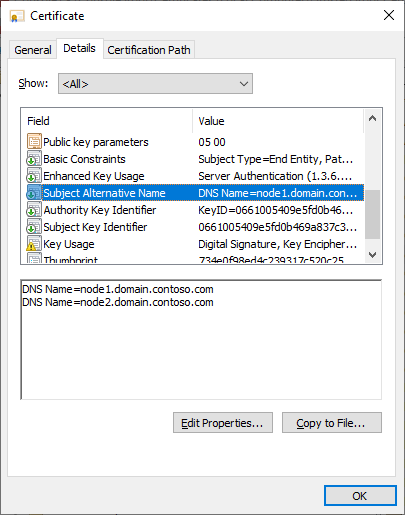
- We recommend Subject Alternative Name (SAN) certificates because all the fully qualified domain names (FQDN) of integration runtime nodes are required to be secured by this certificate. (WCF TLS/SSL validate only check last DNS Name in SAN was fixed in .NET Framework 4.6.1. Refer to Mitigation: X509CertificateClaimSet.FindClaims Method for more information.)
- Wildcard certificates (*) are not supported.
- The certificate must have a private key (like PFX format).
- The certificate can use any key size supported by Windows Server 2012 R2 for TLS/SSL certificates.
- We only support CSP (Cryptographic Service Provider) certificate so far. Certificates that use CNG keys (Key Storage Provider) aren't supported.
Steps
Run below PowerShell command on all machines to get their FQDNs:
[System.Net.Dns]::GetHostByName("localhost").HostNameFor example, the FQDNs are node1.domain.contoso.com and node2.domain.contoso.com.
Generate a certificate with the FQDNs of all machines in Subject Alternative Name.
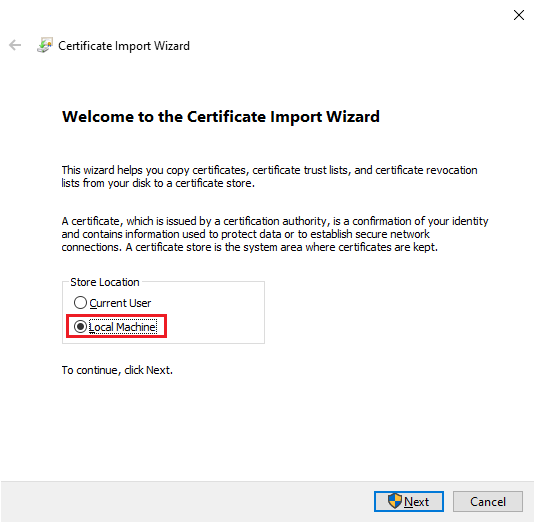
Install the certificate on all nodes to Local Machine -> Personal so that it can be selected on the integration runtime configuration manager:
Click on the certificate and install it.
Select Local Machine and enter the password.
Select Place all certificates in the following store. Click Browse. Select Personal.
Select Finish to install the certificate.
Enable remote access from intranet:
During the self-hosted integration runtime node registration:
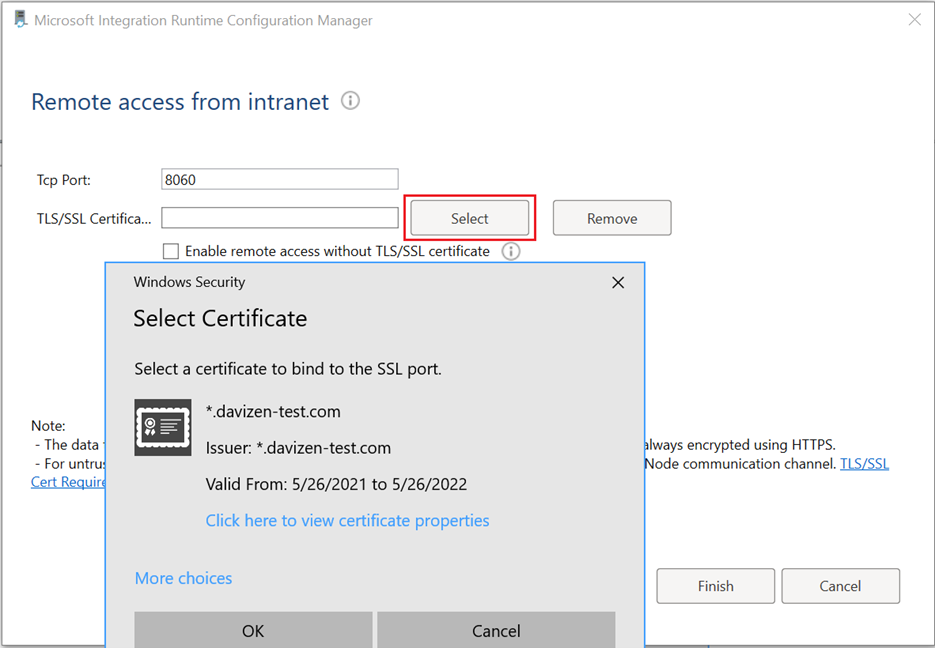
Select Enable remote access from intranet and select Next.
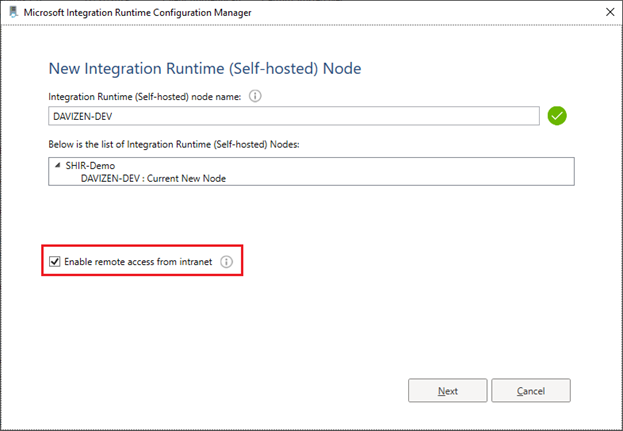
Set the Tcp Port (8060 by default). Make sure the port is open on firewall.
Click Select. In the pop-up window, choose the right certificate and select Finish.
After the self-hosted integration runtime node is registered:
Note
The self-hosted integration runtime can change the remote access settings only when it has single node, which is by design. Otherwise, the radio button cannot be checked.

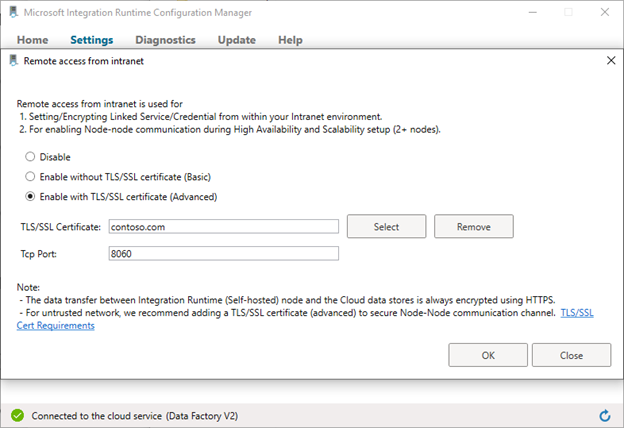
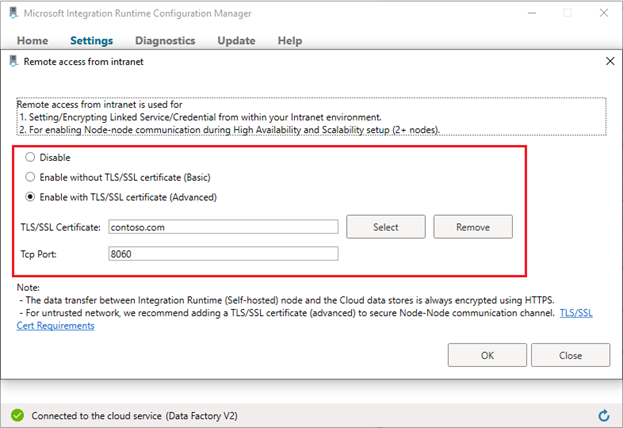
Go to self-hosted Integration Runtime Configuration Manager -> Settings -> Remote access from intranet. Click Change.
Choose Enable with TLS/SSL certificate (Advanced).
Click Select. In the pop-up window, choose the right certificate and select OK.
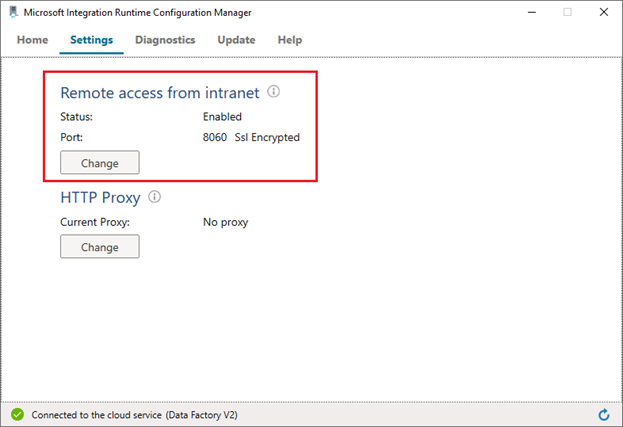
Verify the remote access settings in self-hosted Integration Runtime Configuration Manager.
Using a self-signed certificate if you don’t have the publicly trusted certificate:
Generate and export a self-signed certificate (this step can be skipped if you already have the certificate):
Generate a self-signed certificate via PowerShell (with elevated privileges):
New-SelfSignedCertificate -DnsName contoso.com, node1.domain.contoso.com, node2.domain.contoso.com -Provider "Microsoft Enhanced RSA and AES Cryptographic Provider" -CertStoreLocation cert:\LocalMachine\MyTo export the generated certificate with a private key to a password protected PFX file, you will need its thumbprint. It can be copied from the results of
New-SelfSignedCertificatecommand. For example, it isCEB5B4372AA7BF877E56BCE27542F9F0A1AD197F.Export the generated certificate with the private key via PowerShell (with elevated privileges):
$CertPassword = ConvertTo-SecureString -String “Password” -Force -AsPlainText
Export-PfxCertificate -Cert
cert:\LocalMachine\My\CEB5B4372AA7BF877E56BCE27542F9F0A1AD197F -FilePath C:\self-signedcertificate.pfx -Password $CertPassword
You have exported the certificate with the private key to C:\self-signedcertificate.pfx.
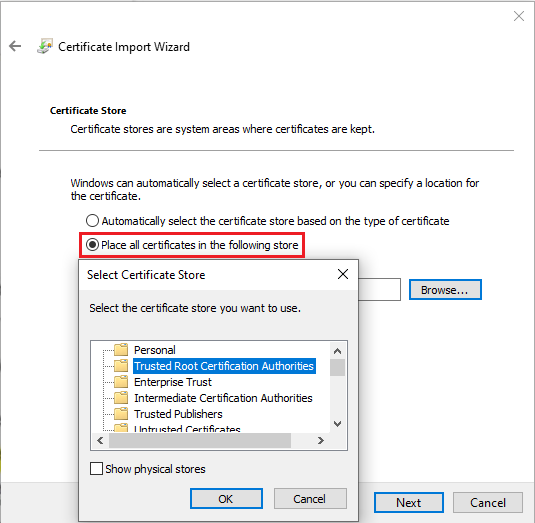
Install the certificate on all nodes to: Local Machine -> Trusted Root Certification Authorities store:
- Click on the certificate and install it.
- Select Local Machine and enter the password.
- Select Place all certificates in the following store. Click Browse. Select Trusted Root Certification Authorities.
- Select Finish to install the certificate.
Troubleshooting
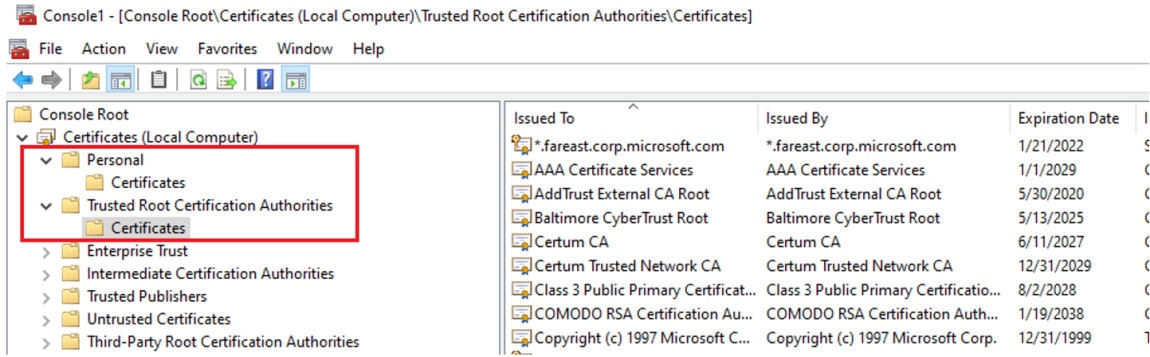
Verify the certificate exists in the target store:
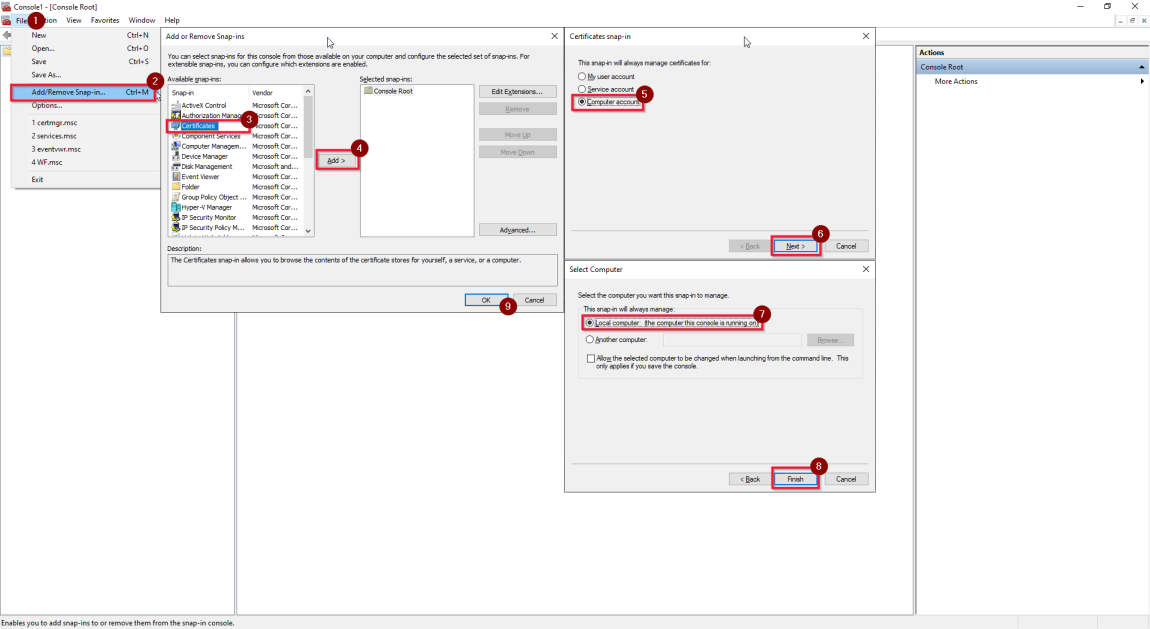
Follow this procedure How to: View certificates with the MMC snap-in - WCF to view Certificates (Local Computer) in the MMC snap-in.
Confirm the certificate is installed in Personal and Trusted Root Certification Authorities store (If it is a self-signed certificate).
Verify the certificate has a private key and isn’t expired.

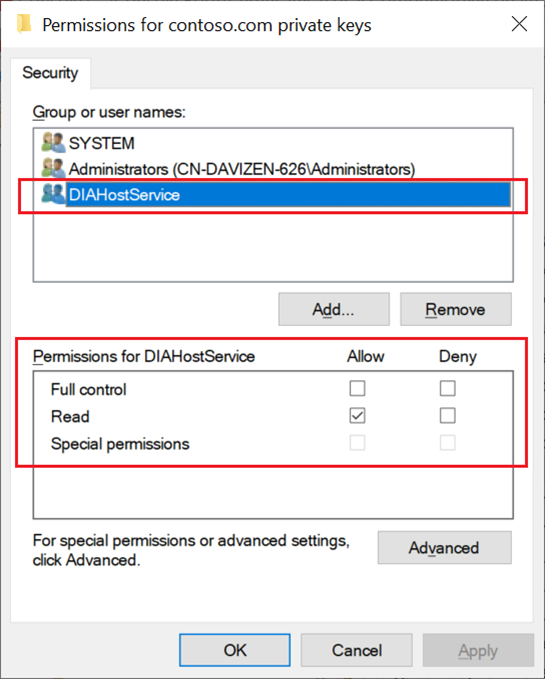
Make sure the service account for the self-hosted integration runtime (default account is NT SERVICE\DIAHostService) has read permission to the private keys of certificate:
Right click on the certificate -> All Tasks -> Manage Private Keys.
If no, grant the permission, Apply and save.