Tutorial: Rack the Azure Stack Edge Pro 2 using a two-post mount
Azure Stack Edge Pro 2 is the next generation of an AI-enabled edge computing device that can transfer data over the network. This device is a part of the Hardware-as-a-service solution offered by Microsoft.
The device must be installed on a standard 19-inch rack. Use the following procedure to rack mount your device on a standard 19-inch rack using a two-post mount.
Prerequisites
- Before you begin, read the safety instructions in your Safety, Environmental, and Regulatory Information booklet. This booklet was shipped with the device.
- Begin installing the rails in the allotted space that is closest to the bottom of the rack enclosure.
- For the rack mounting configuration, you need to supply:
- A Phillips-head screwdriver
Identify the rail kit contents
Inner rail
Chassis
The following screws and nuts:
Rack Type Screws Nuts Square hole  M6X13 (8)
 M6 (8)
Round hole  M5X13 (8)
 M5 (8)
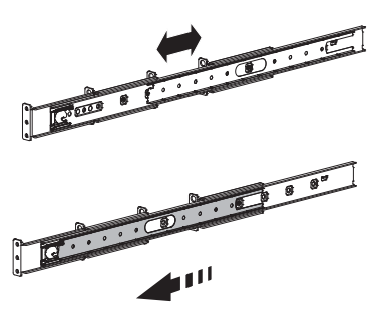
Install and remove rails
Remove the inner rail. Pull the tab forward and take out the inner rail.
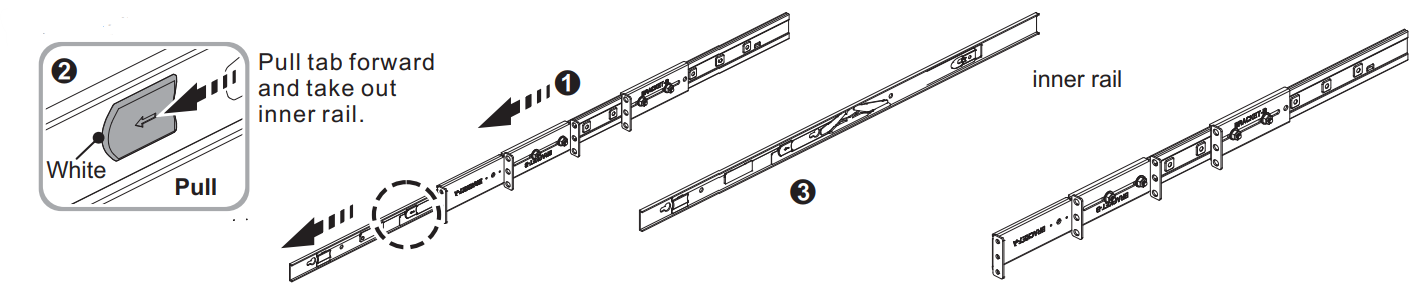
Install the inner rail onto the chassis. Make sure to fasten the inner rail screw.

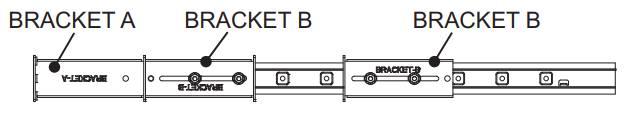
Identify Bracket B:
Adjust the fastening position of Bracket B. Release the retainer by pulling and moving the retainer hook.
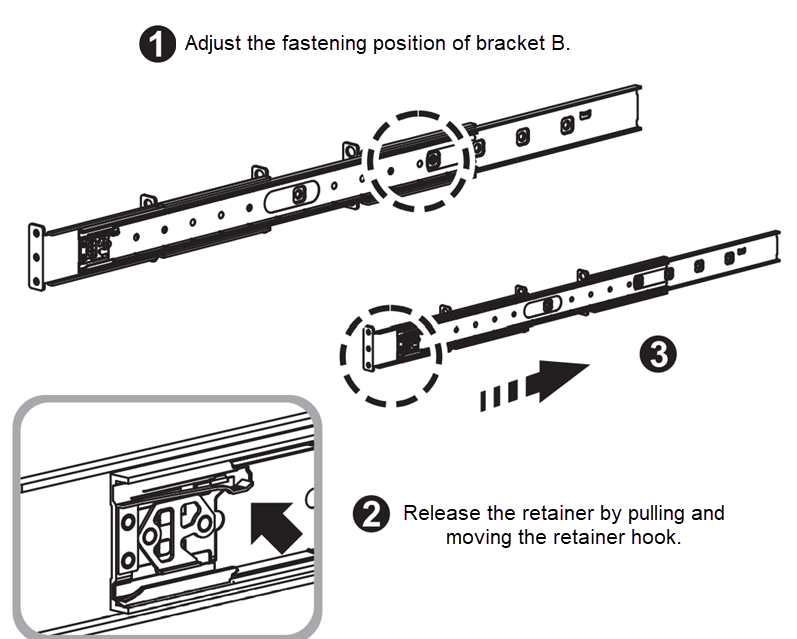
Moving the retainer, loosen the screw by the oval holes on the retainer (no need to detach the screw). When fastening the rear bracket, use the oval hole on the retainer. Don't use other holes on the retainer.
Move Bracket B to the needed position and fasten the screw.
Move and hook the retainer back to the front.
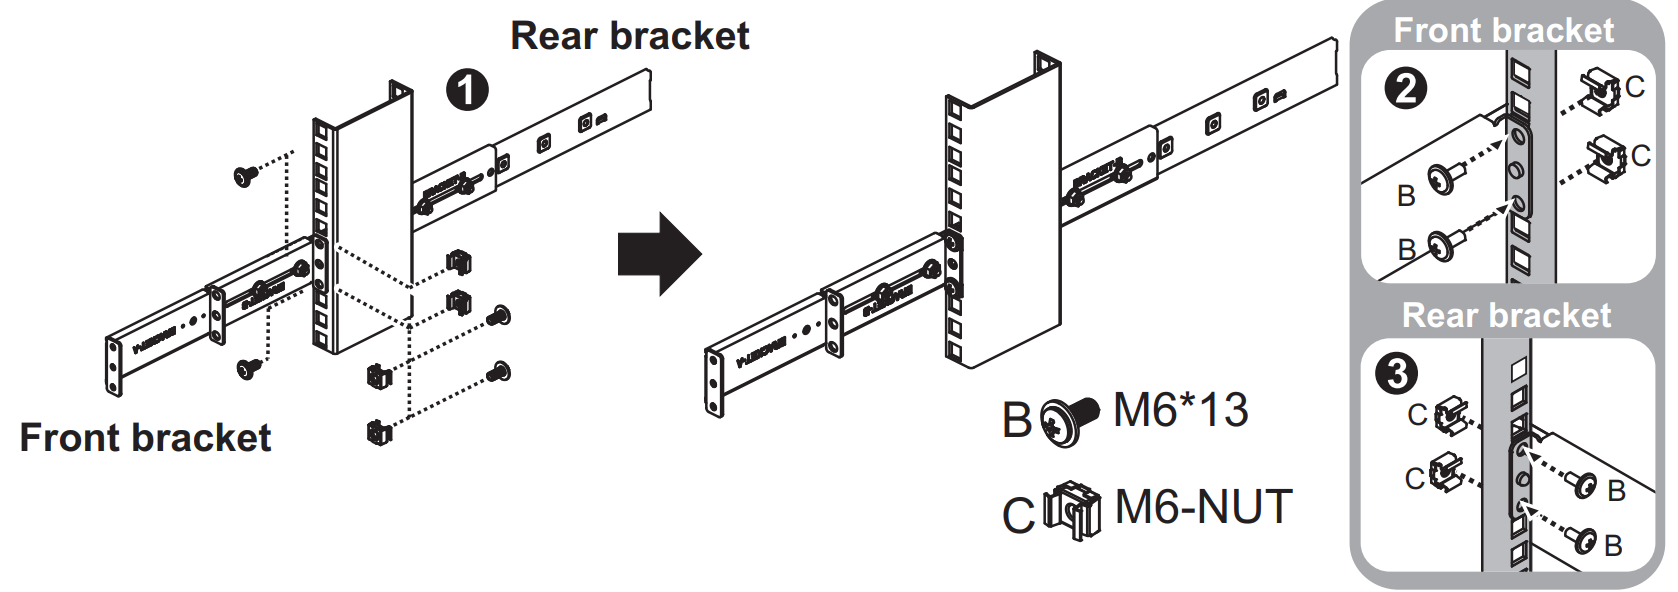
Insert the chassis to complete the installation.
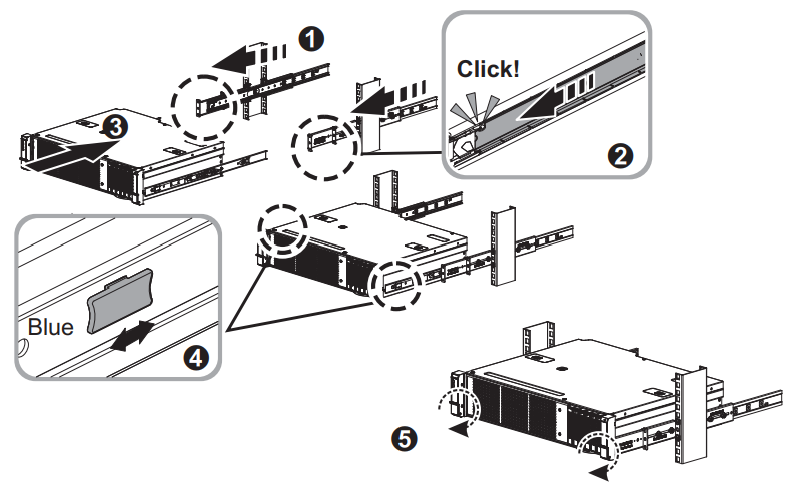
- Ensure the ball bearing retainer is located at the front of the middle rail (reference diagram 1 and 2).
- Insert the chassis into the middle-outer rails (reference diagram 3).
- When you hit a stop, pull/push the blue release tab on the inner rails (reference diagram 4).
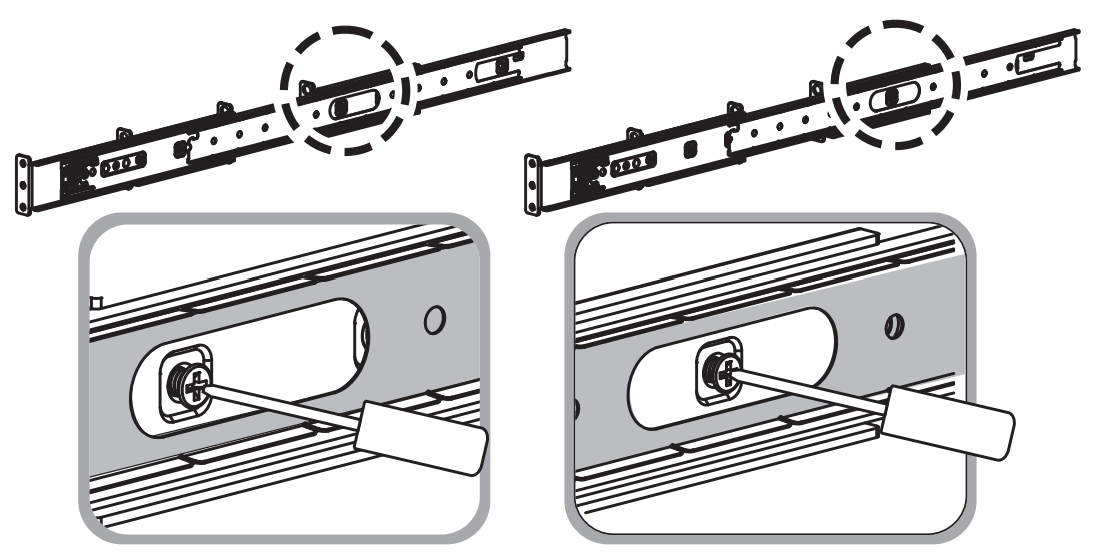
- Tighten the M5 screws of the chassis to the rail once the server is seated (reference diagram 5).
Remove the chassis
- Loosen the M5 screws of the chassis.
- Pull out the chassis.
- Press the disconnect tab forward to remove the chassis.

Feedback
Coming soon: Throughout 2024 we will be phasing out GitHub Issues as the feedback mechanism for content and replacing it with a new feedback system. For more information see: https://aka.ms/ContentUserFeedback.
Submit and view feedback for