Note
Access to this page requires authorization. You can try signing in or changing directories.
Access to this page requires authorization. You can try changing directories.
Learn how to configure your ServiceNow instance for Azure Databricks ingestion.
Choose an authentication method
The following authentication methods are supported:
- User-to-machine (U2M) OAuth (recommended)
- Machine-to-machine (M2M) OAuth (client credentials)
- OAuth Resource Owner Password Credentials (ROPC)
Databricks recommends U2M or M2M OAuth instead of ROPC, because neither requires you to store a ServiceNow user's password in the connection. With U2M OAuth, your ServiceNow connection expires when your auth token expires. By default, this happens every 100 days. To reduce the frequency, you can modify the expiration period in ServiceNow, or use M2M OAuth or ROPC.
Use M2M OAuth for fully automated production pipelines that run without user interaction. With M2M OAuth, Azure Databricks authenticates with the OAuth application's client ID and client secret and requests a new access token as needed, so there's no refresh token to expire and no interactive sign-in. Requests run with the permissions of the OAuth Application User that you assign to the OAuth application. M2M OAuth requires the ServiceNow Washington DC release or later.
You'll use the authentication details you obtain to create a Databricks Unity Catalog connection to ServiceNow.
Grant user permissions
The following options for granting ServiceNow user permissions are supported:
| OAuth scope | Description |
|---|---|
| Admin access (recommended) | Requires the admin and snc_read_only roles. |
| Least-privilege access | Uses table-level ACLs. |
For M2M OAuth, grant these permissions to the user that you assign as the OAuth Application User in Create an OAuth application.
Admin access (recommended)
Databricks recommends this approach because it enables efficient schema discovery. With admin access, the connector retrieves the complete table schema in a single API call per table, regardless of the table's inheritance hierarchy. This reduces API usage and improves pipeline startup performance.
You must have the following permissions:
- To capture deletes, your ServiceNow user must have access to the
sys_audit_delete table, and the table that's being ingested must be tracking deletes (the table attribute can't be set tono_audit_delete=truein ServiceNow). - Your ServiceNow user must have the
adminrole. - (Optional) To limit the admin user to read-only access, you can assign it the
snc_read_onlyrole.
Least-privilege access
Choose this approach only if restricting permissions is more important than minimizing API usage.
Without admin access, the connector must make multiple API calls to discover the schema. Because ServiceNow uses table inheritance, the connector must traverse the full table hierarchy (from the target table up through each parent table to the root), then fetch field definitions for every table in the chain. The exact number of API calls depends on the depth of the table's inheritance hierarchy.
Schema discovery with least-privilege access happens on each pipeline run, not only during initial setup.
This approach requires the following ACL permissions:
sys_dictionarysys_dictionary.*sys_db_objectsys_db_object.*sys_audit_deletesys_audit_delete.*sys_glide_objectsys_glide_object.*
Enable the client credentials grant (M2M only)
Note
Skip this step if you're using U2M OAuth or ROPC.
ServiceNow disables the OAuth client credentials grant by default. A ServiceNow administrator must enable it before you can use M2M OAuth.
In the All menu, enter
sys_properties.listand press Enter.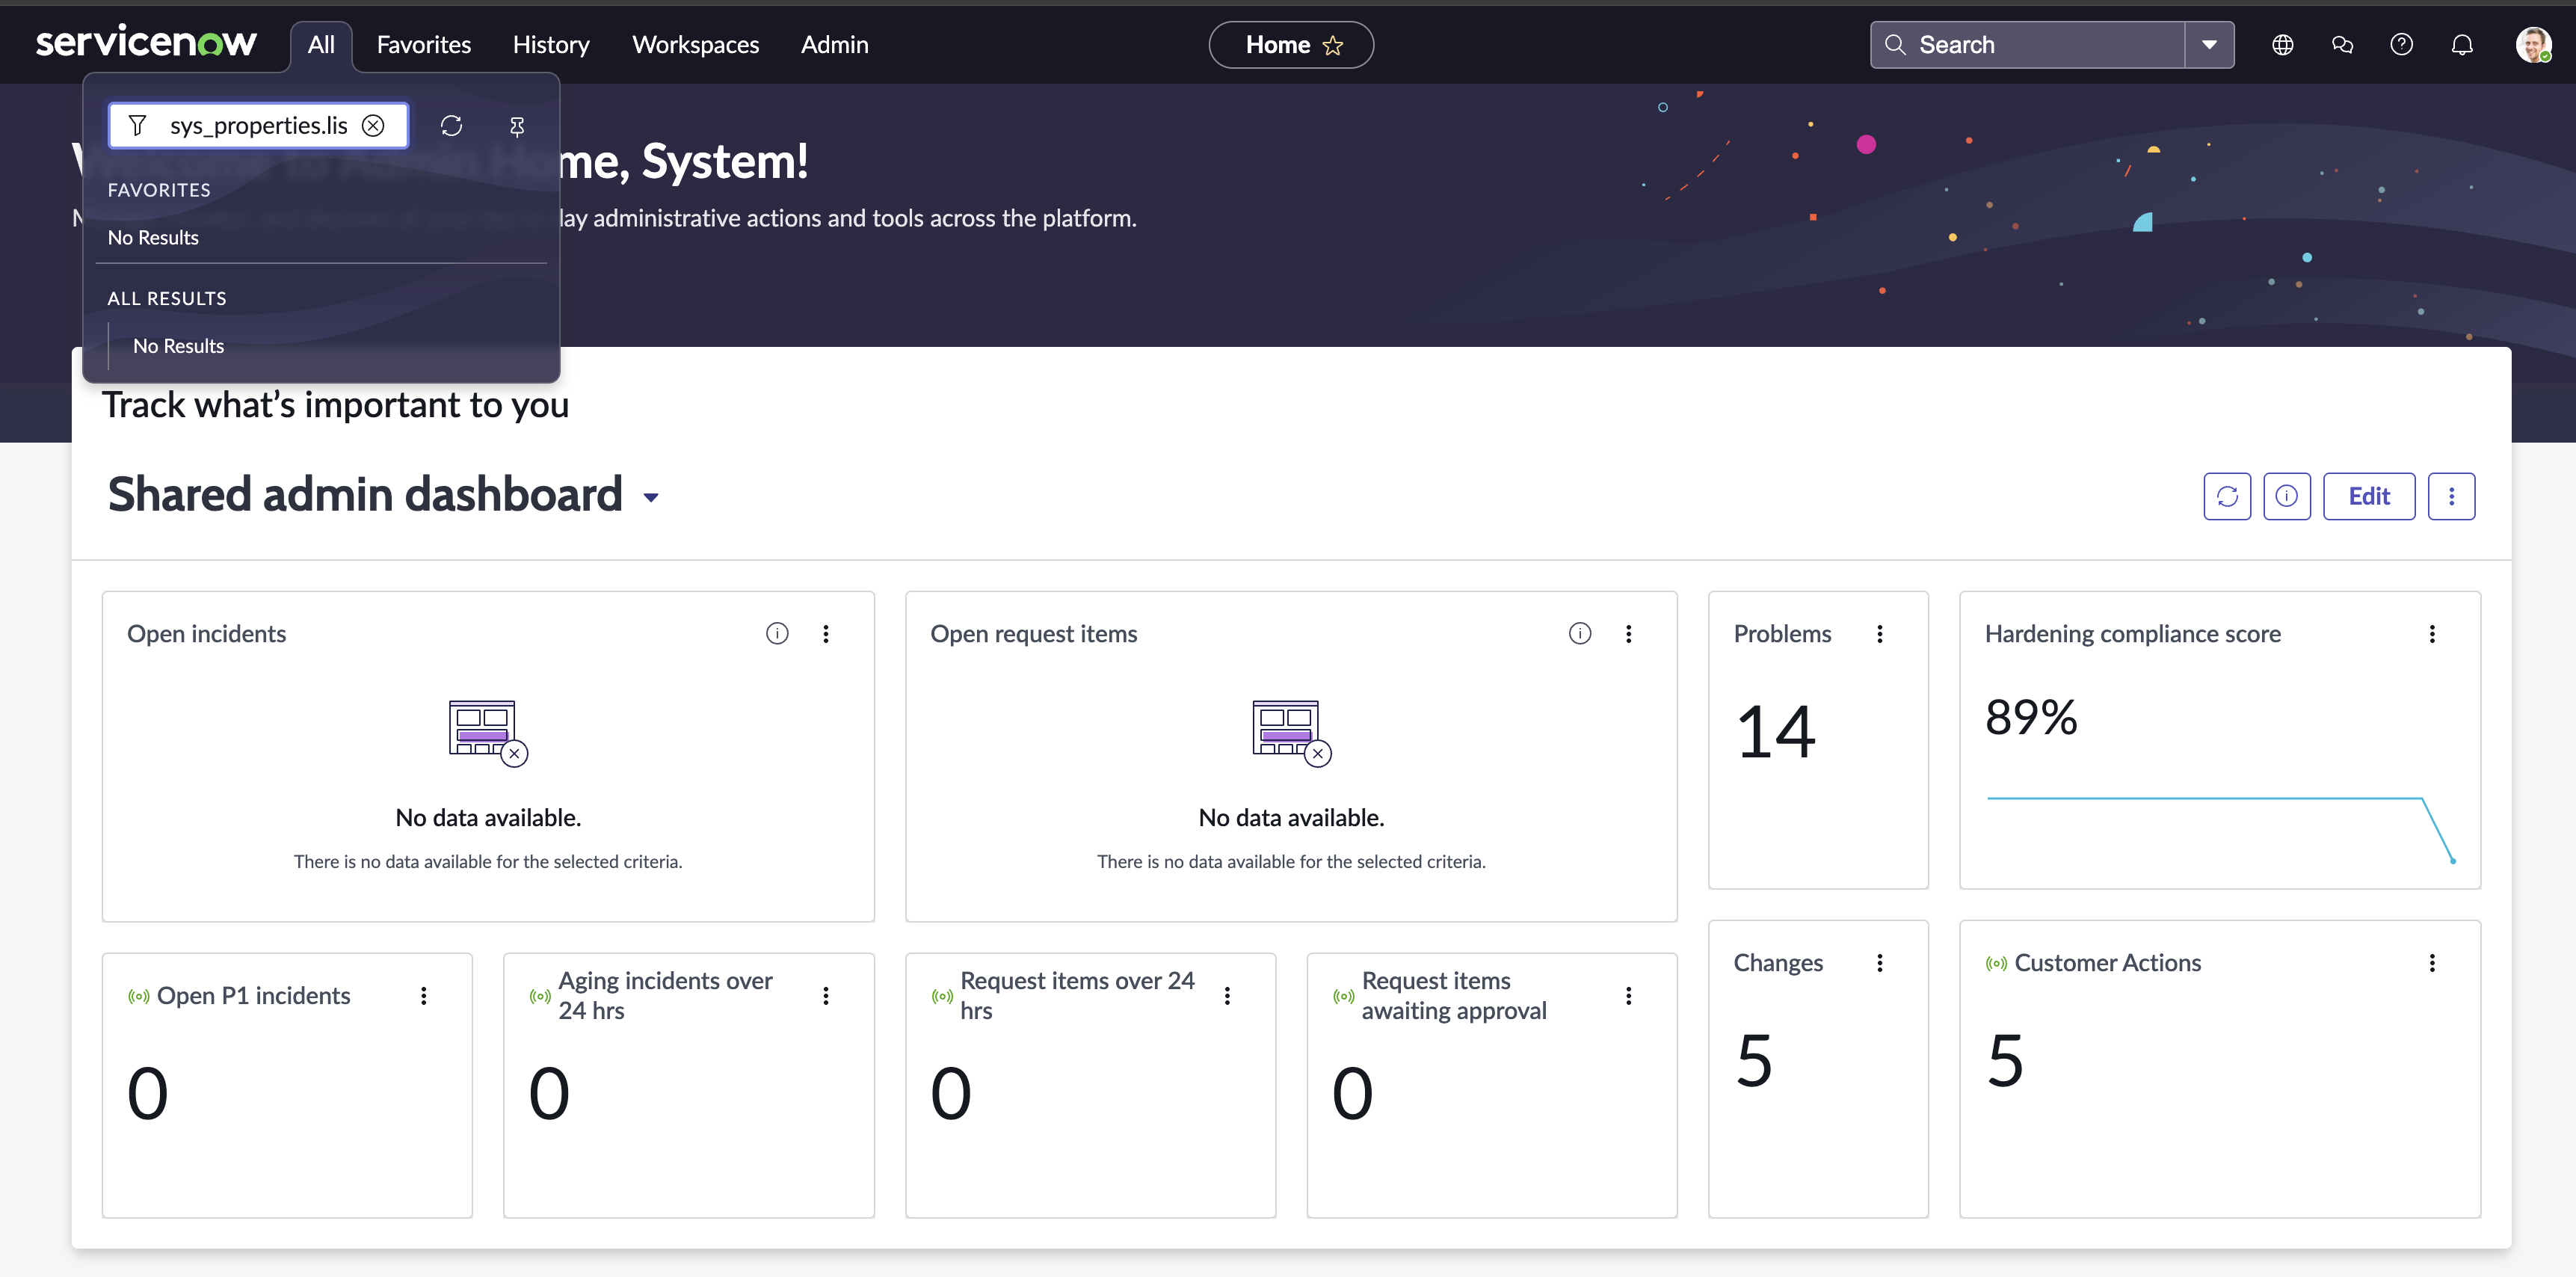
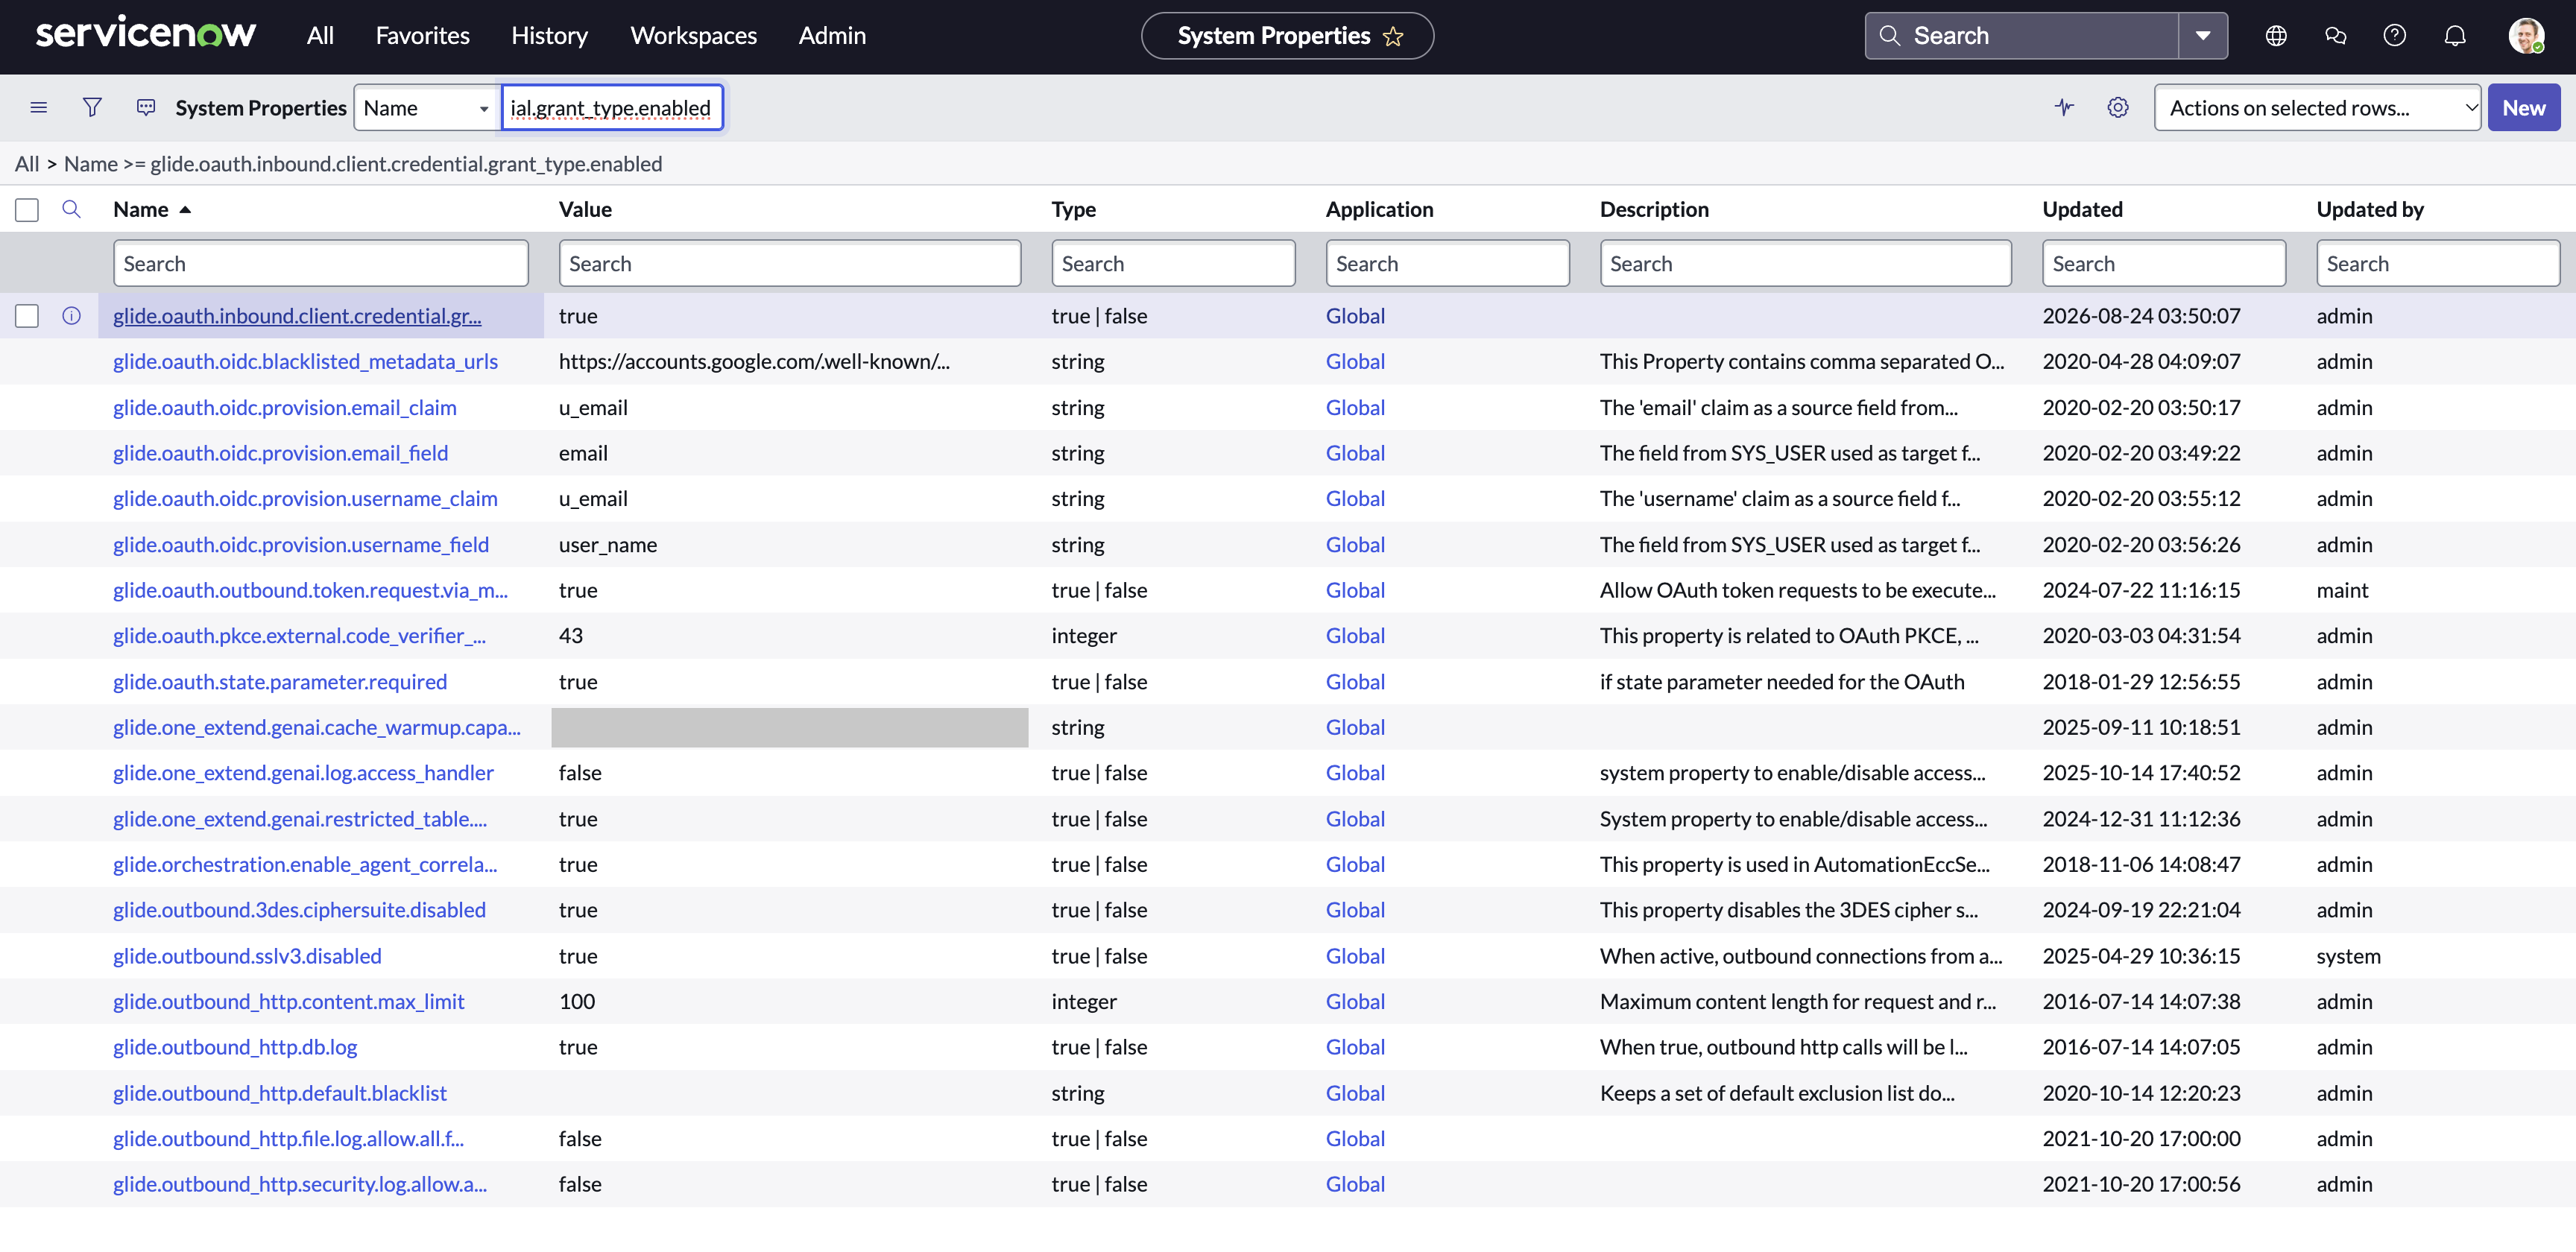
Search for the
glide.oauth.inbound.client.credential.grant_type.enabledproperty.- If the property exists, open it and set Value to
true. - If the property doesn't exist, click New and enter the following:
- Name:
glide.oauth.inbound.client.credential.grant_type.enabled - Type:
true | false - Value:
true
- Name:
- If the property exists, open it and set Value to
Click Update (or Submit for a new property).
Create an OAuth application
This step gathers ServiceNow authentication details for Databricks ingestion.
Important
ServiceNow requires multi-factor authentication (MFA) by default for U2M OAuth. When you sign in, provide your second authentication method as part of the standard MFA flow. This requirement does not apply to M2M OAuth or ROPC authentication.
A ServiceNow administrator can exempt authenticating users from the MFA requirement. For instructions, see User exemption in the ServiceNow documentation.
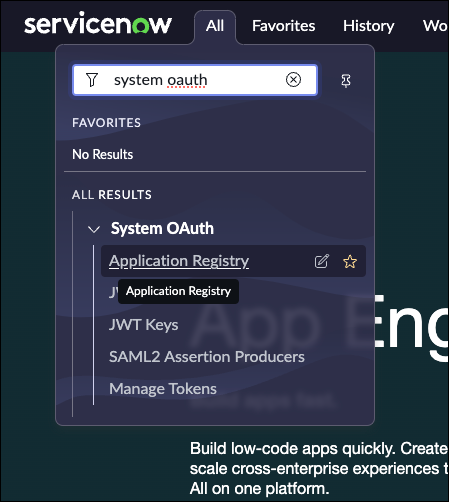
In the All menu, search for System OAuth, and then click Application Registry.
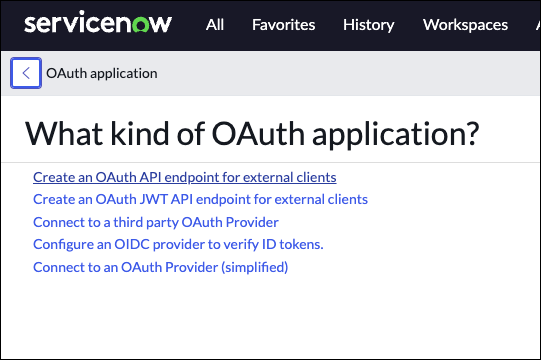
Click New > Create OAuth API endpoint for external clients.
Enter a name for the application.
In the Auth Scopes list, add
useraccount.(U2M OAuth only) For Redirect URL, enter
https://<databricks-workspace-url>/login/oauth/servicenow.html. Replace<databricks-workspace-url>with your full Databricks workspace URL (for example,https://adb-4385079616193792.12.azuredatabricks.net).(M2M OAuth only) Configure the application for the client credentials grant:
If the form has a Default Grant type field, select Client Credentials.
For OAuth Application User, select the user that the connector runs as. This user needs the permissions in Grant user permissions. Databricks recommends a dedicated service account user.
If the OAuth Application User field isn't on the form, right-click the form header, and then click Configure > Form Layout. Move OAuth Application User to the Selected list, and then click Save.
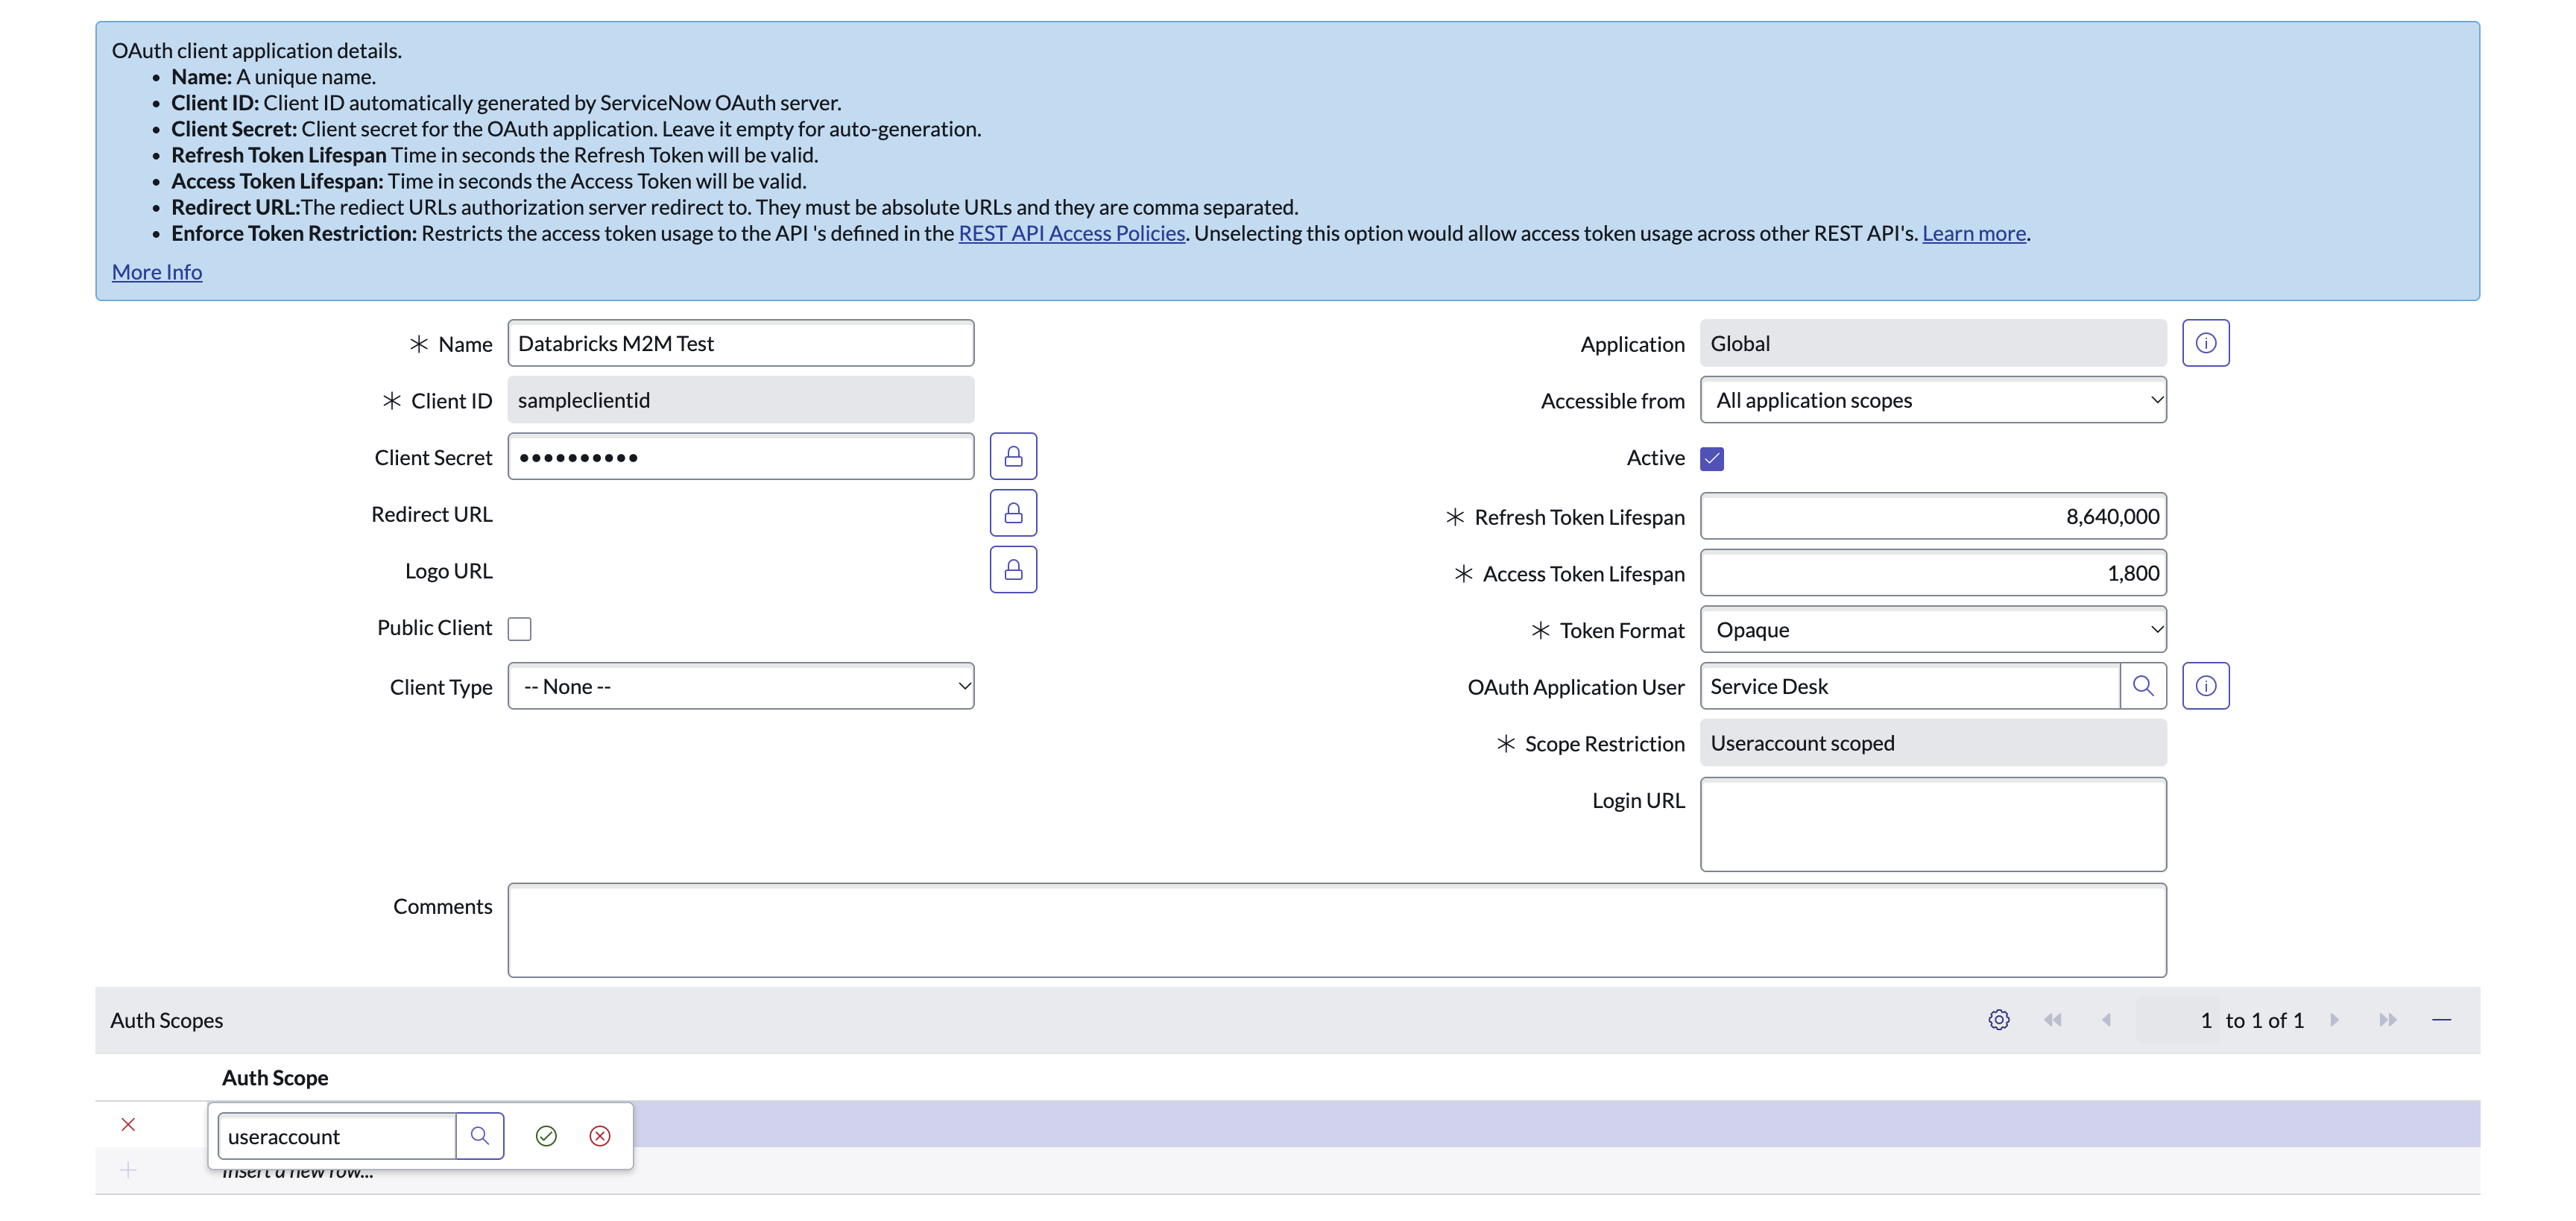
Click Submit.
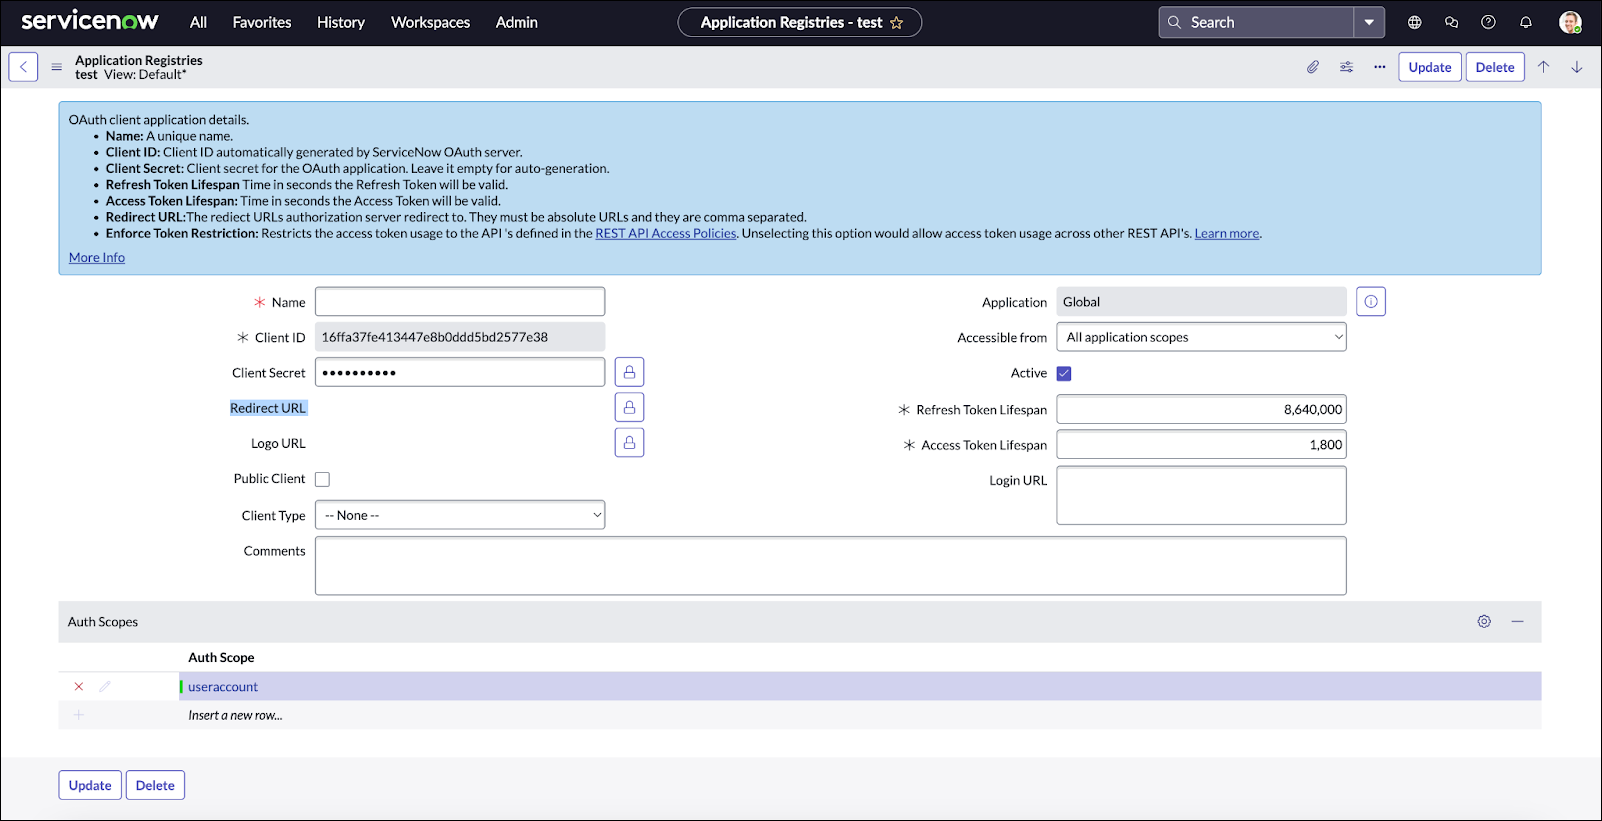
Copy the Client ID and the Client Secret.
Obtain the instance ID
The instance ID is the first part of the ServiceNow account login URL:
https://<instanceid>.service-now.com
For example, if the homepage of your ServiceNow instance is https://abc.service-now.com, the instance ID is abc.
Obtain a username and password
Note
This step is only required for the ROPC flow. Databricks recommends using U2M OAuth instead.
Obtain the username and password of an active ServiceNow user.
Enable indexing on the cursor column
To improve ingestion performance, Databricks recommends working with your ServiceNow administrator to enable indexing on the cursor field in ServiceNow. The cursor column is selected from the following list, in order of availability and preference: sys_updated_on (first choice), sys_created_on (second choice), sys_archived (third choice). This is a standard approach for improving performance when ingesting using the ServiceNow APIs. Setting the index allows Databricks to avoid fully scanning the entire cursor column, which can bottleneck large updates. For instructions, see Create a table index in the ServiceNow documentation.