Note
Access to this page requires authorization. You can try signing in or changing directories.
Access to this page requires authorization. You can try changing directories.
This article describes how to create Azure virtual machines (VMs) in Azure DevTest Labs by using the Azure portal. You can also create DevTest Labs VMs by using PowerShell, Azure CLI, an ARM template, or from a shared image gallery.
Prerequisite
- At least user access to a lab in DevTest Labs.
Configure basic settings
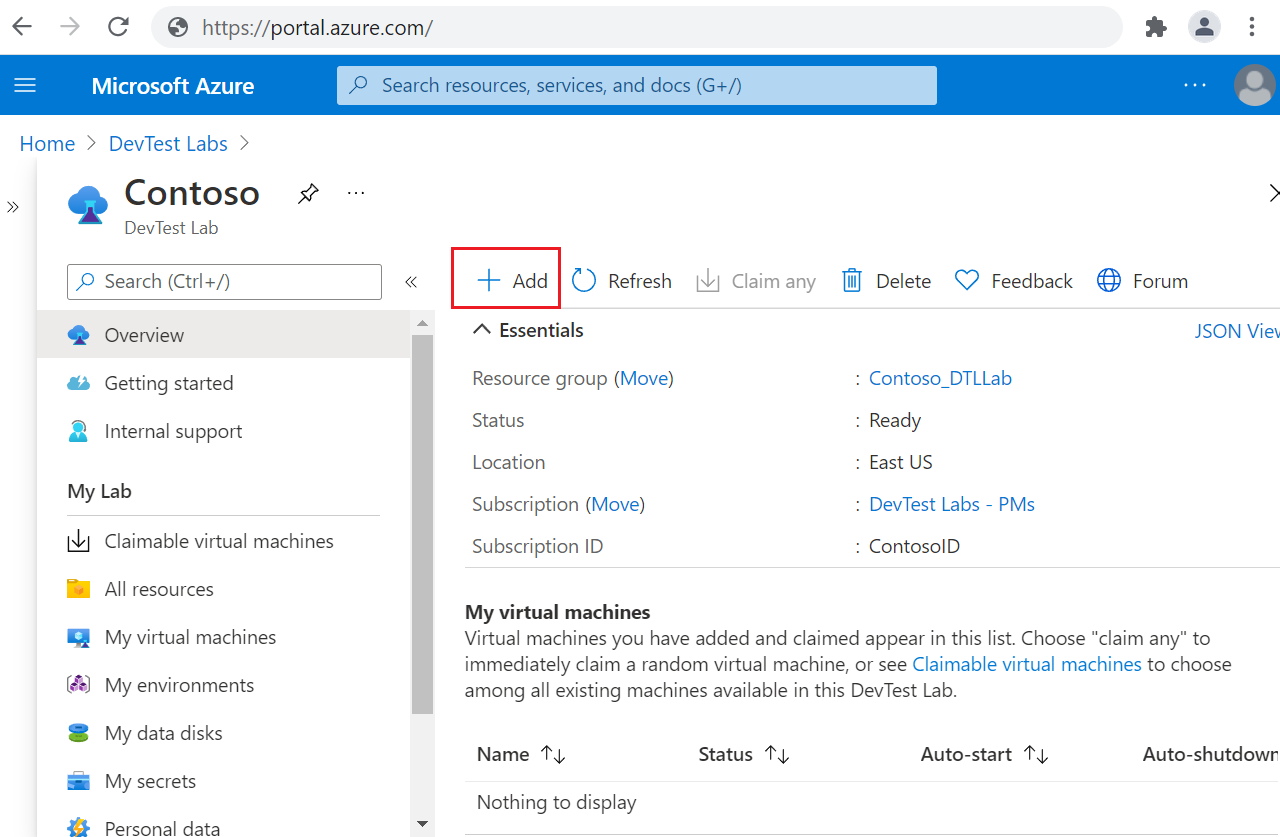
In the Azure portal, go to the Overview page for your lab.
On the lab Overview page, select Add.
On the Choose a base page, select an image for the VM. You can choose from Marketplace images, custom images, or formulas that the lab administrator made available. The following instructions use a Windows 11 Pro image. Some bases might have different settings.
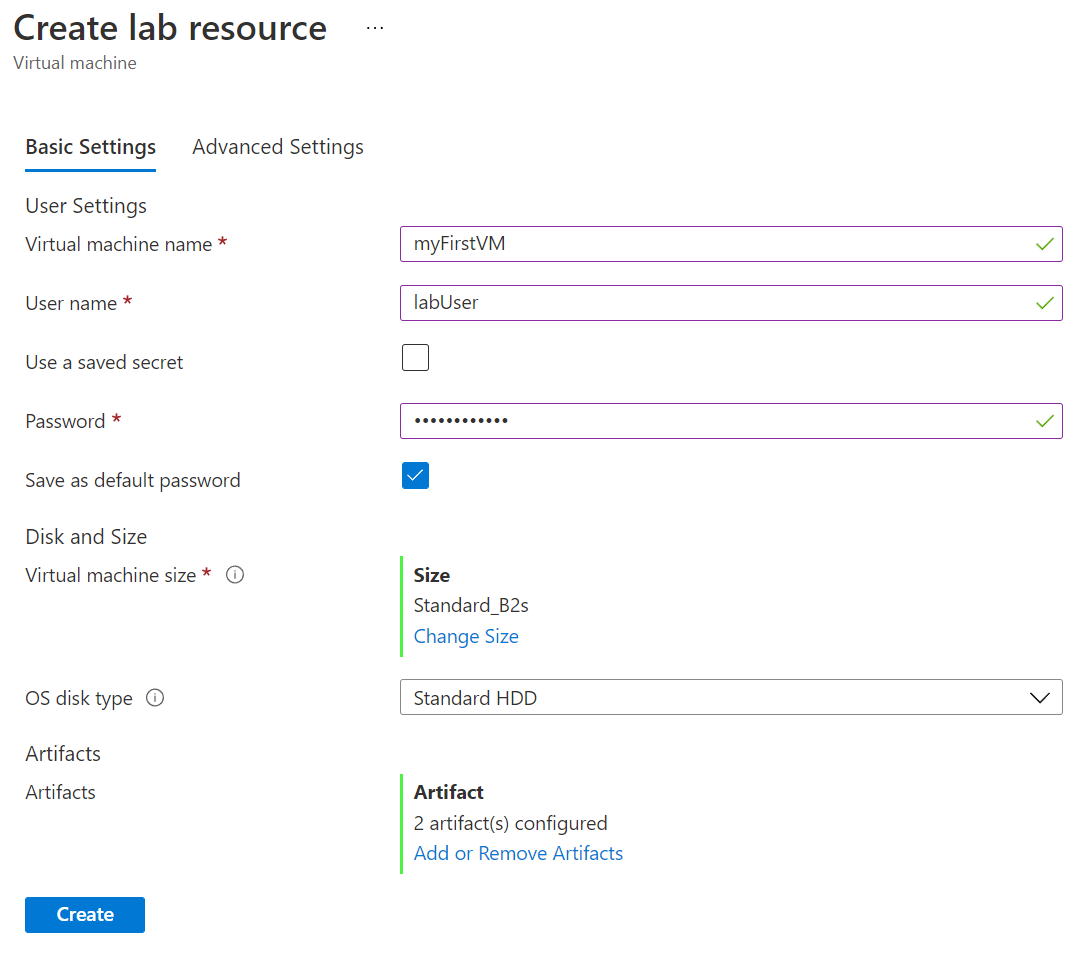
On the Basic Settings tab of the Create lab resource screen, provide the following information:
- Virtual machine name: Keep the autogenerated name, or enter another unique VM name.
- User name: Keep the user name, or enter another user name to grant administrator privileges on the VM.
- Use a saved secret: Select this checkbox to use a secret from Azure Key Vault instead of a password to access the VM. If you select this option, under Secret, select the secret to use from the dropdown list. For more information, see Store secrets in a key vault.
- Password: If you don't use a secret, enter a VM password between 8 and 123 characters long.
- Save as default password: Select this checkbox to save the password in the Key Vault associated with the lab.
- Virtual machine size: Keep the default value for the base, or select Change Size to select a different size. For more information about default VM sizes, see Default VM sizes.
- Allow hibernation: Select this option to enable hibernation for the virtual machine.
Note
If you enable hibernation, you must also select either Public IP or Private IP in Advanced Settings. Hibernation for Shared IPs isn't currently supported.
- OS disk type: Keep the default value for the base, or select a different option from the dropdown list.
- Security type: You can select Trusted launch to enable trusted launch for Generation 2 VMs. If you select Trusted launch, select the Enable secure boot, Enable vTPM, and Integrity monitoring checkboxes as needed. For more information, see Trusted Launch for Azure virtual machines.
- Artifacts: Optionally, select Add or Remove Artifacts to select and configure artifacts to add to the VM. For instructions, see Add artifacts.
Default VM sizes
The default Virtual machine size that appears in Basic Settings depends on the chosen Image Base architecture and the lab's Allowed virtual machine sizes policy setting. For more information, see Set allowed virtual machine sizes.
If the lab's Configuration and policies > Allowed virtual machine sizes policy allows All sizes:
- For an image base with x64 architecture, the default size is D4s_v5.
- For an image base with Arm64 architecture, the default size is D4pls_v5.
If the lab's Configuration and policies > Allowed virtual machine sizes policy allows only limited Selected sizes:
- If D4s_v5 VM size is allowed, the default size is D4s_v5 for an image base with x64 architecture.
- If D4pls_v5 VM size is allowed, the default size is D4pls_v5 for an image base with Arm64 architecture.
- If D4s_v5 size isn't allowed for x64 architectures, or D4pls_v5 size isn't allowed for Arm64 architectures:
- If a 4-core nonpremium CPU size is available, the first available 4-core nonpremium CPU size is selected.
- If no 4-core nonpremium CPU size is available, the first available 4-core CPU size is selected.
- If no 4-core CPU size is available, the first available CPU size is selected.
Add artifacts
Artifacts are tools, actions, or software you can optionally add to lab VMs. You can add artifacts to VMs from the DevTest Labs public artifact repository, or from private artifact repositories connected to the lab. For more information about adding artifacts, see Add artifacts to DevTest Labs VMs.
You can add artifacts to VMs before or after VM creation. To add artifacts after VM creation, see Add artifacts to VMs after creation.
To add or configure artifacts during VM creation:
At the bottom of the Basic Settings tab of the Create lab resource screen, select Add or Remove Artifacts.
On the Add artifacts page, select the arrow next to each artifact you want to add to the VM.
On each Add artifact pane, enter any required and optional parameter values, and then select OK. The artifact appears under Selected artifacts, and the number of configured artifacts updates.
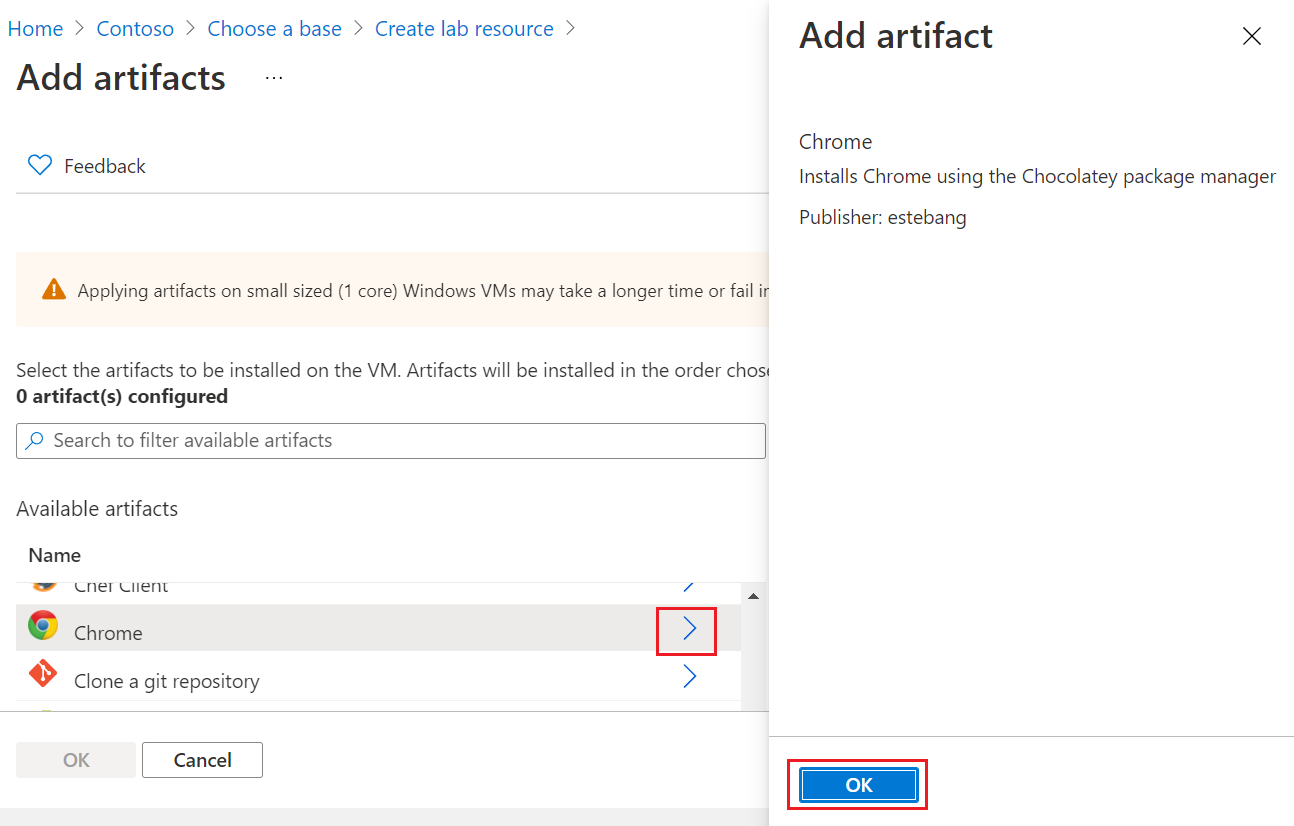
When you're done adding artifacts, select OK on the Add artifacts page.
Configure other settings
After you configure basic settings and artifacts, you can optionally configure advanced settings and tags for your VM.
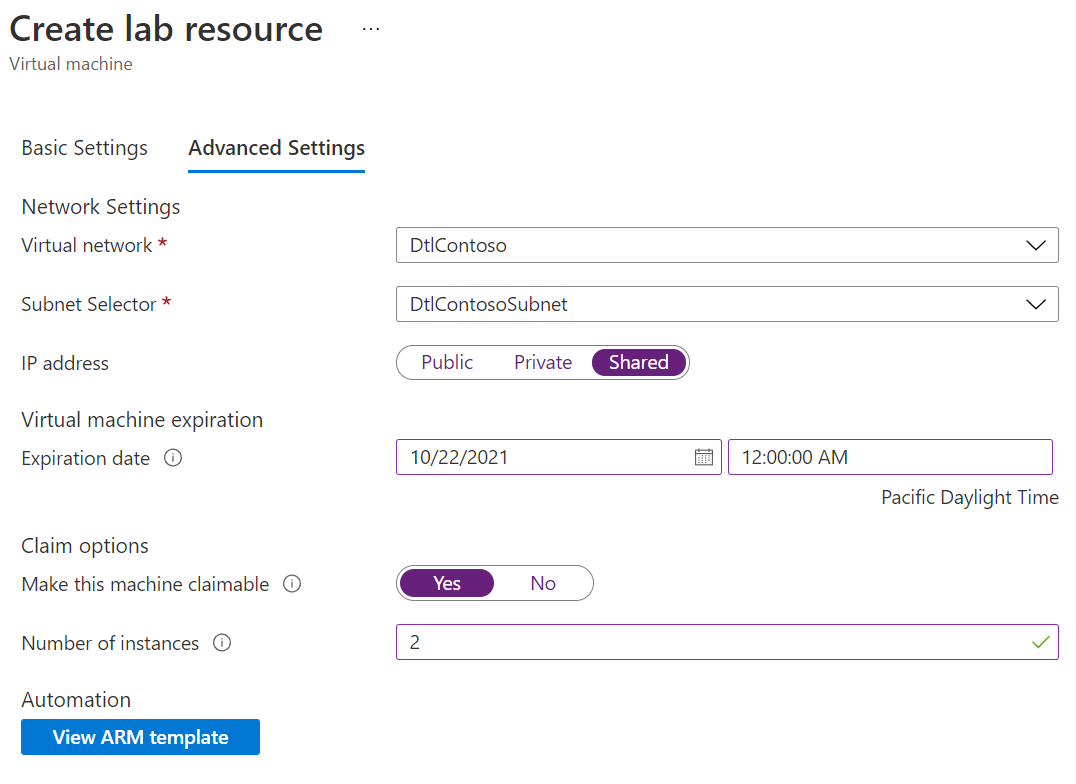
Optionally, select Next: Advanced Settings or the Advanced Settings tab on the Create lab resource screen, and change any of the following values:
- Virtual network: Select a network from the dropdown list. For more information, see Add a virtual network.
- Subnet Selector: If necessary, select a different subnet from the dropdown list.
- IP address: Leave at Shared, or select Public or Private. For more information, see Understand shared IP addresses.
- Expiration date: Leave at Will not expire, or set an expiration date and time for the VM.
- Make this machine claimable: Leave at No to keep yourself as the owner of the VM. Select Yes to make the VM claimable by any lab user after creation. For more information, see Create and manage claimable VMs.
- Number of instances: To create more than one VM with this configuration, enter the number of VMs to create.
- View ARM template: Select this button to view and save the VM configuration as an Azure Resource Manager (ARM) template. You can use the ARM template to deploy new VMs.
Optionally, select Next: Tags or the Tags tab to apply tags to the VM.
Complete VM deployment
After you configure all settings, select Create at the bottom of the Create lab resource screen. During VM deployment, you can select the Notifications icon at the top of the screen to see progress. Creating a VM takes a while.
When the deployment is complete, if you kept yourself as VM owner, the VM appears under My virtual machines on the lab Overview page. To connect to the VM, select it from the list, and then select Connect on the VM's Overview page.
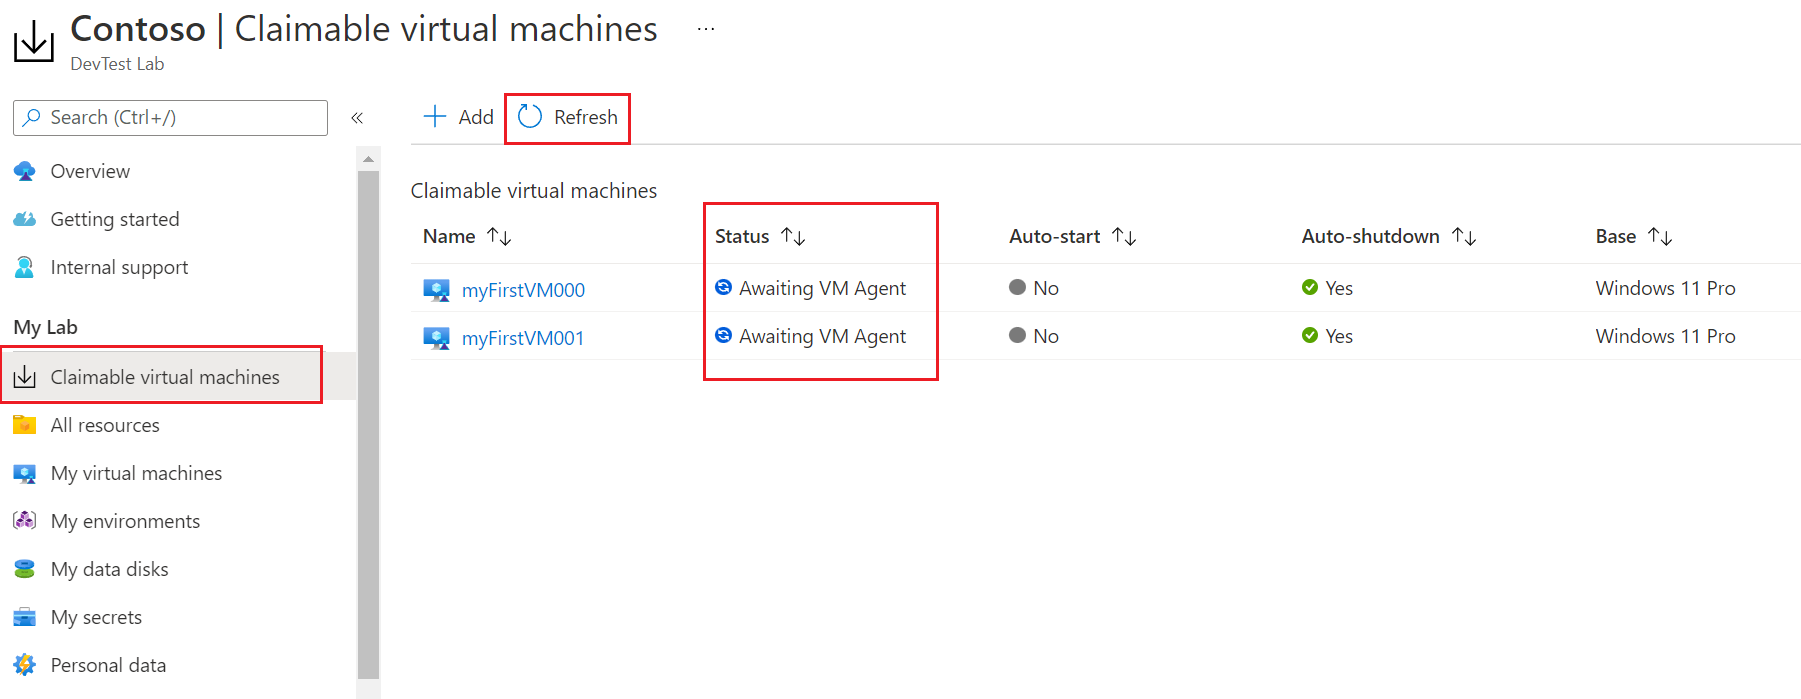
Or, if you chose Make this machine claimable during VM creation, select Claimable virtual machines in the left navigation to see the VM listed on the Claimable virtual machines page. Select Refresh if the VM doesn't appear. To take ownership of a VM in the claimable list, see Use a claimable VM.
When you create a VM in DevTest Labs, you automatically have permission to access that VM, and you can see the VM listed both on the lab Overview page and the All resources page.
DevTest Labs users in the Owner and Contributor roles can see all lab VMs on the lab's All Resources page. Users in the DevTest Labs User role can't access other users' VM resources by default, so they don't automatically see those VMs on the All resources page.
Copy existing Azure VMs into a lab
You can copy existing Azure VMs to DevTest Labs as follows:
- Use a PowerShell script to copy your existing VM's virtual hard disk (VHD) file to the lab.
- Use the VHD file to create a custom image in your lab.
- Create a lab VM from your custom image.
Related content
- For information about creating labs, see Create a lab in the Azure portal.
- Explore the artifacts, environments, and QuickStart ARM templatesDevTest Labs public repositories.